Page 178 of 253

�Ì�Ì
�Ì
Maintenance Minder
187
: Maintenance Sub Items
Rotate tires
Replace air cleaner element If you drive in dusty conditions, replace
every 15,000 miles (24,000 km).
Replace dust and pollen filter If you drive primarily in urban areas that have high
concentrations of soot in the air from industry and
from diesel-powered vehicles, replace every 15,000
miles (24,000 km).
Inspect drive belt
Replace transmission fluid
Replace spark plugs
Inspect valve clearance
Replace engine coolant
Maintenance Main Items
Replace engine oil
Replace engine oil and oil filter
Inspect front and rear brakes
Check parking brake adjustment
Inspect these items: Tie rod ends, steering gear box, and boots
Suspension components
Driveshaft boots
Brake hoses and lines (including ABS)
All fluid levels and condition of fluids
Exhaust system
Fuel lines and connections
AB
Symbol
Symbol
12 3 4 5
If the message ‘‘SERVICE OIL’’ does not appear more than 12 months after
the display is reset, change the engine oil every year.
See information on maintenance and emissions warranty on page .
Independent of the maintenance minder display, replace the brake fluid
every 3 years.
Inspect idle speed every 160,000 miles (256,000 km).
Adjust the valves during services A, B, 1, 2, or 3 only if they are noisy.
NOTE:
185
1:
11
Maintenance Minder
�����—�����—�����y�
�������������y���
�(�#���������y���
�����y
Page 179 of 253
Maintenance Record
188
mi mimimimimimimimimimimimimi
You or the servicing dealer can record all completed maintenance here. When maintenance is performed, record the mileage, circle the coded item(s)
completed, and write in any other non-coded items (such as brake fluid replacement) below the codes. Keep the rec
eipts for all work done on your
vehicle. Maintenance can also be recorded in your Honda service history booklet.
Mileage
km kmkmkmkmkmkm Signature Date
Mileage
km kmkmkmkmkmkm Signature Date
Maintenance
Performed
AB12345
AB12345
AB12345
AB12345
AB12345
AB12345
AB12345 Maintenance
Performed
AB12345
AB12345
AB12345
AB12345
AB12345
AB12345
AB12345
�����—�����—�����y�
���������
���y���
�(�#���������y���
���
�y
Page 180 of 253
Maintenance Record
Maint enance
189
mi mimimimimimimimimimimimimi
Mileage
kmkmkmkmkmkmkm Signature Date
Mileage
km kmkmkmkmkmkm Signature Date
Maintenance
Performed
AB12345
AB12345
AB12345
AB12345
AB12345
AB12345
AB12345 Maintenance
Performed
AB12345
AB12345
AB12345
AB12345
AB12345
AB12345
AB12345
�����—�����—�����y�
�����������
�y���
�(�#���������y���
�����y
Page 183 of 253

Your vehicle does not require any oil
additives. Additives may adversely
af f ect the engine or transmission
perf ormance and durability.
You may use a synthetic motor oil if
it meets the same requirements
given f or a conventional motor oil: it
displays the API Certif ication Seal,
and it is the proper weight. You must
f ollow the oil and f ilter change
intervals shown on the information
display.
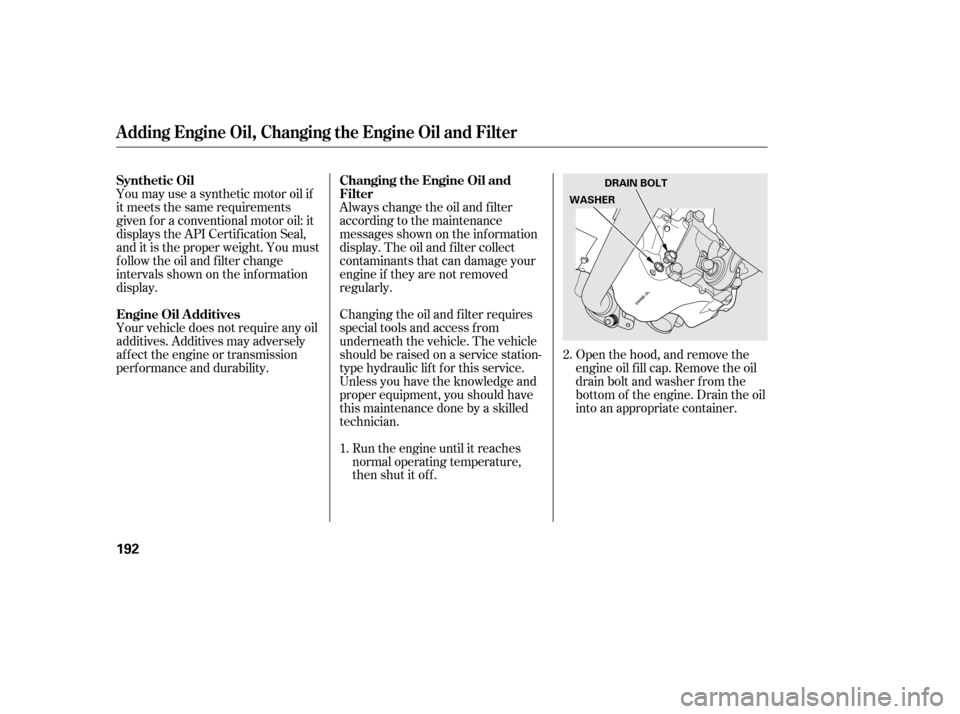
Open the hood, and remove the
engine oil f ill cap. Remove the oil
drain bolt and washer f rom the
bottom of the engine. Drain the oil
into an appropriate container.
Run the engine until it reaches
normal operating temperature,
then shut it off.
Always change the oil and f ilter
according to the maintenance
messages shown on the inf ormation
display. The oil and f ilter collect
contaminants that can damage your
engine if they are not removed
regularly.
Changing the oil and f ilter requires
special tools and access f rom
underneath the vehicle. The vehicle
should be raised on a service station-
type hydraulic lif t f or this service.
Unless you have the knowledge and
proper equipment, you should have
this maintenance done by a skilled
technician. 1.
2.
Synthetic Oil
Engine Oil A dditives
Changing the Engine Oil and
Filter
A dding Engine Oil, Changing the Engine Oil and Filter
192
DRAIN BOLT
WASHER
�����—�����—�����y�
�����������
�y���
�(�#���������y���
�����y
Page 189 of 253

Manual Transmission only
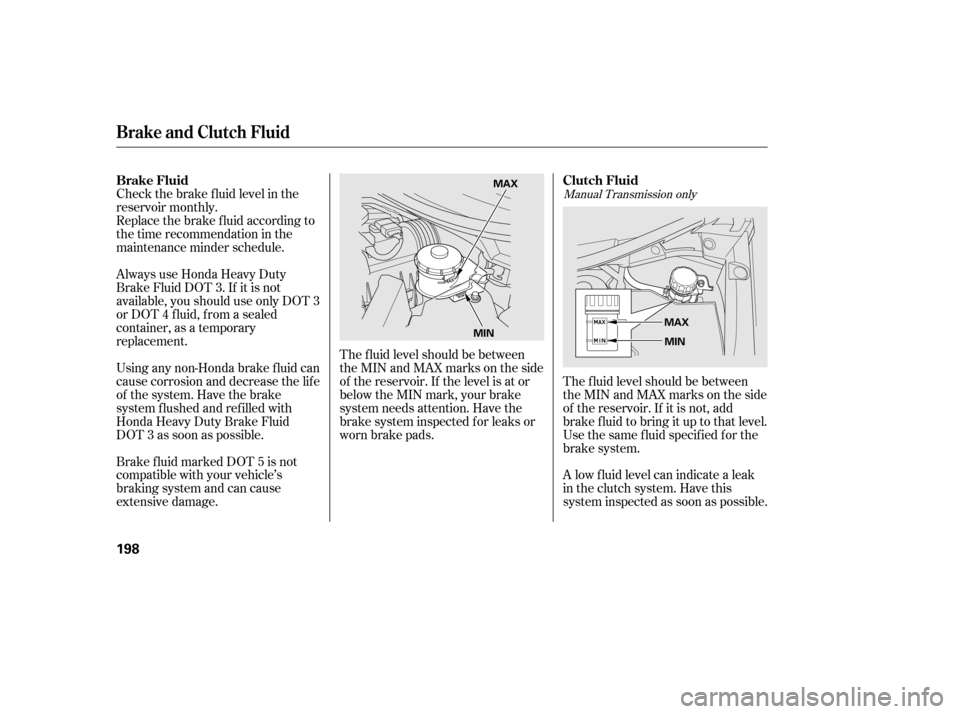
The f luid level should be between
theMINandMAXmarksontheside
of the reservoir. If it is not, add
brake f luid to bring it up to that level.
Use the same fluid specified for the
brake system.
A low f luid level can indicate a leak
in the clutch system. Have this
system inspected as soon as possible.
The f luid level should be between
theMINandMAXmarksontheside
of the reservoir. If the level is at or
below the MIN mark, your brake
system needs attention. Have the
brake system inspected f or leaks or
worn brake pads.
Always use Honda Heavy Duty
Brake Fluid DOT 3. If it is not
available, you should use only DOT 3
or DOT 4 f luid, f rom a sealed
container, as a temporary
replacement.
Using any non-Honda brake f luid can
cause corrosion and decrease the lif e
of the system. Have the brake
system f lushed and ref illed with
Honda Heavy Duty Brake Fluid
DOT 3 as soon as possible.
Brake f luid marked DOT 5 is not
compatible with your vehicle’s
braking system and can cause
extensive damage.
Check the brake f luid level in the
reservoir monthly.
Replace the brake f luid according to
the time recommendation in the
maintenance minder schedule.
Brake and Clutch Fluid
Brake Fluid
Clutch Fluid
198
MAX
MIN MAX
MIN
�����—�����—���
�y�
�������������y���
�(�#���������y�������
�y
Page 197 of 253

Dirt build-up in the loops of the seat
belt anchors can cause the belts to
retract slowly. Wipe the insides of
the loops with a clean cloth
dampened in mild soap and warm
water or isopropyl alcohol.This f ilter removes the dust and
pollenthatisbroughtinfromthe
outside through the heating and
cooling system.
If your seat belts get dirty, use a sof t
brush with a mixture of mild soap
and warm water to clean them. Do
not use bleach, dye, or cleaning
solvents. Let the belts air dry bef ore
you use the vehicle. The floor mats that came with your
vehicle hook over the f loor mat
anchors. This keeps them f rom
sliding f orward and possibly
interf ering with vehicle operation.
If you remove the driver’s f loor mat,
make sure to re-anchor it when you
putitbackinyourvehicle.If you use non-Honda f loor mats,
make sure they f it properly and that
theycanbeusedwiththefloormat
anchors. Do not put additional f loor
mats on top of the anchored mats.
Have your dealer replace the filter
when this service is indicated by a
maintenance message on the
inf ormation display. It should be
replaced every 15,000 miles (24,000
km) if you drive primarily in urban
areas that have high concentrations
of soot in the air, or if the f low f rom
the heating and cooling system
becomeslessthanusual.
If equipped
On models with A/C
Floor Mats
Dust and Pollen Filter
Cleaning the Seat Belts
Cleaning the Seat Belts, Floor Mats, Dust and Pollen Filter
206
LOOP
�����—�����—���
�y�
���������
���y���
�(�#���������y���������y
Page 200 of 253

To saf ely operate your vehicle, your
tires must be the proper type and
size, in good condition with adequate
tread, and correctly inf lated.
The f ollowing pages give more
detailed inf ormation on how to take
care of your tires and what to do
when they need to be replaced.Keeping the tires properly inf lated
provides the best combination of
handling, tread lif e, and riding
comf ort.
Underinf lated tires wear unevenly,
adversely affect handling and fuel
economy, and are more likely to
fail from being overheated.
Overinf lated tires can make your
vehicleridemoreharshly,are
more prone to damage f rom road
hazards, and wear unevenly.
We recommend that you visually
check your tires every day. If you
think a tire might be low, check it
immediately with a tire gauge.
Install the new blade onto the
blade assembly:
Pull back either end of the blade
assembly.
Place the side of the blade not
labeled‘‘LOCK’’ontheendof
the blade assembly, and slide
the blade onto the assembly
until it is f ully installed.
Slide the wiper blade assembly
onto the wiper arm. Make sure it
locks in place.
Reinstall the cover.
Make sure the blade is completely
installed and that its edge is not
bunched up.
Lower the wiper arm down against
the windshield, the passenger’s
side first, then the driver’s side.
6. 7. 8. 9.
10.
CONT INUED
Wiper Blades, Tires
T ires Inf lation Guidelines
Maint enance
209
Using tires that are excessively
worn or improperly inflated can
cause a crash in which you can
be seriously hurt or killed.
Follow all instructions in this
owner’s manual regarding tire
inflation and maintenance.
�����—�����—�����y�
���������
���y���
�(�#���������y�����
���y
Page 202 of 253

Every time you check inf lation, you
should also examine the tires f or
damage, f oreign objects, and wear.
Youshouldlookfor:Bumps or bulges in the tread or
side of the tire. Replace the tire if
youfindeitherof theseconditions.
Cuts, splits, or cracks in the side
of the tire. Replace the tire if you
can see f abric or cord.
Excessive tread wear. In addition to proper inf lation,
correct wheel alignment helps to
decrease tire wear. If you f ind a tire
is worn unevenly, have your dealer
check the wheel alignment.
Have your dealer check the tires if
you f eel a consistent vibration while
driving. A tire should always be
rebalanced if it is removed f rom the
wheel. When you have new tires
installed, make sure they are
balanced. This increases riding
comf ort and tire lif e. For best results,
have the installer perform a dynamic
balance.
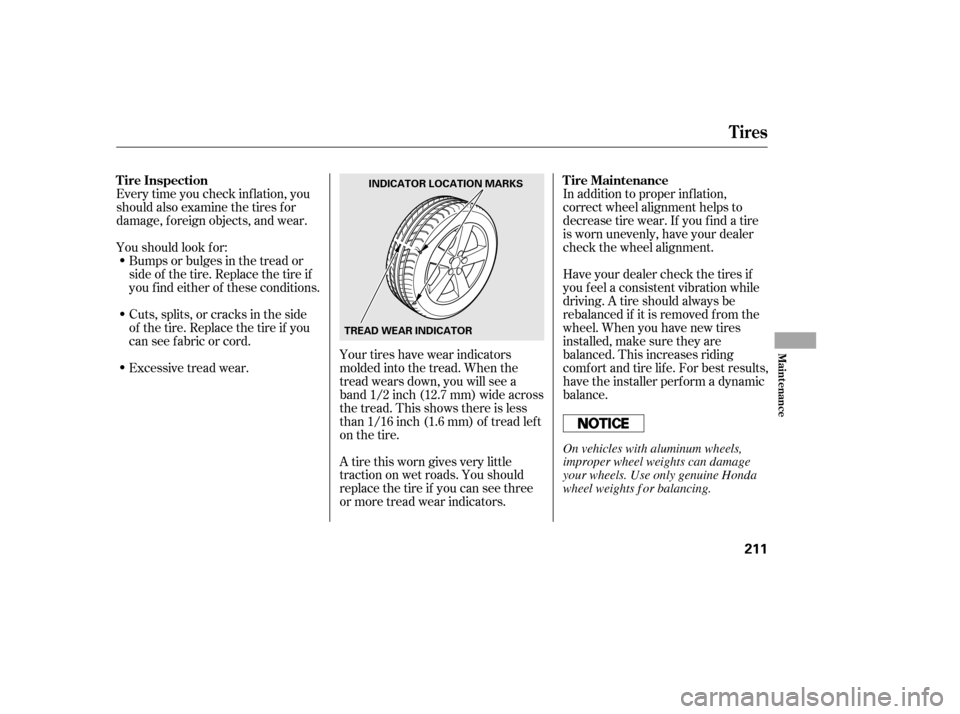
Your tires have wear indicators
molded into the tread. When the
tread wears down, you will see a
band 1/2 inch (12.7 mm) wide across
the tread. This shows there is less
than 1/16 inch (1.6 mm) of tread lef t
on the tire.
A tire this worn gives very little
traction on wet roads. You should
replace the tire if you can see three
or more tread wear indicators.
Tire Inspection
Tire Maintenance
Tires
Maint enance
211
TREAD WEAR INDICATORINDICATOR LOCATION MARKS
On vehicles with aluminum wheels,
improper wheel weights can damage
your wheels. Use only genuine Honda
wheel weights f or balancing.
�����—�����—�����y�
�������������y���
�(�#���������y�����
���y