Page 80 of 253

�µ�µ
�µ
�µ
CONT INUED
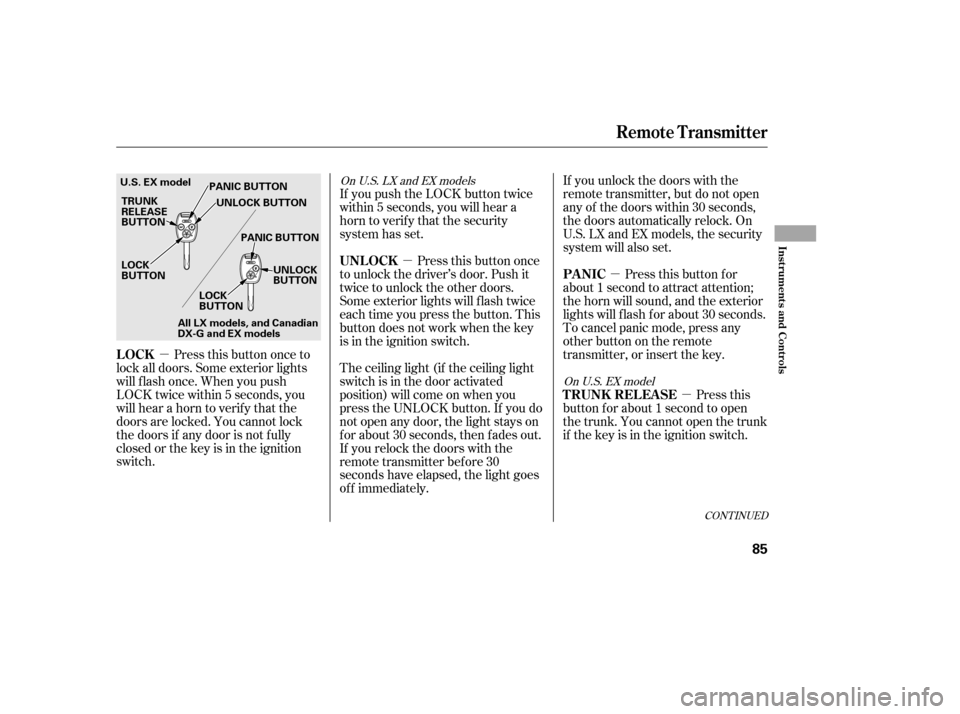
Press this button once to
lock all doors. Some exterior lights
will f lash once. When you push
LOCK twice within 5 seconds, you
will hear a horn to verif y that the
doors are locked. You cannot lock
the doors if any door is not f ully
closed or the key is in the ignition
switch. If you unlock the doors with the
remote transmitter, but do not open
any of the doors within 30 seconds,
the doors automatically relock. On
U.S. LX and EX models, the security
system will also set.
Pressthisbuttonfor
about 1 second to attract attention;
the horn will sound, and the exterior
lights will f lash f or about 30 seconds.
To cancel panic mode, press any
other button on the remote
transmitter, or insert the key.
Press this
button f or about 1 second to open
the trunk. You cannot open the trunk
if the key is in the ignition switch.
The ceiling light (if the ceiling light
switch is in the door activated
position) will come on when you
press the UNLOCK button. If you do
not open any door, the light stays on
f or about 30 seconds, then f ades out.
If you relock the doors with the
remote transmitter before 30
seconds have elapsed, the light goes
of f immediately. Press this button once
to unlock the driver’s door. Push it
twice to unlock the other doors.
Some exterior lights will f lash twice
each time you press the button. This
button does not work when the key
is in the ignition switch.
If you push the LOCK button twice
within 5 seconds, you will hear a
horn to verify that the security
system has set.
On U.S. EX model
On U.S. LX and EX models
Remote Transmitter
LOCK
PA NIC
T RUNK REL EA SE
UNL OCK
Inst rument s and Cont rols
85
LOCK
BUTTON
TRUNK
RELEASE
BUTTON
U.S. EX model
PANIC BUTTON
UNLOCK BUTTON
PANIC BUTTON UNLOCK
BUTTON
LOCK
BUTTON
All LX models, and Canadian
DX-G and EX models
�����—�����—�����y�
����
��������y���
�(�#���������y���������y
Page 85 of 253
The back of the rear seat folds down,
giving you direct access to the trunk.
The seat-back is released f rom inside
the trunk.
When a passenger is seated in the
rear center seating position, make
sure the head restraint is adjusted to
its highest position.
The lid of the console compartment
canbeusedasanarmrestbymoving
it f orward and backward. Make sure
the armrest is securely latched.
Make sure your passenger’s hands
orfingersareawayfromthearmrest
bef ore moving it.
On EX models, the rear seat armrest
is in the center of the rear seat. Pivot
it down to use it.Theseat-backcanbefoldeddownas
one piece.On all models except DX
On DX, LX and Canadian DX-G models
Seats
Folding Rear Seat
Armrest
90
Rear Center Position
RELEASE BUTTON
�����—�����—���
�y�
�������������y���
�(�#���������y���������y
Page 86 of 253
When storing cargo, you can move
therearcentershoulderbeltoutof
the way by removing the belt f rom
the guide.To lock the seat-back upright, push it
firmly against the trunk panel. Make
sure it is latched in place by pulling
on the top of the seat.
To release the seat-back, pull the
release under the trunk panel. Push
the seat-back down, then let go of
the release.
The lef t and right seat-backs can be
f olded separately f rom inside the
trunk.
CONT INUED
On EX models
Seats
Inst rument s and Cont rols
91
GUIDE
CENTER SHOULDER BELT RELEASE
Pull
Pull
EX models
All models
�����—�����—�����y�
�����������
�y���
�(�#���������y���������y
Page 87 of 253

Make sure all items in the trunk, or
items extending through the opening
into the back seat, are secured.
Looseitemscanflyforwardand
cause injury if you have to brake
hard. See on page.
Never drive with the seat-back
f olded down and the trunk lid open.
See on
page .
Make sure that the folded seat-back
does not interf ere with the f ront
passenger’s seat-back. This will
cause the f ront passenger’s weight
sensors to work improperly (see
page ). Also check the passenger
airbag of f indicator to assure proper
operation of the passenger’s
advanced front airbag.
Make sure all rear shoulder belts are
positioned in f ront of the rear seat-
back, and the center shoulder belt is
re-positioned in the guide whenever
the seat-back is in its upright position.
Be sure there are no twist in the
center shoulder belt.
Do not put any heavy items on the
seat-back when it is folded. 28
157
53
Seats
Carrying Cargo
Carbon Monoxide Hazard
92
�����—�����—�����y�
�������������y���
�(�#���������y���������y
Page 138 of 253

Once the security system is set,
opening any door, the trunk, or the
hood without using the key or the
remote transmitter will cause it to
alarm. It also alarms if the radio is
removed f rom the dashboard or the
wiring is cut.
The security system helps to protect
your vehicle and valuables f rom thef t.
The horn sounds and a combination
of headlights (low beam), parking
lights, side marker lights, and
taillights f lash if someone attempts
to break into your vehicle or remove
the radio. This alarm continues f or 2
minutes, then it stops. To reset an
alarming system bef ore the 2
minutes have elapsed, unlock the
driver’s door with the key or the
remote transmitter.
The security system automatically
sets 15 seconds after you lock the
doors, hood, and trunk. For the
system to activate, you must lock the
doors f rom the outside with the key,
driver’s lock tab, door lock switch, or
remote transmitter. The security
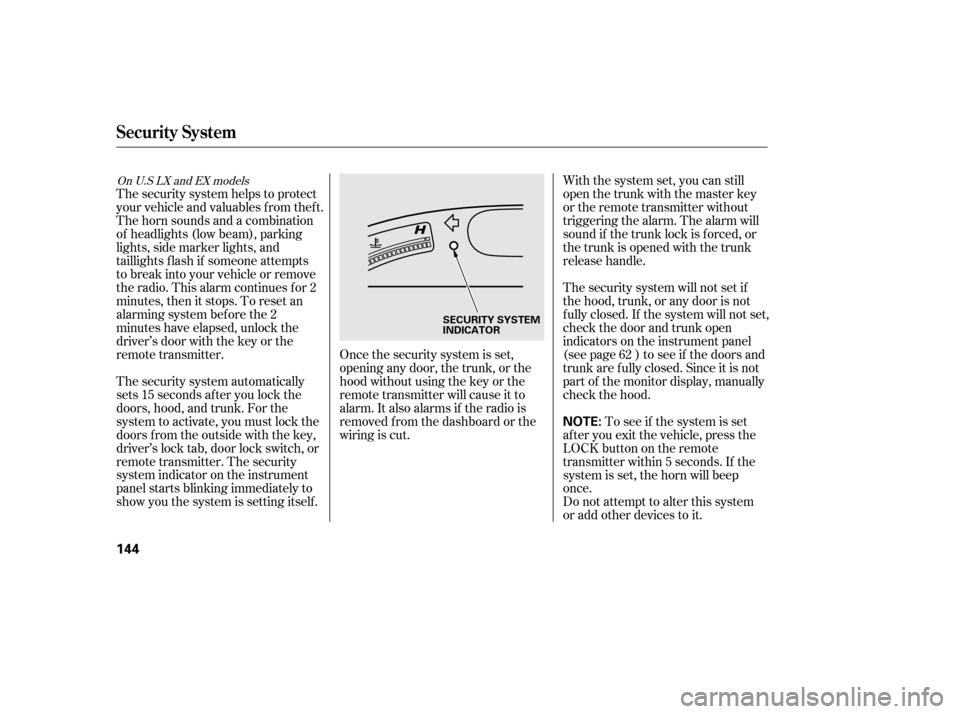
system indicator on the instrument
panel starts blinking immediately to
show you the system is setting itself . With the system set, you can still
open the trunk with the master key
or the remote transmitter without
triggering the alarm. The alarm will
sound if the trunk lock is f orced, or
the trunk is opened with the trunk
release handle.
The security system will not set if
the hood, trunk, or any door is not
f ully closed. If the system will not set,
check the door and trunk open
indicators on the instrument panel
(see page ) to see if the doors and
trunk are f ully closed. Since it is not
part of the monitor display, manually
check the hood.
Do not attempt to alter this system
or add other devices to it.
To see if the system is set
af ter you exit the vehicle, press the
LOCK button on the remote
transmitter within 5 seconds. If the
system is set, the horn will beep
once. 62
On U.S LX and EX models
Security System
144
NOTE:
SECURITY SYSTEM
INDICATOR
�����—�����—�����y�
�����������
�y���
�(�#���������y���
�����y
Page 150 of 253
Your vehicle has several convenient
storage areas:Glove box
Console compartment
Trunk
However, carrying too much cargo,
or improperly storing it, can af f ect
your vehicle’s handling, stability,
stopping distance, and tires, and
make it unsaf e. Bef ore carrying any
type of cargo, be sure to read the
f ollowing pages. Center pocket
Door pockets
Carrying Cargo
Bef ore Driving
157
GLOVE BOX
CENTER POCKET
TRUNK DOOR POCKETS
CONSOLE COMPARTMENT
�����—�����—�����y�
�������������y���
�(�#���������y���
�����y
Page 152 of 253

Store or secure all items that could
be thrown around and hurt
someone during a crash.Distribute cargo evenly on the
f loor of the trunk, placing the
heaviest items on the bottom and
as far forward as possible.
If you carry large items that
prevent you f rom closing the trunk
lid, exhaust gas can enter the
passenger area. To avoid the
possibility of
, f ollow the instructions
on page .
If youfolddownthebackseat,tie
down items that could be thrown
about the vehicle during a crash or
sudden stop.
Keep the glove box closed while
driving. If it is open, a passenger
could injure their knees during a
crash or sudden stop.
Be sure items placed on the f loor
behind the f ront seats cannot roll
under the seats and interf ere with
the driver’s ability to operate the
pedals or the seat.
Do not put any items on top of the
trunk panel. They can block your
view and be thrown around the
vehicle during a crash.
53
Carrying Cargo
Carrying Items in the Passenger
CompartmentCarrying Cargo in the Trunk
carbon monoxide
poisoning
Bef ore Driving
159
�����—�����—�����y�
�������������y���
�(�#���������y���
�����y
Page 154 of 253
Make sure all windows, mirrors,
and outside lights are clean and
unobstructed. Remove f rost, snow,
or ice.
Check that the hood and trunk are
f ully closed.Check that any items you may be
carrying are stored properly or
f astened down securely.
Check the seat adjustment (see
page ).
Check the adjustment of the
inside and outside mirrors (see
page ).
Check the steering wheel
adjustment (see page ).
Make sure the doors are securely
closed and locked.Fasten your seat belt. Check that
your passengers have f astened
their seat belts (see page ).
Youshoulddothefollowingchecks
and adjustments every day bef ore
you drive your vehicle.
When you start the engine, check
the gauges and indicators in the
instrument panel (see page ).
Visually check the tires. If a tire
looks low, use a gauge to check its
pressure (see page ).
1. 2. 3. 4.
9.
8.
7.
6.
5.
10.
88
96 73 16
59
209
Preparing to Drive
162
�����—�����—�����y�
�������������y���
�(�#���������y���
�����y