Page 184 of 307

Help assure your vehicle’s f uture
reliability and perf ormance by paying
extra attention to how you drive
during the f irst 600 miles (1,000 km).
During this period:Avoid full-throttle starts and rapid
acceleration.
You should also f ollow these
recommendations with an
overhauled or exchanged engine, or
when the brakes are replaced. Avoidhardbrakingforthefirst
200 miles (300 km). Do not change the oil until the
scheduled maintenance time. We recommend using quality
gasolines containing detergent
additives that help prevent fuel
system and engine deposits.
In addition, in order to maintain good
perf ormance, f uel economy, and
emissions control, we strongly
recommend, in areas where it is
available, the use of gasoline that
does NOT contain manganese-based
f uel additives such as MMT.
Use of gasoline with these additives
may adversely af f ect perf ormance,
and cause the malfunction indicator
lamp on your instrument panel to
come on. If this happens, contact
your authorized dealer f or service.
Your vehicle is designed to operate
on unleaded gasoline with a pump
octane number of 87 or higher. Use
of a lower octane gasoline can cause
a persistent, heavy, metallic rapping
noise that can lead to engine damage.
Your vehicle is designed to operate
on premium unleaded gasoline with a
pump octane of 91 or higher. Use of
a lower octane gasoline can cause
occasional metallic knocking noises
in the engine and will result in
decreased engine perf ormance. Use
of a gasoline with a pump octane less
than 87 can lead to engine damage.
Break-in Period Fuel Recommendation
Break-in Period, Fuel Recommendation
A ll models except Si
Si model only
180
�����—�����—�����y�
�������������y���
�(�+���������y���
�����y
Page 186 of 307

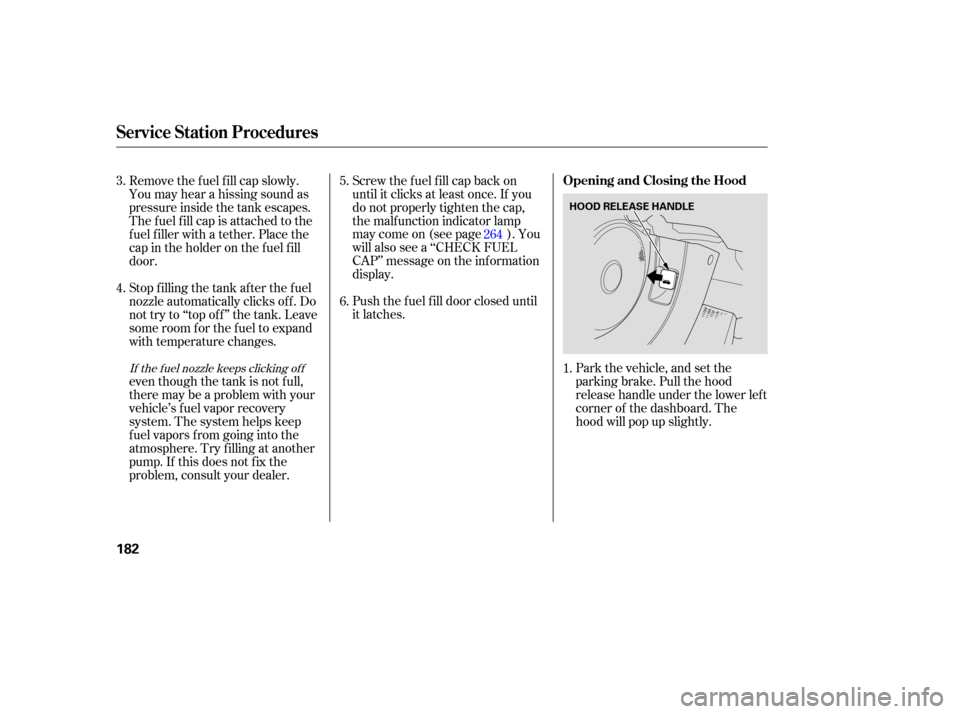
Park the vehicle, and set the
parking brake. Pull the hood
release handle under the lower lef t
corner of the dashboard. The
hood will pop up slightly.
Screw the f uel f ill cap back on
until it clicks at least once. If you
do not properly tighten the cap,
the malf unction indicator lamp
maycomeon(seepage ).You
will also see a ‘‘CHECK FUEL
CAP’’ message on the inf ormation
display.
Push the f uel f ill door closed until
it latches.
Remove the f uel f ill cap slowly.
You may hear a hissing sound as
pressure inside the tank escapes.
The fuel fill cap is attached to the
f uel f iller with a tether. Place the
cap in the holder on the f uel f ill
door.
Stop f illing the tank af ter the f uel
nozzle automatically clicks of f . Do
not try to ‘‘top off’’ the tank. Leave
some room f or the f uel to expand
with temperature changes.
even though the tank is not f ull,
there may be a problem with your
vehicle’s fuel vapor recovery
system. The system helps keep
f uel vapors f rom going into the
atmosphere. Try f illing at another
pump. If this does not f ix the
problem, consult your dealer.
1.
5.
6.
264
4. 3.If the f uel nozzle keeps clicking of f
Service Station Procedures
Opening and Closing the Hood
182
HOOD RELEASE HANDLE
�����—�����—�����y�
������
������y���
�(�+���������y���
�����y
Page 213 of 307

�µ
�µ
�µ
�µ
�µ
�µ
�µ
�µ
�µ
�µ �µ
�µ�µ
�Î
�Î
�Î
�Î
�Î
CONT INUED
Calculated Engine Oil Lif e (%)
100 % 91 % 90 % 81 %
80 % 71 %
70 % 61 %
60 % 51 %
50 % 41 %
40 % 31 %
30 % 21 %
20 % 16 %
15 % 11 % 10 % 6 %
15 % 6 % 5% 1% 0% Displayed
Engine Oil Lif e (%) 100 %90 %
80 %
70 %
60 %
50 %
40 %
30 %
20 %
15 %
10 %
15 %5%
0%
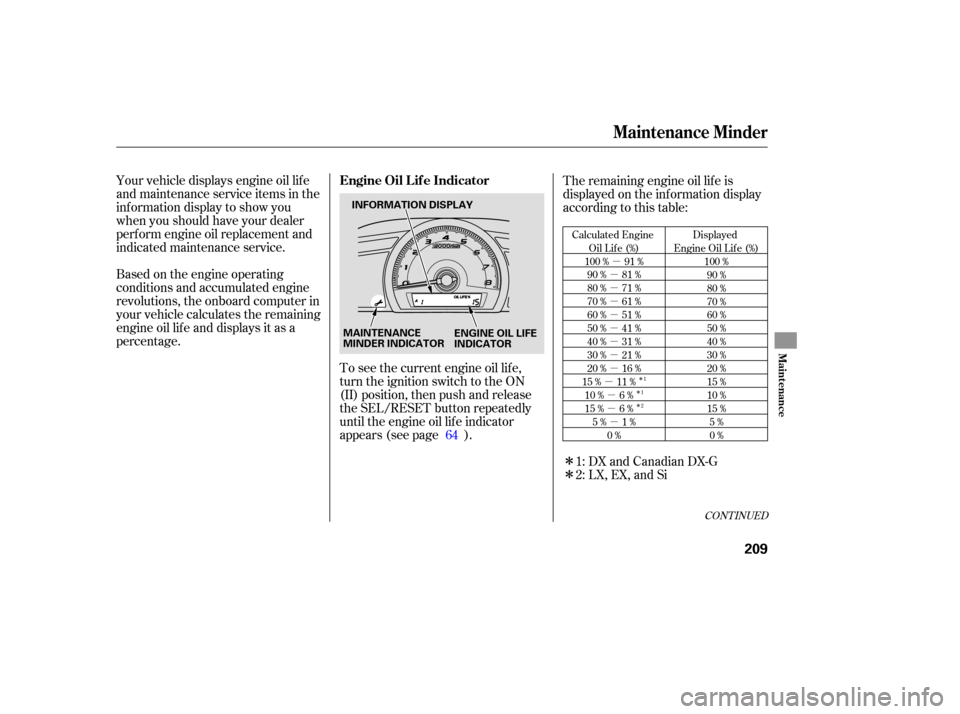
Your vehicle displays engine oil lif e
and maintenance service items in the
inf ormation display to show you
when you should have your dealer
perf orm engine oil replacement and
indicated maintenance service.
Based on the engine operating
conditions and accumulated engine
revolutions, the onboard computer in
your vehicle calculates the remaining
engine oil lif e and displays it as a
percentage. The remaining engine oil lif e is
displayed on the inf ormation display
according to this table:
To see the current engine oil lif e,
turn the ignition switch to the ON
(II) position, then push and release
the SEL/RESET button repeatedly
until the engine oil lif e indicator
appears (see page ). 64
1: DX and Canadian DX-G
2: LX, EX, and Si
1
1
2
Maintenance Minder
Engine Oil L if e Indicator
Maint enance
209
MAINTENANCE
MINDER INDICATOR ENGINE OIL LIFE
INDICATOR
INFORMATION DISPLAY
�����—�����—�����y�
�������������y���
�(�+���������y�����
���y
Page 214 of 307

The maintenance item code or codes
indicate the main and sub items
required at the time of the oil change
(see page ).
If the oil lif e is 15 percent or less,
you will see the oil lif e indicator
everytimeyouturntheignition
switch to the ON (II) position. The
maintenance minder indicator will
also come on, and the maintenance
item code(s) f or other scheduled
maintenance items needing service
will be displayed next to the engine
oil lif e indicator. When the remaining engine oil lif e is
less than 5 percent, you will see a
‘‘SERVICE’’ message on the
inf ormation display, along with the
same maintenance item code(s),
everytimeyouturntheignition
switch to the ON (II) position.You can switch the display to the
odometer, the trip meter, and the
outside temperature indicator (if
equipped) by pushing the SEL/
RESET button on the dashboard
repeatedly.
215
Maintenance Minder
210
ENGINE OIL LIFE
INDICATOR
MAINTENANCE
ITEM CODE(S) SERVICE MESSAGE
�����—�����—�����y�
�������������y���
�(�+���������y�����
���y
Page 216 of 307
Your dealer will reset the display
af ter completing the required
maintenance service. You will see
‘‘OIL LIFE 100 %’’ on the inf ormation
display the next time you turn the
ignition switch to the ON (II)
position.
If maintenance service is done by
someone other than your dealer,
reset the maintenance minder as
f ollows:Turn the ignition switch to the ON
(II) position.
Press the SEL/RESET button
repeatedly until the engine oil lif e
indicator is displayed. Press the SEL/RESET button f or
about 10 seconds. The engine oil
lif e and the maintenance item
code(s) will blink.
All maintenance items displayed in
the inf ormation display are in code.
For an explanation of these
maintenance codes, see page . 3.
1.
2.
215
Maintenance Minder
Resetting the Engine Oil Lif e
Indicator
Maintenance Main Items and Sub
Items
212
MAINTENANCE MAIN ITEM
MAINTENANCE SUB ITEM ENGINE OIL LIFE INDICATOR
�����—�����—�����y�
�������������y���
�(�+���������y�����
���y
Page 219 of 307

�Î
�Î
�Ì �Ì
�Ì �Î
Maintenance Minder
215
:If the message ‘‘SERVICE’’ does not appear more than 12 months after the
display is reset, change the engine oil every year.
See information on maintenance and emissions warranty in the first column
on page .
Independent of the maintenance minder indicator in the information
display, replace the brake fluid every 3 years.
Inspect idle speed every 160,000 miles (256,000 km).
Adjust the valves during services A, B, 1, 2, or 3 only if they are noisy.
NOTE: :
214
Maintenance Sub Items
Rotate tires
Replace air cleaner element If you drive primarily in dusty conditions, replace
every 15,000 miles (24,000 km).
Replace dust and pollen filter If you drive primarily in urban areas that have high
concentrations of soot in the air from industry and
from diesel-powered vehicles, replace every 15,000
miles (24,000 km).
Inspect drive belt
Replace transmission fluid
Replace spark plugs
Inspect valve clearance
Replace engine coolant
Maintenance Main Items
Replace engine oil
Replace engine oil and oil filter
Inspect front and rear brakes
Check parking brake adjustment
Visually inspect these items: Tie rod ends, steering gear box, and boots
Suspension components
Driveshaft boots
Brake hoses and line (including ABS)
All fluid levels and condition of fluids
Exhaust system
Fuel lines and connections
A
B
Symbol
Symbol
1
2
3
4
5
Maintenance Minder
�����—�����—�����y�
�������������y���
�(�+���������y�����
���y
Page 267 of 307

Saf ely pull of f the road, and shut
of f the engine. Turn on the hazard
warning indicators.
If necessary, add oil to bring the
level back to the full mark on the
dipstick (see page ).Immediately turn of f all electrical
accessories. Try not to use other
electrically operated controls such as
the power windows. Keep the engine
running; starting the engine will
discharge the battery rapidly.
Go to a service station or garage
where you can get technical
assistance.
Let the vehicle sit f or a minute.
Open the hood, and check the oil
level (see page ). An engine
very low on oil can lose pressure
during cornering and other driving
maneuvers.
If the charging system
indicator comes on brightly
when the engine is running, the
battery is not being charged.
This indicator should never
come on when the engine is
running. If it starts f lashing or stays
on, the oil pressure has dropped very
low or lost pressure. Serious engine
damage is possible, and you should
take immediate action.
Start the engine, and watch the oil
pressure indicator. If it does not go
out within 10 seconds, turn of f the
engine. There is a mechanical
problem that needs to be repaired
bef ore you can continue driving
(see on page).
1.
2.
3.
4.
183
220
272 Charging System Indicator
L ow Oil Pressure Indicator
Emergency T owing
L ow Oil Pressure Indicator, Charging System Indicator
T aking Care of t he Unexpect ed
263
Running the engine with low oil
pressure can cause serious mechanical
damage almost immediately. Turn of f
the engine as soon as you can saf ely get
the vehicle stopped.
�����—�����—�����y�
����
��������y���
�(�+���������y���������y
Page 269 of 307

However, if the brake pedal does not
f eel normal, you should take
immediate action. A problem in one
part of the system’s dual circuit
design will still give you braking at
two wheels. You will f eel the brake
pedal go down much f arther bef ore
the vehicle begins to slow down, and
you will have to press harder on the
pedal.
If you must drive the vehicle a short
distance in this condition, drive
slowly and caref ully. Slow down by shif ting to a lower
gear, and pull to the side of the road
when it is saf e. Because of the long
distance needed to stop, it is
hazardous to drive the vehicle. You
should have it towed and repaired as
soon as possible (seeon page ).
If the f luid level is low, take your
vehicle to a dealer, and have the
brake system inspected f or leaks or
worn brake pads. If the brake system indicator comes
on while driving, the brake f luid level
is probably low. Press lightly on the
brake pedal to see if it f eels normal.
If it does, check the brake f luid level
thenexttimeyoustopataservice
station (see page ). If the ABS indicator comes on with
the brake system indicator, have
your vehicle inspected by your
dealer immediately.
The brake system
indicator normally
comes on when
you turn the ignition switch to the
ON (II) position and as a reminder to
check the parking brake. It will stay
on if you do not f ully release the
parking brake.
230 272Emergency
Towing
Brake System Indicator
T aking Care of t he Unexpect ed
265
Canada
U.S.
�����—�����—�����y�
����
��������y���
�(�+���������y���������y