2006 GMC SIERRA mirror
[x] Cancel search: mirrorPage 208 of 600

Rear Window Defogger
If your vehicle has this feature, the lines you see on the
rear window warm the glass. The rear window defogger
uses a warming grid to remove fog from the rear window.
If your vehicle has a sliding rear window, you will not
have a rear window defogger; however, your vehicle will
still have a mirror button to activate the heated outside
rearview mirrors, if equipped.
<(Rear):Press this button to turn the rear window
defogger on or off. An indicator light in the button will
come on to let you know that the rear window defogger
is activated. This button will also activate the heated
mirrors, if equipped.
The rear window defogger will automatically turn off
several minutes after the button is pressed. Pressing the
button while the defogger is running can also turn off the
defogger.
W(Mirror):If your vehicle does not have a rear
defogger and is equipped with heated mirrors, your
vehicle will have this button to activate them.
Notice:Do not use a razor blade or sharp object to
clear the inside rear window. Do not adhere anything
to the defogger grid lines in the rear glass. These
actions may damage the rear defogger. Repairs
would not be covered by your warranty.
Outlet Adjustment
Use the air outlets located in the center and on the side
of your instrument panel to direct the air�ow.
Operation Tips
Keep the hood and front air inlets free of ice, snow,
or any other obstruction (such as leaves). The
heater and defroster will work far better, reducing
the chance of fogging the inside of your windows.
When you enter a vehicle in cold weather, turn the
fan knob all the way to the right for a few moments
before driving. This helps clear the intake ducts of
snow and moisture, and reduces the chance of
fogging the inside of your window.
Keep the air path under the front seats clear of
objects. This helps air to circulate throughout your
vehicle.
Adding outside equipment to the front of your
vehicle, such as hood-air de�ectors, may affect the
performance of the heating and air conditioning
system. Check with your dealer before adding
equipment to the outside of your vehicle.
3-30
Page 215 of 600

Passenger Airbag Status Indicator
If your vehicle has the passenger sensing system, your
rearview mirror will have a passenger airbag status
indicator.
When the ignition key is turned to RUN or START, the
passenger airbag status indicator will light ON and OFF,
or the symbol for on and off, for several seconds as a
system check.Then, after several more seconds, the status indicator will
light either ON or OFF, or either the on or off symbol to let
you know the status of the right front passenger’s frontal
airbag.
Your vehicle may have a label on your sun visor that
says, “Never put a rear-facing child seat in the front.”
This is because the risk to the rear-facing child is so
great, if the airbag deploys.
{CAUTION:
Even though the passenger sensing system is
designed to turn off the passenger’s frontal
airbag if the system detects a rear-facing child
restraint, no system is failsafe, and no one can
guarantee that an airbag will not deploy under
some unusual circumstance, even though it is
turned off. We recommend that rear-facing
child restraints be secured in the rear seat,
even if the airbag is off.
Never put a child in a rear-facing child restraint in the right
front passenger seat the unless passenger airbag status
indicator shows off. Passenger Airbag Status Indicator – United States
Passenger Airbag Status Indicator – Canada
3-37
Page 246 of 600

Easy Exit Seat
Press the customization button until EASY EXIT SEAT
appears in the display. To select your preference for seat
position exit, press the select button while EASY EXIT
SEAT is displayed on the DIC. Pressing the select button
will scroll through the following choices:
EASY EXIT SEAT: OFF (default):No seat exit recall
will occur.
EASY EXIT SEAT: ON:The driver’s seat will move
to the exit position when the key is removed from
the ignition.
Choose one of the available options and press the
customization button while it is displayed on the DIC
to select it and move on to the next feature. For
more information on seat position exit, seeMemory
Seat on page 2-83.
Curb View
Press the customization button until CURB VIEW
appears in the display. To select your preference for
curb view, press the select button while CURB VIEW is
displayed on the DIC. Pressing the select button will
scroll through the following choices:
CURB VIEW: OFF (default):Neither outside mirror
will be tilted down when the vehicle is shifted into
REVERSE (R).CURB VIEW: PASSENGER:The passenger’s outside
mirror will be tilted down when the vehicle is shifted
into REVERSE (R).
CURB VIEW: DRIVER:The driver’s outside mirror
will be tilted down when the vehicle is shifted into
REVERSE (R).
CURB VIEW: BOTH:The driver’s and passenger’s
outside mirror will be tilted down when the vehicle
is shifted into REVERSE (R).
Choose one of the available options and press the
customization button while it is displayed on the DIC
to select it and move on to the next feature. For more
information on tilt mirror in reverse, seeOutside Curb
View Assist Mirrors on page 2-72.
Alarm Warning
Press the customization button until ALARM WARNING
appears in the display. To select your preference for
alarm warning, press the select button while ALARM
WARNING is displayed on the DIC. Pressing the select
button will scroll through the following choices:
ALARM WARNING: BOTH (default):The headlamps
will �ash and the horn will chirp when the alarm is active.
ALARM WARNING: OFF:There will be no alarm
warning on activation.
3-68
Page 327 of 600

Check your mirrors, glance over your shoulder and
start your left lane change signal before moving out
of the right lane to pass. When you are far enough
ahead of the passed vehicle to see its front in your
inside mirror, activate your right lane change signal
and move back into the right lane. Remember that if
your passenger side outside mirror is convex, the
vehicle you just passed may seem to be farther away
from you than it really is.
Try not to pass more than one vehicle at a time on
two-lane roads. Reconsider before passing the next
vehicle.
Do not overtake a slowly moving vehicle too rapidly.
Even though the brake lamps are not �ashing, it may
be slowing down or starting to turn.
If you are being passed, make it easy for the
following driver to get ahead of you. Perhaps you
can ease a little to the right.
Loss of Control
Let us review what driving experts say about what
happens when the three control systems — brakes,
steering, and acceleration — do not have enough friction
where the tires meet the road to do what the driver has
asked.
In any emergency, do not give up. Keep trying to steer
and constantly seek an escape route or area of less
danger.
Skidding
In a skid, a driver can lose control of the vehicle.
Defensive drivers avoid most skids by taking reasonable
care suited to existing conditions, and by not overdriving
those conditions. But skids are always possible.
The three types of skids correspond to your vehicle’s
three control systems. In the braking skid, your wheels
are not rolling. In the steering or cornering skid, too much
speed or steering in a curve causes tires to slip and lose
cornering force. And in the acceleration skid, too much
throttle causes the driving wheels to spin.
A cornering skid is best handled by easing your foot off
the accelerator pedal.
4-15
Page 328 of 600

If you have the Traction Assist System (TAS), remember:
It helps avoid only the acceleration skid. SeeTraction
Assist System (TAS) on page 4-8. If you do not have this
system, or if the system is off, then an acceleration skid is
also best handled by easing your foot off the accelerator
pedal.
If your vehicle starts to slide, ease your foot off the
accelerator pedal and quickly steer the way you want
the vehicle to go. If you start steering quickly enough,
your vehicle may straighten out. Always be ready
for a second skid if it occurs.
Of course, traction is reduced when water, snow, ice,
gravel, or other material is on the road. For safety, you
will want to slow down and adjust your driving to these
conditions. It is important to slow down on slippery
surfaces because stopping distance will be longer and
vehicle control more limited.
While driving on a surface with reduced traction, try your
best to avoid sudden steering, acceleration, or braking,
including engine braking by shifting to a lower gear. Any
sudden changes could cause the tires to slide. You may
not realize the surface is slippery until your vehicle is
skidding. Learn to recognize warning clues — such as
enough water, ice, or packed snow on the road to make a
mirrored surface — and slow down when you have any
doubt.
Remember: Any Anti-Lock Brake System (ABS) helps
avoid only the braking skid.Off-Road Driving
This off-road guide is for vehicles that have four-wheel
drive. Also, seeBraking on page 4-5. If your vehicle
does not have four-wheel drive or is equipped with
20-inch tire/wheel assemblies, you should not drive
off-road unless you are on a level, solid surface.
Off-road driving can be great fun. But it does have some
de�nite hazards. The greatest of these is the terrain itself.
“Off-roading” means you have left the great North
American road system behind. Traffic lanes are not
marked. Curves are not banked. There are no road
signs. Surfaces can be slippery, rough, uphill, or downhill.
In short, you have gone right back to nature.
Off-road driving involves some new skills. And that is why
it is very important that you read this guide. You will �nd
many driving tips and suggestions. These will help make
your off-road driving safer and more enjoyable.
If you think you will need some more ground clearance
at the front of your vehicle, you can remove the front
bumper lower air dam.
4-16
Page 344 of 600

After Off-Road Driving
Remove any brush or debris that has collected on
the underbody, chassis, or under the hood. These
accumulations can be a �re hazard.
After operation in mud or sand, have the brake linings
cleaned and checked. These substances can cause
glazing and uneven braking. Check the body structure,
steering, suspension, wheels, tires, and exhaust system
for damage. Also, check the fuel lines and cooling system
for any leakage.
Your vehicle will require more frequent service due to
off-road use. Refer to the Maintenance Schedule for
additional information.
Driving at Night
Night driving is more dangerous than day driving. One
reason is that some drivers are likely to be impaired — by
alcohol or drugs, with night vision problems, or by fatigue.
Here are some tips on night driving.
Drive defensively.
Do not drink and drive.
Adjust the inside rearview mirror to reduce the glare
from headlamps behind you.
Since you cannot see as well, you may need to
slow down and keep more space between you
and other vehicles.
Slow down, especially on higher speed roads. Your
vehicle’s headlamps can light up only so much road
ahead.
In remote areas, watch for animals.
If you are tired, pull off the road in a safe place
and rest.
No one can see as well at night as in the daytime. But as
we get older these differences increase. A 50-year-old
driver may require at least twice as much light to see the
same thing at night as a 20-year-old.
4-32
Page 349 of 600

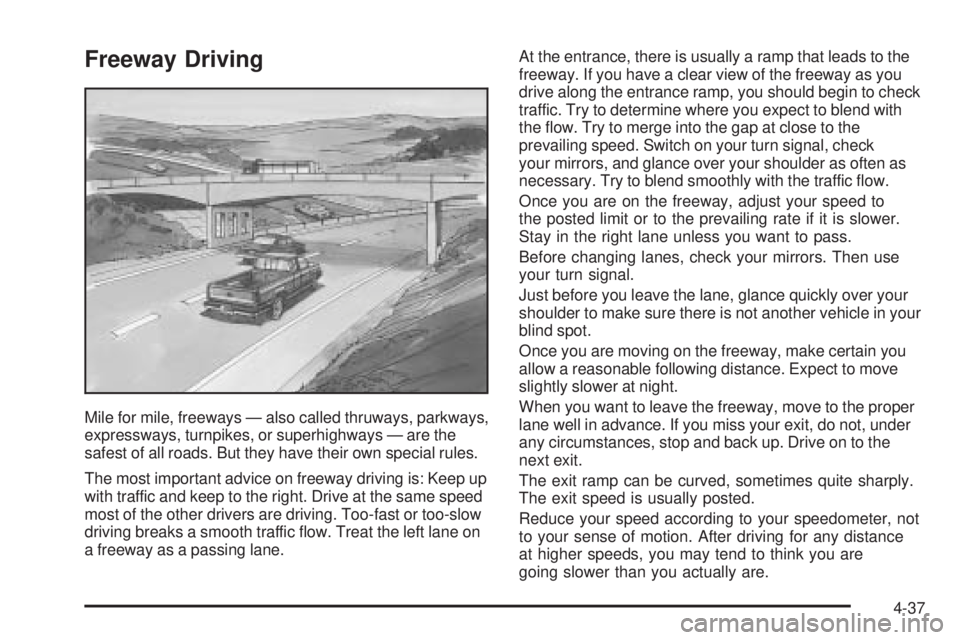
Freeway Driving
Mile for mile, freeways — also called thruways, parkways,
expressways, turnpikes, or superhighways — are the
safest of all roads. But they have their own special rules.
The most important advice on freeway driving is: Keep up
with traffic and keep to the right. Drive at the same speed
most of the other drivers are driving. Too-fast or too-slow
driving breaks a smooth traffic �ow. Treat the left lane on
a freeway as a passing lane.At the entrance, there is usually a ramp that leads to the
freeway. If you have a clear view of the freeway as you
drive along the entrance ramp, you should begin to check
traffic. Try to determine where you expect to blend with
the �ow. Try to merge into the gap at close to the
prevailing speed. Switch on your turn signal, check
your mirrors, and glance over your shoulder as often as
necessary. Try to blend smoothly with the traffic �ow.
Once you are on the freeway, adjust your speed to
the posted limit or to the prevailing rate if it is slower.
Stay in the right lane unless you want to pass.
Before changing lanes, check your mirrors. Then use
your turn signal.
Just before you leave the lane, glance quickly over your
shoulder to make sure there is not another vehicle in your
blind spot.
Once you are moving on the freeway, make certain you
allow a reasonable following distance. Expect to move
slightly slower at night.
When you want to leave the freeway, move to the proper
lane well in advance. If you miss your exit, do not, under
any circumstances, stop and back up. Drive on to the
next exit.
The exit ramp can be curved, sometimes quite sharply.
The exit speed is usually posted.
Reduce your speed according to your speedometer, not
to your sense of motion. After driving for any distance
at higher speeds, you may tend to think you are
going slower than you actually are.
4-37
Page 351 of 600

Highway Hypnosis
Is there actually such a condition as highway hypnosis?
Or is it just plain falling asleep at the wheel? Call it
highway hypnosis, lack of awareness, or whatever.
There is something about an easy stretch of road with
the same scenery, along with the hum of the tires on the
road, the drone of the engine, and the rush of the wind
against the vehicle that can make you sleepy. Do not let it
happen to you! If it does, your vehicle can leave the road
in less than a second, and you could crash and be
injured.
What can you do about highway hypnosis? First, be
aware that it can happen.Then here are some tips:Make sure your vehicle is well ventilated, with a
comfortably cool interior.
Keep your eyes moving. Scan the road ahead and to
the sides. Check your mirrors and your instruments
frequently.
If you get sleepy, pull off the road into a rest, service,
or parking area and take a nap, get some exercise,
or both. For safety, treat drowsiness on the highway
as an emergency.
4-39