2006 GMC SIERRA 1500 turn signal bulb
[x] Cancel search: turn signal bulbPage 186 of 600
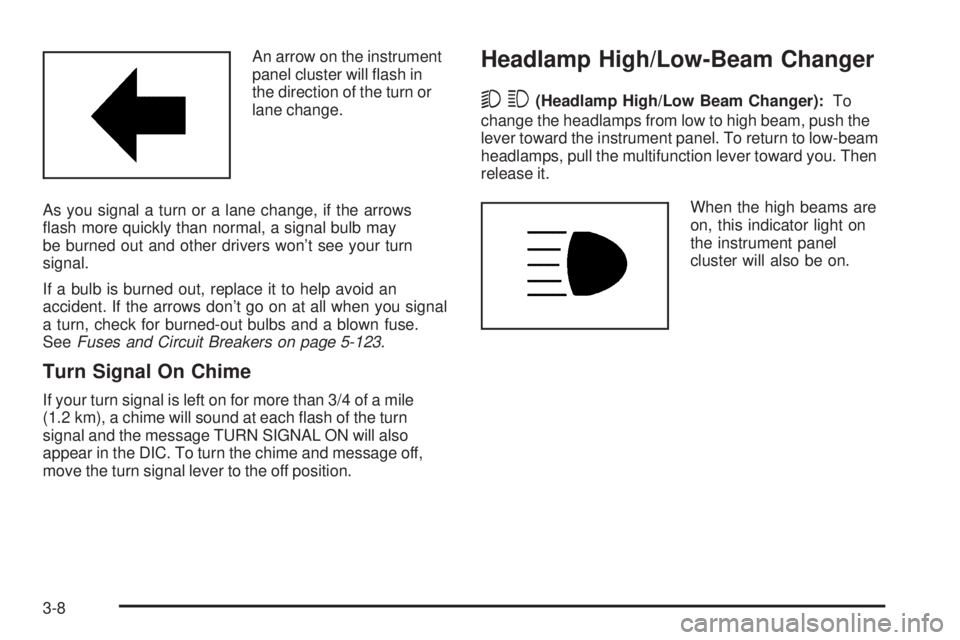
An arrow on the instrument
panel cluster will �ash in
the direction of the turn or
lane change.
As you signal a turn or a lane change, if the arrows
�ash more quickly than normal, a signal bulb may
be burned out and other drivers won’t see your turn
signal.
If a bulb is burned out, replace it to help avoid an
accident. If the arrows don’t go on at all when you signal
a turn, check for burned-out bulbs and a blown fuse.
SeeFuses and Circuit Breakers on page 5-123.
Turn Signal On Chime
If your turn signal is left on for more than 3/4 of a mile
(1.2 km), a chime will sound at each �ash of the turn
signal and the message TURN SIGNAL ON will also
appear in the DIC. To turn the chime and message off,
move the turn signal lever to the off position.
Headlamp High/Low-Beam Changer
53(Headlamp High/Low Beam Changer):To
change the headlamps from low to high beam, push the
lever toward the instrument panel. To return to low-beam
headlamps, pull the multifunction lever toward you. Then
release it.
When the high beams are
on, this indicator light on
the instrument panel
cluster will also be on.
3-8
Page 402 of 600
Making Turns
Notice:Making very sharp turns while trailering
could cause the trailer to come in contact with the
vehicle. Your vehicle could be damaged. Avoid
making very sharp turns while trailering.
When you’re turning with a trailer, make wider turns than
normal. Do this so your trailer won’t strike soft shoulders,
curbs, road signs, trees or other objects. Avoid jerky or
sudden maneuvers. Signal well in advance.
Turn Signals When Towing a Trailer
The arrows on your instrument panel will �ash whenever
you signal a turn or lane change. Properly hooked up, the
trailer lamps will also �ash, telling other drivers you’re
about to turn, change lanes or stop.
When towing a trailer, the arrows on your instrument
panel will �ash for turns even if the bulbs on the trailer are
burned out. Thus, you may think drivers behind you are
seeing your signal when they are not. It’s important to
check occasionally to be sure the trailer bulbs are still
working.
Driving On Grades
Reduce speed and shift to a lower gearbeforeyou start
down a long or steep downgrade. If you don’t shift down,
you might have to use your brakes so much that they
would get hot and no longer work well.If you have an automatic transmission, you can tow
in DRIVE (D). You may want to shift the transmission to
a lower gear selection if the transmission shifts too
often (e.g., under heavy loads and/or hilly conditions).
You may also want to activate the tow/haul mode if
the transmission shifts too often. SeeTow/Haul Mode
Light on page 3-50.
If you have a 5-speed manual transmission and you are
towing a trailer, it’s better not to use FIFTH (5) gear.
Just drive in FOURTH (4) gear (or, as you need to, a
lower gear).
If you have a 6-speed manual transmission and you are
towing a trailer, it’s better not to use SIXTH (6) gear.
Drive in FIFTH (5) gear (or, as you need to, a lower gear).
When towing at high altitude on steep uphill grades,
consider the following: Engine coolant at or near sea level
will boil at a lower temperature than at higher altitudes.
If you turn your engine off immediately after towing at
high altitude on steep uphill grades, your vehicle may
show signs similar to engine overheating. To avoid this,
let the engine run while parked, preferably on level
ground, with the automatic transmission in PARK (P) for
at least �ve minutes before turning the engine off. For
manual transmissions, let the engine run while parked,
preferably on level ground, with the transmission out
of gear and the parking brake applied, for at least �ve
minutes before turning the engine off. If you do get the
overheat warning, seeEngine Overheating on page 5-37.
4-90
Page 414 of 600
Bulb Replacement..........................................5-63
Halogen Bulbs..............................................5-63
Headlamps..................................................5-63
Front Turn Signal, Sidemarker and
Daytime Running Lamps.............................5-64
Roof Marker Lamps......................................5-66
Center High-Mounted Stoplamp (CHMSL)
and Cargo Lamp........................................5-67
Pickup Box Identi�cation and Fender
Marker Lamps...........................................5-68
Taillamps, Turn Signal, Stoplamps and
Back-up Lamps.........................................5-68
Replacement Bulbs.......................................5-70
Windshield Wiper Blade Replacement..............5-71
Tires..............................................................5-72
Tire Sidewall Labeling...................................5-73
Tire Terminology and De�nitions.....................5-76
In�ation - Tire Pressure.................................5-79
Dual Tire Operation.......................................5-80
Tire Inspection and Rotation...........................5-81
When It Is Time for New Tires.......................5-83
Buying New Tires.........................................5-84
Different Size Tires and Wheels......................5-85Uniform Tire Quality Grading..........................5-86
Wheel Alignment and Tire Balance..................5-87
Wheel Replacement......................................5-87
Tire Chains..................................................5-89
If a Tire Goes Flat........................................5-90
Changing a Flat Tire.....................................5-91
Removing the Spare Tire and Tools................5-92
Removing the Flat Tire and Installing the
Spare Tire................................................5-96
Secondary Latch System..............................5-105
Storing a Flat or Spare Tire and Tools...........5-108
Spare Tire.................................................5-112
Appearance Care..........................................5-113
Cleaning the Inside of Your Vehicle...............5-113
Fabric/Carpet..............................................5-114
Leather......................................................5-115
Instrument Panel, Vinyl, and
Other Plastic Surfaces..............................5-115
Care of Safety Belts....................................5-116
Weatherstrips.............................................5-116
Washing Your Vehicle..................................5-116
Cleaning Exterior Lamps/Lenses....................5-117
Finish Care................................................5-117
Section 5 Service and Appearance Care
5-2
Page 476 of 600
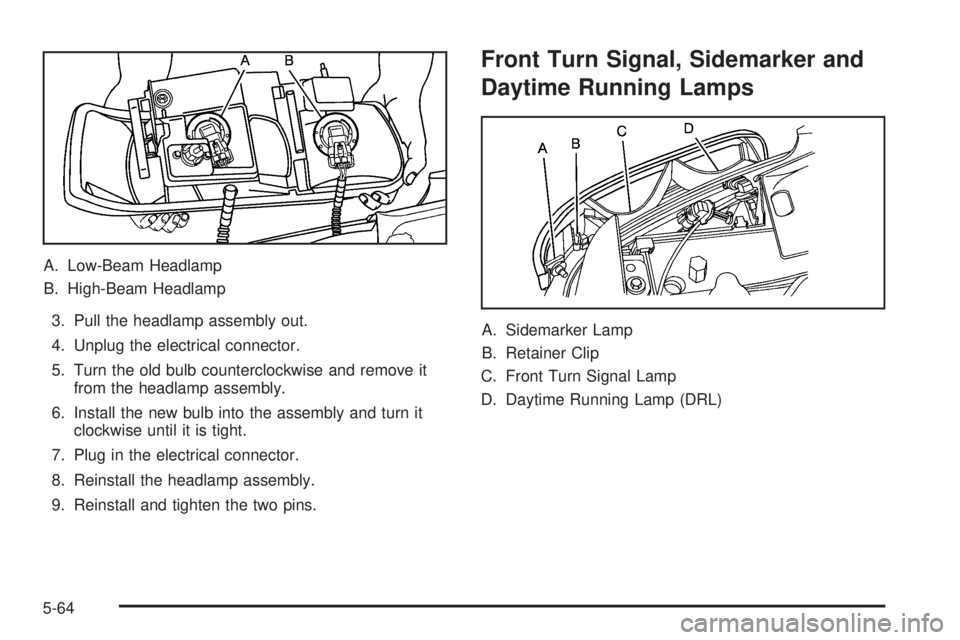
A. Low-Beam Headlamp
B. High-Beam Headlamp
3. Pull the headlamp assembly out.
4. Unplug the electrical connector.
5. Turn the old bulb counterclockwise and remove it
from the headlamp assembly.
6. Install the new bulb into the assembly and turn it
clockwise until it is tight.
7. Plug in the electrical connector.
8. Reinstall the headlamp assembly.
9. Reinstall and tighten the two pins.
Front Turn Signal, Sidemarker and
Daytime Running Lamps
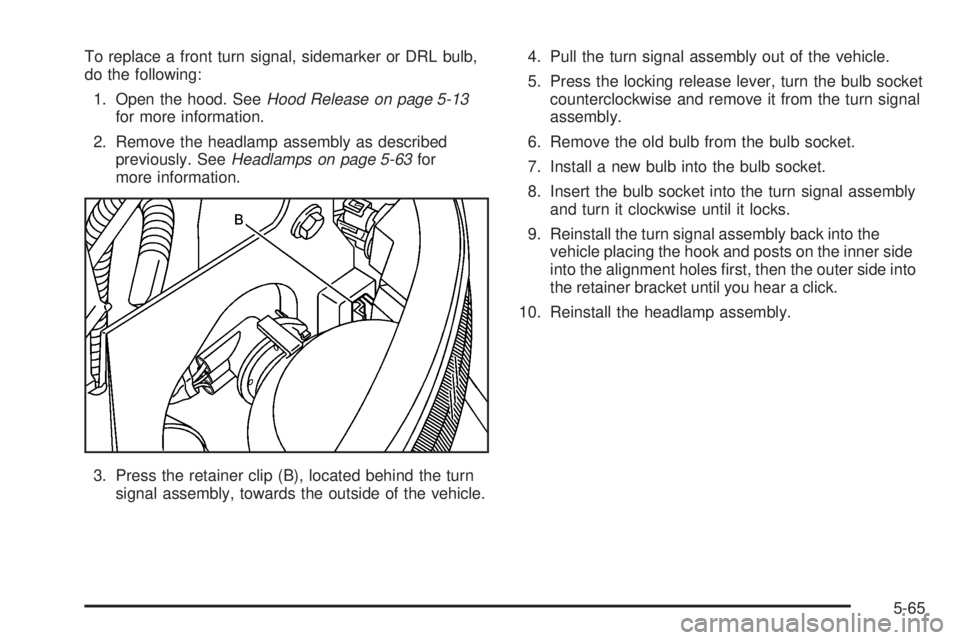
A. Sidemarker Lamp
B. Retainer Clip
C. Front Turn Signal Lamp
D. Daytime Running Lamp (DRL)
5-64
Page 477 of 600
To replace a front turn signal, sidemarker or DRL bulb,
do the following:
1. Open the hood. SeeHood Release on page 5-13
for more information.
2. Remove the headlamp assembly as described
previously. SeeHeadlamps on page 5-63for
more information.
3. Press the retainer clip (B), located behind the turn
signal assembly, towards the outside of the vehicle.4. Pull the turn signal assembly out of the vehicle.
5. Press the locking release lever, turn the bulb socket
counterclockwise and remove it from the turn signal
assembly.
6. Remove the old bulb from the bulb socket.
7. Install a new bulb into the bulb socket.
8. Insert the bulb socket into the turn signal assembly
and turn it clockwise until it locks.
9. Reinstall the turn signal assembly back into the
vehicle placing the hook and posts on the inner side
into the alignment holes �rst, then the outer side into
the retainer bracket until you hear a click.
10. Reinstall the headlamp assembly.
5-65
Page 480 of 600
4. If a CHMSL bulb is replaced, put the new bulb into
the socket and press it in until it is tight.
If a cargo lamp is replaced, put a new cargo lamp
bulb into the socket and press it in until it is tight
before turning the socket counterclockwise.
5. Reinstall the back plate into the lamp assembly.
6. Reinstall the lamp assembly and tighten the screws.
Pickup Box Identi�cation and
Fender Marker Lamps
To replace a pickup box identi�cation or fender marker
lamp bulb, do the following:
1. Remove the screws and lamp assembly.
2. Unplug the lamp assembly harness.
3. Gently pry the individual lamp from the lamp
assembly.
4. Unplug the lamp.
5. Plug in a new lamp and snap it into the assembly.
6. Reinstall the lamp assembly.
Taillamps, Turn Signal, Stoplamps
and Back-up Lamps
To replace one of these bulbs, do the following:
1. Open the tailgate.Tailgate on page 2-14for more
information.
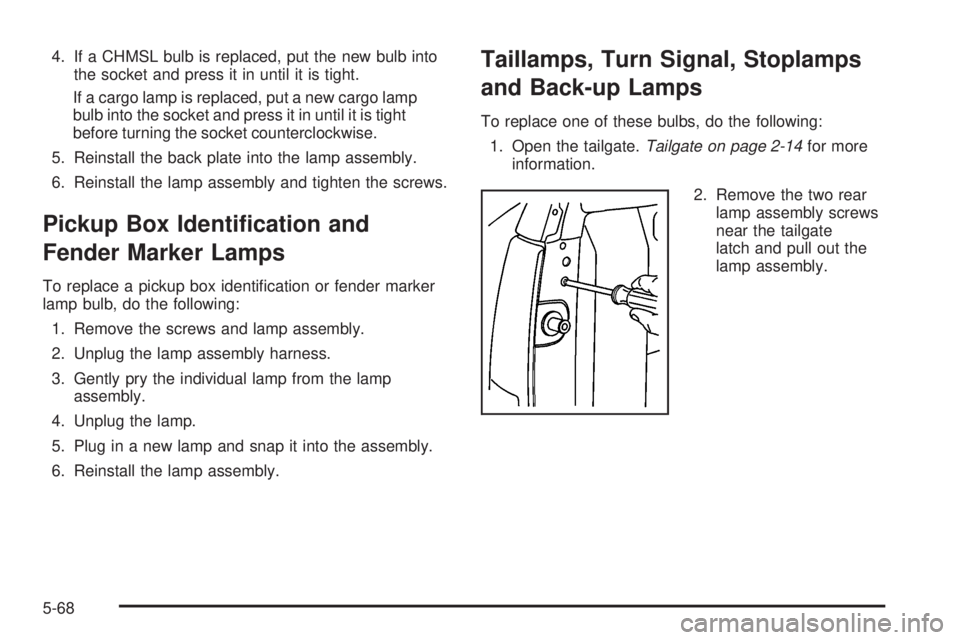
2. Remove the two rear
lamp assembly screws
near the tailgate
latch and pull out the
lamp assembly.
5-68
Page 481 of 600
3. Determine which of the following taillamp assembly
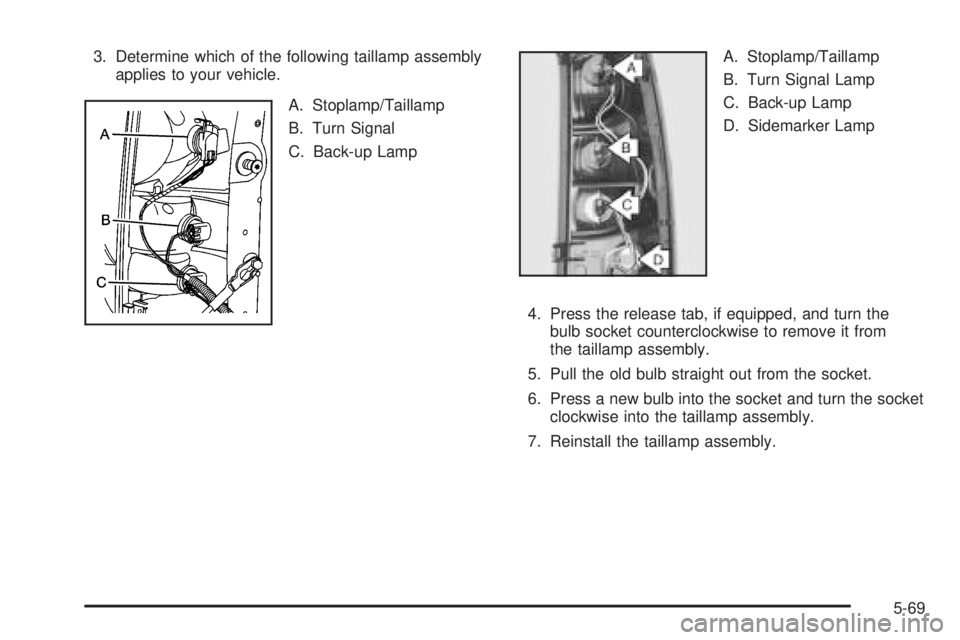
applies to your vehicle.
A. Stoplamp/Taillamp
B. Turn Signal
C. Back-up LampA. Stoplamp/Taillamp
B. Turn Signal Lamp
C. Back-up Lamp
D. Sidemarker Lamp
4. Press the release tab, if equipped, and turn the
bulb socket counterclockwise to remove it from
the taillamp assembly.
5. Pull the old bulb straight out from the socket.
6. Press a new bulb into the socket and turn the socket
clockwise into the taillamp assembly.
7. Reinstall the taillamp assembly.
5-69
Page 482 of 600
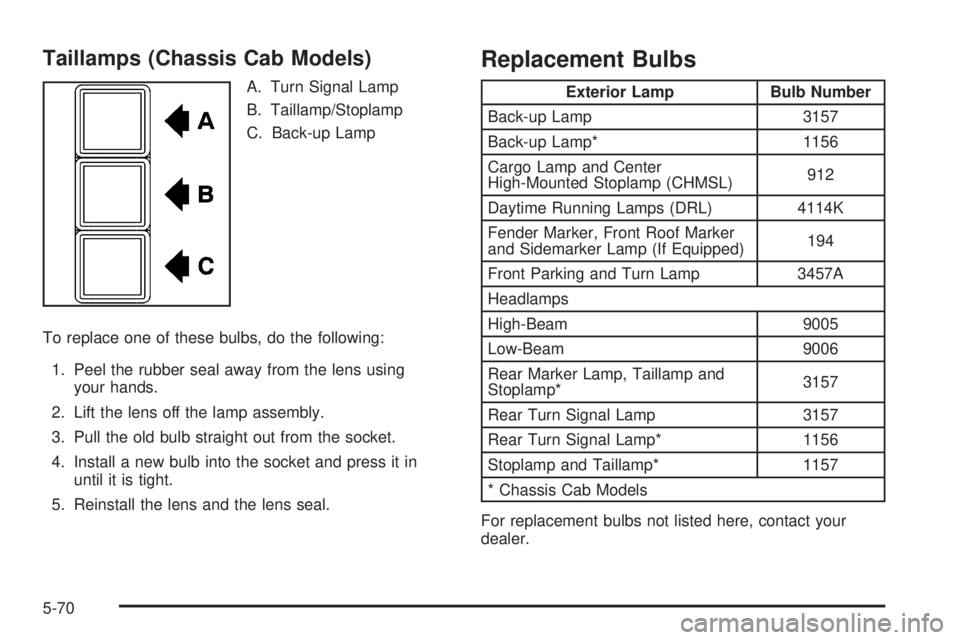
Taillamps (Chassis Cab Models)
A. Turn Signal Lamp
B. Taillamp/Stoplamp
C. Back-up Lamp
To replace one of these bulbs, do the following:
1. Peel the rubber seal away from the lens using
your hands.
2. Lift the lens off the lamp assembly.
3. Pull the old bulb straight out from the socket.
4. Install a new bulb into the socket and press it in
until it is tight.
5. Reinstall the lens and the lens seal.
Replacement Bulbs
Exterior Lamp Bulb Number
Back-up Lamp 3157
Back-up Lamp* 1156
Cargo Lamp and Center
High-Mounted Stoplamp (CHMSL)912
Daytime Running Lamps (DRL) 4114K
Fender Marker, Front Roof Marker
and Sidemarker Lamp (If Equipped)194
Front Parking and Turn Lamp 3457A
Headlamps
High-Beam 9005
Low-Beam 9006
Rear Marker Lamp, Taillamp and
Stoplamp*3157
Rear Turn Signal Lamp 3157
Rear Turn Signal Lamp* 1156
Stoplamp and Taillamp* 1157
* Chassis Cab Models
For replacement bulbs not listed here, contact your
dealer.
5-70