Page 4 of 28
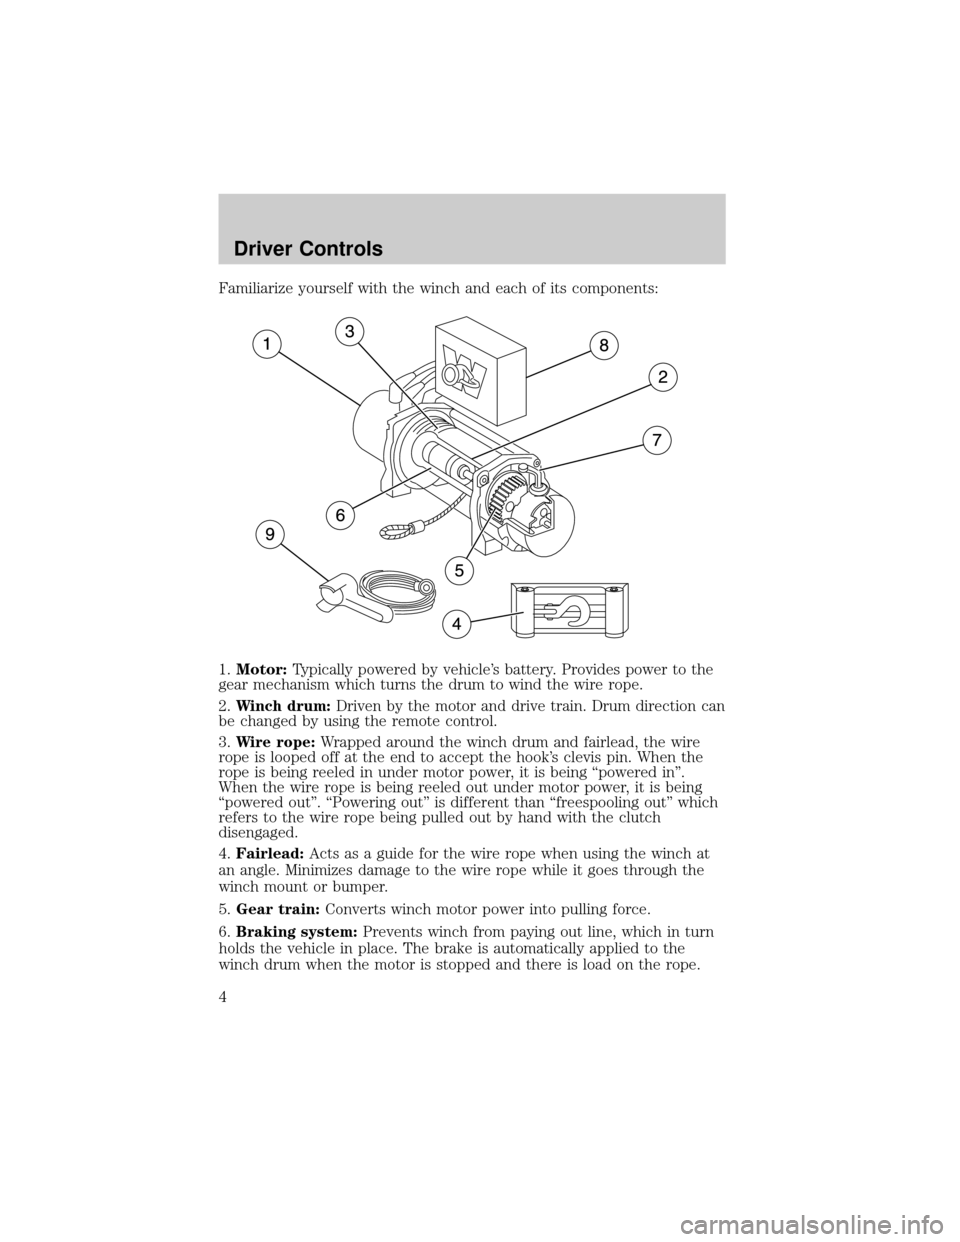
Familiarize yourself with the winch and each of its components:
1.Motor:Typically powered by vehicle's battery. Provides power to the
gear mechanism which turns the drum to wind the wire rope.
2.Winch drum:Driven by the motor and drive train. Drum direction can
be changed by using the remote control.
3.Wire rope:Wrapped around the winch drum and fairlead, the wire
rope is looped off at the end to accept the hook's clevis pin. When the
rope is being reeled in under motor power, it is being ªpowered inº.
When the wire rope is being reeled out under motor power, it is being
ªpowered outº. ªPowering outº is different than ªfreespooling outº which
refers to the wire rope being pulled out by hand with the clutch
disengaged.
4.Fairlead:Acts as a guide for the wire rope when using the winch at
an angle. Minimizes damage to the wire rope while it goes through the
winch mount or bumper.
5.Gear train:Converts winch motor power into pulling force.
6.Braking system:Prevents winch from paying out line, which in turn
holds the vehicle in place. The brake is automatically applied to the
winch drum when the motor is stopped and there is load on the rope.
Driver Controls
4
Page 5 of 28
7.Clutch:Allows the operator to manually disengage the winch drum
from the gear train, enabling the drum to freely rotate (ªfreespoolingº).
Engaging the clutch ªlocksº the winch drum back onto the gear train.
Note:Never engage or disengage the clutch if the winch is under load,
the wire rope is in tension or the winch drum is moving.
8.Control box:Enables the operator to change the direction of the
winch drum rotation.
9.Remote control:Plugs into the control box allowing the operator to
control the winch direction as well as stand clear of the wire rope while
operating the winch.
Winch accessories
Some of the following accessories are items you'll want to have with you
to ensure safe operation of your winch; some are enhancements to add
versatility and convenience to your winch:
²Gloves:It is extremely important to wear protective gloves while
operating the winch or handling wire rope since the rope will, through
normal use, develop sharp barbs which can slice through skin.
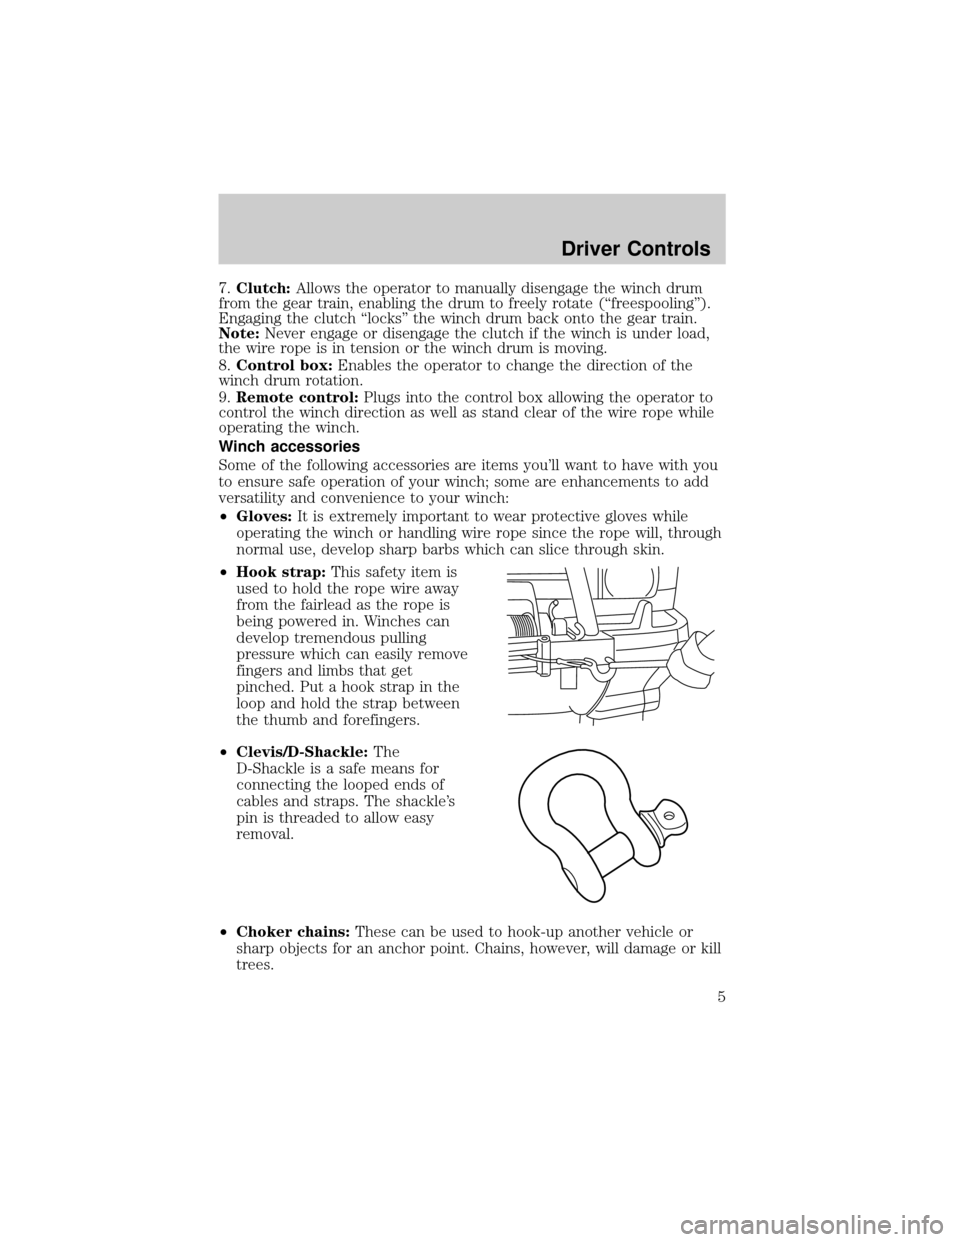
²Hook strap:This safety item is
used to hold the rope wire away
from the fairlead as the rope is
being powered in. Winches can
develop tremendous pulling
pressure which can easily remove
fingers and limbs that get
pinched. Put a hook strap in the
loop and hold the strap between
the thumb and forefingers.
²Clevis/D-Shackle:The
D-Shackle is a safe means for
connecting the looped ends of
cables and straps. The shackle's
pin is threaded to allow easy
removal.
²Choker chains:These can be used to hook-up another vehicle or
sharp objects for an anchor point. Chains, however, will damage or kill
trees.
Driver Controls
5
Page 9 of 28
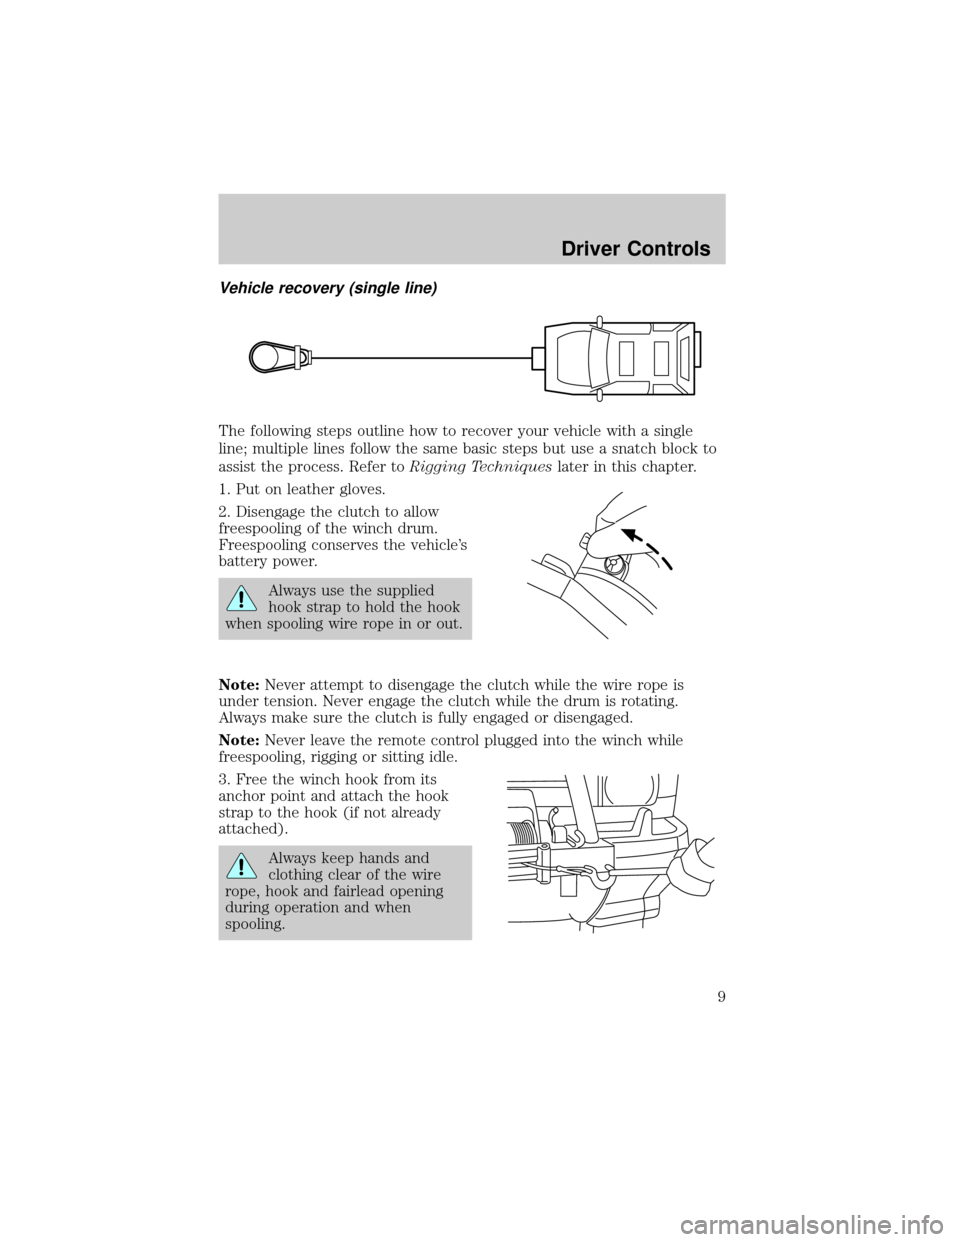
Vehicle recovery (single line)
The following steps outline how to recover your vehicle with a single
line; multiple lines follow the same basic steps but use a snatch block to
assist the process. Refer toRigging Techniqueslater in this chapter.
1. Put on leather gloves.
2. Disengage the clutch to allow
freespooling of the winch drum.
Freespooling conserves the vehicle's
battery power.
Always use the supplied
hook strap to hold the hook
when spooling wire rope in or out.
Note:Never attempt to disengage the clutch while the wire rope is
under tension. Never engage the clutch while the drum is rotating.
Always make sure the clutch is fully engaged or disengaged.
Note:Never leave the remote control plugged into the winch while
freespooling, rigging or sitting idle.
3. Free the winch hook from its
anchor point and attach the hook
strap to the hook (if not already
attached).
Always keep hands and
clothing clear of the wire
rope, hook and fairlead opening
during operation and when
spooling.
Driver Controls
9
Page 10 of 28
4. Pull the wire rope to the anchor point. Be sure to keep a certain
amount of tension in the rope; when slackened, it can become twisted
and overwrap leading to rope damage.
Note:Never winch when there are less than five wraps of wire rope
around the drum.
5. Secure the rope to the anchor point. (SeeChoosing an anchor point
earlier in ths chapter.
6. Attach the clevis/D-shackle to the
two ends of the strap or chain and
through the hook loop. Be careful
not to overtighten (tighten, then
back-off
1¤2turn).
7. Lock (Engage) the clutch using
the lever on the winch.
8. Connect the remote control. Be
careful not to let the remote control
cord dangle in front of the winch.
Always disconnect the remote
control when not in use.
Driver Controls
10
Page 14 of 28
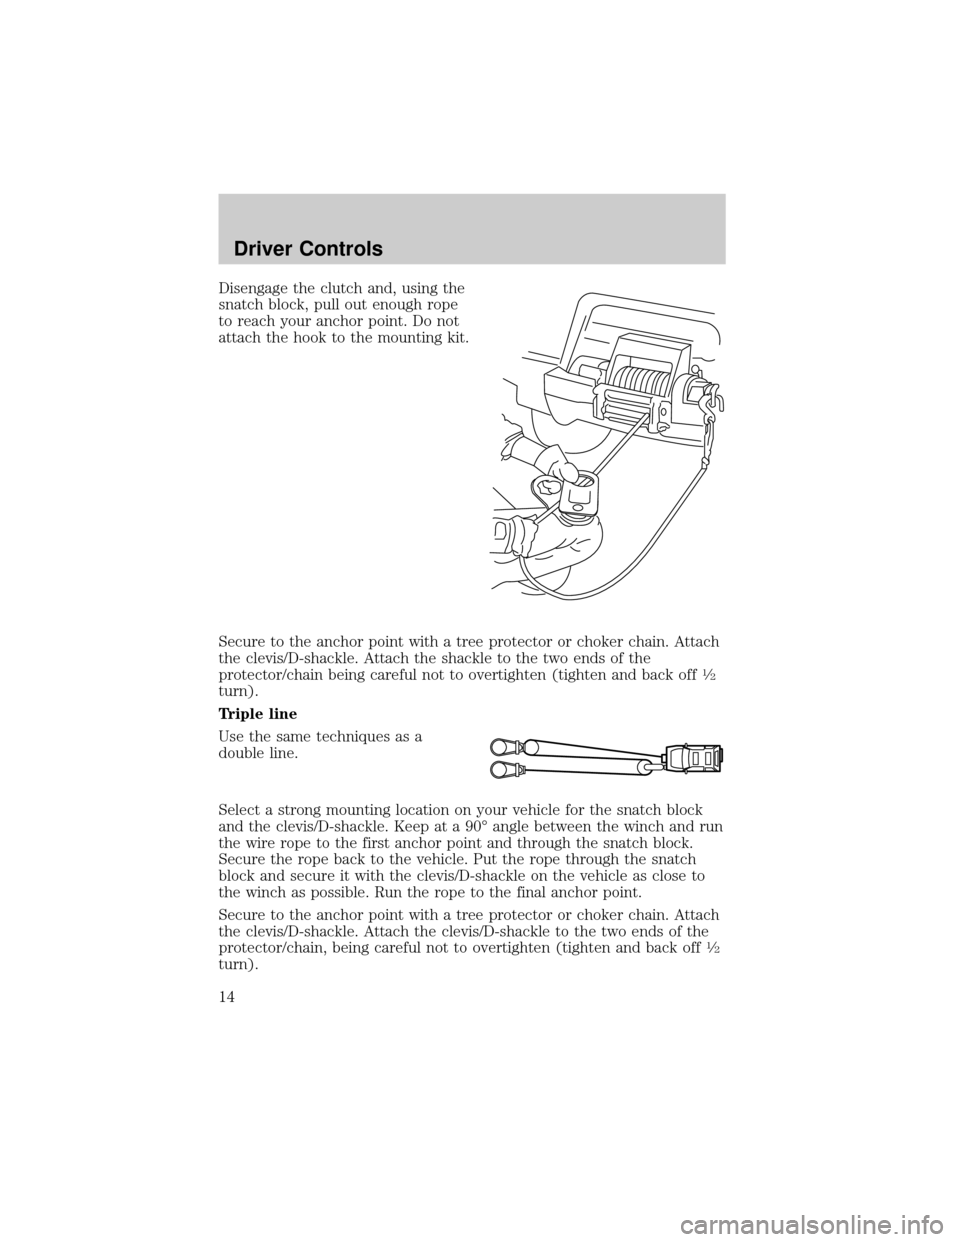
Disengage the clutch and, using the
snatch block, pull out enough rope
to reach your anchor point. Do not
attach the hook to the mounting kit.
Secure to the anchor point with a tree protector or choker chain. Attach
the clevis/D-shackle. Attach the shackle to the two ends of the
protector/chain being careful not to overtighten (tighten and back off
1¤2
turn).
Triple line
Use the same techniques as a
double line.
Select a strong mounting location on your vehicle for the snatch block
and the clevis/D-shackle. Keep at a 90É angle between the winch and run
the wire rope to the first anchor point and through the snatch block.
Secure the rope back to the vehicle. Put the rope through the snatch
block and secure it with the clevis/D-shackle on the vehicle as close to
the winch as possible. Run the rope to the final anchor point.
Secure to the anchor point with a tree protector or choker chain. Attach
the clevis/D-shackle. Attach the clevis/D-shackle to the two ends of the
protector/chain, being careful not to overtighten (tighten and back off
1¤2
turn).
Driver Controls
14
Page 20 of 28
Use extreme caution when accelerating or decelerating on
slippery or unstable surfaces. Vehicles/axles equipped with
traction differentials are inherently more sensitive to side-slip than
vehicles equipped with conventional differentials. Stability can be
retained if side-slip occurs by decelerating (letting off the accelerator).
Do not apply the brake. To do so may result in loss of vehicle control.
The vehicle's braking capacity is reduced when a turn is made while
coasting downhill because the inside wheel is then disconnected from the
driveline. Operating in low gear will allow the engine to act as a retarder
and will improve braking capacity.
Inspection and lubrication
When servicing any driveline components on a vehicle equipped
with a locking rear differential, ensure that the engine is off and
all wheels are off the ground to prevent the vehicle from moving. Axles
equipped with a locking rear differential deliver power to both wheels,
even when only one wheel is on the ground. Failure to observe these
cautionary measures may cause the vehicle to move which can result
in property damage, personal injury, even death.
This differential is designed to operate in the lubricant recommended by
the vehicle/axle manufacturer; no special lubricant is needed. Refer to
theLubricant Specificationsin yourOwner's Guidefor the proper axle
lubricant. For very cold weather applications, use the lightest oil the axle
manufacturer will allow to overcome possible sluggish reengagement of
the driven clutch assemblies.
No adjustments or alterations should be made to the differential. Refer to
the vehicle/axle manufacturer's instructions for adjustments to other
components in the axle.
SAND INGESTION
When driving through sand, traction or brake capability may be limited.
Also, sand may enter your engine's air intake and severely damage your
engine or your vehicle may stall. Driving through sand where the
transmission vent tube or external breather kit is submerged may allow
sand into the transmission and cause internal transmission damage.
Driving
20