2006 FORD MONDEO buttons
[x] Cancel search: buttonsPage 10 of 198
Downloaded from www.Manualslib.com manuals search engine Gear selector buttons. See Automatic transmission (page 110).F
Hazard warning flasher switch. See Hazard warning flashers (page56).G
Air vents. See Air vents (page 81).H
Analogue clock. See Clock (page 97).I
Heated windscreen switch. See Heated windows and mirrors (page86).J
Heated rear window switch. See Heated windows and mirrors (page86).K
Climate controls. See Climate control (page 80).L
Audio/navigation equipment. See the separate handbooks.M
Cup holder. See Cup holders (page 99).N
Heated and ventilated seat switch. See Heated seats (page 95). SeeVentilated seats (page 95).O
Stability control (ESP) switch. See Using stability control (page 120).P
Ignition switch. See Ignition switch (page 100).Q
Cruise control. See Using cruise control (page 124).R
Steering wheel adjustment. See Adjusting the steering wheel (page46).S
Audio control. See Audio control (page 46).T
Fuses. See Fuses (page 136).U
Instrument lighting dimmer. See Instrument lighting dimmer (page97).V
Lighting control/front fog lamps/ rear fog lamps. See Lighting (page53).W
8
Quick start
Page 11 of 198
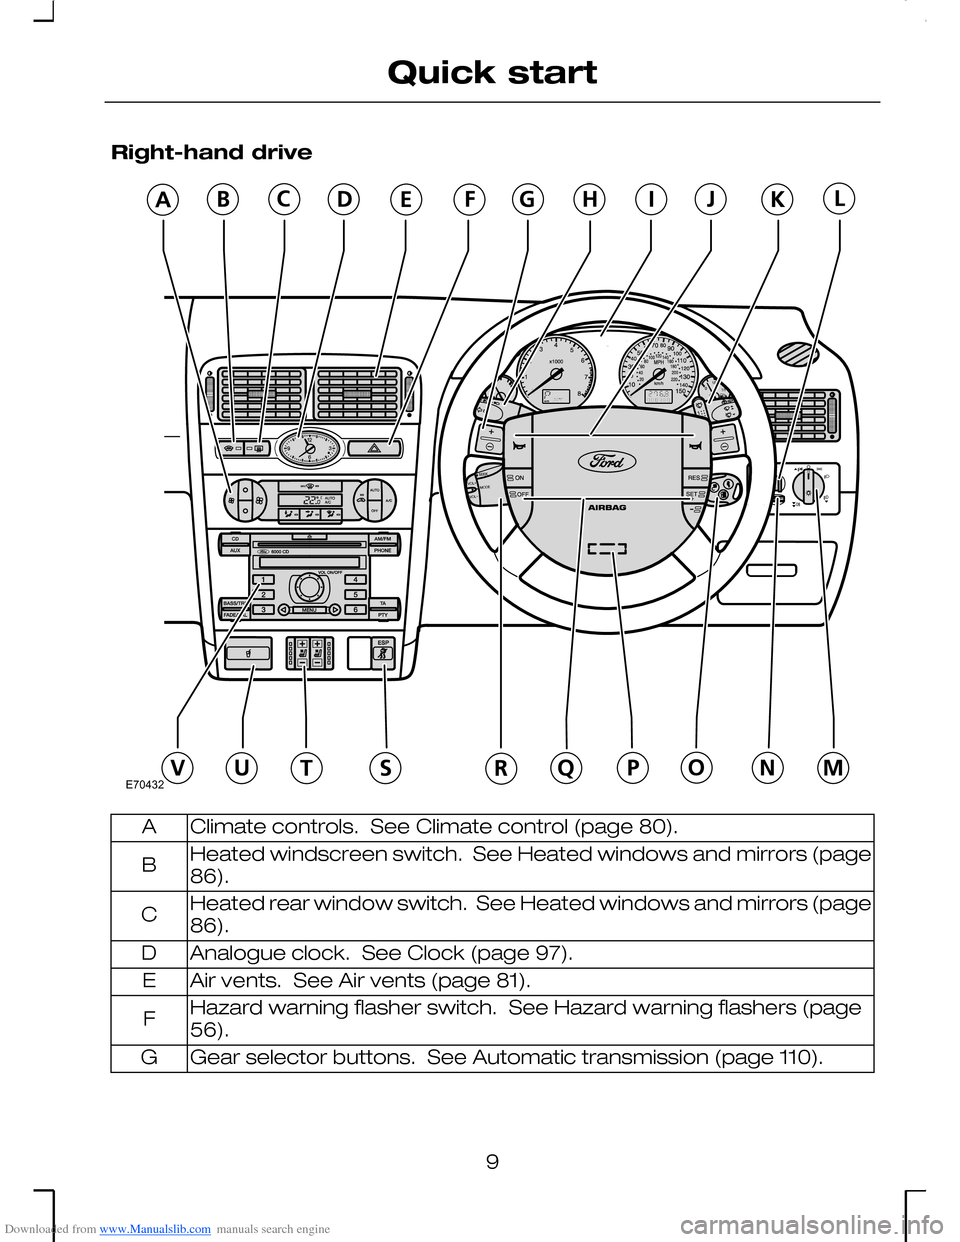
Downloaded from www.Manualslib.com manuals search engine Right-hand drive
Climate controls. See Climate control (page 80).A
Heated windscreen switch. See Heated windows and mirrors (page86).B
Heated rear window switch. See Heated windows and mirrors (page86).C
Analogue clock. See Clock (page 97).D
Air vents. See Air vents (page 81).E
Hazard warning flasher switch. See Hazard warning flashers (page56).F
Gear selector buttons. See Automatic transmission (page 110).G
9
Quick startE70432
Page 34 of 198
Downloaded from www.Manualslib.com manuals search engine GENERAL INFORMATION
ON RADIO FREQUENCIES
See Type approvals (page 183).
WARNINGS
The radio frequency used by theremote control can also be usedby other short distance radiotransmissions (e.g. amateur radios,medical equipment, wirelessheadphones, remote controls, alarmsystems etc.). If the remote controlfrequencies are jammed, you will notbe able to use any remote functions,the vehicle will not lock or unlock, norwill the alarm be armed. However,you can lock/ unlock with the key.
The vehicle or luggagecompartment will be opened ifthe buttons are pressedunintentionally, without the remotecontrol being directed towards thevehicle (e.g. in your pocket).
The range between transmitter andvehicle is environmentally influencedand varies greatly.
PROGRAMMING THE
REMOTE CONTROL
A maximum of four remote controls(including the ones supplied with thevehicle) can be programmed.
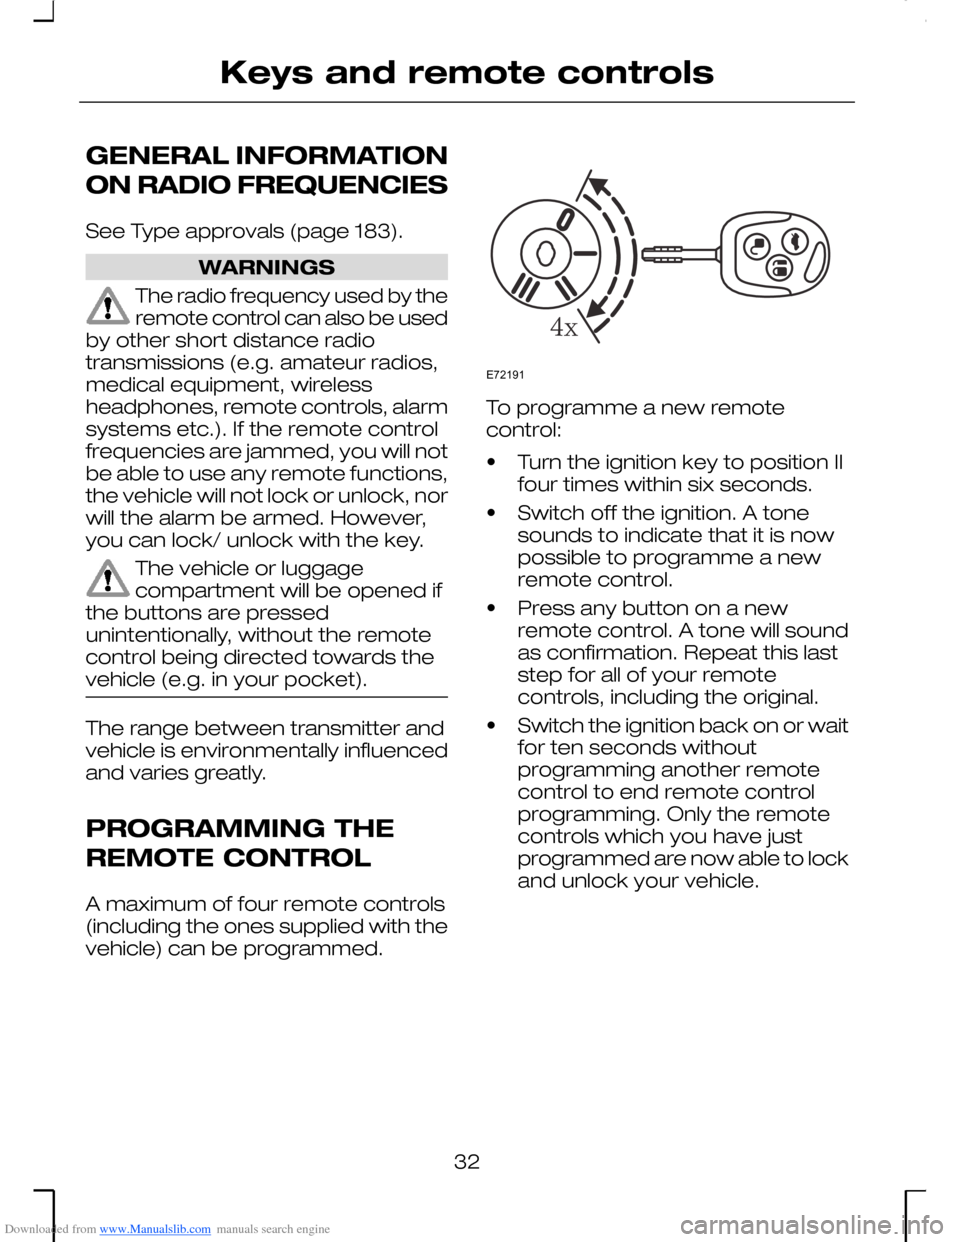
To programme a new remotecontrol:
•Turn the ignition key to position IIfour times within six seconds.
•Switch off the ignition. A tonesounds to indicate that it is nowpossible to programme a newremote control.
•Press any button on a newremote control. A tone will soundas confirmation. Repeat this laststep for all of your remotecontrols, including the original.
•Switch the ignition back on or waitfor ten seconds withoutprogramming another remotecontrol to end remote controlprogramming. Only the remotecontrols which you have justprogrammed are now able to lockand unlock your vehicle.
32
Keys and remote controlsE72191
Page 35 of 198
Downloaded from www.Manualslib.com manuals search engine Re-programming theunlocking function
You can change the unlockingfunction so that pressing the unlockbutton once deactivates the centrallocking or double locking, disarmsthe anti-theft alarm system andunlocks the driver’s door. Pressingthe unlock button twice within threeseconds also unlocks thepassengers’ doors.
If you want the tailgate to be lockedwhile driving, press the locking buttonon the driver’s door to activatecentral locking.
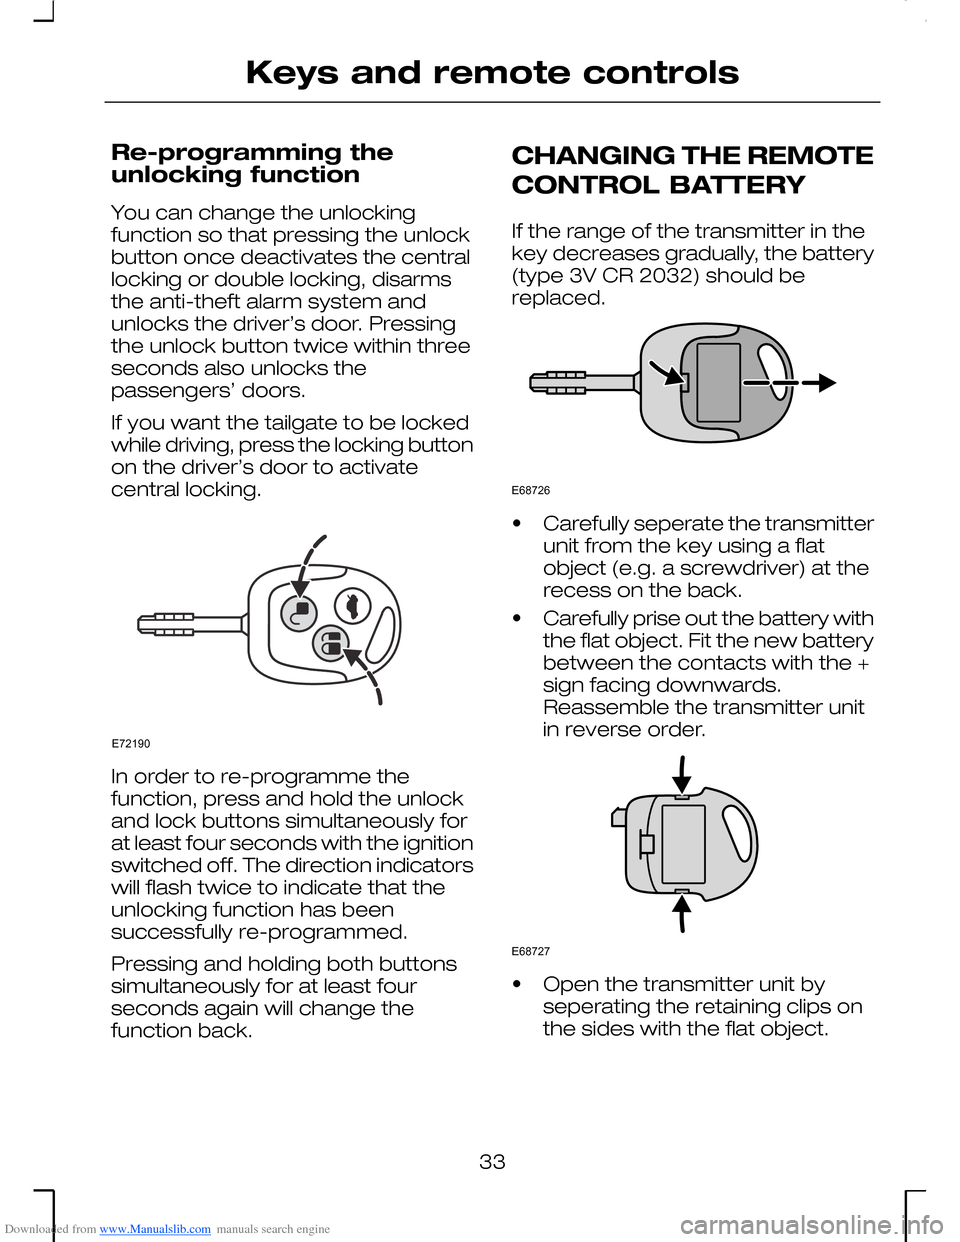
In order to re-programme thefunction, press and hold the unlockand lock buttons simultaneously forat least four seconds with the ignitionswitched off. The direction indicatorswill flash twice to indicate that theunlocking function has beensuccessfully re-programmed.
Pressing and holding both buttonssimultaneously for at least fourseconds again will change thefunction back.
CHANGING THE REMOTE
CONTROL BATTERY
If the range of the transmitter in thekey decreases gradually, the battery(type 3V CR 2032) should bereplaced.
•Carefully seperate the transmitterunit from the key using a flatobject (e.g. a screwdriver) at therecess on the back.
•Carefully prise out the battery withthe flat object. Fit the new batterybetween the contacts with the +sign facing downwards.Reassemble the transmitter unitin reverse order.
•Open the transmitter unit byseperating the retaining clips onthe sides with the flat object.
33
Keys and remote controlsE72190 E68726 E68727
Page 86 of 198
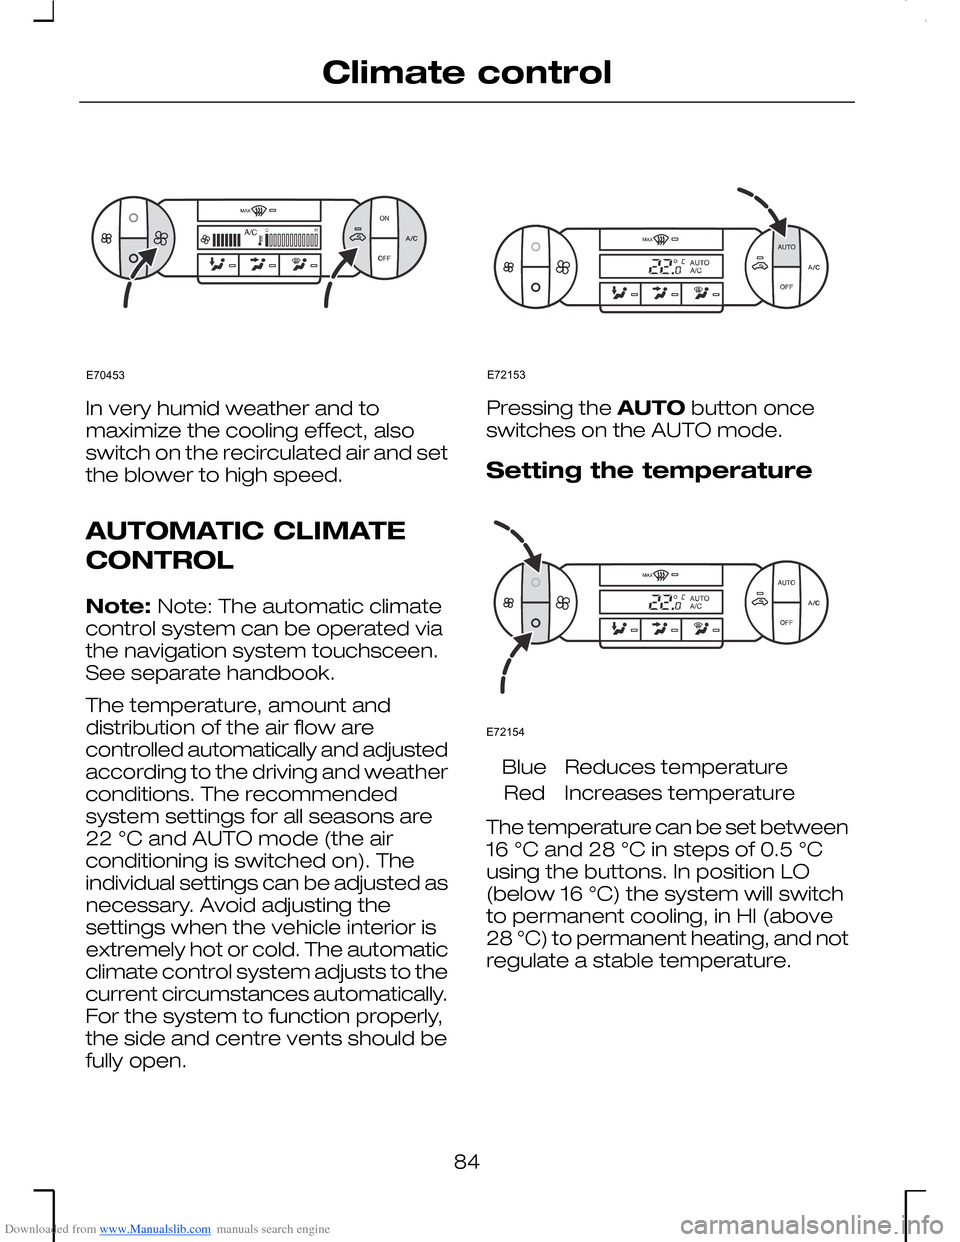
Downloaded from www.Manualslib.com manuals search engine In very humid weather and tomaximize the cooling effect, alsoswitch on the recirculated air and setthe blower to high speed.
AUTOMATIC CLIMATE
CONTROL
Note: Note: The automatic climatecontrol system can be operated viathe navigation system touchsceen.See separate handbook.
The temperature, amount anddistribution of the air flow arecontrolled automatically and adjustedaccording to the driving and weatherconditions. The recommendedsystem settings for all seasons are22 °C and AUTO mode (the airconditioning is switched on). Theindividual settings can be adjusted asnecessary. Avoid adjusting thesettings when the vehicle interior isextremely hot or cold. The automaticclimate control system adjusts to thecurrent circumstances automatically.For the system to function properly,the side and centre vents should befully open.
Pressing the AUTO button onceswitches on the AUTO mode.
Setting the temperature
Reduces temperatureBlue
Increases temperatureRed
The temperature can be set between16 °C and 28 °C in steps of 0.5 °Cusing the buttons. In position LO(below 16 °C) the system will switchto permanent cooling, in HI (above28 °C) to permanent heating, and notregulate a stable temperature.
84
Climate controlE70453 E72153 E72154
Page 87 of 198
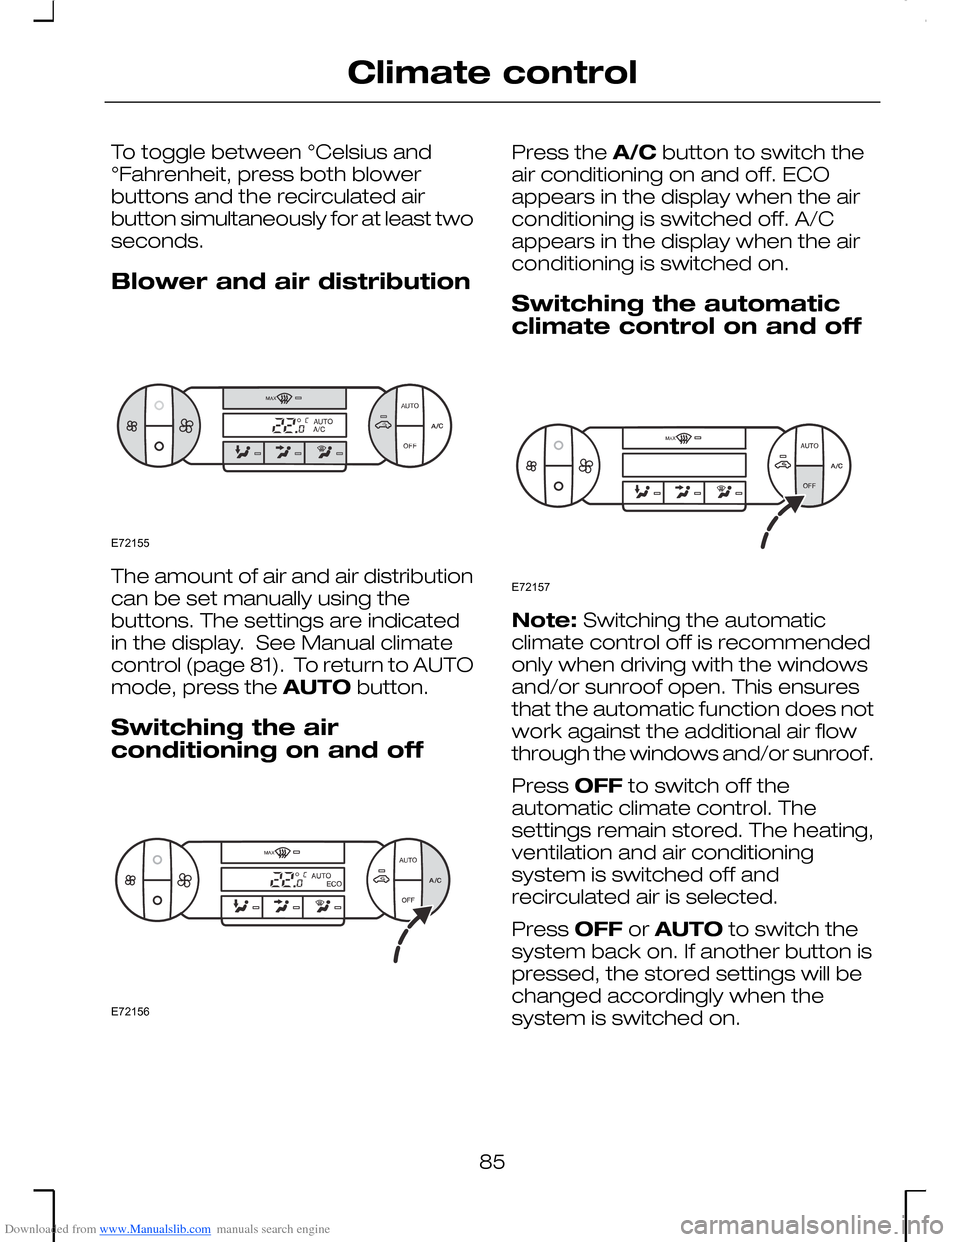
Downloaded from www.Manualslib.com manuals search engine To toggle between °Celsius and°Fahrenheit, press both blowerbuttons and the recirculated airbutton simultaneously for at least twoseconds.
Blower and air distribution
The amount of air and air distributioncan be set manually using thebuttons. The settings are indicatedin the display. See Manual climatecontrol (page 81). To return to AUTOmode, press the AUTO button.
Switching the airconditioning on and off
Press the A/C button to switch theair conditioning on and off. ECOappears in the display when the airconditioning is switched off. A/Cappears in the display when the airconditioning is switched on.
Switching the automaticclimate control on and off
Note: Switching the automaticclimate control off is recommendedonly when driving with the windowsand/or sunroof open. This ensuresthat the automatic function does notwork against the additional air flowthrough the windows and/or sunroof.
Press OFF to switch off theautomatic climate control. Thesettings remain stored. The heating,ventilation and air conditioningsystem is switched off andrecirculated air is selected.
Press OFF or AUTO to switch thesystem back on. If another button ispressed, the stored settings will bechanged accordingly when thesystem is switched on.
85
Climate controlE72155 E72156 E72157
Page 94 of 198
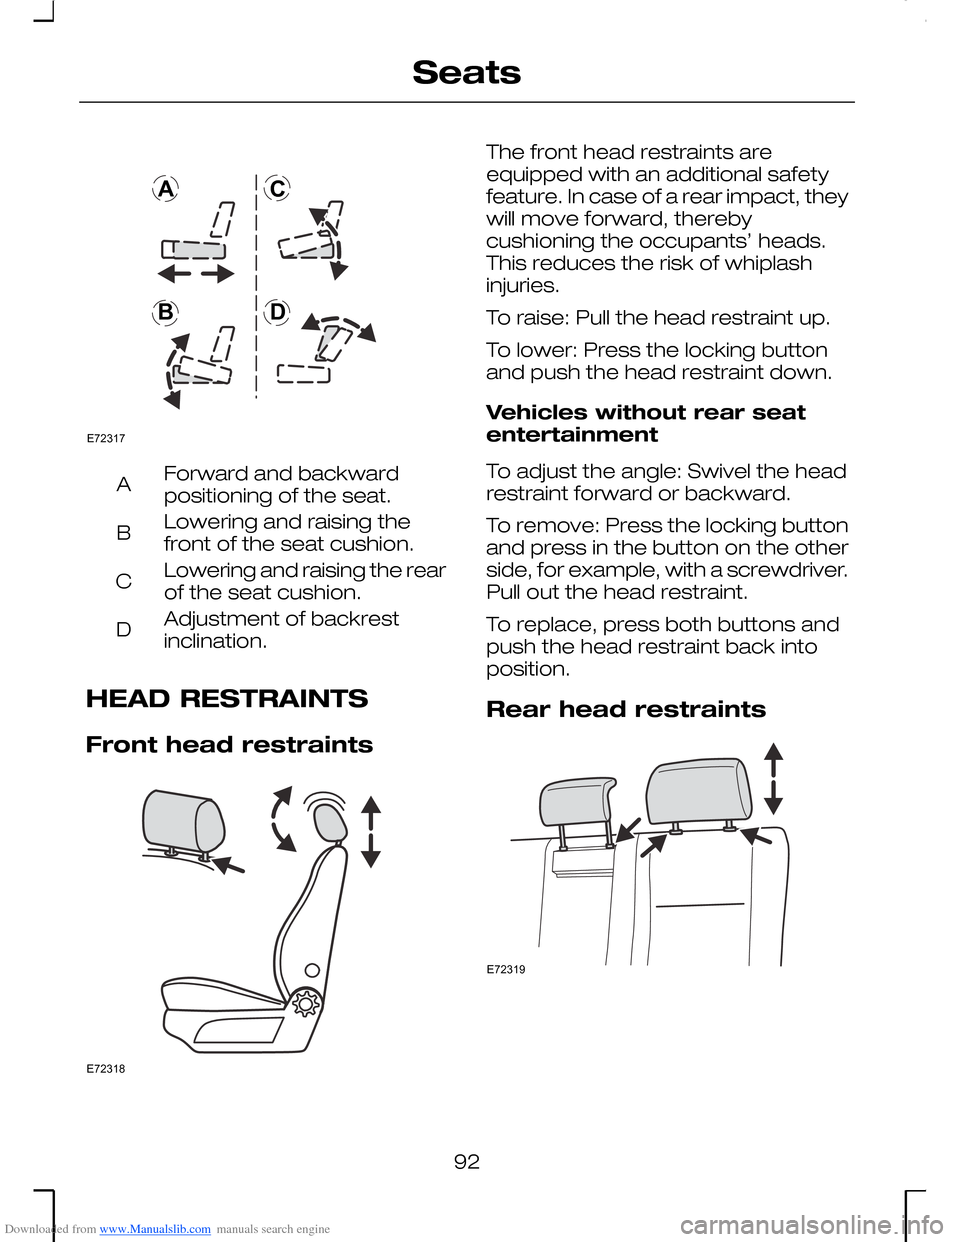
Downloaded from www.Manualslib.com manuals search engine Forward and backwardpositioning of the seat.A
Lowering and raising thefront of the seat cushion.B
Lowering and raising the rearof the seat cushion.C
Adjustment of backrestinclination.D
HEAD RESTRAINTS
Front head restraints
The front head restraints areequipped with an additional safetyfeature. In case of a rear impact, theywill move forward, therebycushioning the occupants’ heads.This reduces the risk of whiplashinjuries.
To raise: Pull the head restraint up.
To lower: Press the locking buttonand push the head restraint down.
Vehicles without rear seatentertainment
To adjust the angle: Swivel the headrestraint forward or backward.
To remove: Press the locking buttonand press in the button on the otherside, for example, with a screwdriver.Pull out the head restraint.
To replace, press both buttons andpush the head restraint back intoposition.
Rear head restraints
92
SeatsE72317ABCD E72318 E72319
Page 95 of 198
Downloaded from www.Manualslib.com manuals search engine WARNING
Always have the rear headrestraint raised when the rearseat is occupied by a passenger ora child restraint.
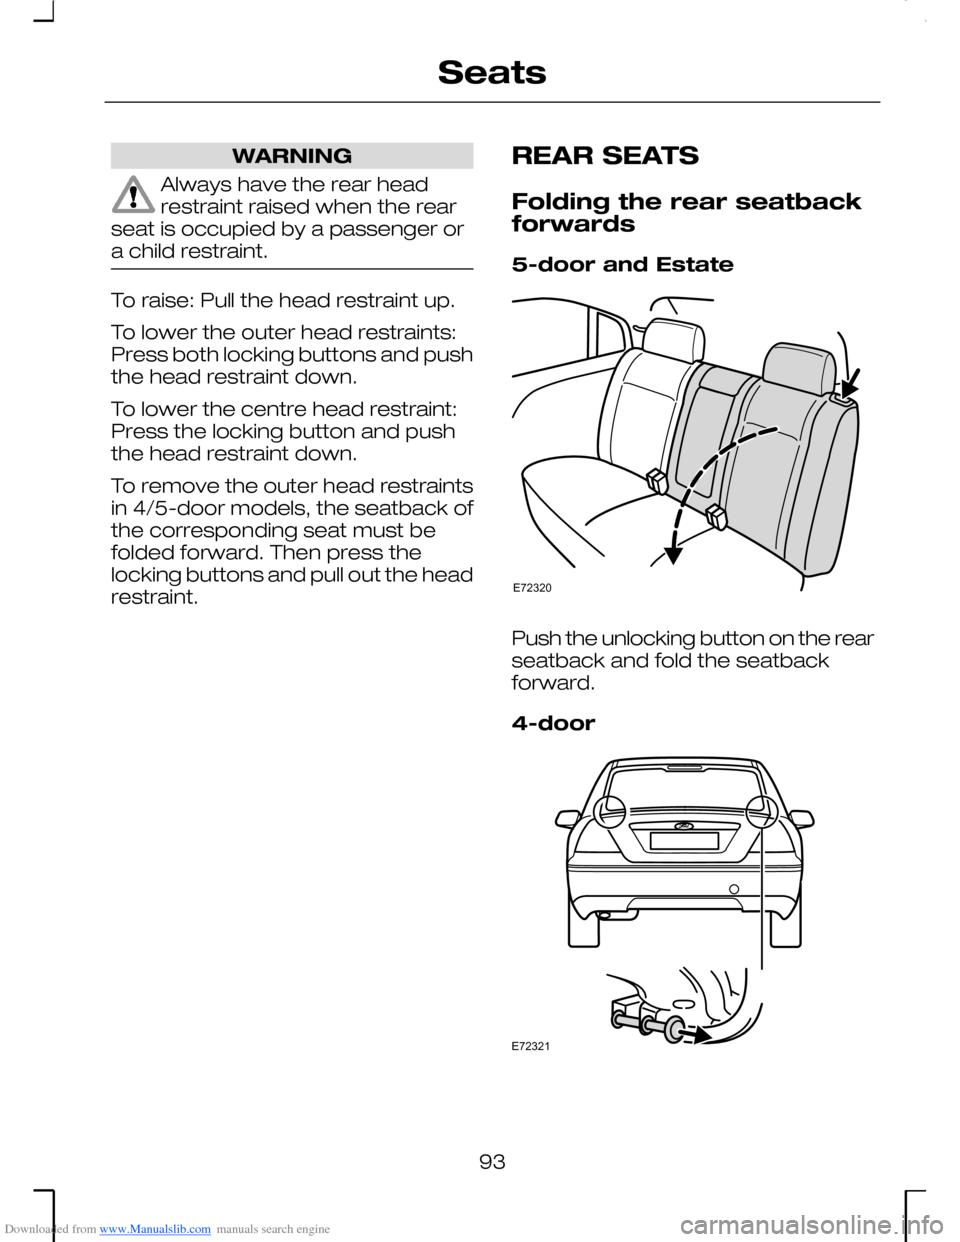
To raise: Pull the head restraint up.
To lower the outer head restraints:Press both locking buttons and pushthe head restraint down.
To lower the centre head restraint:Press the locking button and pushthe head restraint down.
To remove the outer head restraintsin 4/5-door models, the seatback ofthe corresponding seat must befolded forward. Then press thelocking buttons and pull out the headrestraint.
REAR SEATS
Folding the rear seatbackforwards
5-door and Estate
Push the unlocking button on the rearseatback and fold the seatbackforward.
4-door
93
SeatsE72320 E72321