2006 FORD EXPLORER center console
[x] Cancel search: center consolePage 46 of 328
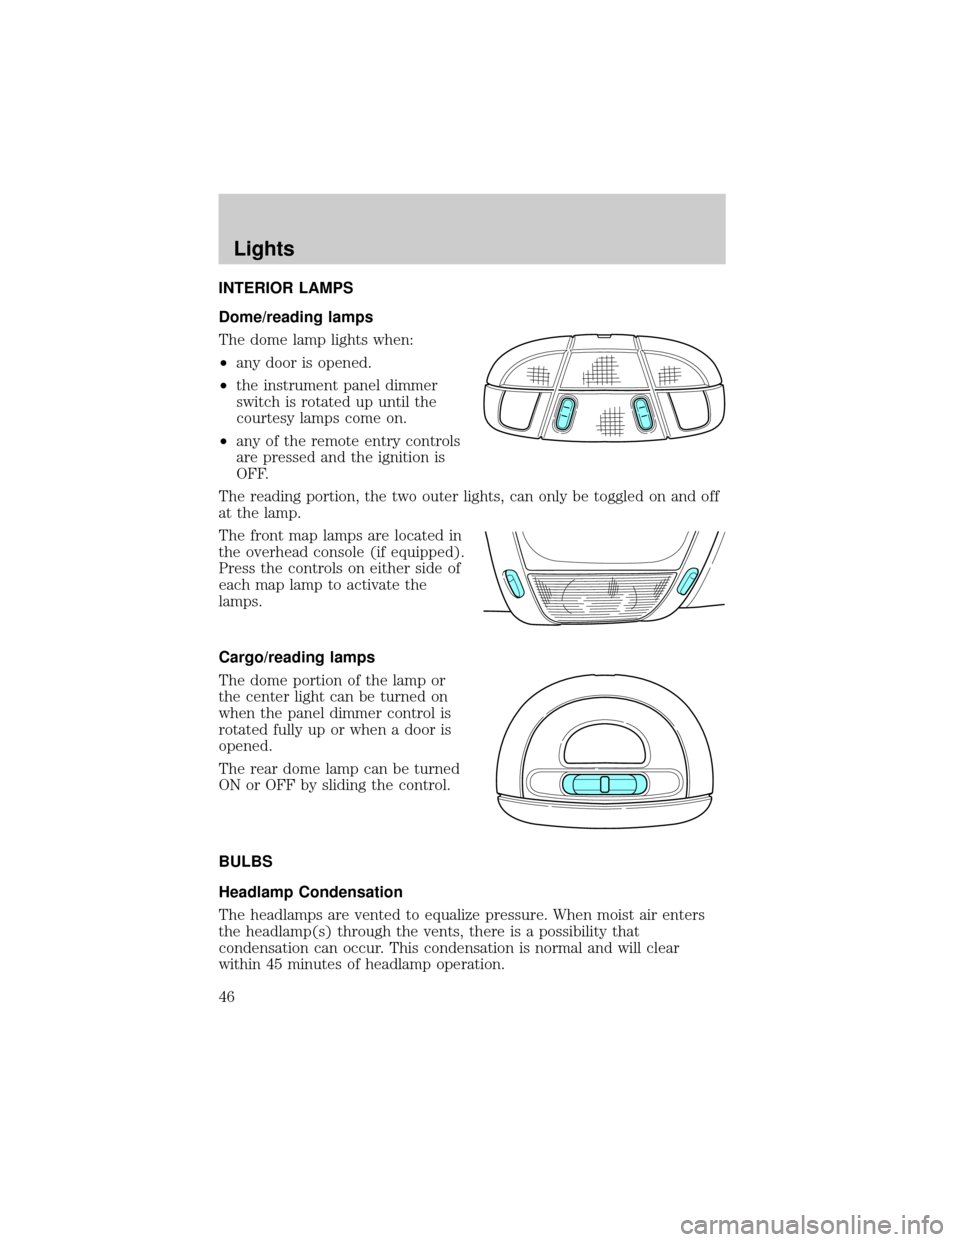
INTERIOR LAMPS
Dome/reading lamps
The dome lamp lights when:
²any door is opened.
²the instrument panel dimmer
switch is rotated up until the
courtesy lamps come on.
²any of the remote entry controls
are pressed and the ignition is
OFF.
The reading portion, the two outer lights, can only be toggled on and off
at the lamp.
The front map lamps are located in
the overhead console (if equipped).
Press the controls on either side of
each map lamp to activate the
lamps.
Cargo/reading lamps
The dome portion of the lamp or
the center light can be turned on
when the panel dimmer control is
rotated fully up or when a door is
opened.
The rear dome lamp can be turned
ON or OFF by sliding the control.
BULBS
Headlamp Condensation
The headlamps are vented to equalize pressure. When moist air enters
the headlamp(s) through the vents, there is a possibility that
condensation can occur. This condensation is normal and will clear
within 45 minutes of headlamp operation.
Lights
46
Page 56 of 328
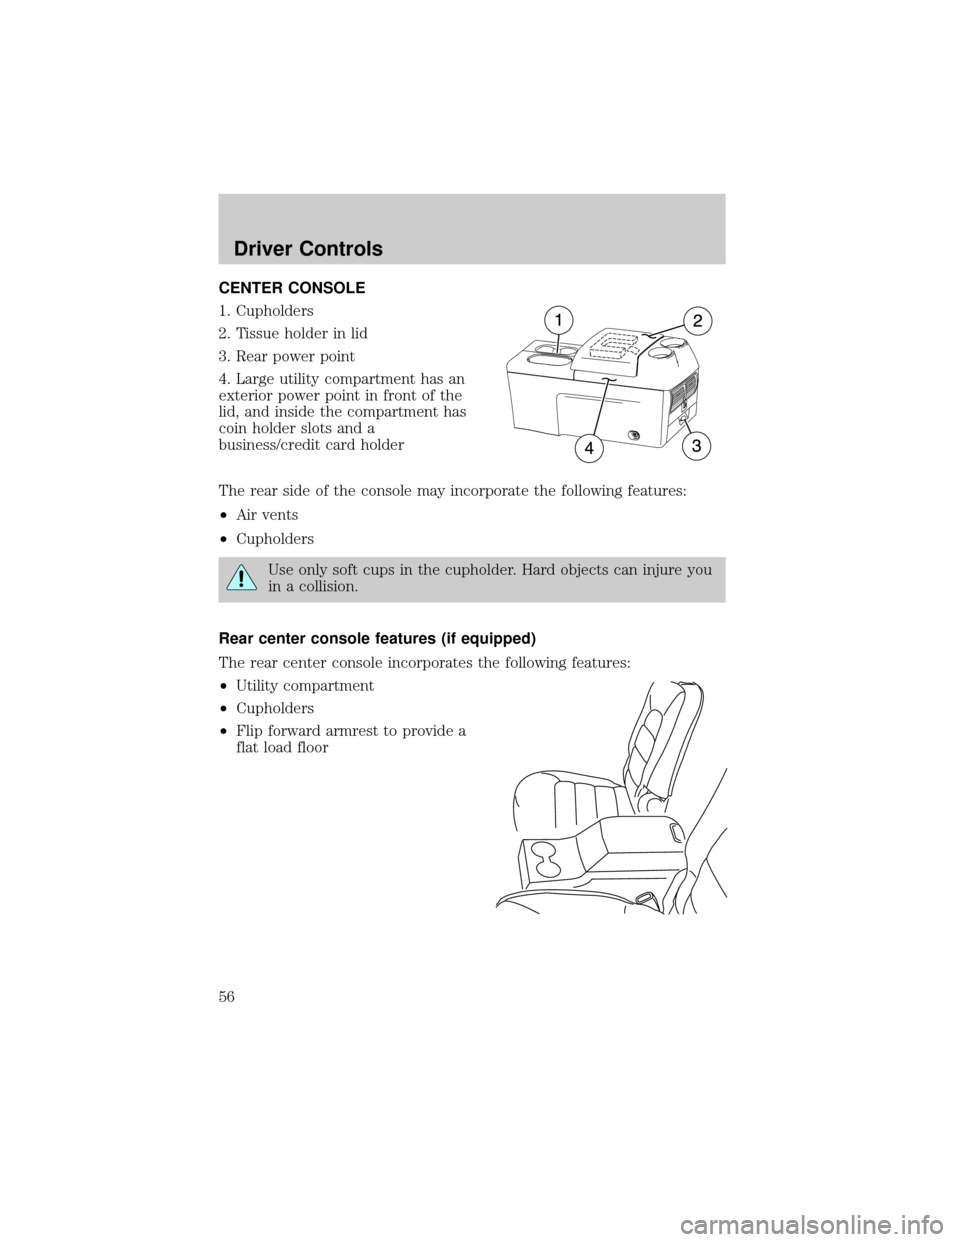
CENTER CONSOLE
1. Cupholders
2. Tissue holder in lid
3. Rear power point
4. Large utility compartment has an
exterior power point in front of the
lid, and inside the compartment has
coin holder slots and a
business/credit card holder
The rear side of the console may incorporate the following features:
²Air vents
²Cupholders
Use only soft cups in the cupholder. Hard objects can injure you
in a collision.
Rear center console features (if equipped)
The rear center console incorporates the following features:
²Utility compartment
²Cupholders
²Flip forward armrest to provide a
flat load floor
Driver Controls
56
Page 117 of 328
To reduce the risk of possible serious injury: Do not hang objects
off seat back or stow objects in the seatback map pocket (if
equipped) when a child is in the front passenger seat. Do not place
objects underneath the front passenger seat or between the seat and
the center console (if equipped). Check the ªpassenger airbag offº or
ªpass airbag offº indicator lamp for proper airbag status. Refer toFront
passenger sensing systemsection for additional details. Failure to
follow these instructions may interfere with the front passenger seat
sensing system.
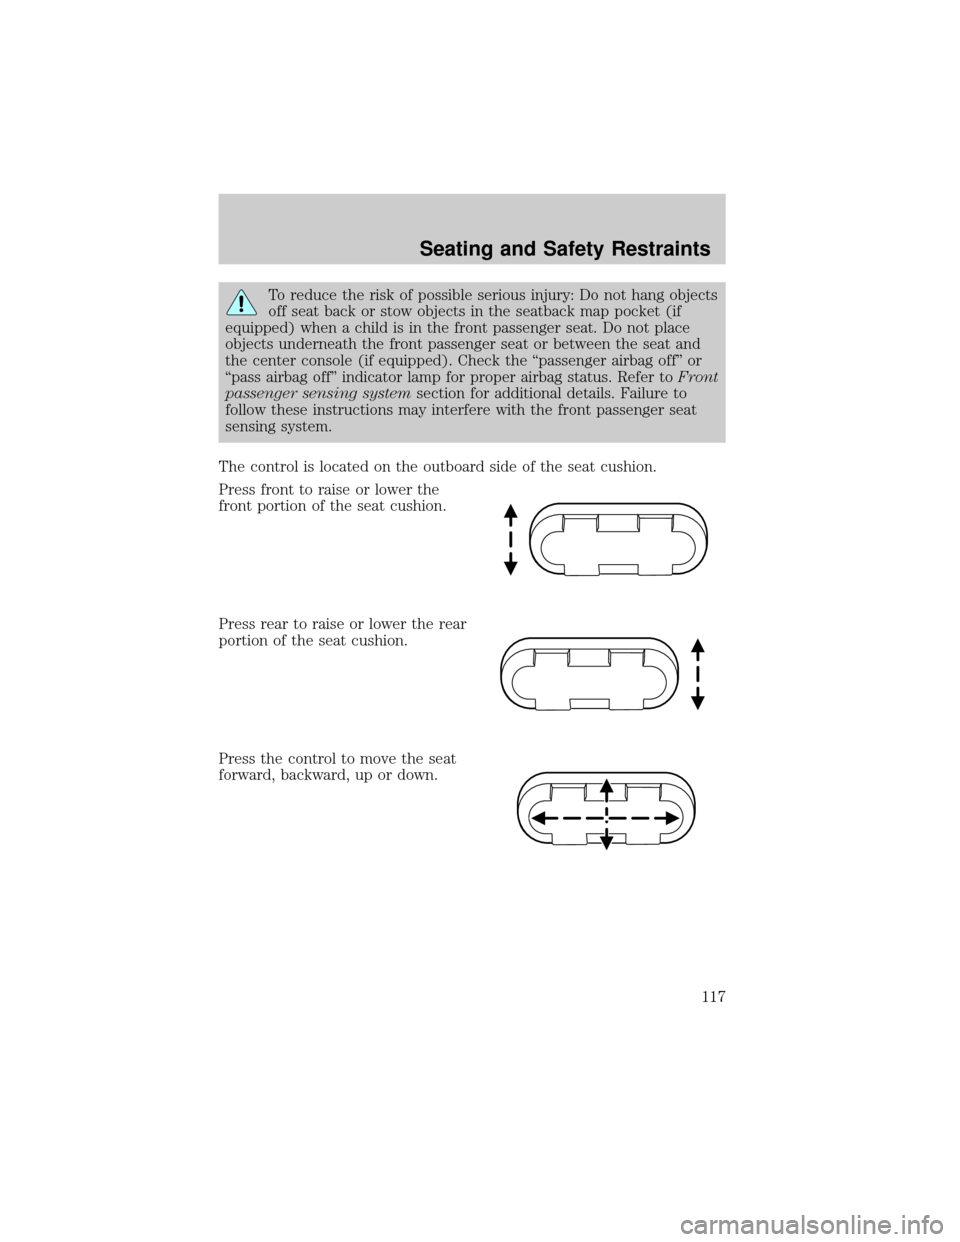
The control is located on the outboard side of the seat cushion.
Press front to raise or lower the
front portion of the seat cushion.
Press rear to raise or lower the rear
portion of the seat cushion.
Press the control to move the seat
forward, backward, up or down.
Seating and Safety Restraints
117
Page 148 of 328
The front passenger sensing system may detect small or medium objects
placed on the seat cushion. For most objects that are in the front
passenger seat, the passenger airbag will be disabled. Even though the
passenger airbag is disabled, the9pass airbag off9lamp may or may not
be illuminated according to the table below.
ObjectsPass Airbag Off
Indicator LampPassenger Airbag
Small (i.e. 3 ring
binder, small purse,
bottled water)Unlit Disabled
Medium (i.e. heavy
briefcase, fully packed
luggage)Lit Disabled
Empty seat, Small or
medium object with
safety belt buckledLit Disabled
If you think that the status of the passenger airbag off indicator lamp is
incorrect, check for the following:
²Objects lodged underneath the seat
²Objects between the seat cushion and the center console (if
equipped)
²Objects hanging off the seat back
²Objects stowed in the seatback map pocket (if equipped)
²Objects placed on the occupant's lap
²Cargo interference with the seat
²Other passengers pushing or pulling on the seat
²Rear passenger feet and knees resting or pushing on the seat
The conditions listed above may cause the weight of a properly seated
occupant to be incorrectly interpreted by the front passenger sensing
system. The person in the front passenger seat may appear heavier or
lighter due to the conditions described in the list above.
Seating and Safety Restraints
148
Page 149 of 328
To reduce the risk of possible serious injury:
Do not stow objects in seat back map pocket (if equipped) or
hang objects off seat back if a child is in the front passenger seat.
Do not place objects underneath the front passenger seat or between
the seat and the center console (if equipped).
Check the ªpassenger airbag offº or ªpass airbag offº indicator lamp for
proper airbag Status.
Failure to follow these instructions may interfere with the front
passenger seat sensing system.
In case there is a problem with the
front passenger sensing system, the
airbag readiness lamp in the
instrument cluster will stay lit.
If the airbag readiness lamp is lit, do the following:
The driver and/or adult passengers should check for any objects that
may be lodged underneath the front passenger seat or cargo interfering
with the seat.
If objects are lodged and/or cargo is interfering with the seat; please take
the following steps to remove the obstruction:
²Pull the vehicle over.
²Turn the vehicle off.
²Driver and/or adult passengers should check for any objects lodged
underneath the front passenger seat or cargo interfering with the seat.
²Remove the obstruction(s) (if found).
²Restart the vehicle.
²Wait at least 2 minutes and verify that the airbag readiness lamp is no
longer illuminated
²If the airbag readiness lamp remains illuminated, this may or may/not
be a problem due to the front passenger sensing system.
DO NOT attempt to repair or service the system; take your vehicle
immediately to an authorized dealer.
If it is necessary to modify an advanced front airbag system to
accommodate a person with disabilities, contact the Ford Customer
Relationship Center at the phone number shown in theCustomer
Assistancesection of thisOwner's Guide.
Seating and Safety Restraints
149
Page 217 of 328
Loaded vehicles, with a higher center of gravity, may handle
differently than unloaded vehicles. Extra precautions such as
slower speeds and increased stopping distance should be taken when
driving a heavily loaded vehicle.
AUTOMATIC TRANSMISSION OPERATION
Brake-shift interlock
This vehicle is equipped with a brake-shift interlock feature that prevents
the gearshift lever from being moved from P (Park) when the ignition is
in the ON position unless brake pedal is depressed.
If you cannot move the gearshift lever out of P (Park) with ignition in
the ON position and the brake pedal depressed:
1. Apply the parking brake, turn ignition key to LOCK, then remove the
key.
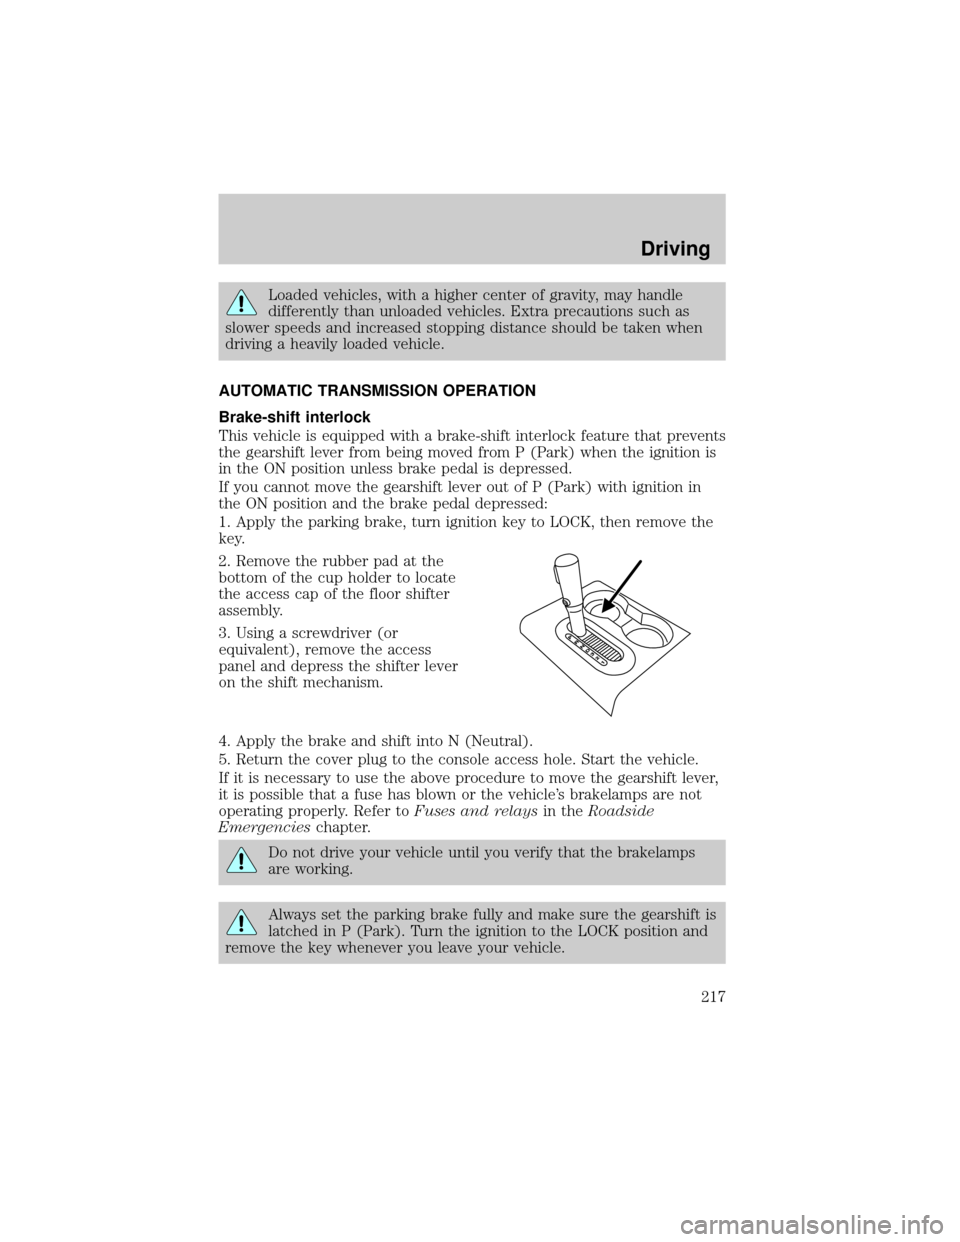
2. Remove the rubber pad at the
bottom of the cup holder to locate
the access cap of the floor shifter
assembly.
3. Using a screwdriver (or
equivalent), remove the access
panel and depress the shifter lever
on the shift mechanism.
4. Apply the brake and shift into N (Neutral).
5. Return the cover plug to the console access hole. Start the vehicle.
If it is necessary to use the above procedure to move the gearshift lever,
it is possible that a fuse has blown or the vehicle's brakelamps are not
operating properly. Refer toFuses and relaysin theRoadside
Emergencieschapter.
Do not drive your vehicle until you verify that the brakelamps
are working.
Always set the parking brake fully and make sure the gearshift is
latched in P (Park). Turn the ignition to the LOCK position and
remove the key whenever you leave your vehicle.
Driving
217
Page 321 of 328

wheels ......................................270
wiper blades ............................272
Climate control (see Air
conditioning or Heating) ............37
Clock adjust
6-CD in dash .............................29
Compass, electronic ....................75
calibration .................................77
set zone adjustment ...........76, 89
Console ........................................56
overhead ....................................54
rear ............................................56
Controls
power seat ...............................116
steering column ........................62
Coolant
checking and adding ..............288
refill capacities ................292, 308
specifications ..................310, 313
Cruise control
(see Speed control) ....................60
Customer Assistance ................235
Ford Extended Service
Plan ..........................................266
Getting assistance outside
the U.S. and Canada ..............267
Getting roadside assistance ...235
Getting the service you
need .........................................262
Ordering additional owner's
literature .................................267
Utilizing the
Mediation/Arbitration
Program ...................................265
D
Daytime running lamps
(see Lamps) ................................43Defrost
rear window ..............................41
Dipstick
automatic transmission
fluid ..........................................305
engine oil .................................281
Doors
lubricant specifications ..........310
Driveline universal joint and
slip yoke ....................................306
Driving under special
conditions ..................224, 228, 232
sand .........................................230
snow and ice ...........................233
through water .................231, 234
Dual automatic temperature
control (DATC) ...........................37
DVD system .................................34
E
Electronic message center ...69, 80
Emergencies, roadside
jump-starting ..........................256
Emergency Flashers .................237
Emission control system ..........302
Engine ........................................313
cleaning ...................................270
coolant .....................................288
fail-safe cooling .......................293
idle speed control ...................286
lubrication
specifications ..................310, 313
refill capacities ........................308
service points ..................278±279
starting after a collision .........237
Engine block heater .................209
Engine oil ..................................281
Index
321