2006 FORD EXPEDITION seats
[x] Cancel search: seatsPage 191 of 360
SAFETY SEATS FOR CHILDREN
Child and infant or child safety seats
Use a safety seat that is recommended for the size and weight of the child.
Carefully follow all of the manufacturer’s instructions with the safety seat
you put in your vehicle. If you do not install and use the safety seat properly,
the child may be injured in a sudden stop or collision.
When installing a child safety seat:
•Review and follow the information
presented in theairbag
supplemental restraint system
(SRS) section in this chapter.
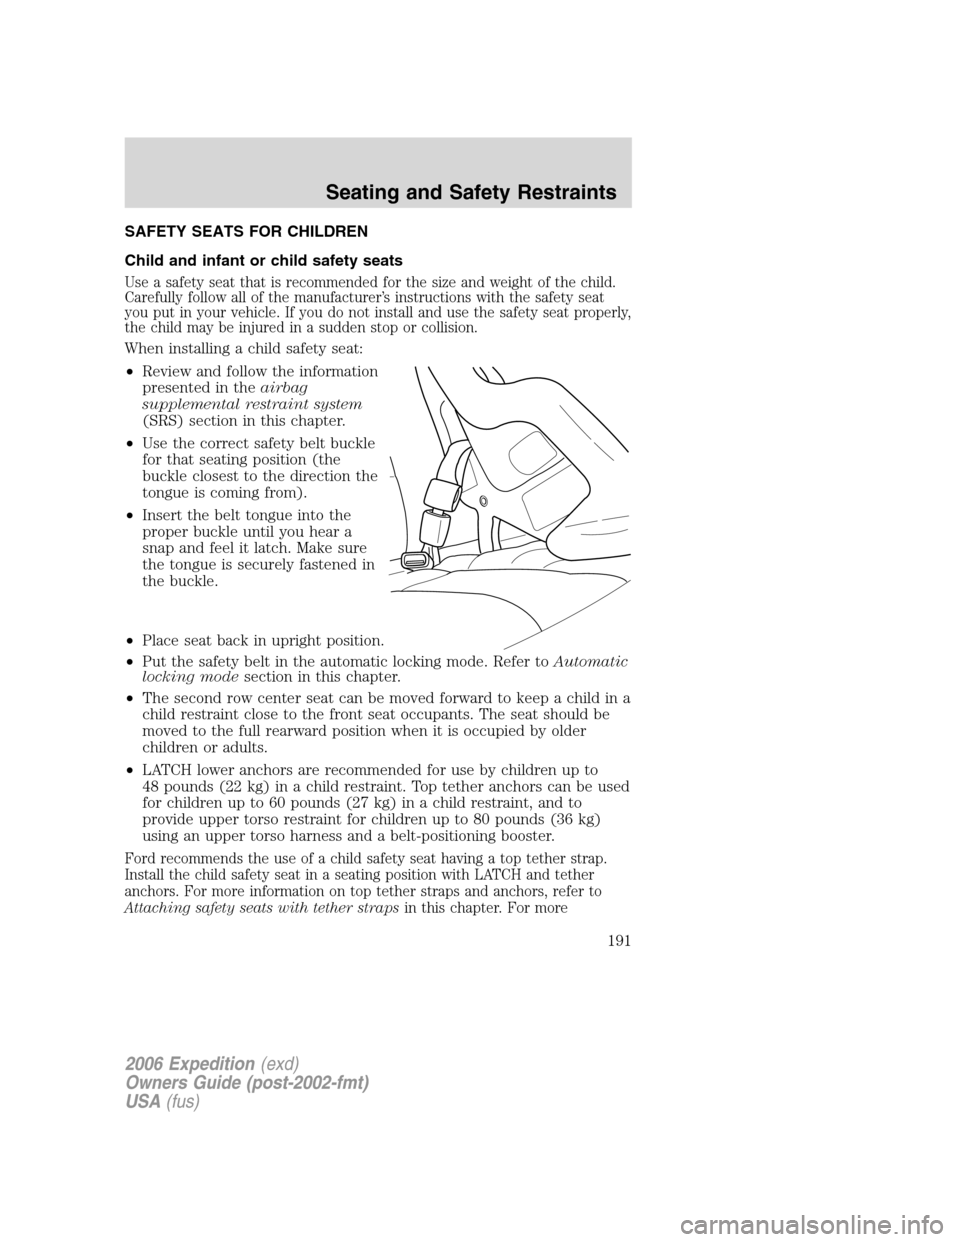
•Use the correct safety belt buckle
for that seating position (the
buckle closest to the direction the
tongue is coming from).
•Insert the belt tongue into the
proper buckle until you hear a
snap and feel it latch. Make sure
the tongue is securely fastened in
the buckle.
•Place seat back in upright position.
•Put the safety belt in the automatic locking mode. Refer toAutomatic
locking modesection in this chapter.
•The second row center seat can be moved forward to keep a child in a
child restraint close to the front seat occupants. The seat should be
moved to the full rearward position when it is occupied by older
children or adults.
•LATCH lower anchors are recommended for use by children up to
48 pounds (22 kg) in a child restraint. Top tether anchors can be used
for children up to 60 pounds (27 kg) in a child restraint, and to
provide upper torso restraint for children up to 80 pounds (36 kg)
using an upper torso harness and a belt-positioning booster.
Ford recommends the use of a child safety seat having a top tether strap.
Install the child safety seat in a seating position with LATCH and tether
anchors. For more information on top tether straps and anchors, refer to
Attaching safety seats with tether strapsin this chapter. For more
2006 Expedition(exd)
Owners Guide (post-2002-fmt)
USA(fus)
Seating and Safety Restraints
191
Page 192 of 360
information of LATCH anchors refer toAttaching safety seats with LATCH
(Lower Anchors and Tethers for Children) attachmentsin this chapter.
Carefully follow all of the manufacturer’s instructions included
with the safety seat you put in your vehicle. If you do not install
and use the safety seat properly, the child may be injured in a sudden
stop or collision.
Installing child safety seats with combination lap and shoulder
belts
Airbags can kill or injure a child in a child seat.NEVERplace a
rear-facing child seat in front of an active airbag. If you must use
a forward-facing child seat in the front seat, move the seat all the way
back.
Children 12 and under should be properly restrained in the rear
seat whenever possible.
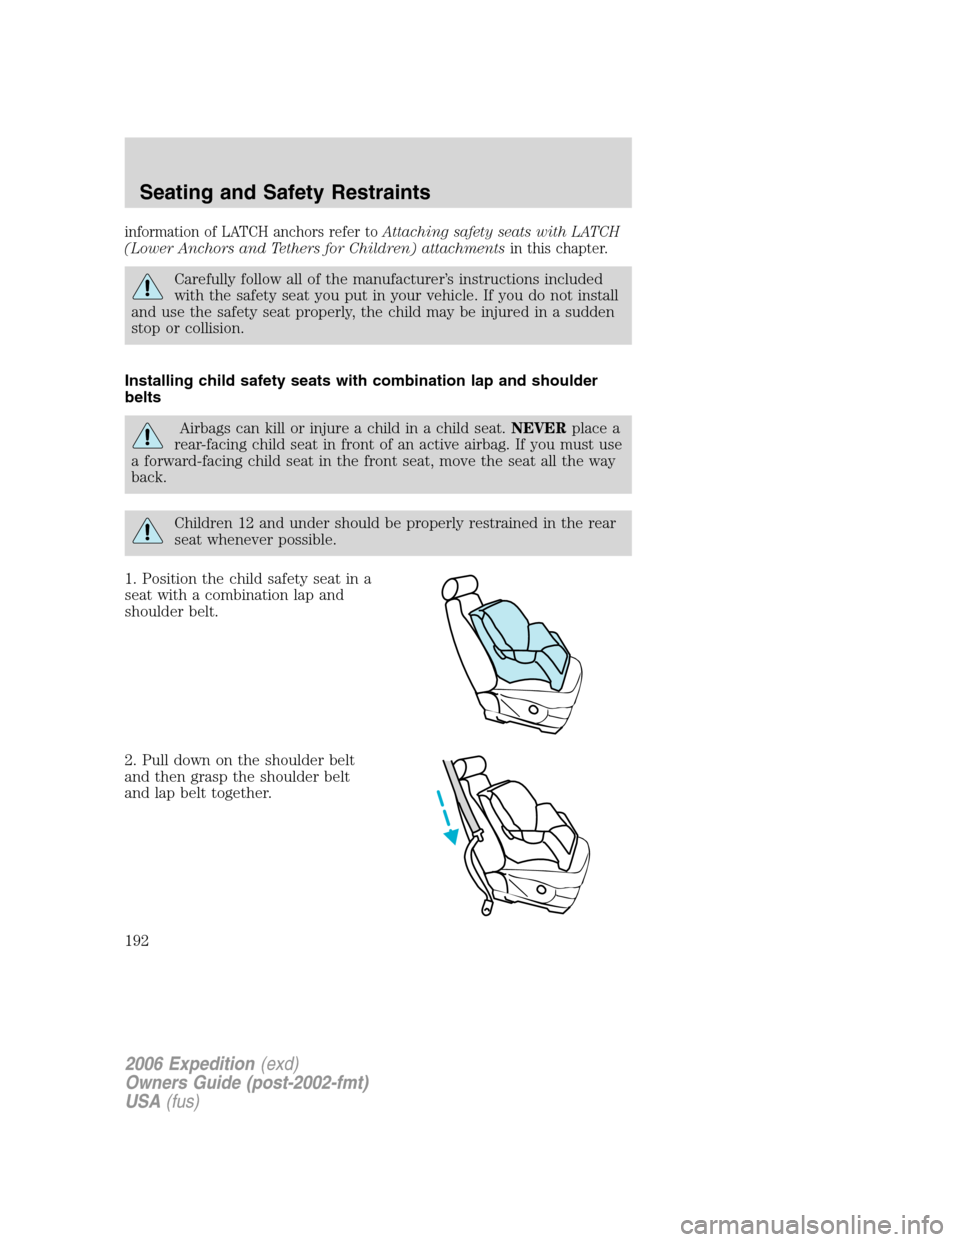
1. Position the child safety seat in a
seat with a combination lap and
shoulder belt.
2. Pull down on the shoulder belt
and then grasp the shoulder belt
and lap belt together.
2006 Expedition(exd)
Owners Guide (post-2002-fmt)
USA(fus)
Seating and Safety Restraints
192
Page 194 of 360
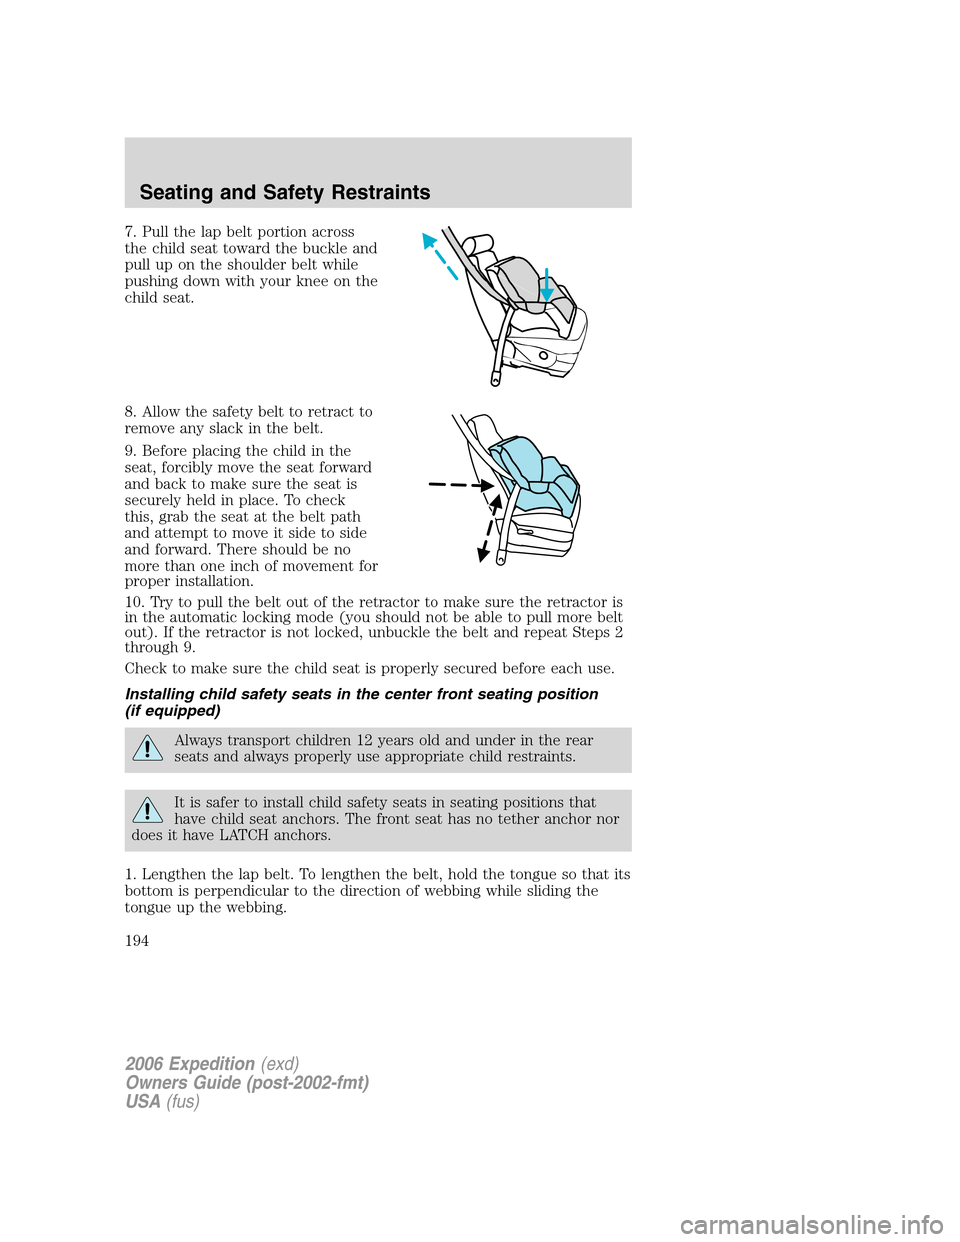
7. Pull the lap belt portion across
the child seat toward the buckle and
pull up on the shoulder belt while
pushing down with your knee on the
child seat.
8. Allow the safety belt to retract to
remove any slack in the belt.
9. Before placing the child in the
seat, forcibly move the seat forward
and back to make sure the seat is
securely held in place. To check
this, grab the seat at the belt path
and attempt to move it side to side
and forward. There should be no
more than one inch of movement for
proper installation.
10. Try to pull the belt out of the retractor to make sure the retractor is
in the automatic locking mode (you should not be able to pull more belt
out). If the retractor is not locked, unbuckle the belt and repeat Steps 2
through 9.
Check to make sure the child seat is properly secured before each use.
Installing child safety seats in the center front seating position
(if equipped)
Always transport children 12 years old and under in the rear
seats and always properly use appropriate child restraints.
It is safer to install child safety seats in seating positions that
have child seat anchors. The front seat has no tether anchor nor
does it have LATCH anchors.
1. Lengthen the lap belt. To lengthen the belt, hold the tongue so that its
bottom is perpendicular to the direction of webbing while sliding the
tongue up the webbing.
2006 Expedition(exd)
Owners Guide (post-2002-fmt)
USA(fus)
Seating and Safety Restraints
194
Page 195 of 360
2. Place the child safety seat in the center seating position.
3. Route the tongue and webbing through the child seat according to the
child seat manufacturer’s instructions.
4. Insert the belt tongue into the proper buckle for the center seating
position until you hear a snap and feel it latch. Make sure the tongue is
securely fastened to the buckle by pulling on tongue.
5. Push down on the child seat with your knee while pulling on the loose
end of the lap belt webbing to tighten the belt.
6. Before placing the child into the child seat, forcibly move the child
seat from side to side and forward to make sure that the seat is held
securely. If the child seat moves excessively, repeat Steps 5 through 6, or
properly install the child seat in a different position.
Attaching child safety seats with tether straps
Most new forward-facing child safety seats include a tether strap which
goes over the back of the seat and hooks to an anchoring point. Tether
straps are available as an accessory for many older safety seats. Contact
the manufacturer of your child seat for information about ordering a
tether strap.
Some of the rear seats of your vehicle are equipped with built-in tether
strap anchors located behind the seats as described below.
In the third row center seating position, the tether anchor is a loop at
the bottom of the seatback.
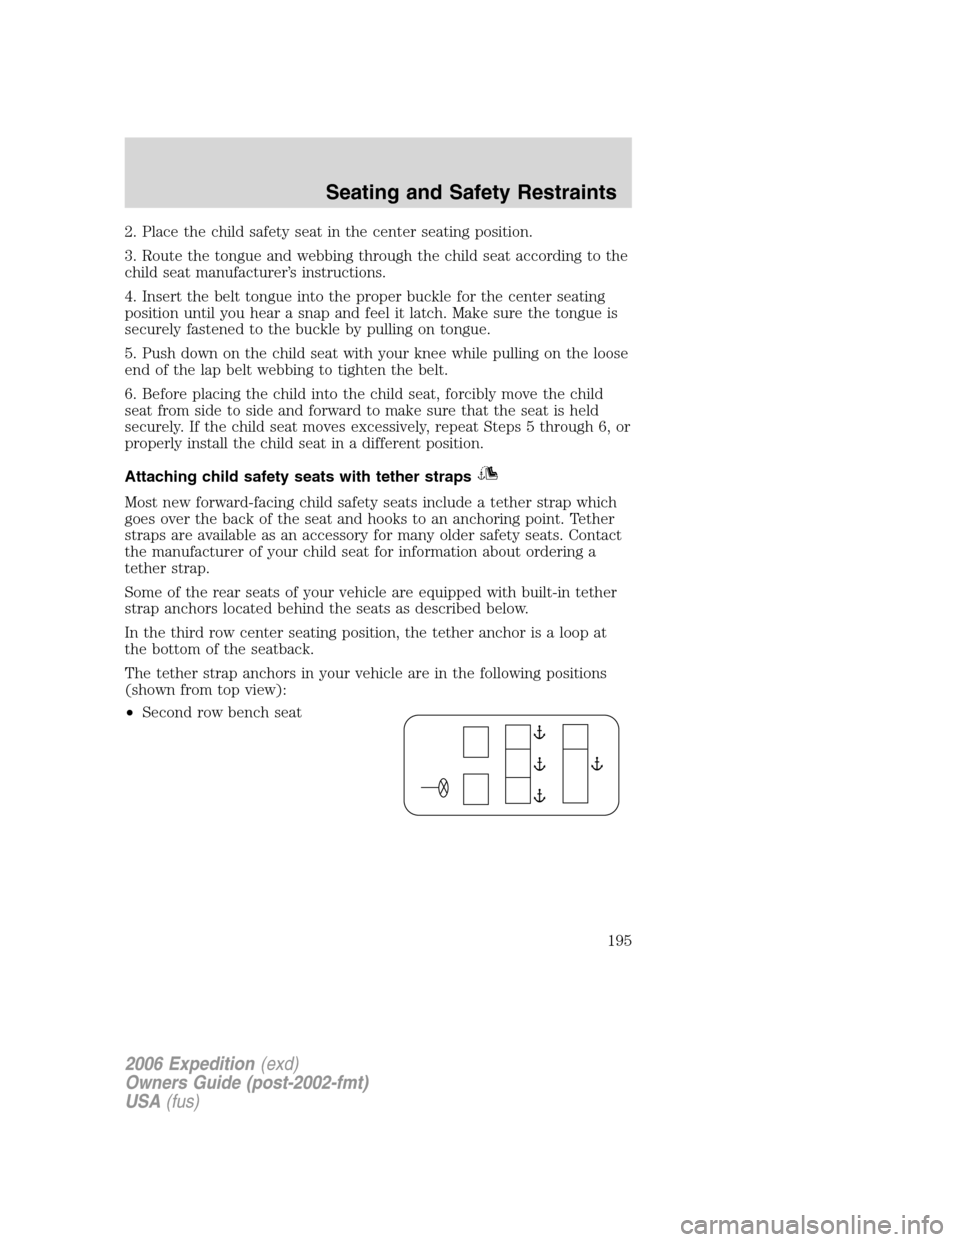
The tether strap anchors in your vehicle are in the following positions
(shown from top view):
•Second row bench seat
2006 Expedition(exd)
Owners Guide (post-2002-fmt)
USA(fus)
Seating and Safety Restraints
195
Page 196 of 360
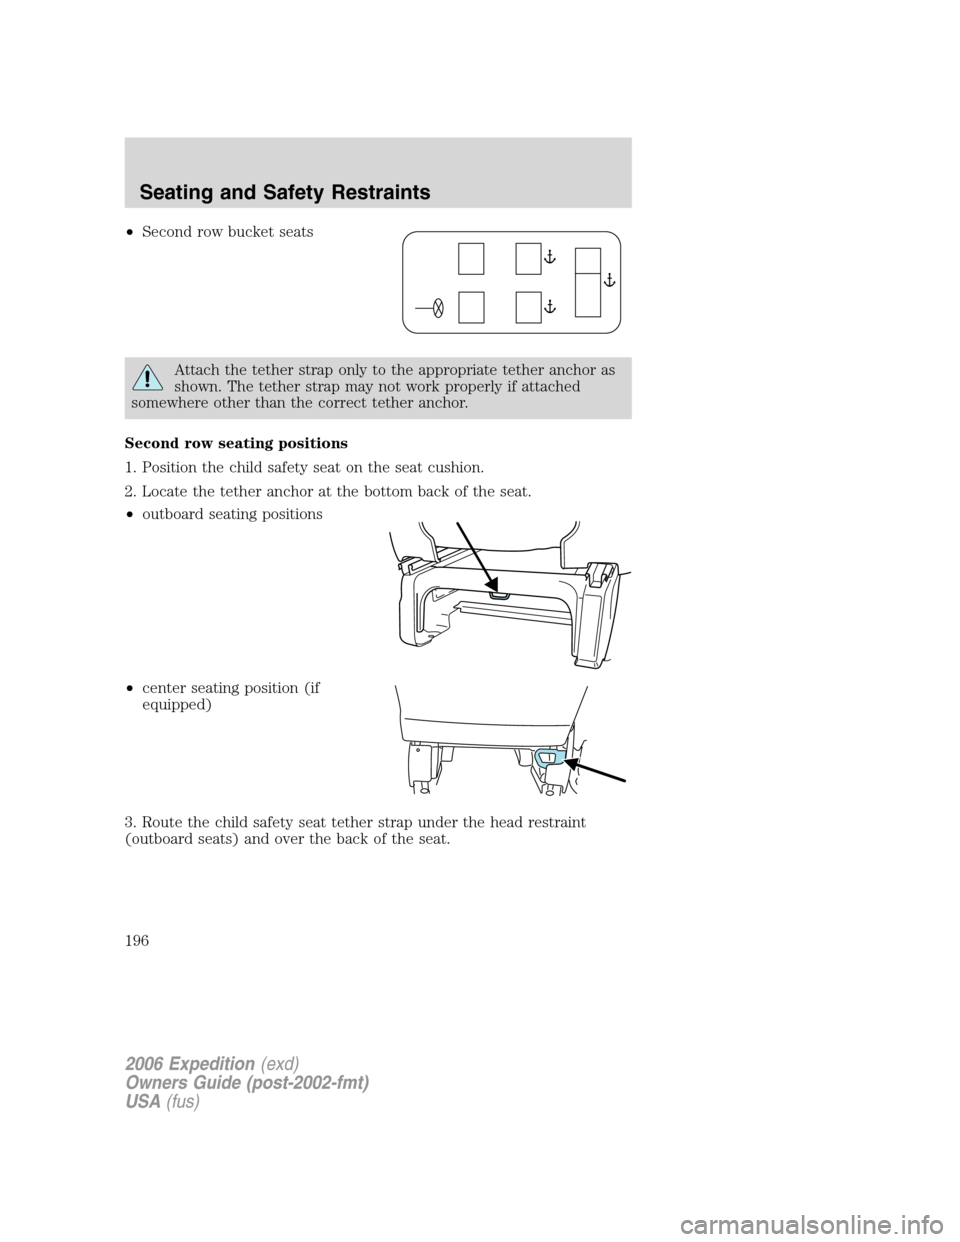
•Second row bucket seats
Attach the tether strap only to the appropriate tether anchor as
shown. The tether strap may not work properly if attached
somewhere other than the correct tether anchor.
Second row seating positions
1. Position the child safety seat on the seat cushion.
2. Locate the tether anchor at the bottom back of the seat.
•outboard seating positions
•center seating position (if
equipped)
3. Route the child safety seat tether strap under the head restraint
(outboard seats) and over the back of the seat.
2006 Expedition(exd)
Owners Guide (post-2002-fmt)
USA(fus)
Seating and Safety Restraints
196
Page 199 of 360
6. Tighten the child safety seat tether strap according to the
manufacturer’s instructions.
If the safety seat is not anchored properly, the risk of a child
being injured in a collision greatly increases.
Attaching safety seats with LATCH (Lower Anchors and Tethers for
Children) attachments for child seat anchors
Some child safety seats have two rigid or webbing mounted attachments
that connect to two anchors at certain seating positions in your vehicle.
This type of child seat eliminates the need to use seat belts to attach the
child seat. For forward-facing child seats, the tether strap must also be
attached to the proper tether anchor. SeeAttaching safety seats with
tether strapsin this chapter.
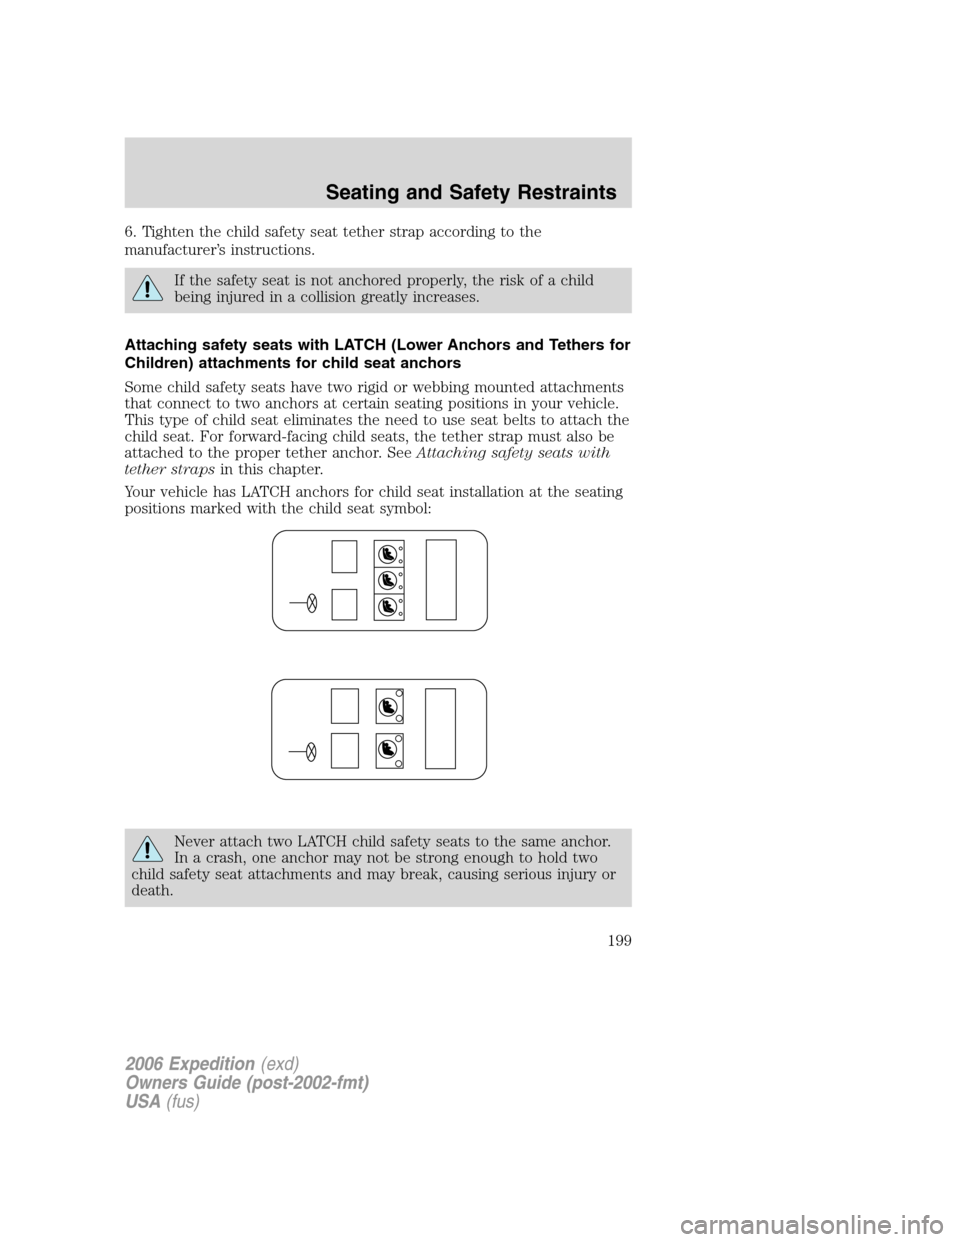
Your vehicle has LATCH anchors for child seat installation at the seating
positions marked with the child seat symbol:
Never attach two LATCH child safety seats to the same anchor.
In a crash, one anchor may not be strong enough to hold two
child safety seat attachments and may break, causing serious injury or
death.
2006 Expedition(exd)
Owners Guide (post-2002-fmt)
USA(fus)
Seating and Safety Restraints
199
Page 280 of 360
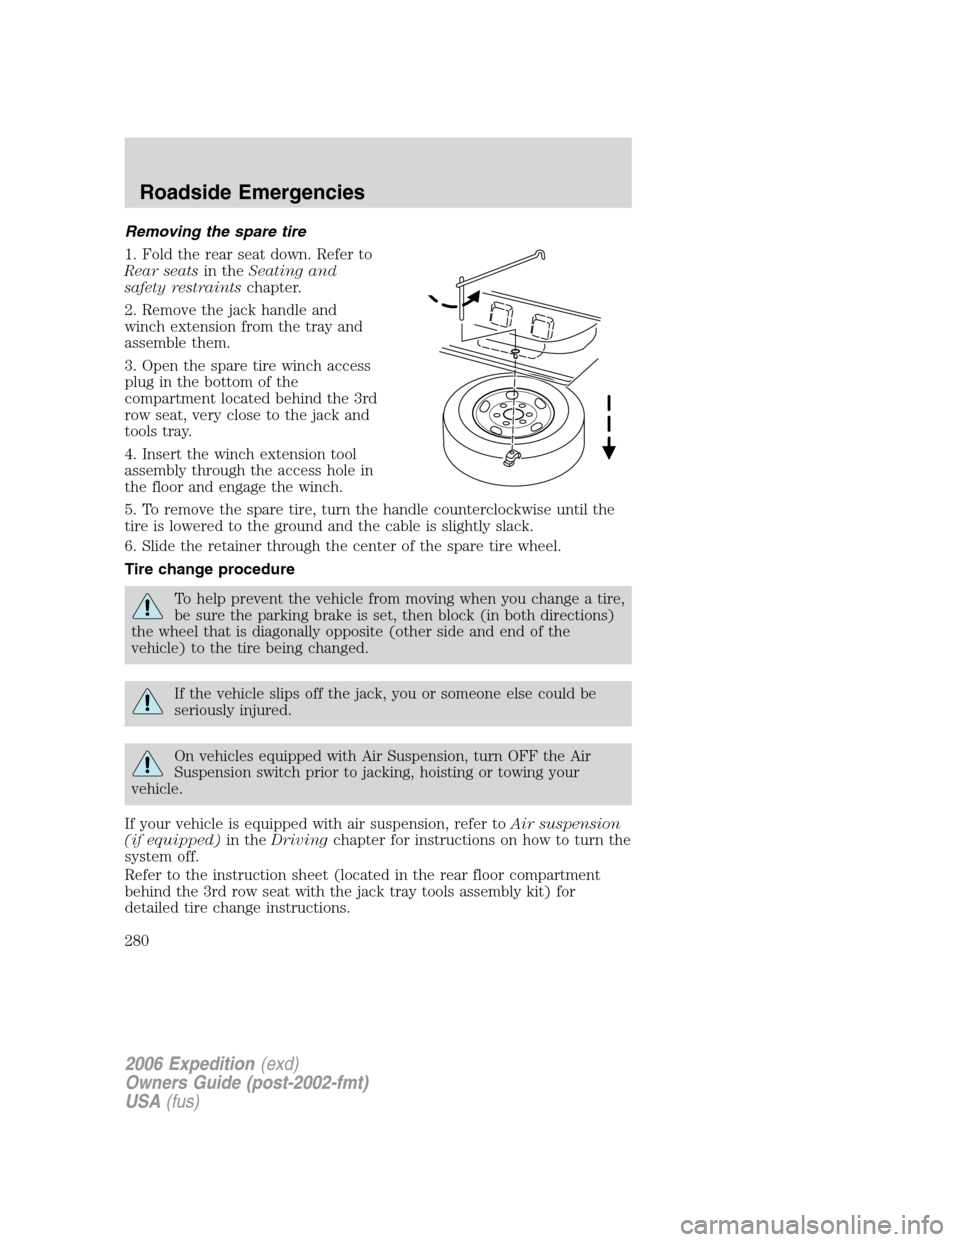
Removing the spare tire
1. Fold the rear seat down. Refer to
Rear seatsin theSeating and
safety restraintschapter.
2. Remove the jack handle and
winch extension from the tray and
assemble them.
3. Open the spare tire winch access
plug in the bottom of the
compartment located behind the 3rd
row seat, very close to the jack and
tools tray.
4. Insert the winch extension tool
assembly through the access hole in
the floor and engage the winch.
5. To remove the spare tire, turn the handle counterclockwise until the
tire is lowered to the ground and the cable is slightly slack.
6. Slide the retainer through the center of the spare tire wheel.
Tire change procedure
To help prevent the vehicle from moving when you change a tire,
be sure the parking brake is set, then block (in both directions)
the wheel that is diagonally opposite (other side and end of the
vehicle) to the tire being changed.
If the vehicle slips off the jack, you or someone else could be
seriously injured.
On vehicles equipped with Air Suspension, turn OFF the Air
Suspension switch prior to jacking, hoisting or towing your
vehicle.
If your vehicle is equipped with air suspension, refer toAir suspension
(if equipped)in theDrivingchapter for instructions on how to turn the
system off.
Refer to the instruction sheet (located in the rear floor compartment
behind the 3rd row seat with the jack tray tools assembly kit) for
detailed tire change instructions.
2006 Expedition(exd)
Owners Guide (post-2002-fmt)
USA(fus)
Roadside Emergencies
280
Page 304 of 360
helps to remove the hot wax deposited on the wiper blade and
windshield from automated car wash facilities.
•Do not use abrasives, as they may cause scratches.
•Do not use fuel, kerosene, or paint thinner to clean any parts.
•Wiper blades can be cleaned with isopropyl (rubbing) alcohol or
windshield washer solution. Be sure to replace wiper blades when they
appear worn or do not function properly.
Do not use sharp objects, such as a razor blade, to clean the
inside of the rear window or to remove decals, as it may cause
damage to the rear window defroster’s heated grid lines.
INSTRUMENT PANEL AND CLUSTER LENS
Clean the instrument panel with a damp cloth, then with a clean, dry
cloth, or use Motorcraft Dash & Vinyl Cleaner (ZC-38-A).
•Avoid cleaners or polish that increase the gloss of the upper portion of
the instrument panel. The dull finish in this area helps protect the
driver from undesirable windshield reflection.
Do not use chemical solvents or strong detergents when cleaning
the steering wheel or instrument panel to avoid contamination of
the air bag system.
•Be certain to wash or wipe your hands clean if you have been in
contact with certain products such as insect repellent and suntan
lotion in order to avoid possible damage to the interior painted
surfaces.
INTERIOR
For fabric, carpets, cloth seats and safety belts:
•Remove dust and loose dirt with a vacuum cleaner.
•Remove light stains and soil with Motorcraft Professional Strength
Carpet & Upholstery Cleaner (ZC-54).
•If grease or tar is present on the material, spot-clean the area first
with Motorcraft Spot and Stain Remover (ZC-14).
•If a ring forms on the fabric after spot cleaning, clean the entire area
immediately (but do not oversaturate) or the ring will set.
•Do not use household cleaning products or glass cleaners, which can
stain and discolor the fabric and affect the flame retardant abilities of
the seat materials.
2006 Expedition(exd)
Owners Guide (post-2002-fmt)
USA(fus)
Cleaning
304