Page 42 of 256
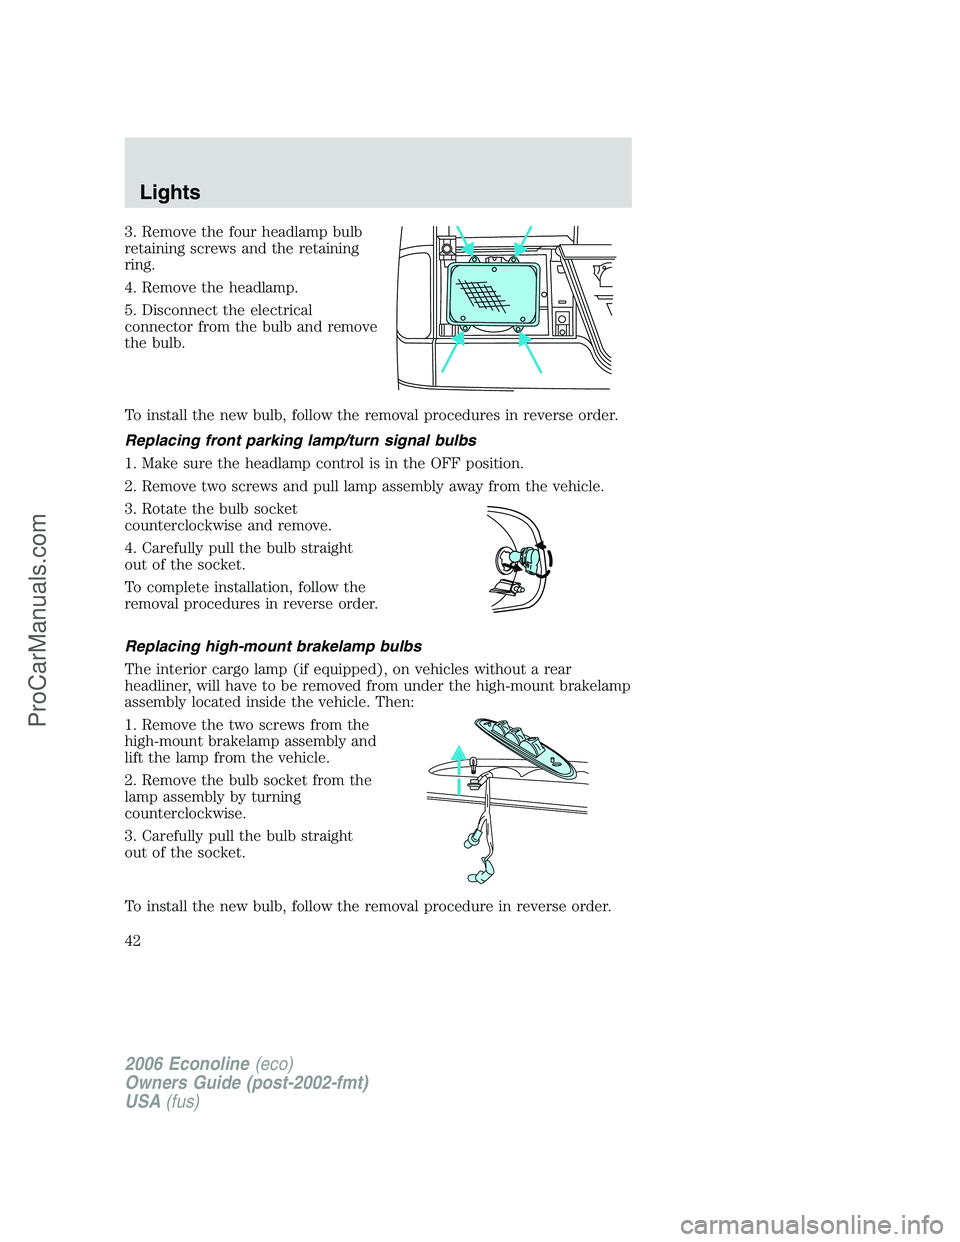
3. Remove the four headlamp bulb
retaining screws and the retaining
ring.
4. Remove the headlamp.
5. Disconnect the electrical
connector from the bulb and remove
the bulb.
To install the new bulb, follow the removal procedures in reverse order.
Replacing front parking lamp/turn signal bulbs
1. Make sure the headlamp control is in the OFF position.
2. Remove two screws and pull lamp assembly away from the vehicle.
3. Rotate the bulb socket
counterclockwise and remove.
4. Carefully pull the bulb straight
out of the socket.
To complete installation, follow the
removal procedures in reverse order.
Replacing high-mount brakelamp bulbs
The interior cargo lamp (if equipped), on vehicles without a rear
headliner, will have to be removed from under the high-mount brakelamp
assembly located inside the vehicle. Then:
1. Remove the two screws from the
high-mount brakelamp assembly and
lift the lamp from the vehicle.
2. Remove the bulb socket from the
lamp assembly by turning
counterclockwise.
3. Carefully pull the bulb straight
out of the socket.
To install the new bulb, follow the removal procedure in reverse order.
2006 Econoline(eco)
Owners Guide (post-2002-fmt)
USA(fus)
Lights
42
ProCarManuals.com
Page 51 of 256

Setting speed control
The controls for using your speed
control are located on the steering
wheel for your convenience.
1. Press the ON control and release
it.
2. Accelerate to the desired speed.
3. Press the SET ACCEL control
and release it.
4. Take your foot off the accelerator
pedal.
Note:
•Vehicle speed may vary
momentarily when driving up and
down a steep hill.
•If the vehicle speed increases above the set speed on a downhill, you
may want to apply the brakes to reduce the speed.
•If the vehicle speed decreases more than 10 mph (16 km/h) below
your set speed on an uphill, your speed control will disengage.
Resuming a set speed
Press the RES (resume) control and
release it. This will automatically
return the vehicle to the previously
set speed. The RES control will not
work if the vehicle speed is not
faster than 30 mph (48 km/h).
R
E
S
S
E
T
A
C
C
E
L
C
O
A
S
T
R
E
S
S
E
T
A
C
C
E
L
C
O
A
S
T
2006 Econoline(eco)
Owners Guide (post-2002-fmt)
USA(fus)
Driver Controls
51
ProCarManuals.com
Page 52 of 256
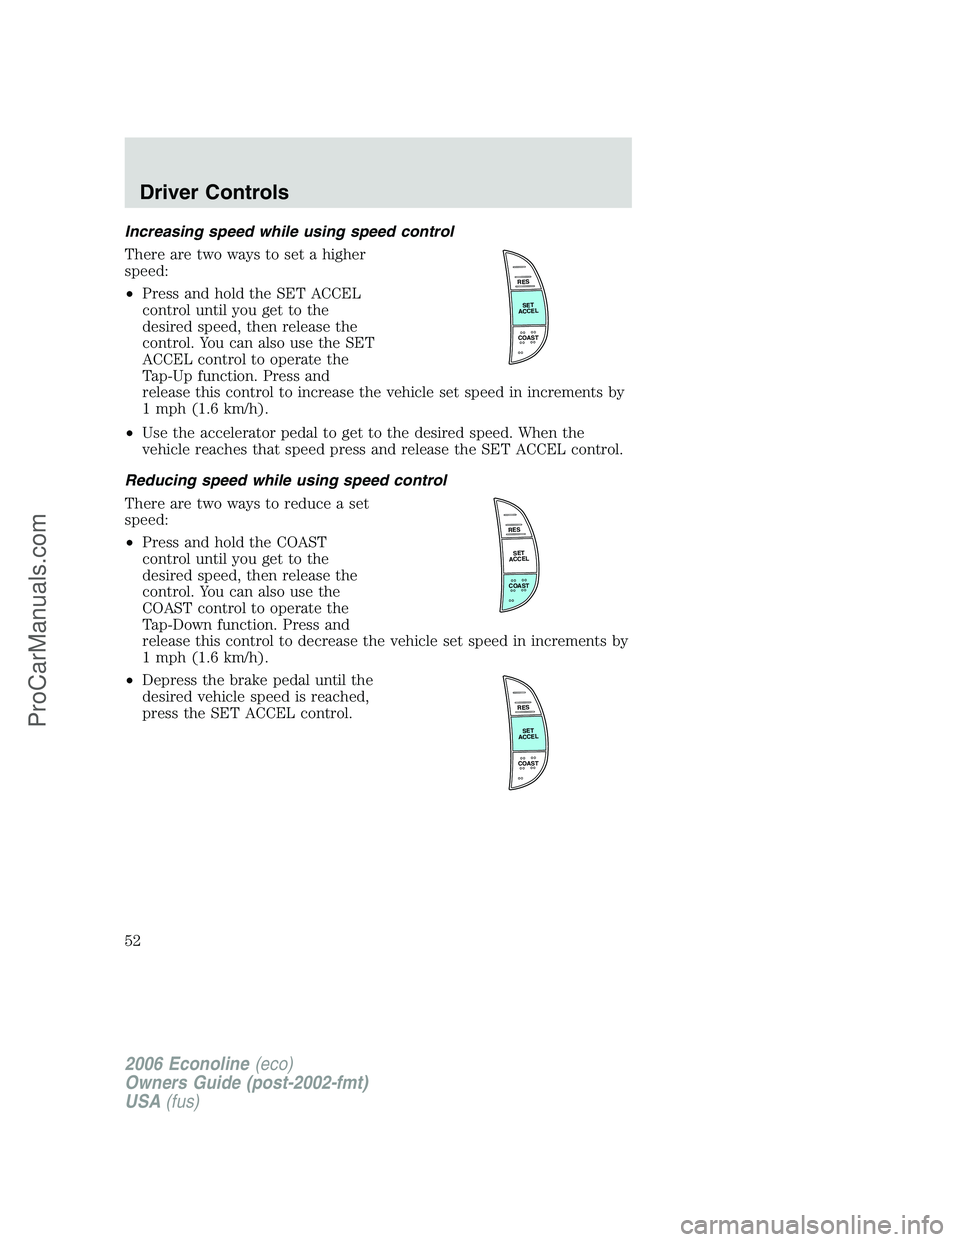
Increasing speed while using speed control
There are two ways to set a higher
speed:
•Press and hold the SET ACCEL
control until you get to the
desired speed, then release the
control. You can also use the SET
ACCEL control to operate the
Tap-Up function. Press and
release this control to increase the vehicle set speed in increments by
1 mph (1.6 km/h).
•Use the accelerator pedal to get to the desired speed. When the
vehicle reaches that speed press and release the SET ACCEL control.
Reducing speed while using speed control
There are two ways to reduce a set
speed:
•Press and hold the COAST
control until you get to the
desired speed, then release the
control. You can also use the
COAST control to operate the
Tap-Down function. Press and
release this control to decrease the vehicle set speed in increments by
1 mph (1.6 km/h).
•Depress the brake pedal until the
desired vehicle speed is reached,
press the SET ACCEL control.
R
E
S
S
E
T
A
C
C
E
L
C
O
A
S
T
R
E
S
S
E
T
A
C
C
E
L
C
O
A
S
T
R
E
S
S
E
T
A
C
C
E
L
C
O
A
S
T
2006 Econoline(eco)
Owners Guide (post-2002-fmt)
USA(fus)
Driver Controls
52
ProCarManuals.com
Page 53 of 256
Turning off speed control
There are two ways to turn off the
speed control:
•Depress the brake pedal. This will
not erase your vehicle’s
previously set speed.
•Press the speed control OFF
control.
Note:When you turn off the speed control or the ignition, your speed
control set speed memory is erased.
2006 Econoline(eco)
Owners Guide (post-2002-fmt)
USA(fus)
Driver Controls
53
ProCarManuals.com
Page 67 of 256
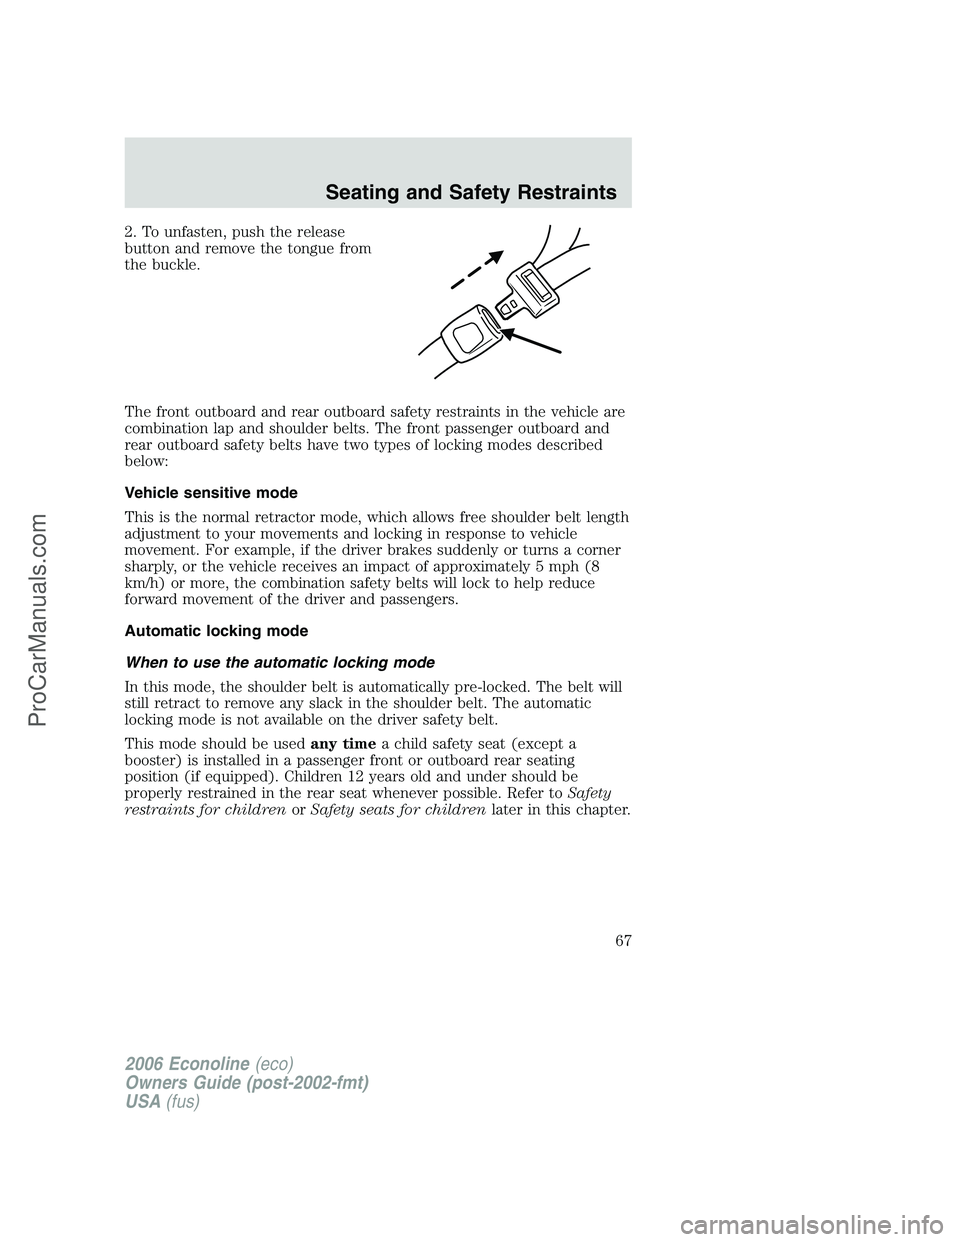
2. To unfasten, push the release
button and remove the tongue from
the buckle.
The front outboard and rear outboard safety restraints in the vehicle are
combination lap and shoulder belts. The front passenger outboard and
rear outboard safety belts have two types of locking modes described
below:
Vehicle sensitive mode
This is the normal retractor mode, which allows free shoulder belt length
adjustment to your movements and locking in response to vehicle
movement. For example, if the driver brakes suddenly or turns a corner
sharply, or the vehicle receives an impact of approximately 5 mph (8
km/h) or more, the combination safety belts will lock to help reduce
forward movement of the driver and passengers.
Automatic locking mode
When to use the automatic locking mode
In this mode, the shoulder belt is automatically pre-locked. The belt will
still retract to remove any slack in the shoulder belt. The automatic
locking mode is not available on the driver safety belt.
This mode should be usedany timea child safety seat (except a
booster) is installed in a passenger front or outboard rear seating
position (if equipped). Children 12 years old and under should be
properly restrained in the rear seat whenever possible. Refer toSafety
restraints for childrenorSafety seats for childrenlater in this chapter.
2006 Econoline(eco)
Owners Guide (post-2002-fmt)
USA(fus)
Seating and Safety Restraints
67
ProCarManuals.com
Page 73 of 256
Reasons given... Consider...
“I have an airbag” Airbags offer greater protection when
used with safety belts. Frontal airbags
are not designed to inflate in rear and
side crashes or rollovers.
“I’d rather be thrown clear”Peoplewho areejected are 40
times more likely to DIE.Safety
belts help prevent ejection, WE CAN’T
“PICK OUR CRASH”.
Do not sit on top of a buckled safety belt to avoid the
BeltMinder�chime. Sitting on the safety belt will increase the
risk of injury in an accident. To disable (one-time) or deactivate the
BeltMinder�feature please follow the directions stated below.
One time disable
Any time the safety belt is buckled and then unbuckled during an
ignition ON cycle, the BeltMinder�will be disabled for that ignition cycle
only.
Deactivating/activating the BeltMinder�feature
Read Steps1-5thoroughly before proceeding with the
deactivation/activation programming procedure.
The BeltMinder�feature can be deactivated/activated by performing the
following procedure:
Before following the procedure, make sure that:
•the parking brake is set
•the gearshift is in P (Park) (automatic transmission)
•the ignition switch is in the OFF position
•all vehicle doors are closed
•the driver’s safety belt is unbuckled
•the parklamps/headlamps are in OFF position
To reduce the risk of injury, do not deactivate/activate the Belt
Minder�feature while driving the vehicle.
1. Turn the ignition switch to the RUN (or ON) position. (DO NOT
START THE ENGINE.)
2006 Econoline(eco)
Owners Guide (post-2002-fmt)
USA(fus)
Seating and Safety Restraints
73
ProCarManuals.com
Page 120 of 256

SNOW TIRES AND CHAINS
Snow tires must be the same size and grade as the tires you
currently have on your vehicle.
The tires on your vehicle have all weather treads to provide traction in
rain and snow. However, in some climates, you may need to use snow
tires and chains. If you need to use chains, it is recommended that steel
wheels (of the same size and specifications) be used, as chains may chip
aluminum wheels.
Follow these guidelines when using snow tires and chains:
•Use only SAE Class S chains.
•Install chains securely, verifying that the chains do not touch any
wiring, brake lines or fuel lines.
•Drive cautiously. If you hear the chains rub or bang against your
vehicle, stop and re-tighten the chains. If this does not work, remove
the chains to prevent damage to your vehicle.
•If possible, avoid fully loading your vehicle.
•Remove the tire chains when they are no longer needed. Do not use
tire chains on dry roads.
•The suspension insulation and bumpers will help prevent vehicle
damage. Do not remove these components from your vehicle when
using snow tires and chains.
VEHICLE LOADING – WITH AND WITHOUT A TRAILER
This section will guide you in the proper loading of your vehicle and/or
trailer, to keep your loaded vehicle weight within its design rating
capability, with or without a trailer. Properly loading your vehicle will
provide maximum return of vehicle design performance. Before loading
your vehicle, familiarize yourself with the following terms for determining
your vehicle’s weight ratings, with or without a trailer, from the vehicle’s
Tire Label or Safety Compliance Certification Label:
Base Curb Weight– is the weight of the vehicle including a full tank of
fuel and all standard equipment. It does not include passengers, cargo, or
optional equipment.
2006 Econoline(eco)
Owners Guide (post-2002-fmt)
USA(fus)
Tires, Wheels and Loading
120
ProCarManuals.com
Page 124 of 256
Exceeding the Safety Compliance Certification Label vehicle
weight rating limits could result in substandard vehicle handling
or performance, engine, transmission and/or structural damage, serious
damage to the vehicle, loss of control and personal injury.
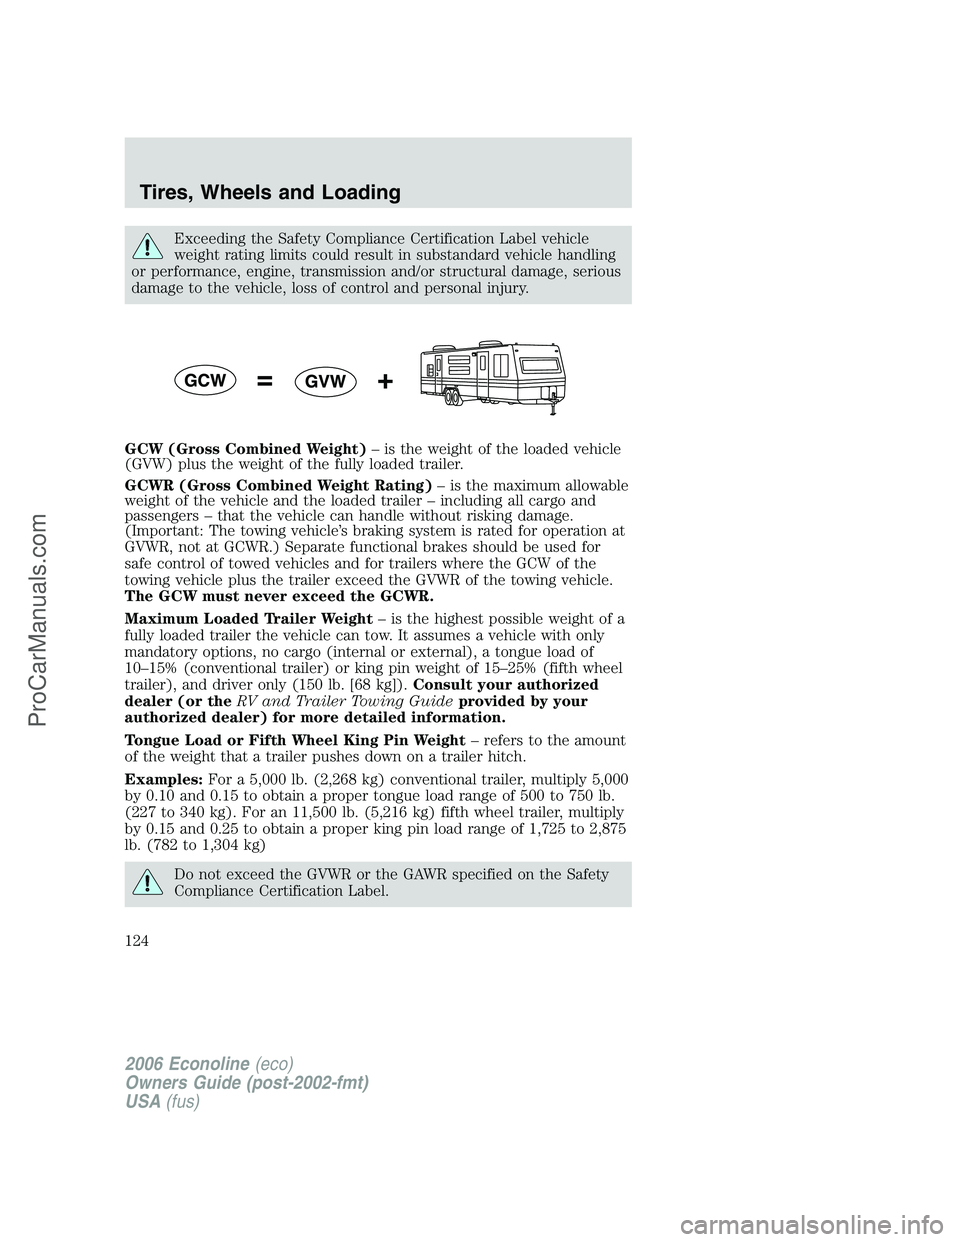
GCW (Gross Combined Weight)– is the weight of the loaded vehicle
(GVW) plus the weight of the fully loaded trailer.
GCWR (Gross Combined Weight Rating)– is the maximum allowable
weight of the vehicle and the loaded trailer – including all cargo and
passengers – that the vehicle can handle without risking damage.
(Important: The towing vehicle’s braking system is rated for operation at
GVWR, not at GCWR.) Separate functional brakes should be used for
safe control of towed vehicles and for trailers where the GCW of the
towing vehicle plus the trailer exceed the GVWR of the towing vehicle.
The GCW must never exceed the GCWR.
Maximum Loaded Trailer Weight– is the highest possible weight of a
fully loaded trailer the vehicle can tow. It assumes a vehicle with only
mandatory options, no cargo (internal or external), a tongue load of
10–15% (conventional trailer) or king pin weight of 15–25% (fifth wheel
trailer), and driver only (150 lb. [68 kg]).Consult your authorized
dealer (or theRV and Trailer Towing Guideprovided by your
authorized dealer) for more detailed information.
Tongue Load or Fifth Wheel King Pin Weight– refers to the amount
of the weight that a trailer pushes down on a trailer hitch.
Examples:For a 5,000 lb. (2,268 kg) conventional trailer, multiply 5,000
by 0.10 and 0.15 to obtain a proper tongue load range of 500 to 750 lb.
(227 to 340 kg). For an 11,500 lb. (5,216 kg) fifth wheel trailer, multiply
by 0.15 and 0.25 to obtain a proper king pin load range of 1,725 to 2,875
lb. (782 to 1,304 kg)
Do not exceed the GVWR or the GAWR specified on the Safety
Compliance Certification Label.
2006 Econoline(eco)
Owners Guide (post-2002-fmt)
USA(fus)
Tires, Wheels and Loading
124
ProCarManuals.com