Page 1 of 14
Page 2 of 14

COMPACT DISC PLAYER...................................................... 10
- Playing a CD ............................................................................. 10
- Previous / next track .............................................................. 10
- Fast forward / backward........................................................ 10
- Random track playing ............................................................. 10
- Track repeat ............................................................................. 10
- Scan tracks ................................................................................ 10
- Eject CD .................................................................................... 10
TROUBLESHOOTING ............................................................ 11
- Sound.......................................................................................... 11
- Radio........................................................................................... 11
- CD ............................................................................................. 12
C C C C
O O O O
N N N N
T T T T
E E E E
N N N N
T T T T
S S S S
INTRODUCTION ................................................................... 2
- Advice......................................................................................... 2
FRONT PANEL .......................................................................... 4
SECURITY PROTECTIONS ................................................... 5
- Protection code ....................................................................... 5
- Identification number ............................................................. 6
TURNING THE SOUND SYSTEM ON/OFF..................... 7
- Volume ....................................................................................... 7
- Mute............................................................................................ 7
- Sound.......................................................................................... 7
- Sound adjustments .................................................................. 7
- Source ....................................................................................... 7
RADIO .......................................................................................... 8
- Band ............................................................................................ 8
- Automatic tuning ..................................................................... 8
- Preset stations.......................................................................... 8
RADIO DATA SYSTEM (RDS) .............................................. 9
- Program Service Name .......................................................... 9
- Alternative frequency (AF) ................................................... 9
- Alarm messages (PTY alarms).............................................. 9
- Traffic announcements (TA) ................................................ 9
Page 3 of 14

2SOUND SYSTEM
In the following pages you will find the in-
structions for use, which you are advised
to read through carefully and always keep
within reach for prompt reference in the
future.
ADVICE
Road safety
You are advised to learn how to use the
various radio functions (e.g.: storing sta-
tions) before starting to drive.
Reception conditions
Reception conditions change constantly
when driving. Reception may be disturbed
by the presence of mountains, buildings or
bridges particularly when far away from
the station being listened to.
IMPORTANT When receiving traffic in-
formation, the volume may be higher than
normal.
I I I I
N N N N
T T T T
R R R R
O O O O
D D D D
U U U U
C C C C
T T T T
I I I I
O O O O
N N N N
Too high a volume when dri-
ving can put the driver’s life at
risk and that of other people. There-
fore the volume should always be ad-
justed in such a way that it is always
possible to hear the noises of the sur-
rounding environment (e.g.: horns, am-
bulance, police sirens, etc.).
WARNING
Care and maintenance
The radio structure ensures long opera-
tion with no need for particular mainte-
nance. In the event of a fault, contact a Fi-
at Dealership.
To clean the front panel only use a soft,
antistatic cloth. Cleaning and polishing
products might spoil the surface.
❒
Carefully clean all Compact Discs of fin-
gerprints and dust using a soft cloth. Sup-
port Compact Discs from the outer cir-
cumference and clean from the centre
outwards;
❒
Never use chemical products for clean-
ing (e.g.: spray cans, antistatic or thin-
ners) as they might damage the surface
of Compact Discs;
❒
After use, put Compact Discs back in
their container, to avoid marks or
scratches that may cause skipping when
playing;
CD
Remember that dirt, marks or distortion
on Compact Disc can cause skipping. To
obtain optimum playing conditions we give
the following advice:❒
Only use Compact Discs which have
the following brand:
Page 4 of 14

3
SOUND SYSTEM
❒
Do not expose Compact Discs to direct
sunlight, high temperatures or damp for
prolonged lengths of time to prevent
them from bending;
❒
Do not stick labels or write on the
recorded surface of Compact Discs.
To remove a Compact Disc from its con-
tainer, press the centre and raise the disc
carefully, holding it by the outer circum-
ference.
Always hold Compact Discs by the outer
circumference. Never touch the surface.
To remove fingerprints and dust, use a soft
cloth starting from the centre of the Com-
pact Disc outwards.
Do not use highly scratched, cracked, or
distorted discs, etc. The use of these discs
will involve malfunctioning or damage to
the player.
For optimal playing use original CDs on-
ly. Regular operation is not guaranteed if
using R/RW CDs not properly mastered
and/or CDs with max. capacity higher than
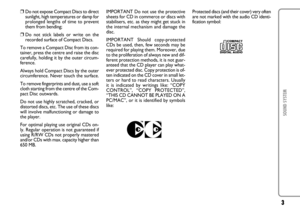
650 MB.IMPORTANT Do not use the protective
sheets for CD in commerce or discs with
stabilisers, etc. as they might get stuck in
the internal mechanism and damage the
disc.
IMPORTANT Should copy-protected
CDs be used, then, few seconds may be
required for playing them. Moreover, due
to the proliferation of always new and dif-
ferent protection methods, it is not guar-
anteed that the CD player can play what-
ever protected disc. Copy protection is of-
ten indicated on the CD cover in small let-
ters or hard to read characters. Usually
it is indicated by writings like: “COPY
CONTROL”, “COPY PROTECTED”,
“THIS CD CANNOT BE PLAYED ON A
PC/MAC”, or it is identified by symbols
like:
Protected discs (and their cover) very often
are not marked with the audio CD identi-
fication symbol:
Page 5 of 14
4SOUND SYSTEM
1Preset button 1
RND - random CD playing
on/off
2Preset button 2
RPT - CD track repeat on/off
3Preset button 3
SCN - CD track scan
4Preset button 4
5Preset button 5
F
F F F
R R R R
O O O O
N N N N
T T T T
P P P P
A A A A
N N N N
E E E E
L L L L
F0E0728m
6TA / AF
Brief pressing: TA on/off
Long pressing: AF on/off
7SOUND - personalized
sound selection
8Brief pressing: turning on
Long pressing: turning off
MUTE - on/off
10VOLUME + / VOLUME -:
volume adjustment;
selected sound adjustment
11BAND / AST
Brief pressing: band selection
Long pressing:
automatic storage (CD)
12¯˙In radio mode
Brief pressing: automatic tuning
Long pressing: manual tuning
In CD mode
Brief pressing:
next/previous track
Long pressing:
fast forward/backward
13SOURCE / RDS
Brief pressing:
RADIO / CD source change
Long pressing: RDS on/off
14CD ejection
15Open to load CD
16Display.
Page 6 of 14

5
SOUND SYSTEM
S S S S
E E E E
C C C C
U U U U
R R R R
I I I I
T T T T
Y Y Y Y
P P P P
R R R R
O O O O
T T T T
E E E E
C C C C
T T T T
I I I I
O O O O
N N N N
S S S S
PROTECTION CODE
If the protection code is active, each time
the sound system is turned on, the display
will show the word “CODE” for a few
seconds.
If sound system supply is interrupted:❒
If the protection code has been acti-
vated and the power supply has been
interrupted, the system will mute the
sound and the display will show the
word “CODE” (antitheft).
❒
Enter the code as described in para-
graph “Entering the protection code”.
Entering the protection code
(specified on the “Security card”, e.g.: 4359):Operation DisplayTurn the sound system on CODEPress the preset button 10 - - -Enter the first digit of the code using button 12or 174 - - -Press again the preset button 14 0 - -Enter the second digit of the code using button 12or 174 3 - -Press again the preset button 14 3 0 -Enter the third digit of the code using button 12or 174 3 5 -Press again the preset button 14 3 5 0Enter the fourth digit of the code using button 12or 174 3 5 9
Press again the preset button 1to confirm
If the right code is entered, the system sounds a beep and the radio starts working.
If a wrong code is entered, the system sounds a warning beep and the display shows
“WAIT”. This message indicates the activation of the break time.
Page 7 of 14
.
❒
Wait until the display shows the word
“CODE” indicati")
6SOUND SYSTEM
❒
Do not turn the radio off while the dis-
play is showing the message “WAIT”
(otherwise the break time will restart).
❒
Wait until the display shows the word
“CODE” indicating that the break time
is over.
❒
Enter the right code as described in
paragraph “Entering the protection
code”.
IMPORTANT Every time the user enters
a wrong code, the break time will double
(1 minute, 2 minutes, 4 minutes, etc…).Deactivating the protection code
❒
Turn the sound system on and keep
button 12 pressed until a beep sounds.
❒
Enter the protection code as described
in paragraph “Entering the protection
code”; the system will beep twice to in-
dicate that the protection code has
been deactivated. If a wrong code is en-
tered, carry out the same procedure as
described in paragraph in “Entering the
protection code”.
Activating the protection code
❒
Turn the sound system on and keep
button 12 pressed until the display
shows the word “CODE”, no beep will
sound. The protection code is active
now.IDENTIFICATION NUMBER
The sound system is provided with an ID
number (specified on the “Security card”).
This card certifies the possession of the
sound system. Produce it as owner-evi-
dence in the event of theft or when re-
quired by Fiat Dealership.
IMPORTANT Do not keep the “Security
Card” in the car.
Page 8 of 14

7
SOUND SYSTEM
To turn the sound system on, press but-
ton 8. To turn the sound system off, keep
it pressed for over 2 seconds.
VOLUME❒
To adjust the volume, press button 10.
IMPORTANT Volume should always be
adjusted in such a way that it is always pos-
sible to hear the noises of the surround-
ing environment (e.g.: horns, ambulance,
police sirens, etc..).
MUTE
Press briefly button 8to turn the mute
function on/off.
Note With TA function active, MUTE can
be interrupted by incoming alarm mes-
sages or traffic announcements.SOUND
Whatever the music (jazz, pop, classic,
rock) or the speech program is, the rec-
ommended solution is button SOUND.
Press button SOUND and then the audio
button to adjust bass/treble tones as re-
quired or to adjust settings with buttons
10to select one of the following sound
styles:
❒
BASS TRE: personalized bass and treble
tones settings
❒
FLAT: original setting
❒
JAZZ: jazz music
❒
VOCAL: speech
❒
POP: pop music
❒
CLASSIC: classic music
❒
ROCK: rock music.SOUND ADJUSTMENTS
Press button SOUND 7 to select the re-
quired sound setting.
Adjust setting by buttons 10:
❒
Sound styles (BASS TRE, FLAT, JAZZ,
VOCAL, POP, CLASSIC, ROCK)
❒
BASS
❒
TREBLE
❒
BALANCE (sound adjustment from
right / left speakers)
❒
FADER (sound adjustment from front /
rear speakers)
❒
LOUD (OFF, LOW, MID, HIGH).
Press the volume buttons to adjust the se-
lected sound mode. Five seconds after the
display will go back to the last operating
mode.
IMPORTANT Bass and treble tones can
only be adjusted after selecting the BASS-
TRE sound style.
SOURCE
Press button SOURCE 13to select the re-
quired sound source: RADIO or CD.
T T T T
U U U U
R R R R
N N N N
I I I I
N N N N
G G G G
T T T T
H H H H
E E E E
S S S S
O O O O
U U U U
N N N N
D D D D
S S S S
Y Y Y Y
S S S S
T T T T
E E E E
M M M M
O O O O
N N N N
/ / / /
O O O O
F F F F
F F F F