Page 105 of 166

104
CONNECT NAV+
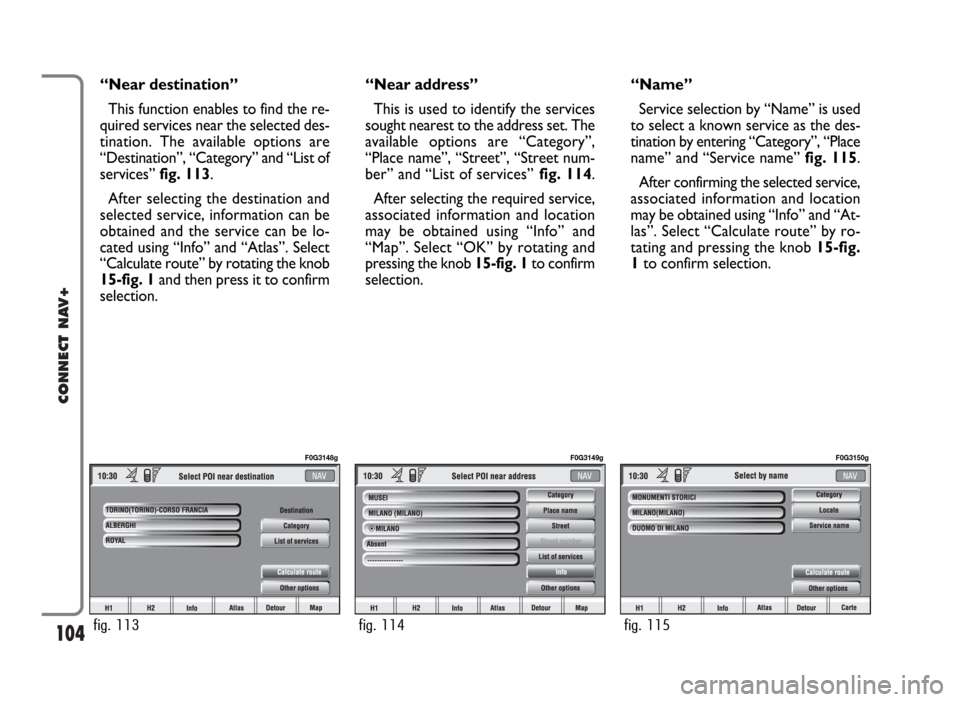
“Near destination”
This function enables to find the re-
quired services near the selected des-
tination. The available options are
“Destination”, “Category” and “List of
services” fig. 113.
After selecting the destination and
selected service, information can be
obtained and the service can be lo-
cated using “Info” and “Atlas”. Select
“Calculate route” by rotating the knob
15-fig. 1and then press it to confirm
selection.“Near address”
This is used to identify the services
sought nearest to the address set. The
available options are “Category”,
“Place name”, “Street”, “Street num-
ber” and “List of services”fig. 114.
After selecting the required service,
associated information and location
may be obtained using “Info” and
“Map”. Select “OK” by rotating and
pressing the knob 15-fig. 1to confirm
selection.“Name”
Service selection by “Name” is used
to select a known service as the des-
tination by entering “Category”, “Place
name” and “Service name” fig. 115.
After confirming the selected service,
associated information and location
may be obtained using “Info” and “At-
las”. Select “Calculate route” by ro-
tating and pressing the knob 15-fig.
1to confirm selection.
fig. 113
F0G3148g
fig. 114
F0G3149g
fig. 115
F0G3150g
Page 106 of 166

105
CONNECT NAV+
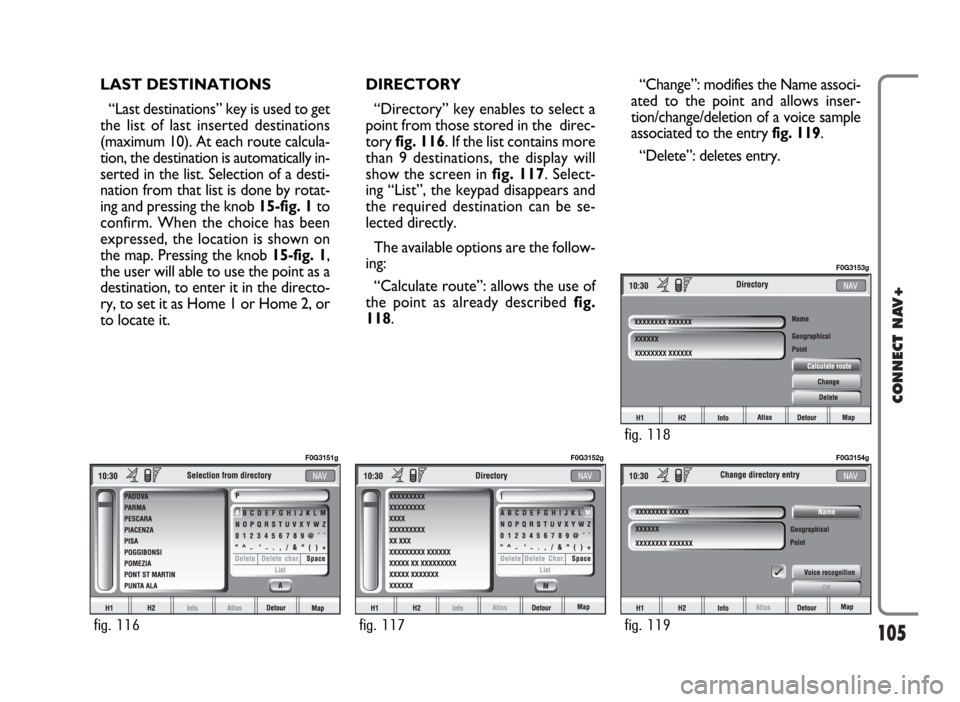
LAST DESTINATIONS
“Last destinations” key is used to get
the list of last inserted destinations
(maximum 10). At each route calcula-
tion, the destination is automatically in-
serted in the list. Selection of a desti-
nation from that list is done by rotat-
ing and pressing the knob 15-fig. 1to
confirm. When the choice has been
expressed, the location is shown on
the map. Pressing the knob 15-fig. 1,
the user will able to use the point as a
destination, to enter it in the directo-
ry, to set it as Home 1 or Home 2, or
to locate it.DIRECTORY
“Directory” key enables to select a
point from those stored in the direc-
tory fig. 116. If the list contains more
than 9 destinations, the display will
show the screen in fig. 117. Select-
ing “List”, the keypad disappears and
the required destination can be se-
lected directly.
The available options are the follow-
ing:
“Calculate route”: allows the use of
the point as already described fig.
118.“Change”: modifies the Name associ-
ated to the point and allows inser-
tion/change/deletion of a voice sample
associated to the entry fig. 119.
“Delete”: deletes entry.
fig. 116
F0G3151g
fig. 117
F0G3152g
fig. 119
F0G3154g
fig. 118
F0G3153g
Page 107 of 166
106
CONNECT NAV+
1.Queue.
2.Accident.
3.Generic danger.
4.Works in progress.
5.Closed road.
6.Narrow road.
7.No entry road.
8.Slippery road.
9.Ice / snow.
10.
Fog.
11.Wind.
12.Procession,
protest.
13.Danger of explosions.
14.Slow down.
15.Traffic signs out of order.
16.Parking.
17.Forecast.
RDS-TMC
Select this function by rotating the
knob 15-fig. 1and then press it to
confirm.
The display shows the following op-
tions fig. 120:
– Near car;
– Near address.“RDS-TMC” icon allows the user to
select a geographical point to get re-
lated RDS-TMC information: RDS-
TMC events are pictured through
dedicated icons on the map. A TMC
event cannot be used to identify a des-
tination.
IMPORTANTTMC information
can be displayed provided that the fol-
lowing two conditions take place: 1)
the active radio station provides such
service; 2) the same station transmits
messages next to the point shown.
fig. 120
F0G3155g
Page 108 of 166
107
CONNECT NAV+
“Near car”
“Near car” option enables to get in-
formation on events near the current
car position.
The menu fig. 121includes the fol-
lowing keys:
“Category”: specifies the event cat-
egory: “Traffic”, “Weather”, “Info”,
“All”.
“List of events”: to open the event
list and to choose the event of inter-
est.“Info”: press 16-fig. 1to get info
about the selected event.
To select the required function, ro-
tate the knob 15-fig. 1and then press
it to confirm.“Near address”
“Near address” enables to get infor-
mation on events near a specific ad-
dress. The following functions are
available fig. 122:
“Category”: specifies the event cat-
egory: “Traffic”, “Weather”, “Info”,
“All”.
“Place name”, “Street”, “Street num-
ber”: inputs resort address.
“List of events”: opens the event list
and choose the event of interest.
fig. 121
F0G3156g
fig. 122
F0G3157g
Page 109 of 166
108
CONNECT NAV+
The following options are available
for both functions:
– “Calculate route”: to start route
calculation to the point in Home 1
(Home 2);
– “Delete”: to delete from Home 1
(Home 2) the selected point.
To select the required function, ro-
tate the knob 15-fig. 1and then press
it to confirm. “Info”: press 16-fig. 1to get info
about the selected event.
To select the required function, ro-
tate the knob 15-fig. 1and then press
it to confirm.Home 1 - Home 2
From screen in fig. 107: selecting
“Other menus” will display the screen
in fig. 123with the options “Home 1”
and “Home 2”.
Selecting and confirming “Home 1”
or “Home 2” by rotating and press-
ing the knob 15-fig. 1, will display in-
formation about the points stored as
“Home 1” or “Home 2”.
fig. 123
F0G3158g
fig. 124
F0G3159g
Page 110 of 166
109
CONNECT NAV+
SET ROUTE
“Set route” allows to define the
route calculation parameters.
When selecting this function by ro-
tating the knob 15-fig. 1and pressing
it to confirm, the display shows the fol-
lowing options fig. 125:Route type
Selecting and confirming “Route
type” by rotating and pressing the
knob 15-fig. 1, makes it possible to
set the route calculation criteria ac-
cording to two different modes:
“Shortest time” or “Shortest dis-
tance”.Highway
Select and confirm “Highway” by ro-
tating and pressing the knob 15-fig.
1to define if route can include high-
way segments or not.
To activate set calculation parame-
ters, select icon “OK” turning the
knob 15-fig. 1and pressing it to con-
firm.
fig. 125
F0G3161g
Page 111 of 166
110
CONNECT NAV+
CHANGE DISPLAY
From the main navigation menu, se-
lect icon “Other menus” by turning
and pressing knob 15-fig. 1to confirm
to pass to the second navigation menu.
To select “ Change display” rotate
the knob 15-fig. 1and press it to con-
firm.This function allows to choose the
desired map display by means of the
following options fig. 126:
Map: displays the map centered with
respect to the car position (standard
map).Whole route: displays the entire
calculated route from the present po-
sition to the destination fig. 127. This
option is available only if a route is ac-
tive.
fig. 126
F0G3162g
fig. 127
F0G3163g
Page 112 of 166
111
CONNECT NAV+
Highway Info: provides information
about next two gas stations and high-
way exits fig. 128. This option is en-
abled only if the car is on a highway
and a route has been previously cal-
culated. If the car gets out from the
highway, the system gets back to
“Map” view.Graphic symbols: displays naviga-
tion icons only fig. 129and not the
map. This option is enabled only if a
route has been previously calculated.
To select the required function, ro-
tate the knob 15-fig. 1and press it to
confirm.DELETE DESTINATION
Select and confirm “Delete destina-
tion” by rotating and pressing the knob
15-fig. 1to delete the last entered
destination.
fig. 128
F0G3164g
fig. 129
F0G3165g