Page 397 of 536
WHAT TO DO IN EMERGENCIES
CONTENTS
�Hazard Warning Lights ..................398
� Jack Location ..........................399
▫ Removal (2500/3500/Mega Cab) ..........399
▫ Removal
(1500 Standard Cab/Quad Cab Vehicles) .....400
▫ Reinstalling The Scissors-Type Jack And Tools
(1500 Models) ........................401
� Changing A Flat Tire ....................403
▫ Removing The Spare Tire ................404 ▫
Tire Changing Procedure ................405
� Hoisting .............................416
� Jump-Starting .........................416
� Freeing A Stuck Vehicle ..................419
� Emergency Tow Hooks — If Equipped ........420
� Towing A Disabled Vehicle ................420
▫ 4-Wheel- Drive Vehicles .................421
▫ 2–Wheel- Drive Vehicles ................421
6
Page 403 of 536
4. Place the jack and tools in the storage position holding
the jack by the jack turn-screw, slip the jack and tools
under seat so that the bottom slot engages into the
fastener on the floor and then secure to the floor pan
using the wing bolt. Reinstall the plastic cover.CHANGING A FLAT TIRE
Jack and Tools TiedJack Wing Bolt
WHAT TO DO IN EMERGENCIES 403
6
Page 404 of 536
Removing The Spare Tire
Remove the spare tire before attempting to jack the truck.
Attach the wheel wrench to the jack extension tube. Insert
the tube through the access hole between the lower
tailgate and the top of the bumper and into the winch
mechanism tube. Rotate the wheel wrench handle coun-
terclockwise until the spare tire is on the ground with
enough cable slack to allow you to pull it out from under
the vehicle. When the spare is clear, tilt the retainer at the
end of the cable and pull it through the center of the
wheel. It is recommended that you stow the flat or spare to
avoid tangling the loose cable.
NOTE: The winch mechanism is designed for use with
the jack extension tube only. Use of an air wrench or other
power tools is not recommended and can damage the
winch.
404 WHAT TO DO IN EMERGENCIES
Page 410 of 536

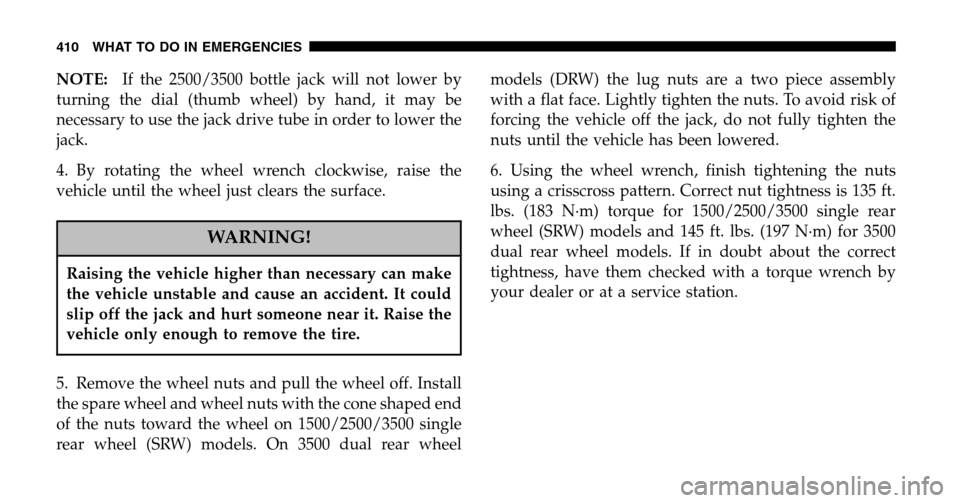
NOTE:If the 2500/3500 bottle jack will not lower by
turning the dial (thumb wheel) by hand, it may be
necessary to use the jack drive tube in order to lower the
jack.
4. By rotating the wheel wrench clockwise, raise the
vehicle until the wheel just clears the surface.
WARNING!
Raising the vehicle higher than necessary can make
the vehicle unstable and cause an accident. It could
slip off the jack and hurt someone near it. Raise the
vehicle only enough to remove the tire.
5. Remove the wheel nuts and pull the wheel off. Install
the spare wheel and wheel nuts with the cone shaped end
of the nuts toward the wheel on 1500/2500/3500 single
rear wheel (SRW) models. On 3500 dual rear wheel models (DRW) the lug nuts are a two piece assembly
with a flat face. Lightly tighten the nuts. To avoid risk of
forcing the vehicle off the jack, do not fully tighten the
nuts until the vehicle has been lowered.
6. Using the wheel wrench, finish tightening the nuts
using a crisscross pattern. Correct nut tightness is 135 ft.
lbs. (183 N·m) torque for 1500/2500/3500 single rear
wheel (SRW) models and 145 ft. lbs. (197 N·m) for 3500
dual rear wheel models. If in doubt about the correct
tightness, have them checked with a torque wrench by
your dealer or at a service station.
410 WHAT TO DO IN EMERGENCIES
Page 412 of 536

CAUTION!
Use a back and forth motion to remove the hub cap.
Do not use a twisting motion when removing the
hub cap, damage to the hub cap finish may occur.
CAUTION!
The rear hub caps on the dual rear wheel has two pry
off notches. Make sure that the hook of the jack
handle driver is located squarely in the cap notch
before attempting to pull off.
You must use the flat end of the lug wrench to pry off the
wheel skins. Insert the flat tip completely and using a
back and forth motion, loosen the wheel skin. Repeat this
procedure around the tire until the skin pops off. Replace the wheel skins first using a rubber mallet. When
replacing the hub caps, tilt the cap retainer over the
lugnut bolt circle and strike the high side down with a
rubber mallet. Be sure that the hub caps and wheel skins
are firmly seated around the wheel.
8-Stud — Dual Rear Wheels
Dual wheels are flat mounted, center piloted. The lug
nuts are a two piece assembly. When the tires are being
rotated or replaced, clean these lug nuts and add 2 drops
of oil at the interface between the hex and the washer.
412 WHAT TO DO IN EMERGENCIES
Page 415 of 536

wheel. The nuts should then be tightened to recom-
mended torque. Tighten the nuts to final torque in
increments. Progress around the bolt circle, tightening
the nut opposite to the nut just previously tightened until
final torque is achieved. Recommended torques are
shown in the following chart.
Disc
Wheels Type Nut Stud Size Torque
Ft. Lbs. Torque
Newton
Meters
Cone 9/16-18 120-150 160-200
Flanged 9/16-18 130-160 190-220
To Stow The Flat Or Spare
NOTE: 1500 Standard and Quad Cab vehicles
equipped with aluminum wheels cannot be stored under
the vehicle because the wheel retainer will not fit through
the wheel pilot hole. Secure the (flat) tire in the bed of the
truck, have the (flat) tire repaired or replaced immedi-
ately.
WARNING!
A loose tire thrown forward in a collision or hard
stop could injure the occupants in the vehicle. Have
the deflated (flat) tire repaired or replaced immedi-
ately.
Turn the wheel so that the valve stem is down. Slide the
wheel retainer through the center of the wheel and
position it properly across the wheel opening.
For convenience in checking the spare tire inflation, stow
with the valve stem toward the rear of the vehicle.
Attach the wheel wrench to the extension tube. Rotate the
winch mechanism until the wheel is drawn into place
against the underside of the vehicle. Continue to rotate
until you feel the winch mechanism slip or click 3 or 4
times. It cannot be overtightened. Push against the tire
several times to be sure it is firmly in place.
WHAT TO DO IN EMERGENCIES 415
6
Page 516 of 536

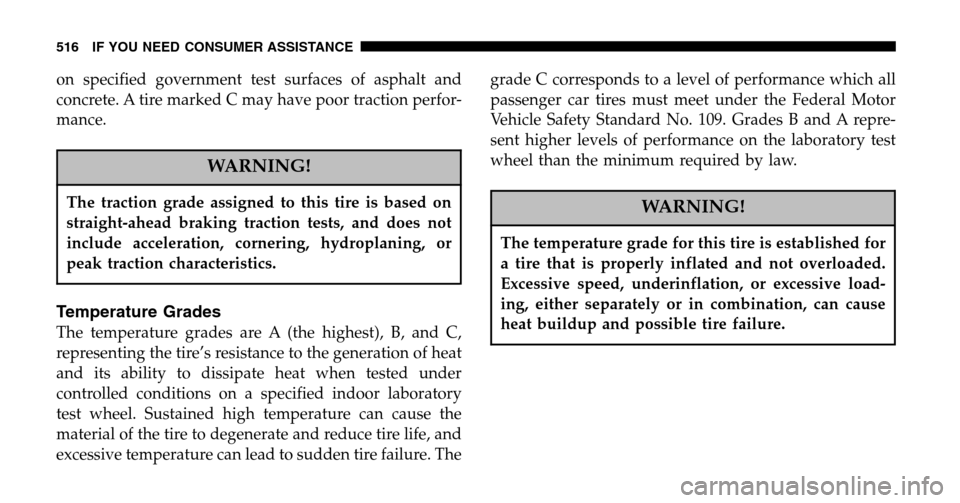
on specified government test surfaces of asphalt and
concrete. A tire marked C may have poor traction perfor-
mance.
WARNING!
The traction grade assigned to this tire is based on
straight-ahead braking traction tests, and does not
include acceleration, cornering, hydroplaning, or
peak traction characteristics.
Temperature Grades
The temperature grades are A (the highest), B, and C,
representing the tire’s resistance to the generation of heat
and its ability to dissipate heat when tested under
controlled conditions on a specified indoor laboratory
test wheel. Sustained high temperature can cause the
material of the tire to degenerate and reduce tire life, and
excessive temperature can lead to sudden tire failure. The grade C corresponds to a level of performance which all
passenger car tires must meet under the Federal Motor
Vehicle Safety Standard No. 109. Grades B and A repre-
sent higher levels of performance on the laboratory test
wheel than the minimum required by law.
WARNING!
The temperature grade for this tire is established for
a tire that is properly inflated and not overloaded.
Excessive speed, underinflation, or excessive load-
ing, either separately or in combination, can cause
heat buildup and possible tire failure.
516 IF YOU NEED CONSUMER ASSISTANCE
Page 522 of 536

Oil Selection....................... 433,483
Oil Synthetic ......................... 434
Temperature Gauge ..................... 221
Equipment Identification Plate .............. 395
Ethylene Glycol Antifreeze ................. 448
Event Data Recorder .................... 54,91
Exhaust Gas Caution .............108,211,360,445
Exhaust System ...................... 108,445
Exterior Lighting ........................ 164
Filters Air Cleaner ........................ 436,459
Engine Fuel .......................... 436
Engine Oil ........................ 435,485
Engine Oil Disposal .................... 435
Flashers Turn Signal .......................... 166
Flat Tire Stowage ..................... 404,415 Flexible Fuel Vehicles
Cruising Range ........................ 365
Engine Oil ........................... 364
Fuel Requirements ..................... 363
Maintenance .......................... 365
Replacement Parts ..................... 365
Starting ............................. 364
Flooded Engine Starting ................... 297
Fluid, Brake ........................... 486
Fluid Capacities ......................... 483
Fluid Level Checks Automatic Transmission ................. 454
Power Steering ........................ 441
Fluids, Lubricants and Genuine Parts .......... 485
Fog Lights ....................... 165,225,482
Fold Flat Load Floor ..................... 204
Four Wheel Drive ....................... 308
Four-Way Hazard Flasher .................. 398
Freeing A Stuck Vehicle ................... 419
522 INDEX