Page 117 of 408
CARGO Light — If Equipped
The cargo lights are turned on by pressing on the
CARGO button. The interior lights will also turn on
when the cargo lights are on. The cargo lights will also
turn on for 30 seconds when a key fob Unlock is pressed,
as part of the illuminated entry feature.
MULTIFUNCTION CONTROL LEVER
The multifunction control lever is located on the left side
of the steering column.
Turn Signals
Move the lever up or down to signal a right-hand or
left-hand turn.
UNDERSTANDING THE FEATURES OF YOUR VEHICLE 117
3
Page 118 of 408

The arrow on either side of the instrument cluster flashes
to indicate the direction of the turn, and proper operation
of the front and rear turn signal lights. If an indicator fails
to light when the lever is moved, it would suggest that
the switch or indicator lamp is defective.
If a defective bulb or wiring circuit is detected for the
turn signal system, the arrow indicators will flash at a
faster rate.
You can signal a lane change by moving the lever
partially up or down.
NOTE: If a turn signal has been left on for at least a mile
duration, a continuous chime will sound.
Passing Light
You can signal another vehicle with your headlights by
partially pulling the multifunction lever toward the steer-
ing wheel. This will cause the high beam headlights to
turn on until the lever is released.
High Beam / Low Beam Select Switch
Pull the multifunction control lever fully toward the
steering wheel to switch the headlights from HIGH or
LOW beam.
118 UNDERSTANDING THE FEATURES OF YOUR VEHICLE
Page 125 of 408
OVERHEAD CONSOLE
The overhead console has the following features:
•Courtesy Lights
•Garage Door Opener — If Equipped
•Compass/Temperature Mini-Trip Computer — If
Equipped
Courtesy/Reading Lights
Near the front of the console are two courtesy/reading
lights.
Both lights illuminate as courtesy lights when a door is
opened, when the dimmer control is rotated to the
courtesy light position (fully upward position), or when
the UNLOCK button is pressed on the Remote Keyless
Entry transmitter, if so equipped. These lights are also
operated individually as reading lights by pressing the
recessed area of the corresponding lens.
NOTE: The courtesy/reading lights will remain on until
the switch is pressed a second time, so be sure they have
been turned off before leaving the vehicle. If the interior
lights are left on after the vehicle is turned OFF, they will
extinguish after 8 minutes.
UNDERSTANDING THE FEATURES OF YOUR VEHICLE 125
3
Page 132 of 408

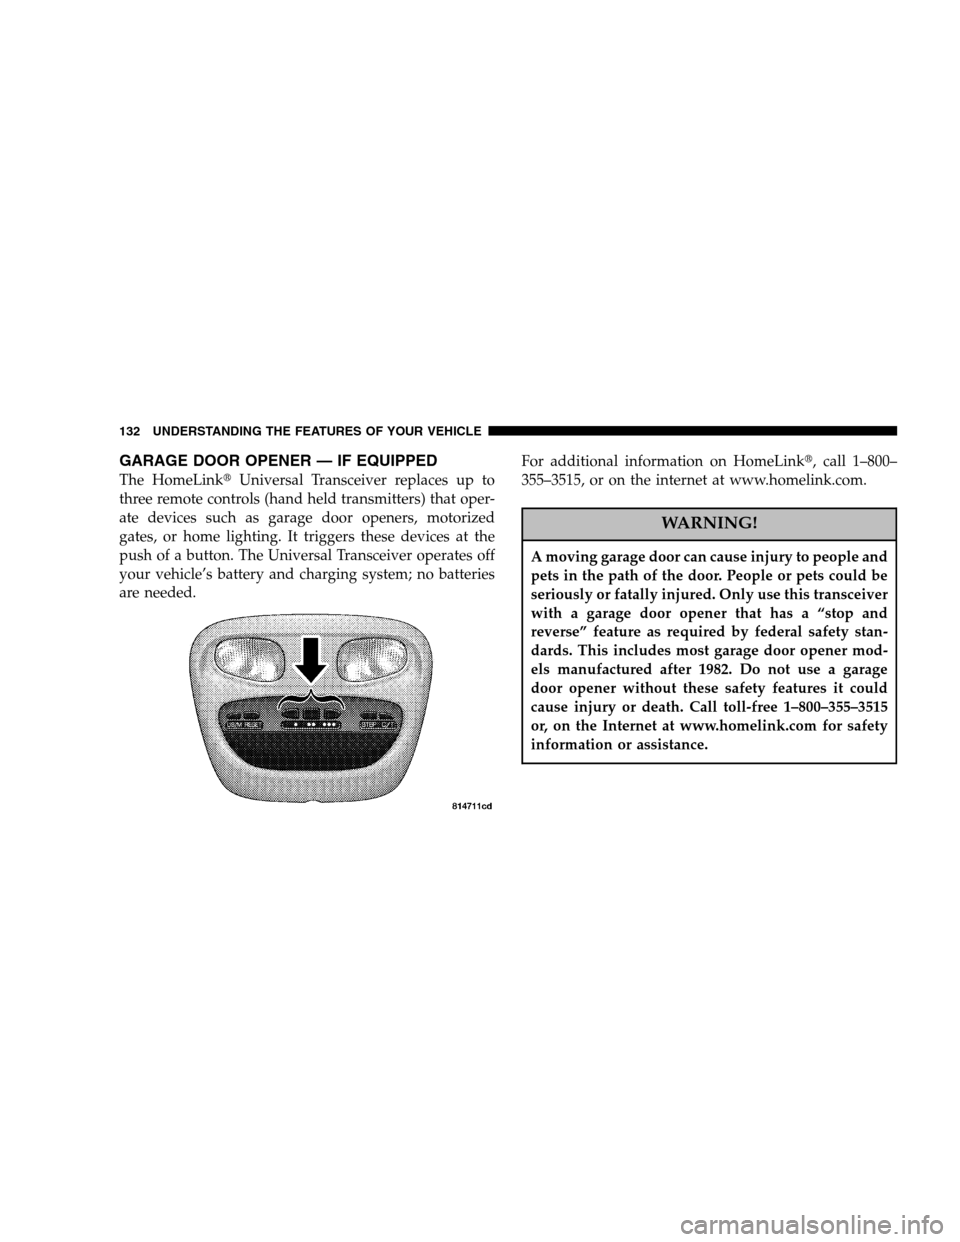
GARAGE DOOR OPENER — IF EQUIPPED
The HomeLink�Universal Transceiver replaces up to
three remote controls (hand held transmitters) that oper-
ate devices such as garage door openers, motorized
gates, or home lighting. It triggers these devices at the
push of a button. The Universal Transceiver operates off
your vehicle’s battery and charging system; no batteries
are needed. For additional information on HomeLink �, call 1–800–
355–3515, or on the internet at www.homelink.com.
WARNING!
A moving garage door can cause injury to people and
pets in the path of the door. People or pets could be
seriously or fatally injured. Only use this transceiver
with a garage door opener that has a “stop and
reverse” feature as required by federal safety stan-
dards. This includes most garage door opener mod-
els manufactured after 1982. Do not use a garage
door opener without these safety features it could
cause injury or death. Call toll-free 1–800–355–3515
or, on the Internet at www.homelink.com for safety
information or assistance.
132 UNDERSTANDING THE FEATURES OF YOUR VEHICLE
Page 133 of 408

WARNING!
Vehicle exhaust contains carbon monoxide, a danger-
ous gas. Do not run the vehicle’s exhaust while
training the transceiver. Exhaust gas can cause seri-
ous injury or death.
WARNING!
Your motorized door or gate will open and close
while you are training the Universal Transceiver. Do
not train the transceiver if people or pets are in the
path of the door or gate. A moving door or gate can
cause serious injury or death to people and pets or
damage to objects.
Programming HomeLink
NOTE: When programming a garage door opener, it is
advised to park outside the garage. It is also recom-
mended that a new battery be placed in the hand-held
transmitter of the device being programmed to
HomeLink for quicker training and accurate transmis-
sion of the radio-frequency signal.
1. Press and hold the two outer HomeLink buttons, and
release only when the indicator light begins to flash (after
20 seconds). Do nothold the buttons for longer than 30
seconds and do notrepeat step one to program a second
and/or third hand-held transmitter to the remaining two
HomeLink buttons.
UNDERSTANDING THE FEATURES OF YOUR VEHICLE 133
3
Page 134 of 408

2. Position the end of your hand-held transmitter 1-3
inches (3-8 cm) away from the HomeLink buttons while
keeping the indicator light in view.
3. Simultaneously press and hold both the HomeLink
button that you want to train and the hand-held trans-
mitter buttons. Do not release the buttons until step 4
has been completed. NOTE:
Some gate operators and garage door openers
may require you to replace this Programming Step 3 with
procedures noted in the �Gate Operator/Canadian Pro-
gramming �section.
4. The HomeLink indicator light will flash slowly and
then rapidly after HomeLink successfully receives the
frequency signal from the hand-held transmitter. Release
both buttons after the indicator light changes from the
slow to the rapid flash.
5. Press and hold the just trained HomeLink button and
observe the indicator light. If the indicator light stays on
constantly, programming is complete and your device
should activate when the HomeLink button is pressed
and released.
NOTE: To program the remaining two HomeLink but-
tons, begin with �Programming�step two. Do not repeat
step one.
134 UNDERSTANDING THE FEATURES OF YOUR VEHICLE
Page 135 of 408

If the indicator light blinksrapidly for two seconds and
then turns to a constant light, continue with �Program-
ming � steps 6-8 to complete the programming of a rolling
code equipped device (most commonly a garage door
opener).
6. At the garage door opener receiver (motor-head unit)
in the garage, locate the �learn�or�smart� button. This
can usually be found where the hanging antenna wire is
attached to the motor-head unit.
7. Firmly press and release the �learn�or�smart� button.
(The name and color of the button may vary by manu-
facturer.)
NOTE: There are 30 seconds in which to initiate step
eight.
8. Return to the vehicle and firmly press, hold for two
seconds and release the programmed HomeLink button.
Repeat the �press/hold/release �sequence a second time, and, depending on the brand of the garage door opener
(or other rolling code equipped device), repeat this
sequence a third time to complete the programming.
HomeLink should now activate your rolling code
equipped device.
NOTE:
To program the remaining two HomeLink but-
tons, begin with �Programming�step two. Do not repeat
step one . For questions or comments, please contact
HomeLink at www.homelink.com or 1-800-355-3515 .
Canadian Programming/Gate Programming
Canadian radio-frequency laws require transmitter sig-
nals to �time-out �(or quit) after several seconds of
transmission which may not be long enough for
HomeLink to pick up the signal during programming.
Similar to this Canadian law, some U.S. gate operators are
designed to �time-out�in the same manner.
UNDERSTANDING THE FEATURES OF YOUR VEHICLE 135
3
Page 136 of 408

If you live in Canada or you are having difficulties
programming a gate operator by using the �Program-
ming � procedures (regardless of where you live), replace
� Programming HomeLink �step 3 with the following:
NOTE: If programming a garage door opener or gate
operator, it is advised to unplug the device during the
� cycling� process to prevent possible overheating.
3. Continue to press and hold the HomeLink button
while you press and release every two seconds (�cycle�)
your hand-held transmitter until the frequency signal has
successfully been accepted by HomeLink. (The indicator
light will flash slowly and then rapidly.) Proceed with
� Programming �step four to complete.
Using HomeLink
To operate, simply press and release the programmed
HomeLink button. Activation will now occur for the
trained device (i.e. garage door opener, gate operator,
security system, entry door lock, home/office lighting, etc.). For convenience, the hand-held transmitter of the
device may also be used at any time. In the event that
there are still programming difficulties or questions,
contact HomeLink at:
www.homelink.com or 1-800-355-
3515 .
Erasing HomeLink Buttons
To erase programming from the three buttons (individual
buttons cannot be erased but can be �reprogrammed�-
note below), follow the step noted:
•Press and hold the two outer HomeLink buttons until
the indicator light begins to flash-after 20 seconds.
Release both buttons. Do not hold for longer that 30
seconds. HomeLink is now in the train (or learning)
mode and can be programmed at any time beginning
with �Programming �- step 2.
136 UNDERSTANDING THE FEATURES OF YOUR VEHICLE