Page 57 of 320

Do not run the engine in a closed garage or in confined
areas any longer than needed to move your vehicle in or
out of the area.
If it is necessary to sit in a parked vehicle with the engine
running, adjust your heating or cooling controls to force
outside air into the vehicle. Set the blower at high speed.
WARNING!
If you are required to drive with the trunk open,
make sure that all windows are closed, and the
climate control blower switch is set at high speed.
DO NOT use the recirculation mode.
Safety Checks You Should Make Inside The
Vehicle
Seat Belts
Inspect the belt system periodically, checking for cuts,
frays and loose parts. Damaged parts must be replacedimmediately. Do not disassemble or modify the system.
Front seat belt assemblies must be replaced after a
collision. Rear seat belt assemblies must be replaced after
a collision if they have been damaged (bent retractor, torn
webbing, etc. If there is any question regarding belt or
retractor condition, replace the belt.
Airbag Light
The light should come on and remain on for 6 to 8
seconds as a bulb check when the ignition switch is first
turned ON. If the LED is not lit during starting, have it
checked. If the light stays on or comes on while driving,
have the system checked by an authorized dealer.
Defroster
Check operation by selecting the defrost mode and place
the blower control on high speed. You should be able to
feel the air directed against the windshield.
THINGS TO KNOW BEFORE STARTING YOUR VEHICLE 57
2
Page 64 of 320

electronic vehicle information center (EVIC). Refer to
Electronic Vehicle Information Center (EVIC) in this
manual for details.
Exterior Mirrors Folding Feature
Some models have exterior mirrors that are hinged and
may move either forward or rearward to resist damage.
The hinges have three detent positions; full forward, full
rearward, and normal.
Outside Mirror — Driver’s Side
Adjust the outside mirror to center on the adjacent lane of
traffic, with a slight overlap of the view obtained on the
inside mirror.
Outside Mirror — Passenger’s Side
Adjust the convex outside mirror so you can just see the
side of your vehicle in the portion of the mirror closest to
the vehicle. This type of mirror will give a much wider
view to the rear, and especially of the lane next to your
vehicle.
WARNING!
Vehicles and other objects seen in the right side
convex mirror will look smaller and farther away
than they really are. Relying too much on your right
side mirror could cause you to collide with another
vehicle or other object.
Use your inside mirror when judging the size or
distance of a vehicle seen in this convex mirror.
Power Remote-Control Mirrors
The power mirror switch is located on the driver’s door
trim panel next to the power door lock switch. A rotary
knob selects the left mirror, right mirror, or off position.
After selecting a mirror move the knob in the same
direction you want the mirror to move. Use the center off
position to guard against accidentally moving a mirror
position.
64 UNDERSTANDING THE FEATURES OF YOUR VEHICLE
Page 85 of 320
North American English
Primary Alternate(s)
Zero Oh
Add location Add new
All All of them
Confirmation prompts Confirmations prompts
Delete a name Delete
Language Select language
List names List all
List paired phones List phones
Pager Beeper
Phone pairing Pairing
Phonebook Phone book
Return to main menu Return. Main menu
Select phone select
Set up Phone settings phone set
upREAR PARK ASSIST SYSTEM
This system is used to help drivers determine if an
obstacle is in the way of the vehicle while it is backing up
in addition to the use of inside rearview and outside
mirrors.
When the driver selects Reverse the system scans for
objects behind the vehicle using four sensors located in
the rear bumper. Objects can be detected from up to 71
inches (180 cm). A warning display above the rear
window provides both visible and audible warnings
indicating the range of the object.
UNDERSTANDING THE FEATURES OF YOUR VEHICLE 85
3
Page 86 of 320

WARNING!
Drivers must be careful when backing up even when
using the Rear Park Assist System. Always check
carefully behind your vehicle, look behind you, and
be sure to check for pedestrians, other vehicles,
obstructions, and blind spots before backing up.
Failure to do so can result in serious personal injury
or death.
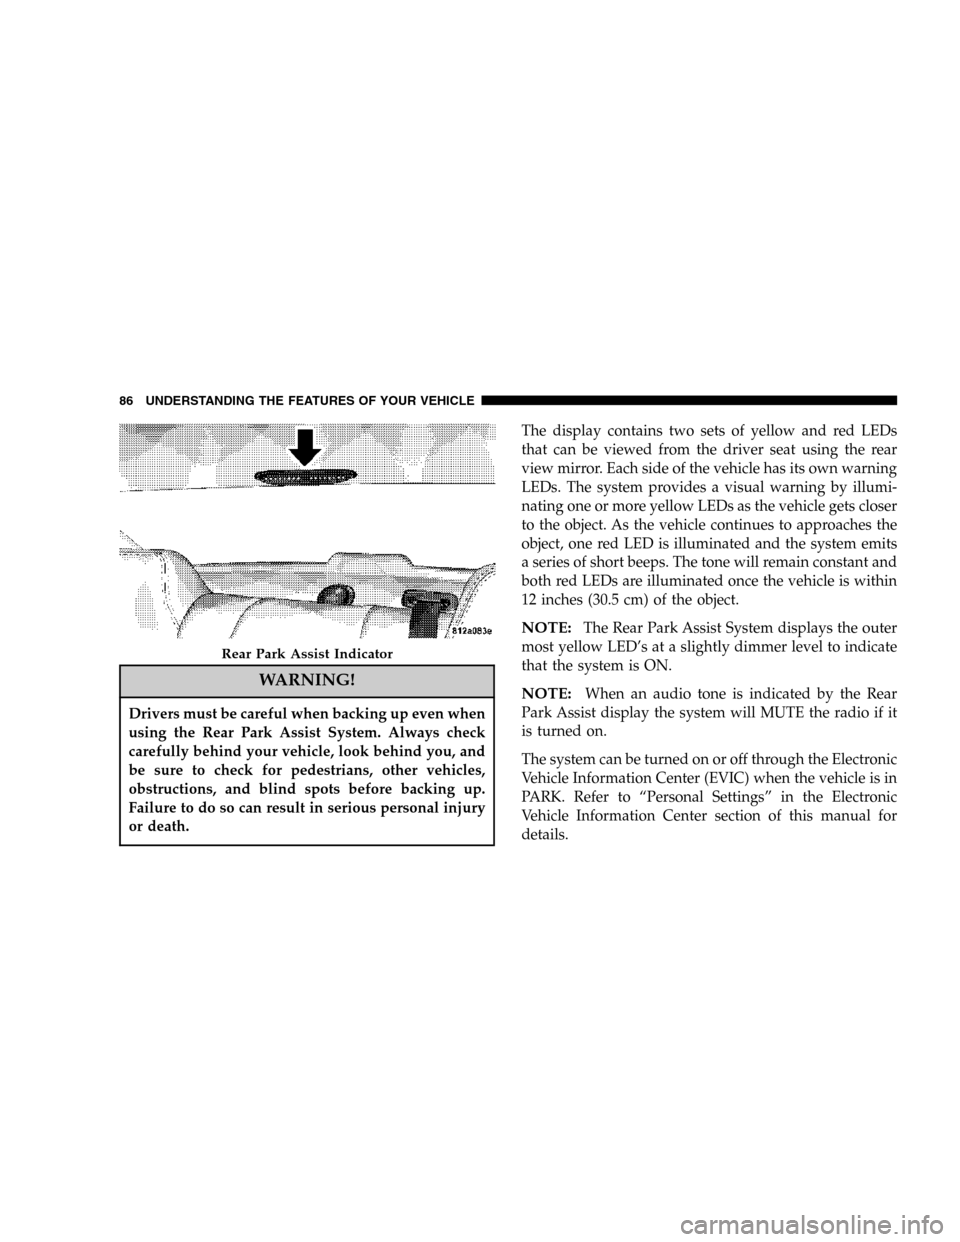
The display contains two sets of yellow and red LEDs
that can be viewed from the driver seat using the rear
view mirror. Each side of the vehicle has its own warning
LEDs. The system provides a visual warning by illumi-
nating one or more yellow LEDs as the vehicle gets closer
to the object. As the vehicle continues to approaches the
object, one red LED is illuminated and the system emits
a series of short beeps. The tone will remain constant and
both red LEDs are illuminated once the vehicle is within
12 inches (30.5 cm) of the object.
NOTE:The Rear Park Assist System displays the outer
most yellow LED’s at a slightly dimmer level to indicate
that the system is ON.
NOTE:When an audio tone is indicated by the Rear
Park Assist display the system will MUTE the radio if it
is turned on.
The system can be turned on or off through the Electronic
Vehicle Information Center (EVIC) when the vehicle is in
PARK. Refer to “Personal Settings” in the Electronic
Vehicle Information Center section of this manual for
details.
Rear Park Assist Indicator
86 UNDERSTANDING THE FEATURES OF YOUR VEHICLE
Page 88 of 320
WARNING!
Adjusting a seat while the vehicle is moving is
dangerous. The sudden movement of the seat could
cause you to lose control. The seat belt might not be
properly adjusted and you could be injured. Adjust
the seat only while the vehicle is parked.
CAUTION!
Do not place any article under a power seat as it may
cause damage to the seat controls.
Power Reclining Seats
The recliner control for both front seats is located on the
outboard side of the seat.
WARNING!
Do not ride with the seatback reclined so that the
shoulder belt is no longer resting against your chest.
In a collision you could slide under the seat belt and
be seriously or even fatally injured. Use the recliner
only when the vehicle is parked.
Power Seat Recline Switch (Driver’s Side Shown)
88 UNDERSTANDING THE FEATURES OF YOUR VEHICLE
Page 94 of 320

WARNING!
The cargo area in the rear of the vehicle (with the
rear seatbacks in the locked-up or folded down
position) should not be used as a play area by
children when the vehicle is in motion. They could
be seriously injured in an accident. Children should
be seated and using the proper restraint system.
ADJUSTABLE PEDALS
This feature allows both the brake and accelerator pedals
to move toward or away from the driver to provide
improved position with the steering wheel. The adjust-
able pedal system is designed to allow a greater range of
driver comfort for steering wheel tilt and seat position.
The switch is located on the front side of the driver’s seat
cushion side shield.Press the switch forward to move the pedals forward
(toward the front of the vehicle).
Press the switch rearward to move the pedals rearward
(toward the driver).
•The pedals can be adjusted with the ignition OFF.
•The pedals can be adjusted while driving.
•The pedalscannotbe adjusted when the vehicle is in R
(Reverse) or when the Speed Control is ON. A message
Adjustable Pedal Switch
94 UNDERSTANDING THE FEATURES OF YOUR VEHICLE
Page 96 of 320

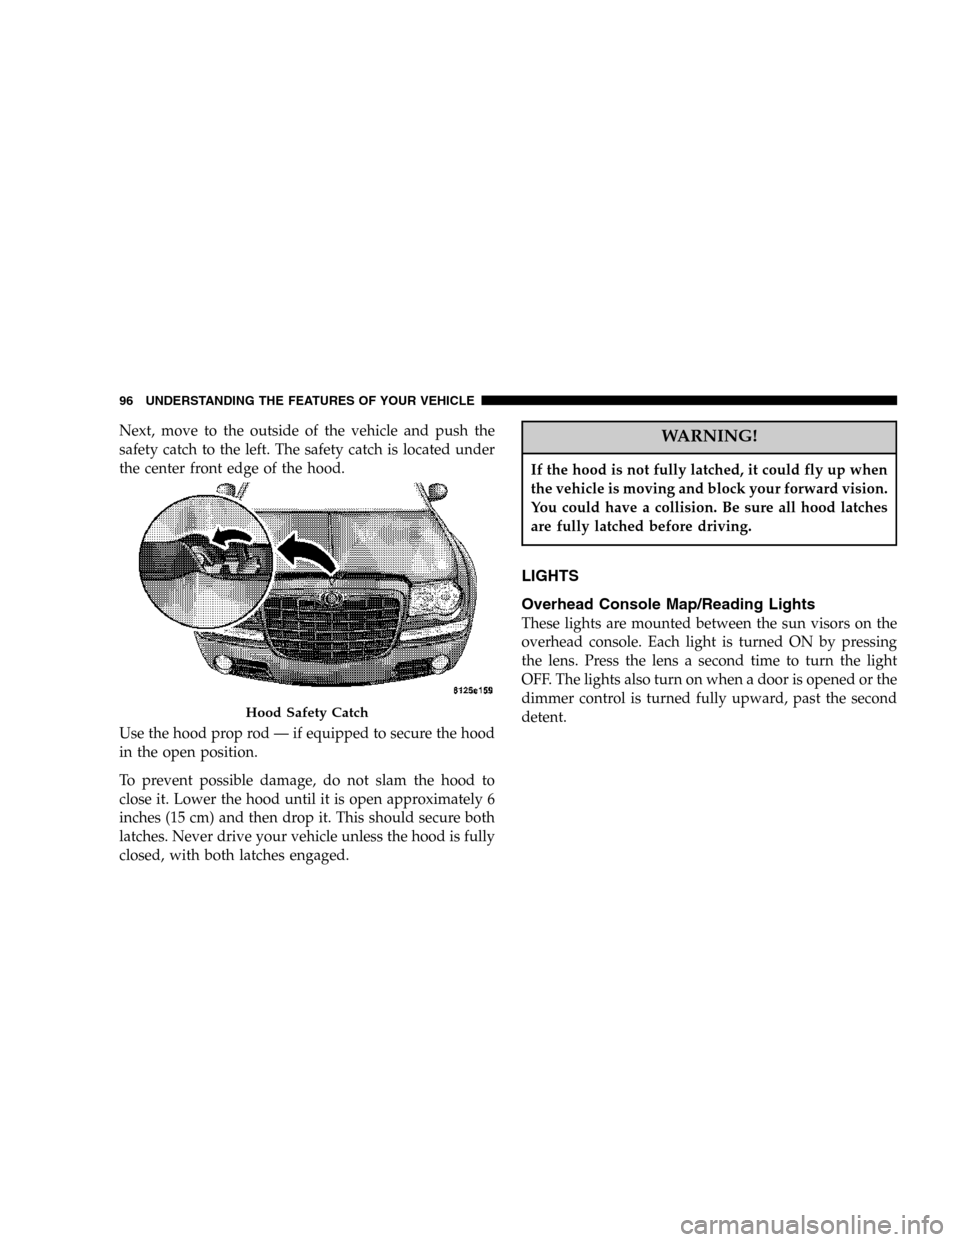
Next, move to the outside of the vehicle and push the
safety catch to the left. The safety catch is located under
the center front edge of the hood.
Use the hood prop rod — if equipped to secure the hood
in the open position.
To prevent possible damage, do not slam the hood to
close it. Lower the hood until it is open approximately 6
inches (15 cm) and then drop it. This should secure both
latches. Never drive your vehicle unless the hood is fully
closed, with both latches engaged.WARNING!
If the hood is not fully latched, it could fly up when
the vehicle is moving and block your forward vision.
You could have a collision. Be sure all hood latches
are fully latched before driving.
LIGHTS
Overhead Console Map/Reading Lights
These lights are mounted between the sun visors on the
overhead console. Each light is turned ON by pressing
the lens. Press the lens a second time to turn the light
OFF. The lights also turn on when a door is opened or the
dimmer control is turned fully upward, past the second
detent.
Hood Safety Catch
96 UNDERSTANDING THE FEATURES OF YOUR VEHICLE
Page 106 of 320
POWER TILT/TELESCOPING STEERING COLUMN
The power tilt/telescoping steering column lever is lo-
cated below the multi-function lever on the steering
column. To tilt the column move the lever up or down as
desired. To lengthen or shorten the steering column pull
the lever toward you or push the lever away from you as
desired.
NOTE:Your remote keyless entry transmitter or
memory buttons on the driver’s door panel can be used
to recall the steering column tilt and telescopic positions.
Refer to the “Seats”section for details.
WARNING!
Moving the steering column while the vehicle is
moving is dangerous. Without a stable steering col-
umn you could lose control of the vehicle and have
an accident. Adjust the column only while the ve-
hicle is stopped.
Power Tilt/Telescoping Steering
106 UNDERSTANDING THE FEATURES OF YOUR VEHICLE