2006 CHEVROLET TRAIL BLAZER buttons
[x] Cancel search: buttonsPage 11 of 534
Heated Seats
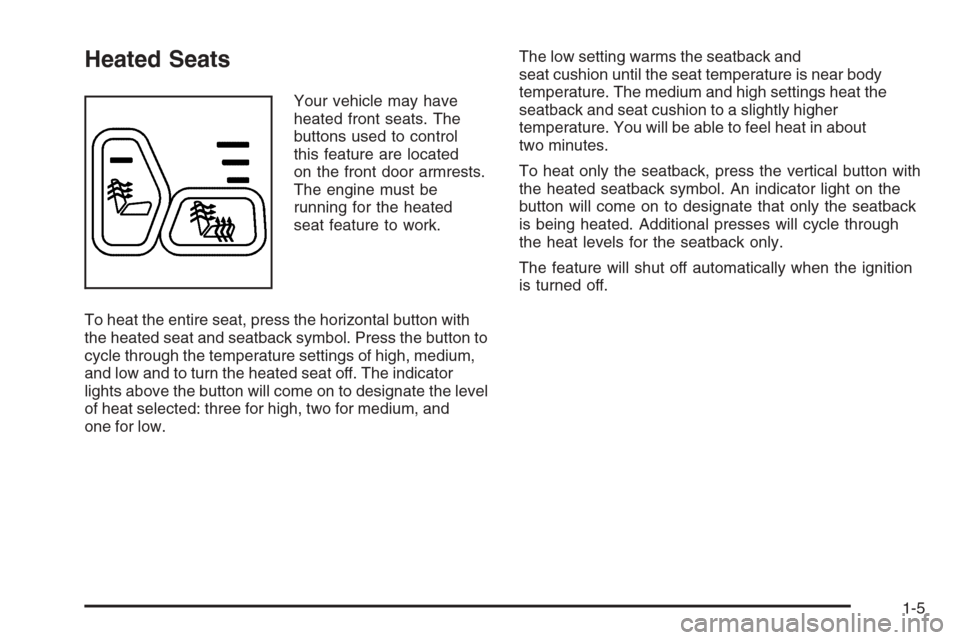
Your vehicle may have
heated front seats. The
buttons used to control
this feature are located
on the front door armrests.
The engine must be
running for the heated
seat feature to work.
To heat the entire seat, press the horizontal button with
the heated seat and seatback symbol. Press the button to
cycle through the temperature settings of high, medium,
and low and to turn the heated seat off. The indicator
lights above the button will come on to designate the level
of heat selected: three for high, two for medium, and
one for low.The low setting warms the seatback and
seat cushion until the seat temperature is near body
temperature. The medium and high settings heat the
seatback and seat cushion to a slightly higher
temperature. You will be able to feel heat in about
two minutes.
To heat only the seatback, press the vertical button with
the heated seatback symbol. An indicator light on the
button will come on to designate that only the seatback
is being heated. Additional presses will cycle through
the heat levels for the seatback only.
The feature will shut off automatically when the ignition
is turned off.
1-5
Page 116 of 534
{CAUTION:
If your vehicle has four-wheel drive, it will
be free to roll — even if the shift lever is in
PARK (P) — if the transfer case is in
NEUTRAL. So be sure the transfer case is in a
drive gear — not in NEUTRAL. SeeFour-Wheel
Drive on page 2-27.
Follow the proper steps to be sure your vehicle will not
move. SeeShifting Into Park (P) on page 2-32.
If you are pulling a trailer, seeTowing a Trailer on
page 4-59.
Mirrors
Manual Rearview Mirror
Your vehicle may have this feature. While sitting in a
comfortable driving position, adjust the rearview
mirror so you can see clearly behind your vehicle. Grip
the mirror in the center to move it up or down and
side to side. The day/night control, located at the bottom
of the mirror, adjusts the mirror to reduce headlamp
glare from behind during evening or dark conditions.
Turn the control clockwise for night use; return it to the
center for daytime use.
Manual Rearview Mirror with
OnStar
®
Your vehicle may have a rearview mirror with the
OnStar®system.
Control buttons for the OnStar
®system are at the
bottom of the mirror. See your GM dealer for more
information on the OnStar
®system and how to
subscribe to OnStar®. Also, seeOnStar®System on
page 2-49for more information about the services
OnStar
®provides.
Mirror Operation
While sitting in a comfortable driving position, adjust the
rearview mirror so you can see clearly behind your
vehicle. Grip it in the center to move it up or down and
side to side. The day/night control, located at the
bottom of the mirror, adjusts the mirror to reduce
headlamp glare from behind during evening or dark
conditions. Move the control to the right for night
conditions. Return it to the center for daytime use.
2-36
Page 117 of 534

Manual Rearview Mirror with
OnStar
®, Compass, and
Temperature Display
Your vehicle may have a manual rearview mirror with
OnStar®, compass and temperature display located
in the upper right corner.
Control buttons for the OnStar
®system are at the
bottom of the mirror. See your GM dealer for more
information about the OnStar
®system. Also, see
OnStar®System on page 2-49for more information
about the services OnStar®provides.
When cleaning the mirror, use a paper towel or similar
material dampened with glass cleaner. Do not spray
glass cleaner directly on the mirror as that may cause
the liquid cleaner to enter the mirror housing.
Mirror Operation
While sitting in a comfortable position, adjust the
rearview mirror so you can see clearly behind your
vehicle. Grip it in the center and move it up or down and
side to side. The day/night control, located at the
bottom of the mirror, adjusts the mirror to reduce
headlamp glare from behind during evening or dark
conditions.
Temperature and Compass Display
O
(On/Off):Press this button to turn the compass and
temperature display on or off. The compass display,
can show a maximum of two characters. For example,
NE is displayed for north-east.
When the ignition and the compass/temperature
feature are on, character boxes will appear for about
two seconds. After two seconds, the mirror will display
the direction the vehicle is facing and the outside
temperature.
To set the temperature in Fahrenheit or Celsius, do the
following:
1. Press and hold the on/off button until either a
�ashing F or C appears.
2. Press the button again to change the display to
the desired unit of measurement. After about
four seconds of inactivity, the new unit will be
locked in and the compass/temperature display
will return.
2-37
Page 119 of 534

Automatic Dimming Rearview Mirror
with OnStar
®and Compass
Your vehicle may have an automatic-dimming rearview
mirror with a compass and the OnStar®system.
There are three additional buttons for the OnStar®
system. See your dealer for more information on the
system and how to subscribe to OnStar®. SeeOnStar®
System on page 2-49for more information about the
services OnStar®provides.
Mirror Operation
When turned on, this mirror automatically dims to the
proper level to minimize glare from any headlamps
behind you after dark.
O(On/Off): This is the on/off button for the automatic
dimming feature and compass. Press the far left button,
located below the mirror face, for up to three seconds
to turn the feature on and off. A light on the mirror will be
lit while the feature is turned on.
Compass Operation
Press the on/off button once to turn the compass
on or off.
There is a compass display in the window in the upper
right corner of the mirror face. The compass displays
a maximum of two characters. For example, “NE”
is displayed for north-east.
Compass Calibration
Press and hold the on/off button down for nine seconds
to activate the compass calibration mode. CAL will
be displayed in the compass window on the mirror.
The compass can be calibrated by driving the vehicle in
circles at 5 mph (8 km/h) or less until the display
reads a direction.
Compass Variance
Compass variance is the difference between earth’s
magnetic north and true geographic north. The mirror is
set to zone eight upon leaving the factory. It will be
necessary to adjust the compass to compensate
for compass variance if you live outside zone eight.
Under certain circumstances, such as during a
long distance cross-country trip, it will be necessary to
adjust for compass variance. If not adjusted to
account for compass variance, your compass could give
false readings.
2-39
Page 123 of 534
Passenger Airbag Indicator
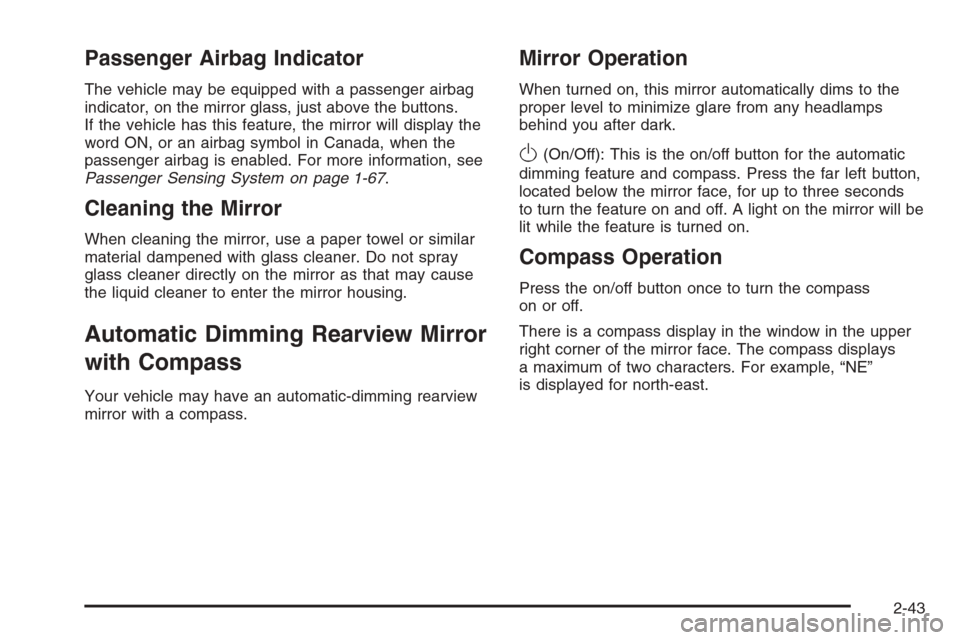
The vehicle may be equipped with a passenger airbag
indicator, on the mirror glass, just above the buttons.
If the vehicle has this feature, the mirror will display the
word ON, or an airbag symbol in Canada, when the
passenger airbag is enabled. For more information, see
Passenger Sensing System on page 1-67.
Cleaning the Mirror
When cleaning the mirror, use a paper towel or similar
material dampened with glass cleaner. Do not spray
glass cleaner directly on the mirror as that may cause
the liquid cleaner to enter the mirror housing.
Automatic Dimming Rearview Mirror
with Compass
Your vehicle may have an automatic-dimming rearview
mirror with a compass.
Mirror Operation
When turned on, this mirror automatically dims to the
proper level to minimize glare from any headlamps
behind you after dark.
O(On/Off): This is the on/off button for the automatic
dimming feature and compass. Press the far left button,
located below the mirror face, for up to three seconds
to turn the feature on and off. A light on the mirror will be
lit while the feature is turned on.
Compass Operation
Press the on/off button once to turn the compass
on or off.
There is a compass display in the window in the upper
right corner of the mirror face. The compass displays
a maximum of two characters. For example, “NE”
is displayed for north-east.
2-43
Page 127 of 534
To adjust for compass variance:
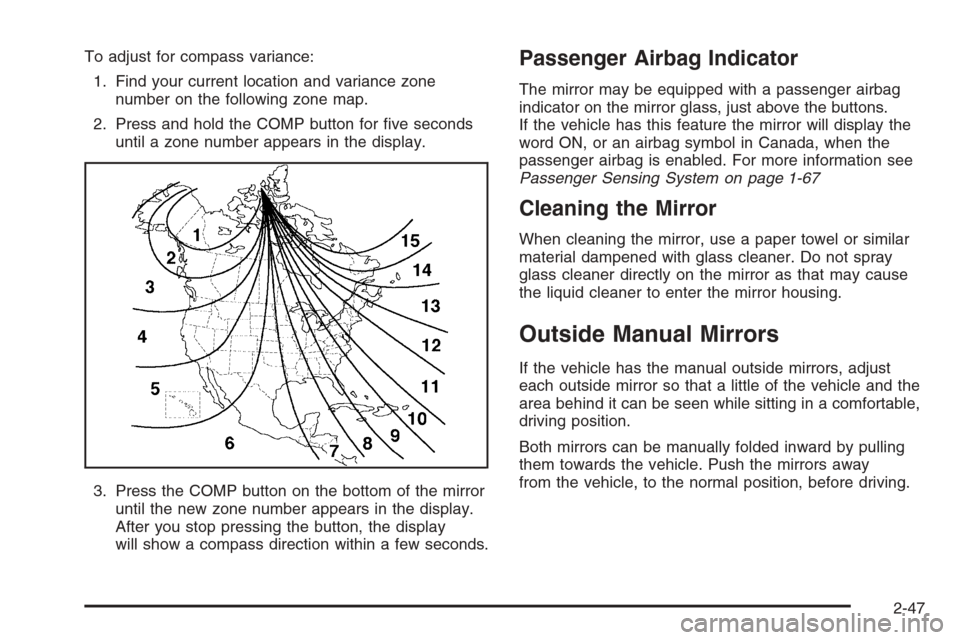
1. Find your current location and variance zone
number on the following zone map.
2. Press and hold the COMP button for �ve seconds
until a zone number appears in the display.
3. Press the COMP button on the bottom of the mirror
until the new zone number appears in the display.
After you stop pressing the button, the display
will show a compass direction within a few seconds.Passenger Airbag Indicator
The mirror may be equipped with a passenger airbag
indicator on the mirror glass, just above the buttons.
If the vehicle has this feature the mirror will display the
word ON, or an airbag symbol in Canada, when the
passenger airbag is enabled. For more information see
Passenger Sensing System on page 1-67
Cleaning the Mirror
When cleaning the mirror, use a paper towel or similar
material dampened with glass cleaner. Do not spray
glass cleaner directly on the mirror as that may cause
the liquid cleaner to enter the mirror housing.
Outside Manual Mirrors
If the vehicle has the manual outside mirrors, adjust
each outside mirror so that a little of the vehicle and the
area behind it can be seen while sitting in a comfortable,
driving position.
Both mirrors can be manually folded inward by pulling
them towards the vehicle. Push the mirrors away
from the vehicle, to the normal position, before driving.
2-47
Page 133 of 534
Universal Home Remote System
Operation
Do not use the Universal Home Remote with any
garage door opener that does not have the stop and
reverse feature. This includes any garage door opener
model manufactured before April 1, 1982. If you
have a newer garage door opener with rolling codes,
please be sure to follow Steps 6 through 8 to complete
the programming of your Universal Home Remote
Transmitter.
Read the instructions completely before attempting to
program the Universal Home Remote. Because of
the steps involved, it may be helpful to have another
person available to assist you in the programming steps.
Keep the original hand-held transmitter for use in
other vehicles as well as for future Universal Home
Remote programming. It is also recommended that upon
the sale of the vehicle, the programmed Universal
Home Remote buttons should be erased for security
purposes. See “Erasing Universal Home Remote
Buttons” later in this section or, for assistance, see
Customer Assistance Offices on page 7-4.Be sure that people and objects are clear of the garage
door or gate operator you are programming. When
programming a garage door, it is advised to park outside
of the garage.
It is recommended that a new battery be installed in
your hand-held transmitter for quicker and more
accurate transmission of the radio-frequency signal.
Programming Universal Home Remote
Follow these steps to program up to three channels:
1. Press and hold down the two outside Universal
Home Remote buttons, releasing only when the
Universal Home Remote indicator light begins
to �ash, after 20 seconds. Do not hold down the
buttons for longer than 30 seconds and do not
repeat this step to program a second and/or third
hand-held transmitter to the remaining two Universal
Home Remote buttons.
2. Position the end of your hand-held transmitter
about 1 to 3 inches (3 to 8 cm) away from the
Universal Home Remote buttons while keeping the
indicator light in view.
2-53
Page 134 of 534
3. Simultaneously press and hold both the desired
Universal Home Remote button and the hand-held
transmitter button. Do not release the buttons
until Step 4 has been completed.
Some entry gates and garage door openers may
require you to substitute Step 3 with the procedure
noted in “Gate Operator and Canadian
Programming” later in this section.
4. The indicator light will �ash slowly at �rst and then
rapidly after Universal Home Remote successfully
receives the frequency signal from the hand-held
transmitter. Release both buttons.
5. Press and hold the newly-trained Universal Home
Remote button and observe the indicator light.
If the indicator light stays on constantly,
programming is complete and your device should
activate when the Universal Home Remote button is
pressed and released.
To program the remaining two Universal Home
Remote buttons, begin with Step 2 under
“Programming Universal Home Remote.” Do not
repeat Step 1 as this will erase all of the
programmed channels.
If the indicator light blinks rapidly for two seconds
and then turns to a constant light, continue with
Steps 6 through 8 following to complete the
programming of a rolling-code equipped device,
most commonly, a garage door opener.6. Locate in the garage, the garage door opener
receiver (motor-head unit). Locate the “Learn”
or “Smart” button. This can usually be found where
the hanging antenna wire is attached to the
motor-head unit.
7. Firmly press and release the “Learn” or “Smart”
button. The name and color of the button may
vary by manufacturer.
You will have 30 seconds to start Step 8.
8. Return to the vehicle. Firmly press and hold the
programmed Universal Home Remote button for
two seconds, then release. Repeat the
press/hold/release sequence a second time, and
depending on the brand of the garage door opener,
or other rolling code device, repeat this sequence
a third time to complete the programming.
The Universal Home Remote should now activate
your rolling-code equipped device.
To program the remaining two Universal Home Remote
buttons, begin with Step 2 of “Programming Universal
Home Remote.” You do not want to repeat Step 1,
as this will erase all previous programming from
the Universal Home Remote buttons.
2-54