2006 CHEVROLET TAHOE battery
[x] Cancel search: batteryPage 147 of 540

See “Erasing Universal Home Remote Buttons” later in
this section or, for assistance, seeCustomer Assistance
Offices on page 7-4.
Be sure that people and objects are clear of the garage
door or gate operator you are programming. When
programming a garage door, it is advised to park outside
of the garage.
It is recommended that a new battery be installed in
your hand-held transmitter for quicker and more
accurate transmission of the radio-frequency signal.
Programming Universal Home Remote
Follow these steps to program up to three channels:
1. Press and hold down the two outside Universal
Home Remote buttons, releasing only when the
Universal Home Remote indicator light begins
to �ash, after 20 seconds. Do not hold down the
buttons for longer than 30 seconds and do not
repeat this step to program a second and/or
third hand-held transmitter to the remaining
two Universal Home Remote buttons.
2. Position the end of your hand-held transmitter
about 1 to 3 inches (3 to 8 cm) away from the
Universal Home Remote buttons while keeping
the indicator light in view.3. Simultaneously press and hold both the desired
Universal Home Remote button and the hand-held
transmitter button. Do not release the buttons
until Step 4 has been completed.
Some entry gates and garage door openers may
require you to substitute Step 3 with the procedure
noted in “Gate Operator and Canadian
Programming” later in this section.
4. The indicator light will �ash slowly at �rst and then
rapidly after Universal Home Remote successfully
receives the frequency signal from the hand-held
transmitter. Release both buttons.
5. Press and hold the newly-trained Universal Home
Remote button and observe the indicator light.
If the indicator light stays on constantly,
programming is complete and your device should
activate when the Universal Home Remote button
is pressed and released.
To program the remaining two Universal Home
Remote buttons, begin with Step 2 under
“Programming Universal Home Remote.” Do not
repeat Step 1 as this will erase all of the
programmed channels.
If the indicator light blinks rapidly for two seconds
and then turns to a constant light, continue with
Steps 6 through 8 following to complete the
programming of a rolling-code equipped device,
most commonly, a garage door opener.
2-53
Page 154 of 540

Sunroof
Your vehicle may be equipped with a power sliding
sunroof. To open or close your sunroof, the ignition
needs to be on or RAP needs to be active. See
“Retained Accessory Power” underIgnition Positions
on page 2-19.
Press and release the rear side of the button located in
the front overhead console to express-open the glass
panel and sunshade. To stop the express-open motion,
press the front or rear of the button again. To close
the glass panel, press and hold the front of the button.
The glass will not be fully seated unless the button
is held until the glass stops moving. With the sunroof
closed, press the forward side of the button to open the
sunroof to the vent position.
The sunroof is also equipped with a sunshade which
you can pull forward to block sun rays.If a hand, arm, or other object is blocking the sunroof
glass panel as it is closing, the glass panel will stop
at the obstruction. After the obstruction is removed, the
glass panel can be closed or opened.
Use care not to leave the sunroof open for long periods
of time as debris may collect in the tracks.
If the battery has been recharged, disconnected or is
not working, you may need to reprogram the sunroof. To
do this, start the vehicle and press the forward side of
the sunroof button until the glass panel moves to a fully
closed position. Release, and press again to move to
the vent position, which occurs when the sunroof is fully
tilted upward and the button is held for an additional
twenty seconds. This will reset the memory and enable
the sunroof to function properly.
Vehicle Personalization
In addition to the following features, your vehicle may
also have features that can be programmed through the
Driver Information Center (DIC). SeeDIC Vehicle
Customization on page 3-66for more information.
2-60
Page 157 of 540

Instrument Panel Overview...............................3-4
Hazard Warning Flashers................................3-5
Other Warning Devices...................................3-6
Horn .............................................................3-6
Tilt Wheel.....................................................3-6
Turn Signal/Multifunction Lever.........................3-7
Turn and Lane-Change Signals........................3-7
Headlamp High/Low-Beam Changer..................3-8
Flash-to-Pass.................................................3-9
Windshield Wipers..........................................3-9
Windshield Washer.......................................3-10
Rear Window Wiper/Washer...........................3-10
Cruise Control..............................................3-11
Headlamps..................................................3-14
Headlamps on Reminder................................3-15
Daytime Running Lamps (DRL).......................3-15
Automatic Headlamp System..........................3-16
Fog Lamps ..................................................3-17
Auxiliary Roof Mounted Lamp.........................3-18
Instrument Panel Brightness...........................3-18
Dome Lamps ...............................................3-18
Dome Lamp Override....................................3-19
Entry Lighting...............................................3-19
Exit Lighting.................................................3-19
Front Reading Lamps....................................3-19Battery Run-Down Protection..........................3-20
Accessory Power Outlet(s).............................3-20
Ashtray(s) and Cigarette Lighter......................3-21
Climate Controls............................................3-21
Climate Control System.................................3-21
Dual Climate Control System..........................3-22
Dual Automatic Climate Control System...........3-25
Outlet Adjustment.........................................3-30
Rear Air Conditioning and Heating System.......3-31
Rear Air Conditioning and Heating System
and Electronic Climate Controls...................3-32
Warning Lights, Gages, and Indicators............3-34
Instrument Panel Cluster................................3-35
Speedometer and Odometer...........................3-36
Trip Odometer..............................................3-36
Tachometer.................................................3-36
Safety Belt Reminder Light.............................3-36
Airbag Readiness Light..................................3-37
Passenger Airbag Status Indicator...................3-37
Battery Warning Light....................................3-39
Voltmeter Gage............................................3-40
Brake System Warning Light..........................3-41
Anti-Lock Brake System Warning Light.............3-42
Engine Coolant Temperature Gage..................3-42
Section 3 Instrument Panel
3-1
Page 176 of 540

Battery Run-Down Protection
This feature shuts off the dome, and reading lamps if
they are left on for more than 10 minutes when the
ignition is off. This will keep the battery from
running down.
Accessory Power Outlet(s)
With accessory power outlets you can plug in auxiliary
electrical equipment such as a cellular telephone or
CB radio.
Your vehicle may have two accessory power outlets,
or may have one accessory power outlet located
near the cigarette lighter, if equipped. The cigarette
lighter is designed to �t only in the receptacle to the
right of the accessory power outlet.
To use the outlet, lift the cover. When not using it,
always close the cover.Certain power accessory plugs may not be compatible
to the accessory power outlet and could result in
blown vehicle or adapter fuses. If you experience a
problem, see your dealer for additional information on
the accessory power plugs.
Notice:Adding any electrical equipment to your
vehicle may damage it or keep other components
from working as they should. The repairs would not
be covered by your warranty. Do not use equipment
exceeding maximum amperage rating. Check
with your dealer before adding electrical equipment.
When adding electrical equipment, be sure to follow
the proper installation instructions included with
the equipment.
Notice:Improper use of the power outlet can cause
damage not covered by your warranty. Do not
hang any type of accessory or accessory bracket
from the plug because the power outlets are
designed for accessory power plugs only.
3-20
Page 195 of 540

If, after several seconds, all status indicator lights
remain on, or if there are no lights at all, there may be
a problem with the lights or the passenger sensing
system. See your dealer for service.
{CAUTION:
If the off indicator and the airbag readiness
light ever come on together, it means that
something may be wrong with the airbag
system. If this ever happens, have the vehicle
serviced promptly, because an adult-size
person sitting in the right front passenger
seat may not have the protection of the
frontal airbag. SeeAirbag Readiness Light
on page 3-37.
Battery Warning Light
If this light is displayed
when the engine is
running, you may have
a problem with your
charging system.
The battery display will also stay on while the key is in
RUN until the engine is started.
If the light stays on after starting the engine it could
indicate a problem with the generator drive belt, or some
other charging system problem. Have it checked right
away. Driving with this light displayed could drain
your battery.
If you must drive a short distance with this light
displayed, it helps to turn off all your accessories, such
as the radio and the air conditioner.
3-39
Page 196 of 540

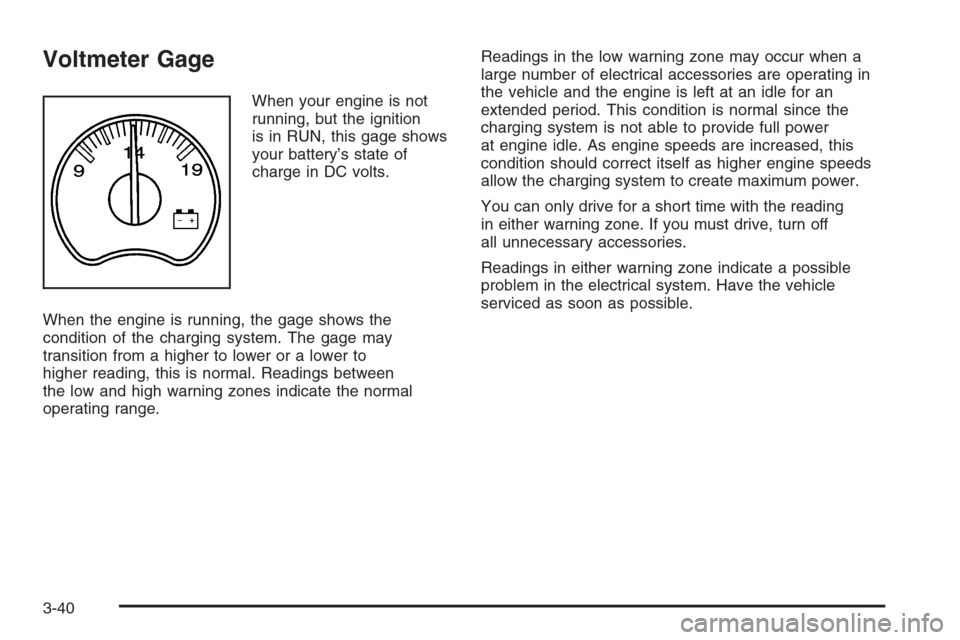
Voltmeter Gage
When your engine is not
running, but the ignition
is in RUN, this gage shows
your battery’s state of
charge in DC volts.
When the engine is running, the gage shows the
condition of the charging system. The gage may
transition from a higher to lower or a lower to
higher reading, this is normal. Readings between
the low and high warning zones indicate the normal
operating range.Readings in the low warning zone may occur when a
large number of electrical accessories are operating in
the vehicle and the engine is left at an idle for an
extended period. This condition is normal since the
charging system is not able to provide full power
at engine idle. As engine speeds are increased, this
condition should correct itself as higher engine speeds
allow the charging system to create maximum power.
You can only drive for a short time with the reading
in either warning zone. If you must drive, turn off
all unnecessary accessories.
Readings in either warning zone indicate a possible
problem in the electrical system. Have the vehicle
serviced as soon as possible.
3-40
Page 203 of 540

If you experience one or more of these conditions,
change the fuel brand you use. It will require at least
one full tank of the proper fuel to turn the light off.
If none of the above steps have made the light turn off,
your dealer can check the vehicle. Your dealer has
the proper test equipment and diagnostic tools to �x
any mechanical or electrical problems that may
have developed.
Emissions Inspection and Maintenance
Programs
Some state/provincial and local governments have or
may begin programs to inspect the emission control
equipment on your vehicle. Failure to pass this
inspection could prevent you from getting a vehicle
registration.
Here are some things you need to know to help your
vehicle pass an inspection:
Your vehicle will not pass this inspection if the check
engine light is on or not working properly.Your vehicle will not pass this inspection if the OBD
(on-board diagnostic) system determines that critical
emission control systems have not been completely
diagnosed by the system. The vehicle would be
considered not ready for inspection. This can happen if
you have recently replaced your battery or if your
battery has run down. The diagnostic system is
designed to evaluate critical emission control systems
during normal driving. This may take several days
of routine driving. If you have done this and your vehicle
still does not pass the inspection for lack of OBD
system readiness, your GM dealer can prepare the
vehicle for inspection.
3-47
Page 211 of 540

DIC Warnings and Messages
Warning messages are displayed on the Driver
Information Center (DIC) to notify the driver that the
status of the vehicle has changed and that some action
may be needed by the driver to correct the condition.
If there is more than one message that needs to
be displayed, they will appear one after another. Some
messages may not require immediate action, but
you should press any of the four DIC buttons on the
steering wheel to acknowledge that you received
the messages and clear them from the display. If your
vehicle does not have DIC buttons on the steering
wheel, press the trip odometer reset stem located on
the instrument panel cluster to acknowledge messages
and clear them from the display. Some messages
cannot be cleared from the display because they are
more urgent. These messages require action before they
can be removed from the DIC display. You should
take any messages that appear on the display seriously
and remember that clearing the messages will only
make the messages disappear, not correct the problem.
The following are the possible messages that can be
displayed and some information about them.
BATTERY NOT CHARGING
On some vehicles, if the battery is not charging during
operation, this message will appear on the DIC.
Driving with this problem could drain your battery. Have
the electrical system checked by your GM dealer as
soon as possible. SeeBattery Warning Light on
page 3-39andVoltmeter Gage on page 3-40. Pressing
any of the four DIC buttons will acknowledge the
message and clear it from the DIC display. If your
vehicle does not have the four DIC buttons, pressing
the trip odometer reset stem will acknowledge the
message and clear it from the DIC display.
BUCKLE PASSENGER
If your vehicle has the passenger sensing system, this
message reminds you to buckle the passenger’s
seat belt. SeePassenger Sensing System on page 1-82.
This message will display and a chime will sound when
the ignition is on, the driver’s seat belt is buckled, the
passenger’s seat belt is unbuckled with the passenger
airbag enabled, and the vehicle is in motion. You should
have the passenger buckle their seat belt.
This reminder will be repeated if the ignition is on, the
vehicle is in motion, the driver is buckled and the
passenger is still unbuckled, and the passenger airbag
is enabled. If the passenger’s seat belt is already
buckled, this message and chime will not come on.
3-55