2006 CHEVROLET SILVERADO fold seats
[x] Cancel search: fold seatsPage 15 of 594
Head Restraints
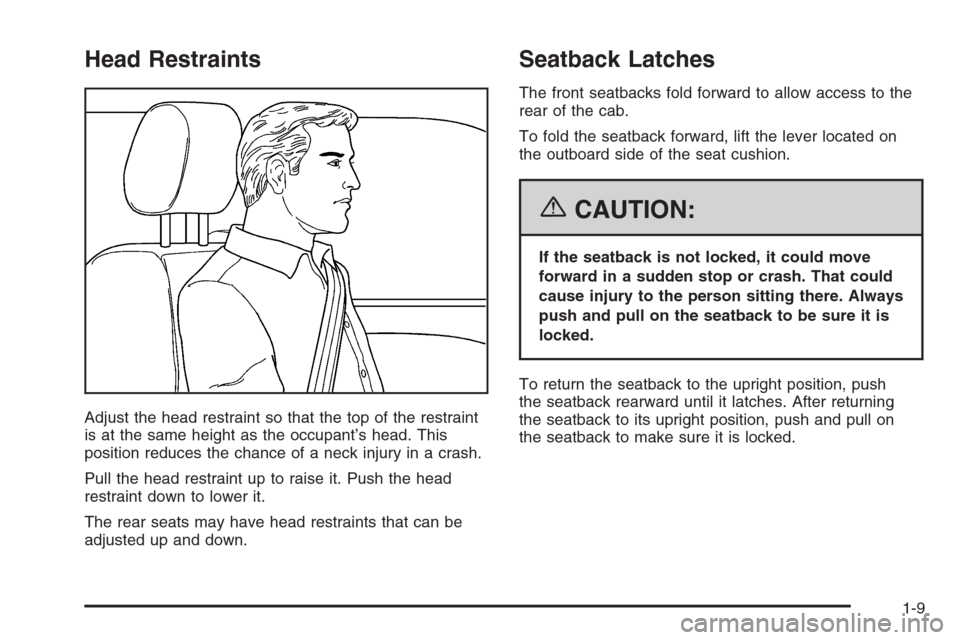
Adjust the head restraint so that the top of the restraint
is at the same height as the occupant’s head. This
position reduces the chance of a neck injury in a crash.
Pull the head restraint up to raise it. Push the head
restraint down to lower it.
The rear seats may have head restraints that can be
adjusted up and down.
Seatback Latches
The front seatbacks fold forward to allow access to the
rear of the cab.
To fold the seatback forward, lift the lever located on
the outboard side of the seat cushion.
{CAUTION:
If the seatback is not locked, it could move
forward in a sudden stop or crash. That could
cause injury to the person sitting there. Always
push and pull on the seatback to be sure it is
locked.
To return the seatback to the upright position, push
the seatback rearward until it latches. After returning
the seatback to its upright position, push and pull on
the seatback to make sure it is locked.
1-9
Page 16 of 594
Rear Seats
Rear Seat Operation (Extended Cab)
Folding the Rear Seat
The rear seat in the extended cab can be folded up to
provide more cargo space.
To fold the seat up, do the following:
Notice:Folding a rear seat with the safety belts
still fastened may cause damage to the seat or the
safety belts. Always unbuckle the safety belts
and return them to their normal stowed position
before folding a rear seat.
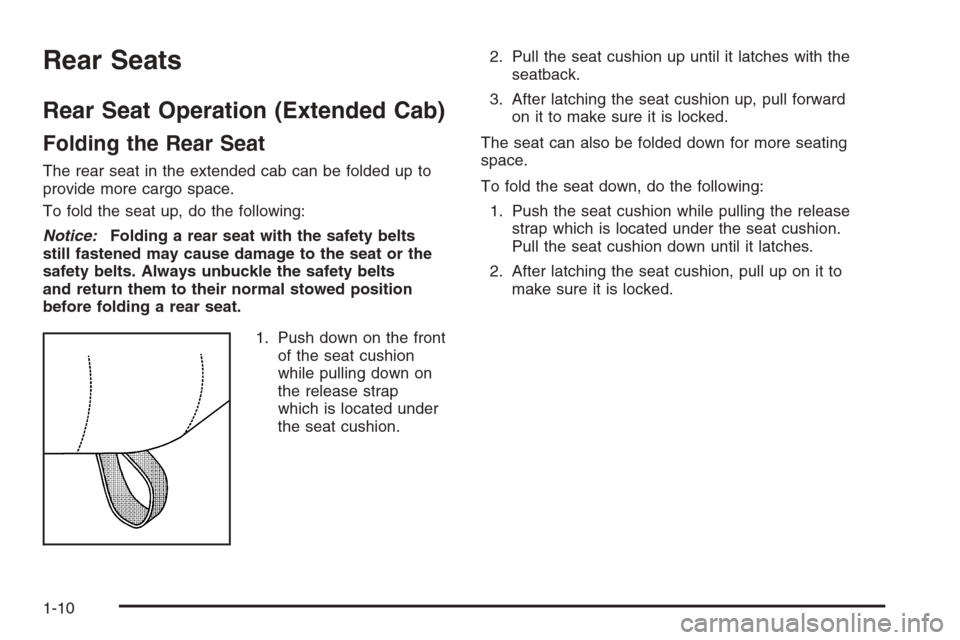
1. Push down on the front
of the seat cushion
while pulling down on
the release strap
which is located under
the seat cushion.2. Pull the seat cushion up until it latches with the
seatback.
3. After latching the seat cushion up, pull forward
on it to make sure it is locked.
The seat can also be folded down for more seating
space.
To fold the seat down, do the following:
1. Push the seat cushion while pulling the release
strap which is located under the seat cushion.
Pull the seat cushion down until it latches.
2. After latching the seat cushion, pull up on it to
make sure it is locked.
1-10
Page 163 of 594

Outside Power Foldaway Mirrors
If your vehicle is equipped
with this feature, the
controls are located on the
driver’s door armrest.
Move the upper selector switch to the left or right to
choose the mirror you want to adjust; then press
the dots located on the four-way control pad to adjust
the mirror.
The mirrors may also include a memory function which
works together with the memory seats. SeeMemory
Seat on page 2-79for more information.To fold or unfold the mirrors, move the selector switch,
located above the mirror control, to the middle
position. The mirror control will illuminate. Press the
right or left side of the mirror control to fold or unfold the
mirrors. You may notice the mirror glass adjust as the
mirrors fold in; this is normal. The mirror glass will
reposition itself once the mirrors are unfolded.
If the mirrors are accidentally folded/unfolded manually,
they may shake or �utter at normal driving speeds
and may not stay in the unfolded position. If this
happens, you will need to reset the mirrors. See
“Resetting the Power Foldaway Mirrors” next.
Resetting the Power Foldaway Mirrors
You will need to reset the power foldaway mirrors if the
following occurs:
They are accidentally manually folded/unfolded.
The mirrors will not stay in the unfolded position.
The mirrors shake and �utter at normal driving
speeds.
To reset the power foldaway mirrors, fold and unfold
them at least three times using the mirror controls. This
will reset them to their normal position.
2-67
Page 172 of 594
Front Storage Area
Your vehicle may have a center armrest storage
compartment in the front bench seat.
To open it, fold down the armrest and press the latch
handle located at the front of the armrest. Then, let the
lid pop up and swing open.
The storage compartment may have a cassette/compact
disc holder.
Center Console Storage Area
Your vehicle may be equipped with a console
compartment between the bucket seats.
To open it, press the button located on the right side of
the front of the lid and swing the lid open.
Your vehicle may have a compact disc holder in the
console.
Your console may have a cupholder that swings down
for the rear seat passengers to use. The front cupholder
pulls out and swivels 180° to provide clearance
between tall beverage containers and the manual
transmission shift lever (if equipped).
Tonneau Cover
If your vehicle is equipped with a tonneau cover, follow
the directions below to remove the cover.
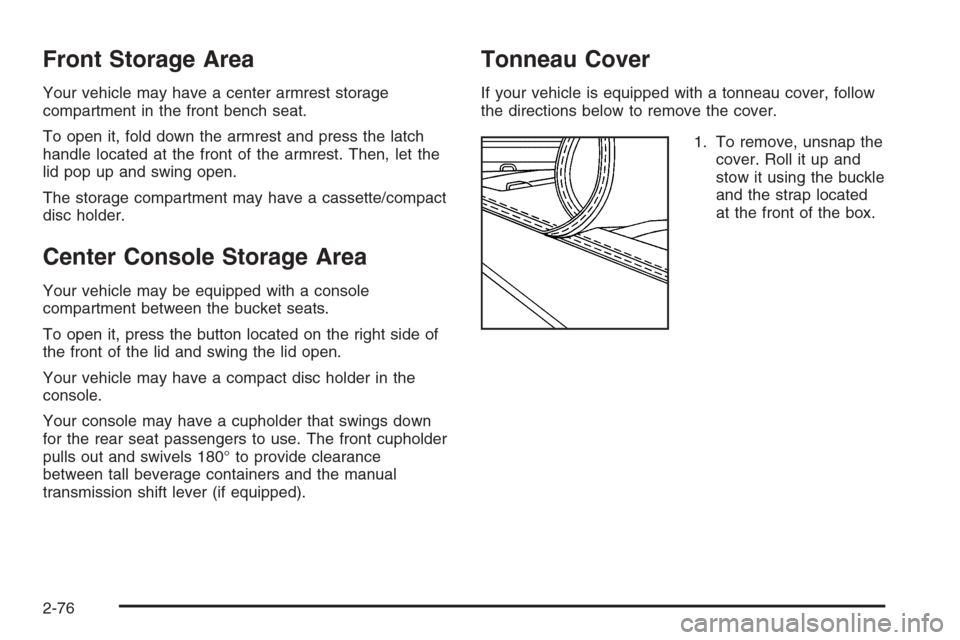
1. To remove, unsnap the
cover. Roll it up and
stow it using the buckle
and the strap located
at the front of the box.
2-76
Page 359 of 594
If you put things inside your vehicle — like suitcases,
tools, packages, or anything else — they go as fast
as the vehicle goes. If you have to stop or turn quickly,
or if there is a crash, they will keep going.
{CAUTION:
Things you put inside your vehicle can strike
and injure people in a sudden stop or turn, or
in a crash.
Put things in the cargo area of your
vehicle. Try to spread the weight evenly.
Never stack heavier things, like suitcases,
inside the vehicle so that some of them
are above the tops of the seats.
Do not leave an unsecured child restraint
in your vehicle.
When you carry something inside the
vehicle, secure it whenever you can.
Do not leave a seat folded down unless
you need to.
There is also important loading information for off-road
driving in this manual. See “Loading Your Vehicle
for Off-Road Driving“ underOff-Road Driving on
page 4-17.
Two-Tiered Loading
By positioning four 2 inches (5 cm) by 6 inches (15 cm)
wooden planks across the width of the pickup box,
you can create an upper load platform. The planks
must be inserted in the pickup box depressions. The
length of the planks must allow for at least a 3/4 inch
(2 cm) bearing surface on each end of the plank.
When using this upper load platform, be sure the load is
securely tied down to prevent it from shifting. The
load’s center of gravity should be positioned in a zone
over the rear axle. The zone is located in the area
between the front of each wheel well and the rear of
each wheel well. The center of gravity height must not
extend above the top of the pickup box �areboard.
Any load that extends beyond the vehicle’s taillamp area
must be properly marked according to local laws and
regulations.
Remember not to exceed the Gross Axle Weight Rating
(GAWR) of the front or rear axle.
4-53
Page 557 of 594
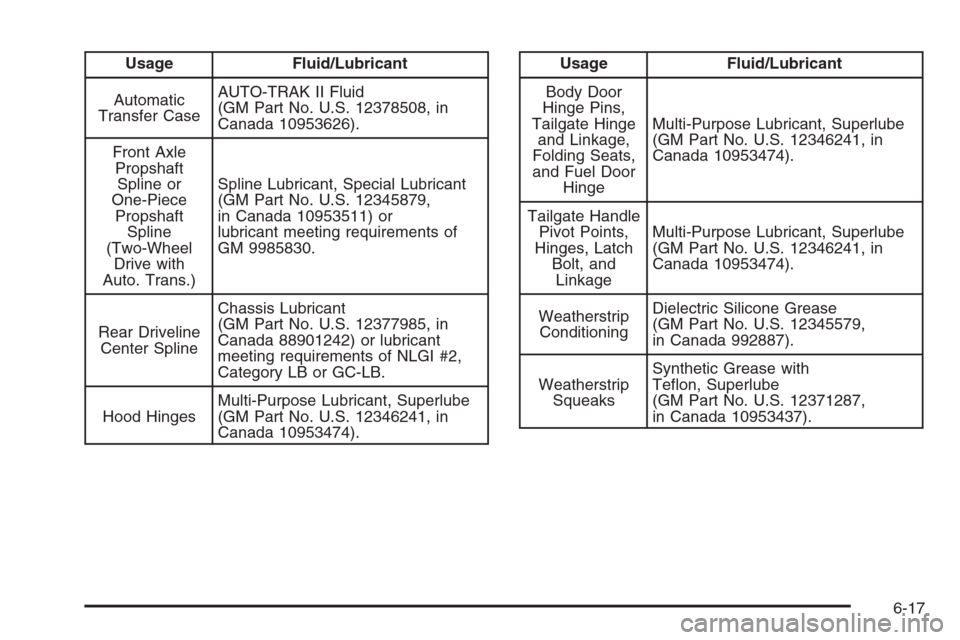
Usage Fluid/Lubricant
Automatic
Transfer CaseAUTO-TRAK II Fluid
(GM Part No. U.S. 12378508, in
Canada 10953626).
Front Axle
Propshaft
Spline or
One-Piece
Propshaft
Spline
(Two-Wheel
Drive with
Auto. Trans.)Spline Lubricant, Special Lubricant
(GM Part No. U.S. 12345879,
in Canada 10953511) or
lubricant meeting requirements of
GM 9985830.
Rear Driveline
Center SplineChassis Lubricant
(GM Part No. U.S. 12377985, in
Canada 88901242) or lubricant
meeting requirements of NLGI #2,
Category LB or GC-LB.
Hood HingesMulti-Purpose Lubricant, Superlube
(GM Part No. U.S. 12346241, in
Canada 10953474).Usage Fluid/Lubricant
Body Door
Hinge Pins,
Tailgate Hinge
and Linkage,
Folding Seats,
and Fuel Door
HingeMulti-Purpose Lubricant, Superlube
(GM Part No. U.S. 12346241, in
Canada 10953474).
Tailgate Handle
Pivot Points,
Hinges, Latch
Bolt, and
LinkageMulti-Purpose Lubricant, Superlube
(GM Part No. U.S. 12346241, in
Canada 10953474).
Weatherstrip
ConditioningDielectric Silicone Grease
(GM Part No. U.S. 12345579,
in Canada 992887).
Weatherstrip
SqueaksSynthetic Grease with
Te�on, Superlube
(GM Part No. U.S. 12371287,
in Canada 10953437).
6-17
Page 587 of 594
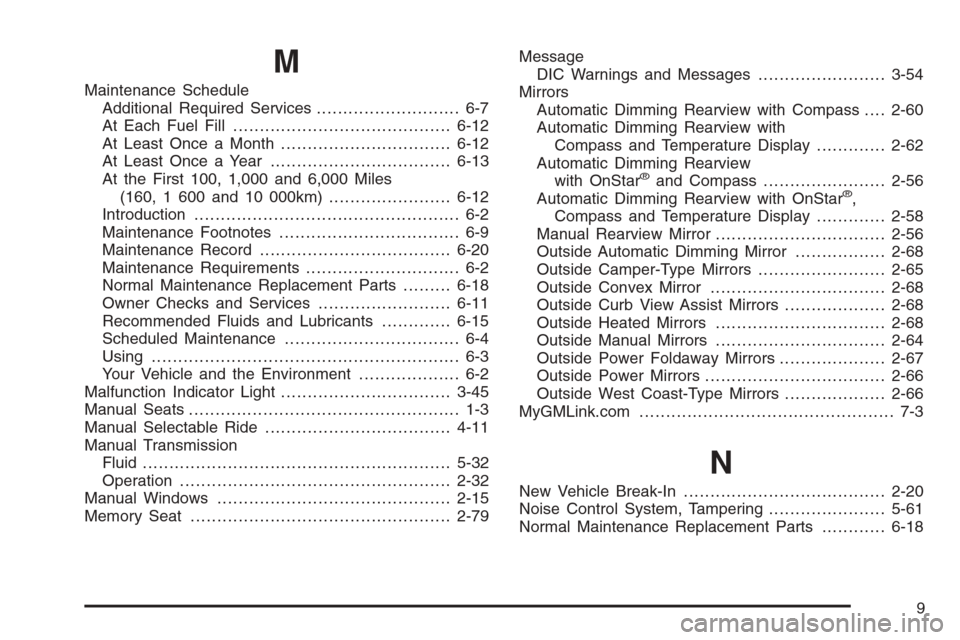
M
Maintenance Schedule
Additional Required Services........................... 6-7
At Each Fuel Fill.........................................6-12
At Least Once a Month................................6-12
At Least Once a Year..................................6-13
At the First 100, 1,000 and 6,000 Miles
(160, 1 600 and 10 000km).......................6-12
Introduction.................................................. 6-2
Maintenance Footnotes.................................. 6-9
Maintenance Record....................................6-20
Maintenance Requirements............................. 6-2
Normal Maintenance Replacement Parts.........6-18
Owner Checks and Services.........................6-11
Recommended Fluids and Lubricants.............6-15
Scheduled Maintenance................................. 6-4
Using.......................................................... 6-3
Your Vehicle and the Environment................... 6-2
Malfunction Indicator Light................................3-45
Manual Seats................................................... 1-3
Manual Selectable Ride...................................4-11
Manual Transmission
Fluid..........................................................5-32
Operation...................................................2-32
Manual Windows............................................2-15
Memory Seat.................................................2-79Message
DIC Warnings and Messages........................3-54
Mirrors
Automatic Dimming Rearview with Compass....2-60
Automatic Dimming Rearview with
Compass and Temperature Display.............2-62
Automatic Dimming Rearview
with OnStar
®and Compass.......................2-56
Automatic Dimming Rearview with OnStar®,
Compass and Temperature Display.............2-58
Manual Rearview Mirror................................2-56
Outside Automatic Dimming Mirror.................2-68
Outside Camper-Type Mirrors........................2-65
Outside Convex Mirror.................................2-68
Outside Curb View Assist Mirrors...................2-68
Outside Heated Mirrors................................2-68
Outside Manual Mirrors................................2-64
Outside Power Foldaway Mirrors....................2-67
Outside Power Mirrors..................................2-66
Outside West Coast-Type Mirrors...................2-66
MyGMLink.com................................................ 7-3
N
New Vehicle Break-In......................................2-20
Noise Control System, Tampering......................5-61
Normal Maintenance Replacement Parts............6-18
9