Page 397 of 594

If your trailer is equipped with electric brakes, you can
get a jumper harness (electric trailer brake control)
with a trailer battery feed fuse from your dealer.
If you need to tow a light-duty trailer with a standard
four-way round pin connector, you can also get an
adapter from your dealer.
Heavy-DutyTrailer Wiring Harness
Package
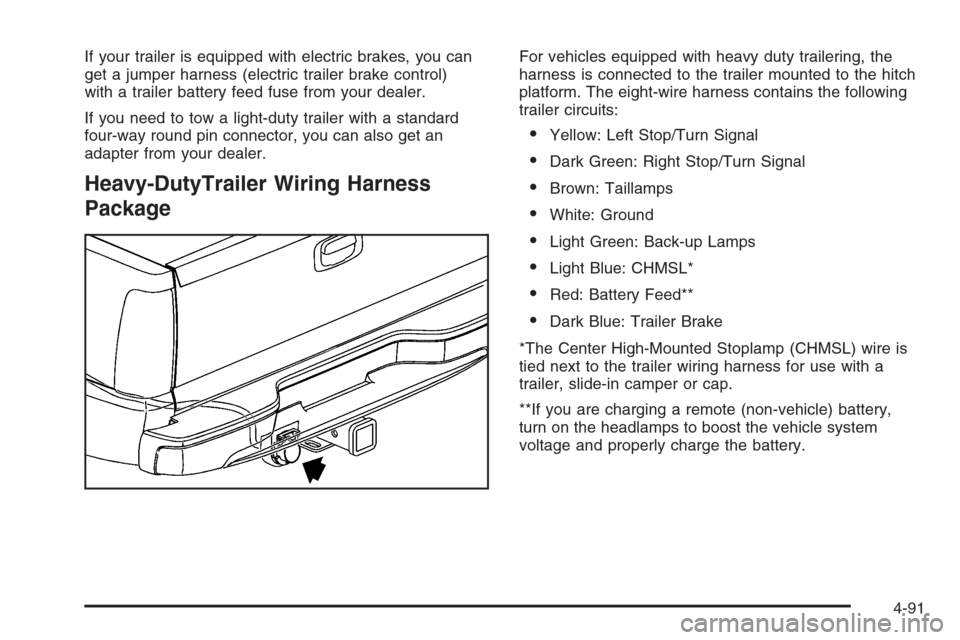
For vehicles equipped with heavy duty trailering, the
harness is connected to the trailer mounted to the hitch
platform. The eight-wire harness contains the following
trailer circuits:
Yellow: Left Stop/Turn Signal
Dark Green: Right Stop/Turn Signal
Brown: Taillamps
White: Ground
Light Green: Back-up Lamps
Light Blue: CHMSL*
Red: Battery Feed**
Dark Blue: Trailer Brake
*The Center High-Mounted Stoplamp (CHMSL) wire is
tied next to the trailer wiring harness for use with a
trailer, slide-in camper or cap.
**If you are charging a remote (non-vehicle) battery,
turn on the headlamps to boost the vehicle system
voltage and properly charge the battery.
4-91
Page 406 of 594

Bulb Replacement..........................................5-62
Halogen Bulbs..............................................5-62
Headlamps..................................................5-62
Front Turn Signal, Sidemarker and Daytime
Running Lamps.........................................5-64
Roof Marker Lamps......................................5-66
Center High-Mounted Stoplamp (CHMSL)
and Cargo Lamp.......................................5-67
Pickup Box Identi�cation and Fender
Marker Lamps...........................................5-69
Taillamps, Turn Signal, Stoplamps and
Back-up Lamps.........................................5-69
License Plate Lamp......................................5-71
Replacement Bulbs.......................................5-72
Windshield Wiper Blade Replacement..............5-73
Tires..............................................................5-74
Tire Sidewall Labeling...................................5-75
Tire Terminology and De�nitions.....................5-78
In�ation - Tire Pressure.................................5-81
Dual Tire Operation.......................................5-83
Tire Inspection and Rotation...........................5-83
When It Is Time for New Tires.......................5-86
Buying New Tires.........................................5-87Different Size Tires and Wheels......................5-88
Uniform Tire Quality Grading..........................5-89
Wheel Alignment and Tire Balance..................5-90
Wheel Replacement......................................5-90
Tire Chains..................................................5-92
If a Tire Goes Flat........................................5-93
Changing a Flat Tire.....................................5-94
Removing the Spare Tire and Tools................5-95
Removing the Flat Tire and Installing
the Spare Tire..........................................5-99
Secondary Latch System..............................5-109
Storing a Flat or Spare Tire and Tools...........5-112
Spare Tire.................................................5-116
Appearance Care..........................................5-116
Cleaning the Inside of Your Vehicle...............5-116
Fabric/Carpet..............................................5-118
Leather......................................................5-118
Instrument Panel, Vinyl, and Other
Plastic Surfaces.......................................5-119
Care of Safety Belts....................................5-119
Weatherstrips.............................................5-119
Washing Your Vehicle..................................5-120
Cleaning Exterior Lamps/Lenses....................5-120
Section 5 Service and Appearance Care
5-2
Page 466 of 594
Bulb Replacement
For the proper type of replacement bulbs, see
Replacement Bulbs on page 5-72.
For any bulb changing procedure not listed in this
section, contact your dealer.
Halogen Bulbs
{CAUTION:
Halogen bulbs have pressurized gas inside
and can burst if you drop or scratch the bulb.
You or others could be injured. Be sure to
read and follow the instructions on the bulb
package.
Headlamps
To replace a headlamp bulb, do the following:
1. Open the hood. SeeHood Release on page 5-13
for more information.
2. Remove the pin on the headlamp assembly by
turning the pin up and pulling it straight out.
5-62
Page 467 of 594
3. Pull the headlamp assembly out.
A. Low-Beam Headlamp
B. High-Beam Headlamp4. Unplug the electrical connector.
5. Turn the old bulb counterclockwise and remove it
from the headlamp assembly.
6. Put the new bulb into the assembly and turn it
clockwise until it is tight.
7. Plug in the electrical connector.
8. Reinstall the headlamp assembly.
9. Install the pin and turn it into the locking feature.
5-63
Page 468 of 594
Front Turn Signal, Sidemarker and
Daytime Running Lamps
To replace a front turn signal, sidemarker, or DRL bulb,
do the following:
1. Remove the headlamp assembly as mentioned
previously. SeeHeadlamps on page 5-62for
more information.
2. Press the retainer clip (arrow), located behind the
turn signal assembly, towards the outside of the
vehicle.3. Pull the turn signal assembly out from the vehicle.
5-64
Page 469 of 594
A. Daytime Running Lamp (DRL)
B. Front Turn Signal/Parking Lamp
C. Sidemarker Lamp
4. Press the locking release lever (the sidemarker
lamp does not have a locking release lever), turn
the bulb socket counterclockwise and remove it from
the turn signal assembly.5. Remove the old bulb from the bulb socket.
6. Install a new bulb into the bulb socket.
7. Reinstall the bulb socket into the turn signal
assembly and turn it clockwise until it locks
(the sidemarker lamps does not lock into place).
8. Reinstall the turn signal assembly back onto the
vehicle placing the hook and posts on the inner
side into the alignment holes �rst and then the outer
side into the retainer bracket. Push until you
hear a click.
9. Reinstall the headlamp assembly back into the
vehicle.
5-65
Page 476 of 594
Replacement Bulbs
Exterior Lamp Bulb Number
Back-up Lamp 3157
Back-up Lamp* 1156
Cargo Lamp and Center
High-Mounted Stoplamp (CHMSL)912
Daytime Running Lamps (DRL) 4114K
Fender Marker, Front Roof
Marker and Sidemarker Lamp
(If Equipped)194
Front Parking and Turn Lamp 3457A
License Plate Lamp 168
Exterior Lamp Bulb Number
Headlamps
High-Beam 9005
Low-Beam 9006
Rear Marker Lamp,
Taillamp and Stoplamp*3157
Rear Turn Signal Lamp 3157
Rear Turn Signal Lamp* 1156
Stoplamp and Taillamp* 1157
* Chassis Cab Models
For replacement bulbs not listed here, contact your
dealer.
5-72
Page 495 of 594

Each new wheel should have the same load-carrying
capacity, diameter, width, offset and be mounted
the same way as the one it replaces.
If you need to replace any of your wheels, wheel bolts
or wheel nuts, replace them only with new GM
original equipment parts. This way, you will be sure to
have the right wheel, wheel bolts and wheel nuts
for your vehicle.
{CAUTION:
Using the wrong replacement wheels, wheel
bolts, or wheel nuts on your vehicle can be
dangerous. It could affect the braking and
handling of your vehicle, make your tires lose
air and make you lose control. You could have
a collision in which you or others could be
injured. Always use the correct wheel, wheel
bolts, and wheel nuts for replacement.
Notice:The wrong wheel can also cause problems
with bearing life, brake cooling, speedometer or
odometer calibration, headlamp aim, bumper height,
vehicle ground clearance, and tire or tire chain
clearance to the body and chassis.Whenever a wheel, wheel bolt or wheel nut is
replaced on a dual wheel setup, check the wheel
nut torque after 100, 1,000 and 6,000 miles
(160, 1 600 and 10 000 km) of driving. For proper
torque, see “Wheel Nut Torque” underCapacities and
Speci�cations on page 5-134.
SeeChanging a Flat Tire on page 5-94for more
information.
Used Replacement Wheels
{CAUTION:
Putting a used wheel on your vehicle is
dangerous. You cannot know how it has been
used or how far it has been driven. It could fail
suddenly and cause a crash. If you have to
replace a wheel, use a new GM original
equipment wheel.
5-91