2006 CHEVROLET SILVERADO ECO mode
[x] Cancel search: ECO modePage 168 of 594
Universal Home Remote System
Operation
Do not use the Universal Home Remote with any
garage door opener that does not have the stop and
reverse feature. This includes any garage door opener
model manufactured before April 1, 1982. If you
have a newer garage door opener with rolling codes,
please be sure to follow Steps 6 through 8 to complete
the programming of your Universal Home Remote
Transmitter.
Read the instructions completely before attempting to
program the Universal Home Remote. Because of
the steps involved, it may be helpful to have another
person available to assist you in the programming steps.
Keep the original hand-held transmitter for use in
other vehicles as well as for future Universal Home
Remote programming. It is also recommended that upon
the sale of the vehicle, the programmed Universal
Home Remote buttons should be erased for security
purposes. See “Erasing Universal Home Remote
Buttons” later in this section or, for assistance, see
Customer Assistance Offices on page 7-4.
Be sure that people and objects are clear of the garage
door or gate operator you are programming. When
programming a garage door, it is advised to park outside
of the garage.It is recommended that a new battery be installed in
your hand-held transmitter for quicker and more
accurate transmission of the radio-frequency signal.Programming Universal Home Remote
Follow these steps to program up to three channels:
1. Press and hold down the two outside Universal
Home Remote buttons, releasing only when the
Universal Home Remote indicator light begins to
�ash, after 20 seconds. Do not hold down the
buttons for longer than 30 seconds and do not repeat
this step to program a second and/or third hand-held
transmitter to the remaining two Universal Home
Remote buttons.
2. Position the end of your hand-held transmitter
about 1 to 3 inches (3 to 8 cm) away from the
Universal Home Remote buttons while keeping the
indicator light in view.
3. Simultaneously press and hold both the desired
Universal Home Remote button and the hand-held
transmitter button. Do not release the buttons
until Step 4 has been completed.
Some entry gates and garage door openers may
require you to substitute Step 3 with the procedure
noted in “Gate Operator and Canadian
Programming” later in this section.
2-72
Page 170 of 594
Gate Operator and Canadian
Programming
Canadian radio-frequency laws require transmitter
signals to time out or quit after several seconds of
transmission. This may not be long enough for Universal
Home Remote to pick up the signal during programming.
Similarly, some U.S. gate operators are manufactured
to time out in the same manner.
If you live in Canada, or you are having difficulty
programming a gate operator or garage door opener by
using the “Programming Universal Home Remote”
procedures, regardless of where you live, replace
Step 3 under “Programming Universal Home Remote”
with the following:
Continue to press and hold the Universal Home Remote
button while you press and release every two seconds
(cycle) the hand-held transmitter button until the
frequency signal has been successfully accepted by the
Universal Home Remote. The Universal Home Remote
indicator light will �ash slowly at �rst and then rapidly.
Proceed with Step 4 under “Programming Universal
Home Remote” to complete.
Using Universal Home Remote
Press and hold the appropriate Universal Home Remote
button for at least half of a second. The indicator light
will come on while the signal is being transmitted.
Erasing Universal Home Remote
Buttons
To erase programming from the three Universal Home
Remote buttons do the following:
1. Press and hold down the two outside buttons until
the indicator light begins to �ash, after 20 seconds.
Do not hold the two outside buttons for longer
than 30 seconds.
2. Release both buttons.
The Universal Home Remote is now in the training
(learning) mode and can be programmed at any time
beginning with Step 2 under “Programming Universal
Home Remote” shown earlier in this section.
Individual buttons cannot be erased, but they can be
reprogrammed. See “Reprogramming a Single Universal
Home Remote Button” following this section.
2-74
Page 183 of 594

To tilt the wheel, hold the steering wheel and pull the
lever. Then move the steering wheel to a comfortable
position and release the lever to lock the wheel in place.
Turn Signal/Multifunction Lever
The lever on the left side of the steering column
includes the following:
GTurn and Lane Change Signals. SeeTurn and
Lane-Change Signals on page 3-7.
53Headlamp High/Low-Beam Changer. See
Headlamp High/Low-Beam Changer on page 3-8.
Flash-to-Pass. SeeFlash-to-Pass on page 3-8.
NWindshield Wipers. SeeWindshield Wipers on
page 3-9.
LWindshield Washer. SeeWindshield Washer
on page 3-9.
ICruise Control. SeeCruise Control on
page 3-10.
For information on the headlamps, seeHeadlamps on
page 3-13.
Turn and Lane-Change Signals
The turn signal has two upward (for right) and
two downward (for left) positions. These positions
allow you to signal a turn or a lane change.
To signal a turn, move the lever all the way up or
down. When the turn is �nished, the lever will return
automatically.
To signal a lane change, raise or lower the lever for
less than one second until the arrow starts to �ash.
This will cause the turn signals to automatically �ash
three times. It will �ash six times if tow-haul mode
is active. Holding the turn signal lever for more than
one second will cause the turn signals to �ash until you
release the lever. The lever will return by itself when
it is released.
3-7
Page 201 of 594

The passenger’s temperature setting can be set to
match the driver’s temperature setting by pressing and
holding the AUTO button for four seconds. Both the
driver and passenger arrows will be displayed.
Automatic Operation
AUTO (Automatic):When automatic operation is
active the system will control the inside temperature,
the air delivery, and the fan speed.
Use the steps below to place the entire system in
automatic mode:
1. Press the AUTO button.
When AUTO is selected, the display will change to
show the current driver’s set temperature, delivery
mode and fan speed. Press the AUTO button again
within �ve seconds to display the passenger’s set
temperature.
If the driver and passenger’s temperature settings
are not the same, the opposite side temperature
setting will be displayed for an additional
�ve seconds. To make the passenger’s temperature
the same as the driver’s press and hold the
AUTO button for about four seconds.
When AUTO is selected, the air conditioning
operation and air inlet will be automatically
controlled. The air conditioning compressor will
run when the outside temperature is over about 40°F
(4°C). The air inlet will normally be set to outside air.If it’s hot outside, the air inlet may automatically
switch to recirculate inside air to help quickly cool
down your vehicle. The light on the button will
illuminate in recirculation.
2. Set the driver’s and passenger’s temperature.
To �nd your comfort setting, start with a 74°F (23°C)
temperature setting and allow about 20 minutes
for the system to regulate. Turn the driver’s or
passenger’s side temperature knob to adjust the
temperature setting as necessary. If you choose the
temperature setting of 60°F (15°C) the system
will remain at the maximum cooling setting. If you
choose the temperature setting of 90°F (32°C)
the system will remain at the maximum heat setting.
Choosing either maximum setting will not cause
the vehicle to heat or cool any faster.
Be careful not to cover the sensor located on the
top of the instrument panel near the windshield. This
sensor regulates air temperature based on sun
load, and also turns on your headlamps.
To avoid blowing cold air in cold weather, the
system will delay turning on the fan until warm air is
available. The length of delay depends on the
engine coolant temperature. Pressing the fan switch
will override this delay and change the fan to a
selected speed.
3-25
Page 203 of 594
When the weather is cool or damp, operating the system
in recirculation for extended periods of time may cause
fogging of the vehicle’s windows. To clear the fog, select
either defog or front defrost.
You may also notice that the A/C compressor will run
while in recirculation mode. This is normal and helps to
prevent fogging.
9(Off):Press this button to turn off the entire climate
control system. Outside air will still enter the vehicle, and
will be directed to the �oor. This direction can be changed
by pressing the mode button. The temperature can also
be adjusted using either temperature knob. Press the up
or down arrows on the fan switch, the defrost button, the
AUTO button, or the air conditioning button to turn the
system on when it is off.
Display
If you press the mode button to select an air delivery
mode, the display will change to show you the selected
air delivery mode. After ten seconds, the display will
change to show the driver temperature setting and the
selected mode.
If you press the up or down arrows on the fan switch,
the display will change to show the selected fan speed.
After ten seconds, the display will change to show
the driver temperature setting and the selected mode.Whenever you press AUTO, the display will change to
show the following:
The current driver’s set temperature and an arrow
for �ve seconds
The current passenger’s set temperature setting
and an arrow for �ve seconds
The automatic air delivery mode and fan speed
If the driver’s and passenger’s temperature settings are
the same when AUTO is pressed, the temperature setting
and both arrows will be displayed for �ve seconds along
with the automatic air delivery mode and fan speed. After
the �ve second update, the display will change to show
the temperature setting, both arrows and AUTO.
Air Conditioning
#
(Air Conditioning):Press this button to turn the
air conditioning (A/C) compressor on and off. The
snow�ake symbol will appear on the display when the
A/C is on and will turn off when the air conditioning is off.
Pressing this button when the outside temperature is
too cool for air conditioning will make the snow�ake
symbol �ash three times and then turn off to let
you know the air conditioning mode is not available.
3-27
Page 208 of 594
Speedometer and Odometer
Your speedometer lets you see your speed in both
miles per hour (mph) and kilometers per hour (km/h).
Your odometer shows how far your vehicle has
been driven, in either miles (used in the United States)
or kilometers (used in Canada).
Engine Hour Meter Display
The Driver Information Center (DIC) can also display
the number of hours the engine has run. To display the
hour meter, turn the ignition off, press and hold the
reset button for at least four seconds. The hour meter
will be displayed for up to 30 seconds, or until the
ignition is turned on. SeeDIC Operation and Displays
on page 3-52for more information.
Trip Odometer
The trip odometer can tell you how far your vehicle has
been driven since you last set the trip odometer to zero.Press the reset button, located on the instrument panel
cluster next to the trip odometer display, to toggle
between the trip odometer and the regular odometer.
Holding the reset button for approximately one second
while the trip odometer is displayed will reset it.
To display the odometer reading with the ignition off,
press the reset button.
SeeDIC Operation and Displays on page 3-52for more
information.
Tachometer
Your tachometer displays the engine speed in
revolutions per minute (rpm). See “Grade Braking
(Allison Transmission
®)” underTow/Haul Mode on
page 2-30for more information.
Notice:If you operate the engine with the
tachometer in the solid red area, your vehicle could
be damaged. The damages would not be covered
by your warranty. Do not operate the engine in
the solid red area.
3-32
Page 215 of 594
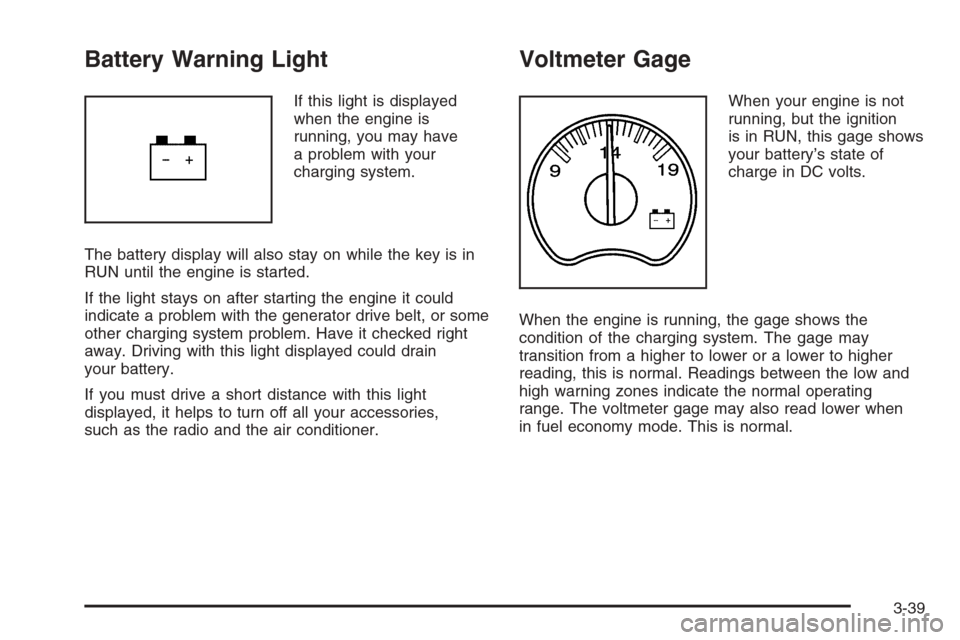
Battery Warning Light
If this light is displayed
when the engine is
running, you may have
a problem with your
charging system.
The battery display will also stay on while the key is in
RUN until the engine is started.
If the light stays on after starting the engine it could
indicate a problem with the generator drive belt, or some
other charging system problem. Have it checked right
away. Driving with this light displayed could drain
your battery.
If you must drive a short distance with this light
displayed, it helps to turn off all your accessories,
such as the radio and the air conditioner.
Voltmeter Gage
When your engine is not
running, but the ignition
is in RUN, this gage shows
your battery’s state of
charge in DC volts.
When the engine is running, the gage shows the
condition of the charging system. The gage may
transition from a higher to lower or a lower to higher
reading, this is normal. Readings between the low and
high warning zones indicate the normal operating
range. The voltmeter gage may also read lower when
in fuel economy mode. This is normal.
3-39
Page 216 of 594

Readings in the low warning zone may occur when a
large number of electrical accessories are operating in
the vehicle and the engine is left at an idle for an
extended period. This condition is normal since the
charging system is not able to provide full power
at engine idle. As engine speeds are increased, this
condition should correct itself as higher engine speeds
allow the charging system to create maximum power.
You can only drive for a short time with the reading
in either warning zone. If you must drive, turn off
all unnecessary accessories.
Readings in either warning zone indicate a possible
problem in the electrical system. Have the vehicle
serviced as soon as possible.Up-Shift Light
(Manual Transmission)
This light is used on some
models with manual
transmissions.
The shift indicator light will show you when to shift to
the next highest gear, and will help you get the best fuel
economy.
3-40