2006 CHEVROLET SILVERADO service
[x] Cancel search: servicePage 103 of 594

To replace the battery in the keyless entry transmitter,
do the following:
1. Insert a thin object, such as a coin, in the slot
between the covers of the transmitter housing
near the key ring hole. Remove the bottom
by twisting the coin.
2. Remove and replace the battery with a
three-volt CR2032 or equivalent battery,
positive (+) side up.3. Align the covers and snap them together.
4. Resynchronize the transmitter. See
“Resynchronization” following this information.
5. Check the operation of the transmitter.
Resynchronization
Resynchronization may be necessary due to the
security method used by this system. The transmitter
does not send the same signal twice to the receiver.
The receiver will not respond to a signal that has been
sent previously. This prevents anyone from recording
and playing back the signal from the transmitter.
To resynchronize your transmitter, stand close to your
vehicle and press and hold the lock and unlock
buttons on the transmitter at the same time for
15 seconds. The door locks should cycle to con�rm
synchronization. If the locks do not cycle, see your
dealer for service.
2-7
Page 115 of 594
If you set off the alarm by accident, turn off the alarm by
pressing unlock on the remote keyless entry transmitter
or by placing the key in the ignition and turning it
to START.
Testing the Alarm
The alarm can be tested by following these steps:
1. From inside the vehicle, lower the driver’s window
and open the driver’s door.
2. Activate the system by locking the doors with the
RKE transmitter.
3. Get out of the vehicle, close the door and wait for
the security light to go out.
4. Then reach in through the window, unlock the door
with the manual door lock and open the door. This
should set off the alarm.
If the alarm does not sound when it should, but the
vehicle’s headlamps �ash, check to see if the horn
works. The horn fuse may be blown. To replace the
fuse, seeFuses and Circuit Breakers on page 5-126.
If the alarm does not sound or the vehicle’s headlamps
do not �ash, see your dealer for service.
Passlock®
Your vehicle is equipped with the
Passlock®theft-deterrent system.
Passlock
®is a passive theft-deterrent system.
Passlock®enables fuel if the ignition lock cylinder is
turned with a valid key. If a correct key is not used or the
ignition lock cylinder is tampered with, fuel is disabled.
If the engine stalls and the security light �ashes,
wait until the light stops �ashing before trying to restart
the engine. Remember to release the key from
START as soon as the engine starts.
If the engine is running and the security light comes on,
you will be able to restart the engine if you turn the
engine off. However, your Passlock
®system is
not working properly and must be serviced by your
dealer. Your vehicle is not protected by Passlock
®at this
time. You may also want to check the fuse. See
Fuses and Circuit Breakers on page 5-126. See your
dealer for service.
In an emergency, call the GM Roadside Assistance
Center. SeeRoadside Assistance Program on page 7-6.
2-19
Page 116 of 594
Starting and Operating
Your Vehicle
New Vehicle Break-In
Notice:Your vehicle does not need an elaborate
break-in. But it will perform better in the long run if
you follow these guidelines:
Keep your speed at 55 mph (88 km/h) or less for
the �rst 500 miles (805 km).
Do not drive at any one constant speed, fast or
slow, for the �rst 500 miles (805 km). Do not
make full-throttle starts. Avoid downshifting to
brake, or slow, the vehicle.
Avoid making hard stops for the �rst 200 miles
(322 km) or so. During this time your new brake
linings are not yet broken in. Hard stops with new
linings can mean premature wear and earlier
replacement. Follow this breaking-in guideline
every time you get new brake linings.
Do not tow a trailer during break-in. SeeTowing
a Trailer on page 4-67for the trailer towing
capabilities of your vehicle and more
information.
Following break-in, engine speed and load can be
gradually increased.
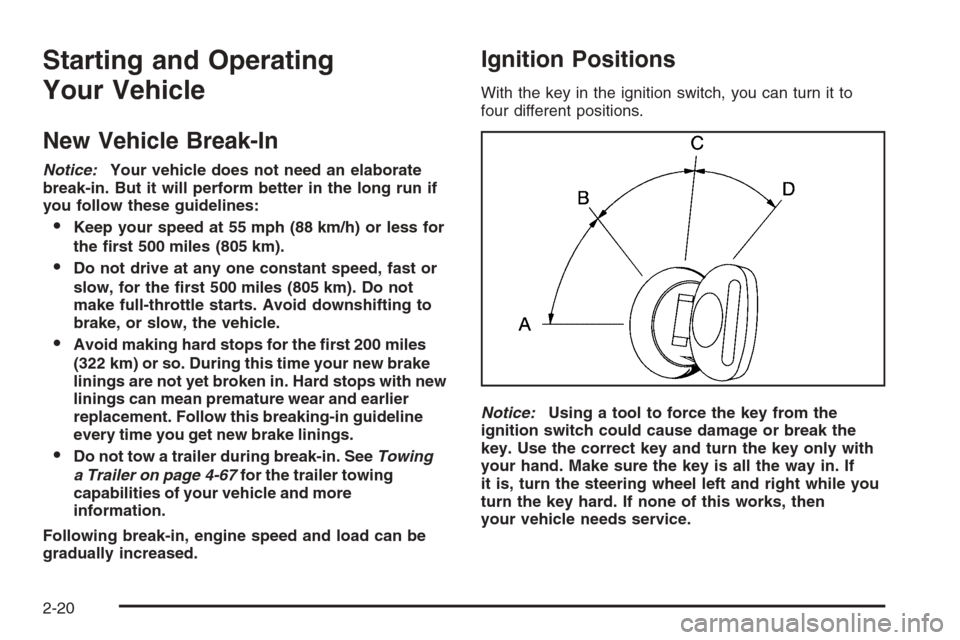
Ignition Positions
With the key in the ignition switch, you can turn it to
four different positions.
Notice:Using a tool to force the key from the
ignition switch could cause damage or break the
key. Use the correct key and turn the key only with
your hand. Make sure the key is all the way in. If
it is, turn the steering wheel left and right while you
turn the key hard. If none of this works, then
your vehicle needs service.
2-20
Page 137 of 594

When the vehicle detects a loss of traction, the system
will automatically engage four-wheel drive. Driving in
this mode results in slightly lower fuel economy
than Two-Wheel High.
2
m(Two-Wheel High):This setting is used for driving
in most street and highway situations. Your front axle
is not engaged in two-wheel drive. This setting also
provides the best fuel economy.
{CAUTION:
Shifting the transfer case to NEUTRAL
can cause your vehicle to roll even if the
transmission is in PARK (P). You or someone
else could be seriously injured. Be sure to set
the parking brake before placing the transfer
case in NEUTRAL. SeeParking Brake on
page 2-49.
N (NEUTRAL):Shift the vehicle’s transfer case to
N (NEUTRAL) only when towing your vehicle.
SeeRecreational Vehicle Towing on page 4-62or
Towing Your Vehicle on page 4-61for more information.4
m(Four-Wheel High):Use this setting when you
need extra traction, such a on snowy or icy roads or in
most off-road situations. This setting also engages
your front axle to help drive your vehicle. This is the best
setting to use when plowing snow.
4
n(Four-Wheel Low):This setting also engages
your front axle and delivers extra torque. You may never
need Four-Wheel Low. It sends maximum power to all
four wheels. You might choose Four-Wheel Low if
you are driving off-road in deep sand, deep mud, deep
snow, and while climbing or descending steep hills.
When operating in Four-Wheel Low, the gear ratio
provides additional torque when compared to
four-wheel high. The transmission gear shift feel will
be exaggerated.
Indicator lights in the switches show which setting your
transfer case is in. The indicator lights will come on
brie�y when you turn on the ignition and one will stay on.
If the lights do not come on, you should take your
vehicle to your dealer for service. An indicator light will
�ash while the transfer case is being shifted. It will
stay on when the shift is complete. If for some reason
the transfer case cannot make a requested shift, it
will return to the last chosen setting.
If the SERVICE 4WD message stays on, you should
take your vehicle to your dealer for service. See
DIC Warnings and Messages on page 3-54for further
information.
2-41
Page 142 of 594

4m(Four-Wheel High):This setting engages your
front axle to help drive your vehicle. Use four-wheel high
when you need extra traction, such as on snowy or
icy roads, or in most off-road situations.
4
n(Four-Wheel Low):This setting also engages
your front axle to give you extra traction. You may never
need Four-Wheel Low. It sends the maximum power
to all four wheels. You might choose Four-Wheel Low if
you were driving off-road in sand, mud or deep snow
and while climbing or descending steep hills. When
operating in Four-Wheel Low, the gear ratio provides
additional torque when compared to Four-Wheel
High. The transmission gear shift feel will be
exaggerated.
Indicator lights in the switches show you which setting
you are in. The indicator lights will come on brie�y when
you turn on the ignition and the last chosen setting
will stay on. If the lights do not come on, you should take
your vehicle in for service. An indicator light will �ash
while shifting. Fast �ashing means the conditions
were not met to make the desired shift, typically the
vehicle was going too fast, the automatic transmission
was not in neutral, or the clutch pedal was not fully
pressed. Slow �ashing means the shift is in progress.
It will stay on when the shift is completed. If for
some reason the transfer cannot make a requested
shift, it will return to the last chosen setting.
Shifting from Two-Wheel High to
Four-Wheel High
Press and release the Four-Wheel High switch. This
can be done at any speed, and the front axle will lock
automatically with some delay.
Shifting from Four-Wheel High to
Two-Wheel High
Press and release the Two-Wheel High switch. This can
be done at any speed, and the front axle will unlock
automatically with some delay.
It is normal to hear and feel your vehicle’s transfer case
shift into Four-Wheel Low. If you shift with the vehicle
stopped, the indicator light may remain �ashing slowly. It
may be necessary to shift the transmission momentarily
into REVERSE (R) and DRIVE (D), for an automatic
transmission, or REVERSE (R) and FIRST (1) for
a manual transmission to have the light stop �ashing.
2-46
Page 152 of 594
Mirrors
Manual Rearview Mirror
Pull or push the tab under the inside rearview mirror
to adjust it to the night or daytime setting. In the
nighttime setting, the glare from headlamps behind the
vehicle will be less intense.
Automatic Dimming Rearview Mirror
with OnStar
®and Compass
Your vehicle may have an automatic-dimming rearview
mirror with a compass and the OnStar®system.
There are three additional buttons for the OnStar
®
system. See your dealer for more information on the
system and how to subscribe to OnStar®. SeeOnStar®
System on page 2-69for more information about the
services OnStar®provides.
Mirror Operation
When turned on, this mirror automatically dims to the
proper level to minimize glare from any headlamps
behind you after dark.
O(On/Off): This is the on/off button for the automatic
dimming feature and compass. Press the far left button,
located below the mirror face, for up to three seconds
to turn the feature on and off. A light on the mirror will be
lit while the feature is turned on.
Compass Operation
Press the on/off button once to turn the compass on
or off.
There is a compass display in the window in the upper
right corner of the mirror face. The compass displays
a maximum of two characters. For example, “NE”
is displayed for north-east.
Compass Calibration
Press and hold the on/off button down for nine seconds
to activate the compass calibration mode. CAL will
be displayed in the compass window on the mirror.
The compass can be calibrated by driving the vehicle in
circles at 5 mph (8 km/h) or less until the display
reads a direction.
2-56
Page 165 of 594
OnStar®System
OnStar®uses several innovative technologies and live
advisors to provide you with a wide range of safety,
security, information, and convenience services. If your
airbags deploy, the system is designed to make an
automatic call to OnStar
®Emergency where we
can request emergency services be sent to your
location. If you lock your keys in the car, call OnStar
®
at 1-888-4-ONSTAR and they can send a signal to
unlock your doors. If you need roadside assistance,
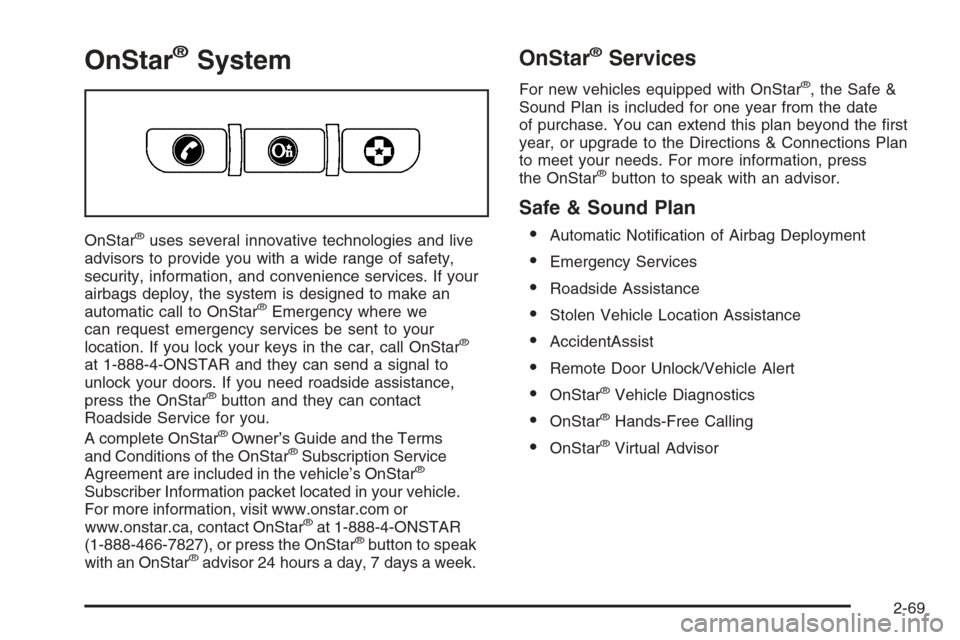
press the OnStar
®button and they can contact
Roadside Service for you.
A complete OnStar
®Owner’s Guide and the Terms
and Conditions of the OnStar®Subscription Service
Agreement are included in the vehicle’s OnStar®
Subscriber Information packet located in your vehicle.
For more information, visit www.onstar.com or
www.onstar.ca, contact OnStar
®at 1-888-4-ONSTAR
(1-888-466-7827), or press the OnStar®button to speak
with an OnStar®advisor 24 hours a day, 7 days a week.
OnStar®Services
For new vehicles equipped with OnStar®, the Safe &
Sound Plan is included for one year from the date
of purchase. You can extend this plan beyond the �rst
year, or upgrade to the Directions & Connections Plan
to meet your needs. For more information, press
the OnStar
®button to speak with an advisor.
Safe & Sound Plan
Automatic Noti�cation of Airbag Deployment
Emergency Services
Roadside Assistance
Stolen Vehicle Location Assistance
AccidentAssist
Remote Door Unlock/Vehicle Alert
OnStar®Vehicle Diagnostics
OnStar®Hands-Free Calling
OnStar®Virtual Advisor
2-69
Page 166 of 594
Directions & Connections®Plan
All Safe & Sound Plan Services
Driving Directions
RideAssist
Information and Convenience Services
OnStar®Hands-Free Calling
OnStar®Hands-Free Calling allows OnStar®subscribers
to make and receive calls using voice commands at
the touch of a button. Hands-Free Calling is fully
integrated into the vehicle, and may be used with
Pre-Paid Packages or linked to a cell phone through
OnStar
®Shared Minutes Plan. To �nd out more, refer to
the OnStar®Owner’s Guide in the vehicle’s glove
box, visit www.onstar.com or www.onstar.ca, or speak
with an OnStar
®advisor by pressing the OnStar®button
or calling 1-888-4-ONSTAR (1-888-466-7827).
OnStar®Virtual Advisor
Your vehicle may have Virtual Advisor. It is a feature of
OnStar®Hands-Free Calling that uses your minutes
to access weather, local traffic reports, and stock quotes.
By pressing the phone button and giving a few simple
voice commands, you can browse through the
various topics. Customize your information pro�le at
www.myonstar.com. See the OnStar
®Owner’s Guide for
more information.
OnStar®Steering Wheel Controls
Your vehicle may be
equipped with a Talk/Mute
button that can be used
to interact with OnStar
®.
See the Audio Steering
Wheel Control section for
your speci�c vehicle
operation.
When calling into voice mail systems, or to dial directory
numbers, press this button once, wait for the response,
say the number(s) to be dialed, wait for the number(s)
to be repeated and then say “dial”. See the OnStar
®
Owner’s Guide for more information.
2-70