2006 CHEVROLET MALIBU lock
[x] Cancel search: lockPage 152 of 442
Front Reading Lamps
Push the lens to turn the reading lamps on and off.
The reading lamps will turn on when the door is open
if the dome lamp is in the door position. The reading
lamps will also turn on with the dome lamp switch in
the on position. The lamps will not turn on if the door is
open and the dome lamp is in the off position.
Rear Reading Lamps
The vehicle’s dome lamp may have two reading
lamps. The reading lamps turn on and off by pushing
on the lens.
Trunk Lamp
The trunk lamp comes on when you open your trunk.
Cargo Lamp
If your vehicle is the MAXX model, it has a cargo lamp.
The cargo lamp comes on when the liftgate is opened.
If you want to leave the liftgate open you can turn off
the cargo lamp by pushing on the lens.
Battery Run-Down Protection
Your vehicle has a battery run-down protection feature
designed to protect your vehicle’s battery.
When any interior lamp (trunk, reading, or visor vanity)
is left on while the ignition is turned off, the battery
run-down protection system will automatically shut the
lamp(s) off after 20 minutes. This will avoid draining
the battery.
To reactivate the interior lamps, do one of the following:
Turn on the ignition.
Turn the exterior lamp control off and then on.
Open a door.
Press any remote keyless entry transmitter button
(if equipped).
Press the remote trunk release button.
Press the power door lock switch.
The battery run-down feature will also be activated
when any door on the vehicle is left open and the
ignition is in OFF.
3-20
Page 154 of 442
Cigarette Lighter
Your vehicle may have a cigarette lighter. To use the
lighter, located on the instrument panel below the
climate controls, push it in all the way and let go.
When it is ready, it will pop back out by itself.
Notice:Holding a cigarette lighter in while it is
heating will not allow the lighter to back away from
the heating element when it is hot. Damage from
overheating may occur to the lighter or heating
element, or a fuse could be blown. Do not hold a
cigarette lighter in while it is heating.
Notice:If you put papers, pins, or other �ammable
items in the ashtray, hot cigarettes or other
smoking materials could ignite them and possibly
damage your vehicle. Never put �ammable items in
the ashtray.
Climate Controls
Climate Control System
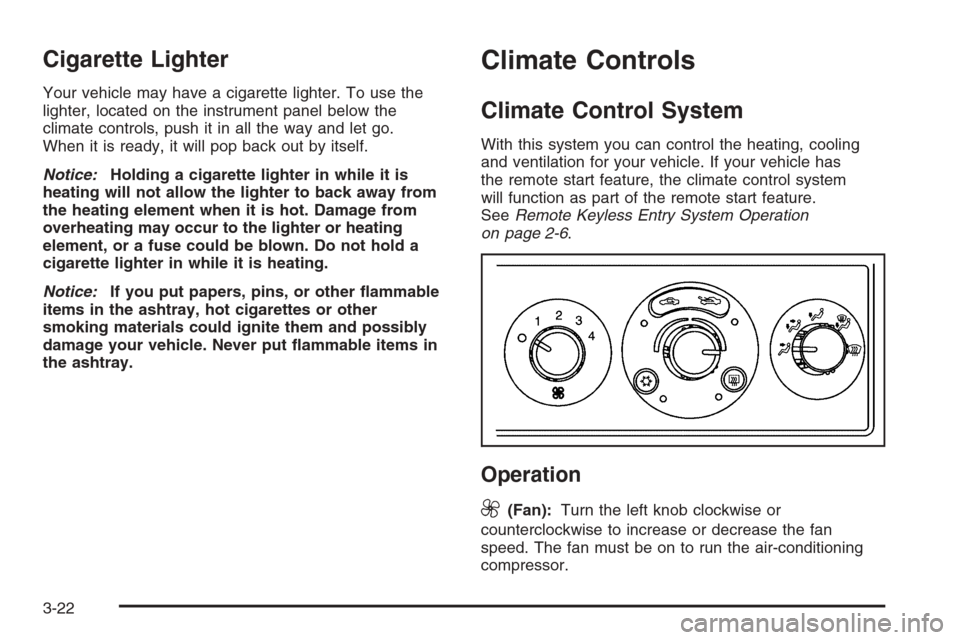
With this system you can control the heating, cooling
and ventilation for your vehicle. If your vehicle has
the remote start feature, the climate control system
will function as part of the remote start feature.
SeeRemote Keyless Entry System Operation
on page 2-6.
Operation
9
(Fan):Turn the left knob clockwise or
counterclockwise to increase or decrease the fan
speed. The fan must be on to run the air-conditioning
compressor.
3-22
Page 156 of 442
Temperature Control:Turn the center knob clockwise
or counterclockwise to increase or decrease the
temperature inside your vehicle.
When it’s cold outside 0°F (−18°C) or lower, use the
engine coolant heater, if equipped, to provide warmer air
faster to your vehicle. An engine coolant heater warms
the coolant that the engine uses to provide heat to
warm the inside of your vehicle. For more information,
seeEngine Coolant Heater on page 2-26.
#(Air Conditioning):Press this button to turn the air
conditioning system on or off. When the air conditioning
button is pressed, an indicator light will come on to
let you know that air conditioning is activated.
On hot days, open the windows to let hot inside air
escape; then close them. This helps to reduce the
time it takes for your vehicle to cool down. It also
helps the system to operate more efficiently.For quick cool down on hot days, do the following:
1. Select the vent mode.
2. Select the highest fan speed.
3. Select air conditioning.
4. Select the recirculation mode.
5. Select the coolest temperature.
Using these settings together for long periods of time
may cause the air inside of your vehicle to become too
dry. To prevent this from happening, after the air in
your vehicle has cooled, turn the recirculation mode off.
The air-conditioning system removes moisture from
the air, so you may sometimes notice a small amount
of water dripping underneath your vehicle while idling
or after turning off the engine. This is normal.
3-24
Page 163 of 442
If your vehicle has the remote start feature, the rear
defogger and heated mirrors will automatically be
turned on if it is cold outside. The indicator light will
not be on. When the vehicle transitions out of remote
start mode the rear defogger and heated mirrors will
turn off.
Notice:Do not use a razor blade or sharp object
to clear the inside rear window. Do not adhere
anything to the defogger grid lines in the rear glass.
These actions may damage the rear defogger.
Repairs would not be covered by your warranty.
Outlet Adjustment
Use the thumbwheels on the air outlets, located on the
center and on the sides of the instrument panel, to
change the horizontal direction of the air�ow. Use the
tabs on the outlet vanes to change the vertical direction
of the air�ow. Use the tabs on the outlet vanes to
shut off air�ow to the outlets.
The two upper outlets in the center of the instrument
panel are dedicated to the rear seats. These outlets
are �xed to aim air�ow into the rear seats to help
cool the rear occupants in hot weather. Air�ow can
be shut off at the upper outlets by turning the vertical
thumbwheel. The louvers are �xed, do not attempt
to move them or they may break.
Operation Tips
Clear away any ice, snow or leaves from the air
inlets at the base of the windshield that may
block the �ow of air into your vehicle.
Use of non-GM approved hood de�ectors may
adversely affect performance of the system.
Keep the path under the front seats clear of objects
to help circulate the air inside of your vehicle more
effectively.
When an objectionable odor outside the vehicle
is encountered, use the recirculation mode, with
the temperature knob at a comfortable setting
to prevent the odor from entering the vehicle
through the ventilation system. This can be helpful
when driving through a long tunnel with poor
ventilation. However, extended usage of this
mode in cold or cool weather can cause window
fogging.
3-31
Page 169 of 442
The Driver Information Center (DIC) may display a
BRAKE FLUID message. SeeDIC Warnings and
Messages on page 3-50for more information.
If the light comes on while you are driving, pull off the
road and stop carefully. You may notice that the pedal
is harder to push or the pedal may go closer to the
�oor. It may take longer to stop. Try turning off
and restarting the vehicle one or two times, if the
light is still on, have the vehicle towed for service.
SeeTowing Your Vehicle on page 4-39.
{CAUTION:
Your brake system may not be working
properly if the brake system warning light is
on. Driving with the brake system warning light
on can lead to an accident. If the light is still
on after you have pulled off the road and
stopped carefully, have the vehicle towed
for service.
Anti-Lock Brake System
Warning Light
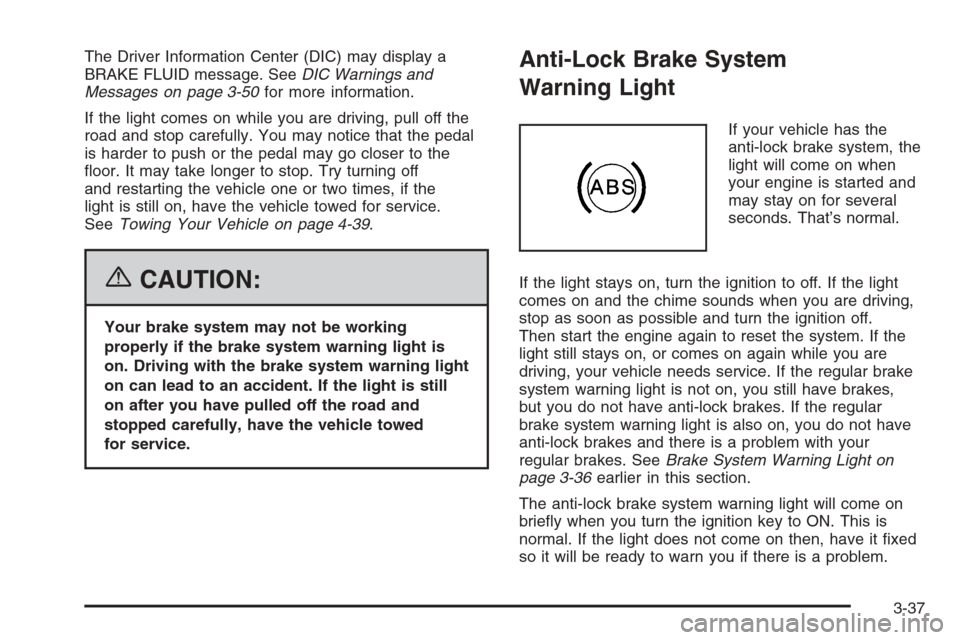
If your vehicle has the
anti-lock brake system, the
light will come on when
your engine is started and
may stay on for several
seconds. That’s normal.
If the light stays on, turn the ignition to off. If the light
comes on and the chime sounds when you are driving,
stop as soon as possible and turn the ignition off.
Then start the engine again to reset the system. If the
light still stays on, or comes on again while you are
driving, your vehicle needs service. If the regular brake
system warning light is not on, you still have brakes,
but you do not have anti-lock brakes. If the regular
brake system warning light is also on, you do not have
anti-lock brakes and there is a problem with your
regular brakes. SeeBrake System Warning Light on
page 3-36earlier in this section.
The anti-lock brake system warning light will come on
brie�y when you turn the ignition key to ON. This is
normal. If the light does not come on then, have it �xed
so it will be ready to warn you if there is a problem.
3-37
Page 181 of 442
Always reset the engine oil life system after an oil
change. SeeEngine Oil Life System on page 5-20.
In addition to the engine oil life system monitoring the oil
life, additional maintenance is recommended in the
Maintenance Schedule in this manual. SeeScheduled
Maintenance on page 6-4andEngine Oil on page 5-17.
Personalization
MENU:Press this button while the vehicle is in ON
to scroll through each of the personalization options
in the following order. If the vehicle is moving faster
than 2 mph (3 km/h), the personalization menu options
are not available, except for the UNITS option. All of
the personalization options may not be available
on your vehicle. Only the options available will be
displayed on your DIC.
Units Selection (English/Metric)
Oil Life Reset
Remote Start Capability
Horn Chirp During Remote Keyless Entry Locking
Horn Chirp During Remote Keyless Entry Unlocking
Exterior Light Flash During Remote Keyless
Entry Locking or Unlocking
Delayed Locking
Automatic Vehicle Unlocking: Speci�c Doors
Automatic Vehicle Unlocking: When Key is Off or
When Shift To Park
Exterior Perimeter Lighting During Remote Keyless
Entry Unlock
Select Language: (English, French, Spanish or
German)
When the desired option is reached, press the enter
button to toggle between the modes of that option.
To make a selection, press the MENU button again.
If no selection is made within 10 seconds, the display
will revert back to the previous information displayed.
The MENU mode is exited when the information button
is pressed, a 10 second time period has elapsed,
the ignition is turned to OFF, or the end of the MENU
list is reached.
SeeDIC Vehicle Personalization on page 3-52for
more information on the personalization options.
Enter
ENTER/r(Enter):Press this button to reset certain
functions and to turn off or acknowledge messages
on the DIC display. This button also toggles through
the options available in each personalization menu.
3-49
Page 184 of 442
DIC Vehicle Personalization
The following personalization options may appear on
your vehicle’s audio display by pressing the MENU
button:
UNITS:When UNITS appears on the display, press the
enter button to move between METRIC or ENGLISH.
When you have made your choice, press the MENU
button to record your selection. The initial setting from
the factory is English for the United States and metric
for Canada.
If you choose English, all information will be displayed
in English units. For example, distance in miles (mi) and
fuel economy in miles per gallon (mpg) is displayed.
If you choose metric, all information will be displayed in
metric units. For example, distance in kilometers
(km) and fuel economy in liters per 100 kilometers
(L/100 km) is displayed.
The unit measurement will also change the trip
odometer, temperature, and average fuel economy
displays.
OIL LIFE RESET:When this option is displayed, you
can reset the engine oil life system. To reset the system,
seeEngine Oil Life System on page 5-20.
REMOTE START:If your vehicle has this feature, the
remote start option can be enabled or disabled.When REMOTE START appears on the display, press
the enter button to move between OFF and ON.
When you have made your choice, press the MENU
button to record your selection. The initial setting from
the factory is ON.
LOCK HORN:If your vehicle has remote keyless entry,
this option which allows the vehicle’s horn to chirp
every time the lock button on the remote keyless entry
transmitter is pressed, can be enabled or disabled.
When LOCK HORN appears on the display, press the
enter button to move between ON and OFF. When
you have made your choice, press the MENU button to
record your selection. The initial setting from the
factory is OFF.
UNLOCK HORN:If your vehicle has remote keyless
entry, this option which allows the vehicle’s horn to chirp
every time the unlock button on the remote keyless
entry transmitter is pressed, can be enabled or disabled.
When UNLOCK HORN appears on the display, press
the enter button to move between ON and OFF.
When you have made your choice, press the MENU
button to record your selection. The initial setting from
the factory is OFF.
LIGHT FLASH:If your vehicle has remote keyless entry,
this option which allows the vehicle’s exterior perimeter
lighting to �ash every time the lock or unlock button on
the remote keyless entry transmitter is pressed, can be
enabled or disabled.
3-52
Page 185 of 442
When LIGHT FLASH appears on the display, press the
enter button to move between OFF and ON. When you
have made your choice, press the MENU button to record
your selection. The initial setting from the factory is ON.
DELAY LOCK:The delayed locking option, which
delays the actual locking of the vehicle, can be enabled
or disabled. When DELAY LOCK appears on the
display, press the enter button to move between OFF
and ON. When you have made your choice, press
the MENU button to record your selection. The initial
setting from the factory is ON.
AUTO UNLK (Unlock):The automatic door unlocking
option, which allows the vehicle to automatically
unlock certain doors can be enabled or disabled. When
AUTO UNLK appears on the display, press the enter
button to move between ALL, DRIVER, or NONE. When
you have made your choice, press and the MENU
button to record your selection. The initial setting from
the factory is ALL. SeeProgrammable Automatic
Door Locks on page 2-13for more information.
UNLK (Unlock):This screen displays only if DRIVER
or ALL is selected for the AUTO UNLK option. This
option determines when the automatic door unlocking
will occur, when either the key is turned to OFF or
the vehicle is shifted into PARK (P). When UNLK
appears on the display, press the enter button to
move between KEY OFF and SHIFT TO P (Park).When you have made your choice, press the MENU
button to record your selection. The initial setting from
the factory is SHIFT TO P (Park). SeeProgrammable
Automatic Door Locks on page 2-13for more
information.
EXT (Exterior) LIGHTS:If your vehicle has remote
keyless entry, this option, which allows the vehicle’s
exterior perimeter lighting to turn on each time the
unlock button on the remote keyless entry transmitter
is pressed, can be enabled or disabled. When
EXT LIGHTS appears on the display, press the enter
button to move between ON and OFF. When you have
made your choice, press the MENU button to record
your selection. The initial setting from the factory is ON.
LANGUAGE:To select your choice of language,
press the enter button to move between the optional
languages.
The languages are ENGLISH, FRENCH, SPANISH,
and GERMAN.
Choosing a language will display all of the information
on the DIC in the desired language.
When you have made your choice, press the MENU
button for at least one second to record your selection.
The initial setting from the factory is ENGLISH.
3-53