2006 CHEVROLET MALIBU shift
[x] Cancel search: shiftPage 137 of 442
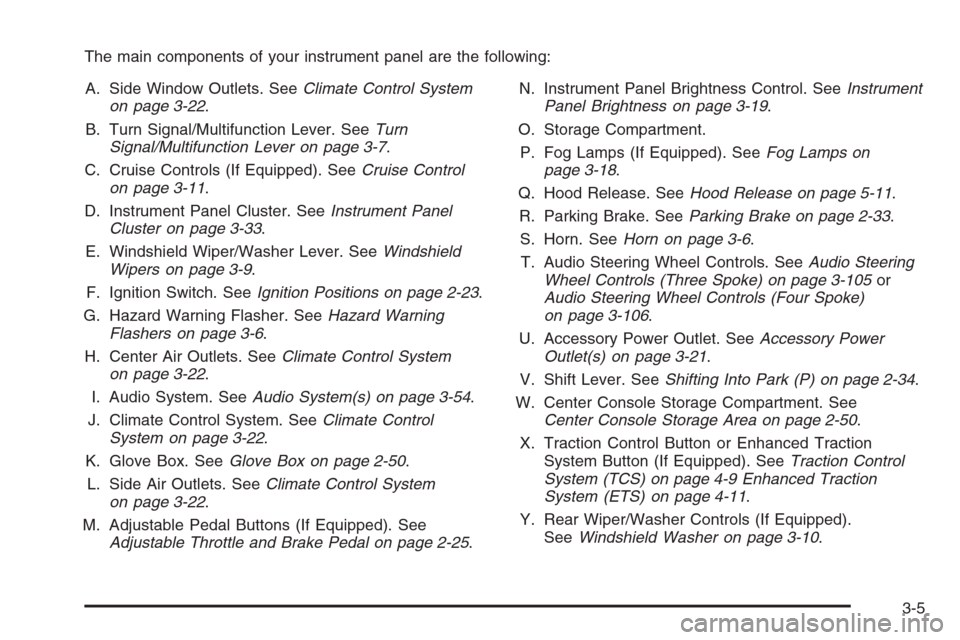
The main components of your instrument panel are the following:
A. Side Window Outlets. SeeClimate Control System
on page 3-22.
B. Turn Signal/Multifunction Lever. SeeTurn
Signal/Multifunction Lever on page 3-7.
C. Cruise Controls (If Equipped). SeeCruise Control
on page 3-11.
D. Instrument Panel Cluster. SeeInstrument Panel
Cluster on page 3-33.
E. Windshield Wiper/Washer Lever. SeeWindshield
Wipers on page 3-9.
F. Ignition Switch. SeeIgnition Positions on page 2-23.
G. Hazard Warning Flasher. SeeHazard Warning
Flashers on page 3-6.
H. Center Air Outlets. SeeClimate Control System
on page 3-22.
I. Audio System. SeeAudio System(s) on page 3-54.
J. Climate Control System. SeeClimate Control
System on page 3-22.
K. Glove Box. SeeGlove Box on page 2-50.
L. Side Air Outlets. SeeClimate Control System
on page 3-22.
M. Adjustable Pedal Buttons (If Equipped). See
Adjustable Throttle and Brake Pedal on page 2-25.N. Instrument Panel Brightness Control. SeeInstrument
Panel Brightness on page 3-19.
O. Storage Compartment.
P. Fog Lamps (If Equipped). SeeFog Lamps on
page 3-18.
Q. Hood Release. SeeHood Release on page 5-11.
R. Parking Brake. SeeParking Brake on page 2-33.
S. Horn. SeeHorn on page 3-6.
T. Audio Steering Wheel Controls. SeeAudio Steering
Wheel Controls (Three Spoke) on page 3-105or
Audio Steering Wheel Controls (Four Spoke)
on page 3-106.
U. Accessory Power Outlet. SeeAccessory Power
Outlet(s) on page 3-21.
V. Shift Lever. SeeShifting Into Park (P) on page 2-34.
W. Center Console Storage Compartment. See
Center Console Storage Area on page 2-50.
X. Traction Control Button or Enhanced Traction
System Button (If Equipped). SeeTraction Control
System (TCS) on page 4-9 Enhanced Traction
System (ETS) on page 4-11.
Y. Rear Wiper/Washer Controls (If Equipped).
SeeWindshield Washer on page 3-10.
3-5
Page 145 of 442
Resuming a Set Speed
Suppose you set your cruise control at a desired
speed and then you apply the brake. This shuts off
the cruise control. But you don’t need to reset it.
Once you are driving about 25 mph (40 km/h) or
more, press the RES+ button on your steering wheel.
The vehicle will go back to your chosen speed and
stay there.
Increasing Speed While Using
Cruise Control
There are two ways to go to a higher speed.
If the cruise control system is already engaged, press
the RES+ symbol. Hold it there until you get up to the
speed you want, and then release the button.
To increase your speed in very small amounts,
press the RES+ symbol brie�y and then release it.
Each time you do this, your vehicle will go about
1 mph (1.6 km/h) faster.
Reducing Speed While Using
Cruise Control
To reduce your speed while using cruise control:
Press and hold the set button on the steering wheel
until you reach the lower speed you want, then
release it.
To slow down in very small amounts, press the set
button on the steering wheel brie�y. Each time you
do this, you’ll go about 1 mph (1.6 km/h) slower.
Passing Another Vehicle While Using
Cruise Control
Use the accelerator pedal to increase your speed.
When you take your foot off the pedal, your vehicle
will slow down to the cruise speed you set earlier.
Using Cruise Control on Hills
How well your cruise control will work on hills depends
upon your speed, load and the steepness of the hills.
When going up steep hills, you may have to step on the
accelerator pedal to maintain your speed. When going
downhill, you may have to brake or shift to a lower gear
to keep your speed down. Of course, applying the brake
takes you out of cruise control. Many drivers �nd this to
be too much trouble and do not use cruise control on
steep hills.
Ending Cruise Control
There are three ways to disengage the cruise control:
Step lightly on the brake pedal; when cruise
control disengages, the cruise symbol in the
instrument panel cluster will go out.
Press the on/off button, this will turn off the cruise
control system.
Press the cancel button. When cruise control
disengages, the cruise symbol in the instrument
panel cluster will go out.
3-13
Page 149 of 442
The DRL system will turn your low-beam headlamps on
at a reduced brightness when the following conditions
are met:
The ignition is on.
The exterior lamp control is turned to AUTO.
In addition, Canadian vehicles DRL will also turn
on if you have turned on your parking lamps.
The light sensor detects daytime light. See the
end of this section for more information on the
light sensor.
The shift lever is not in PARK (P).
While the DRL system is on, the taillamps, sidemarker
lamps, and instrument panel lights will not be
illuminated.
The DRL system will be off any time your vehicle is
in PARK (P). The DRL system on U.S. vehicles can
also be turned off by using the off/on switch for
one ignition cycle.
As with any vehicle, you should turn on the regular
headlamp system when you need it.
Light Sensor
Your vehicle has a light sensor on top of the instrument
panel. Make sure it is not covered or the headlamps
may remain on when you do not need them. The light
sensor for the DRL and Automatic Headlamp features
is located on top of the instrument panel.
The automatic headlamp system may be on when
driving through a parking garage, heavy outcast
weather, or a tunnel. This is normal.
Automatic Headlamp System
When it is dark enough outside, your automatic
system will turn on your headlamps at the normal
brightness along with other lamps such as the
taillamps, sidemarker, parking lamps, instrument
panel lights, and interior switch backlighting.
Make sure the light sensor is not covered. See “Light
Sensor” inDaytime Running Lamps (DRL) on page 3-16.
3-17
Page 181 of 442
Always reset the engine oil life system after an oil
change. SeeEngine Oil Life System on page 5-20.
In addition to the engine oil life system monitoring the oil
life, additional maintenance is recommended in the
Maintenance Schedule in this manual. SeeScheduled
Maintenance on page 6-4andEngine Oil on page 5-17.
Personalization
MENU:Press this button while the vehicle is in ON
to scroll through each of the personalization options
in the following order. If the vehicle is moving faster
than 2 mph (3 km/h), the personalization menu options
are not available, except for the UNITS option. All of
the personalization options may not be available
on your vehicle. Only the options available will be
displayed on your DIC.
Units Selection (English/Metric)
Oil Life Reset
Remote Start Capability
Horn Chirp During Remote Keyless Entry Locking
Horn Chirp During Remote Keyless Entry Unlocking
Exterior Light Flash During Remote Keyless
Entry Locking or Unlocking
Delayed Locking
Automatic Vehicle Unlocking: Speci�c Doors
Automatic Vehicle Unlocking: When Key is Off or
When Shift To Park
Exterior Perimeter Lighting During Remote Keyless
Entry Unlock
Select Language: (English, French, Spanish or
German)
When the desired option is reached, press the enter
button to toggle between the modes of that option.
To make a selection, press the MENU button again.
If no selection is made within 10 seconds, the display
will revert back to the previous information displayed.
The MENU mode is exited when the information button
is pressed, a 10 second time period has elapsed,
the ignition is turned to OFF, or the end of the MENU
list is reached.
SeeDIC Vehicle Personalization on page 3-52for
more information on the personalization options.
Enter
ENTER/r(Enter):Press this button to reset certain
functions and to turn off or acknowledge messages
on the DIC display. This button also toggles through
the options available in each personalization menu.
3-49
Page 185 of 442
When LIGHT FLASH appears on the display, press the
enter button to move between OFF and ON. When you
have made your choice, press the MENU button to record
your selection. The initial setting from the factory is ON.
DELAY LOCK:The delayed locking option, which
delays the actual locking of the vehicle, can be enabled
or disabled. When DELAY LOCK appears on the
display, press the enter button to move between OFF
and ON. When you have made your choice, press
the MENU button to record your selection. The initial
setting from the factory is ON.
AUTO UNLK (Unlock):The automatic door unlocking
option, which allows the vehicle to automatically
unlock certain doors can be enabled or disabled. When
AUTO UNLK appears on the display, press the enter
button to move between ALL, DRIVER, or NONE. When
you have made your choice, press and the MENU
button to record your selection. The initial setting from
the factory is ALL. SeeProgrammable Automatic
Door Locks on page 2-13for more information.
UNLK (Unlock):This screen displays only if DRIVER
or ALL is selected for the AUTO UNLK option. This
option determines when the automatic door unlocking
will occur, when either the key is turned to OFF or
the vehicle is shifted into PARK (P). When UNLK
appears on the display, press the enter button to
move between KEY OFF and SHIFT TO P (Park).When you have made your choice, press the MENU
button to record your selection. The initial setting from
the factory is SHIFT TO P (Park). SeeProgrammable
Automatic Door Locks on page 2-13for more
information.
EXT (Exterior) LIGHTS:If your vehicle has remote
keyless entry, this option, which allows the vehicle’s
exterior perimeter lighting to turn on each time the
unlock button on the remote keyless entry transmitter
is pressed, can be enabled or disabled. When
EXT LIGHTS appears on the display, press the enter
button to move between ON and OFF. When you have
made your choice, press the MENU button to record
your selection. The initial setting from the factory is ON.
LANGUAGE:To select your choice of language,
press the enter button to move between the optional
languages.
The languages are ENGLISH, FRENCH, SPANISH,
and GERMAN.
Choosing a language will display all of the information
on the DIC in the desired language.
When you have made your choice, press the MENU
button for at least one second to record your selection.
The initial setting from the factory is ENGLISH.
3-53
Page 226 of 442
b(Size):Press this button to change the display
mode for 4:3 aspect ratio movies. This function cycles
between NORMAL, WIDE, and FULL video modes.
NormalThe horizontal image is not stretched.
The borders at the left and the right of the
picture are blanked. All lines of the vertical image
are displayed.
WideThe horizontal image is non-lineraly stretched.
The image tends to be stretched more at the
borders then the middle. The borders are not
displayed.
FullThe horizontal image is linearly stretched.
All vertical lines are displayed. No borders are
present.
z(Display):Press this button to display the title,
chapter, the time of a DVD or track number, the time
of a CD, and the menu functions on the video screen.
Press this button again to turn off the display item.
}(Audio Compression):DVDs have a wide
dynamic audio range. Audio compression may be
used to reduce the difference between soft and loud
selections of the DVD. Press this button to switch
the audio compression on and off.
AUX (Auxiliary):Press this button to switch the system
between the DVD player and an auxiliary source.
Setup Menu
To access the setup menu, ensure that a DVD is in
the player and the video is stopped. Press the display
button. Once the menu is activated, use the directional
arrows and the enter button to navigate the screen.
Picture Preferences
The USER PREFERENCE SETTINGS menu allows
the default viewing preferences to be modi�ed. Use the
remote control up and down arrow buttons to select.
The movie may stop while selections are being made.
TV Shape:The default video screen display may
be selected from 4:3 letterbox, 4:3 panscan, or 16:9.
Black Level Shift:The default black level to the video
screen may be adjusted.
Video Shift:The default position of the video on the
display may be adjusted.
Color Settings:The default color setting of the video
screen may be selected from Personal, Rich, Natural,
Soft, or Animation.
Personal Color:The default setting for Saturation,
Brightness, and Contrast may be adjusted.
3-94
Page 249 of 442
Braking in Emergencies
At some time, nearly every driver gets into a situation
that requires hard braking.
If you have ABS, you can steer and brake at the same
time. However, if you do not have ABS, your �rst
reaction — to hit the brake pedal hard and hold it
down — may be the wrong thing to do. Your wheels can
stop rolling. Once they do, the vehicle cannot respond
to your steering. Momentum will carry it in whatever
direction it was headed when the wheels stopped rolling.
That could be off the road, into the very thing you
were trying to avoid, or into traffic.
If you do not have ABS, use a “squeeze” braking
technique. This will give you maximum braking while
maintaining steering control. You can do this by pushing
on the brake pedal with steadily increasing pressure.
In an emergency, you will probably want to squeeze
the brakes hard without locking the wheels. If you hear
or feel the wheels sliding, ease off the brake pedal. This
will help you retain steering control. If you do have ABS, it
is different. SeeAnti-Lock Brake System (ABS) on
page 4-7.
In many emergencies, steering can help you more than
even the very best braking.
Traction Control System (TCS)
Your vehicle may have a Traction Control System (TCS)
that limits wheel spin. This is especially useful in
slippery road conditions. The system operates only if it
senses that one or both of the front wheels are
spinning or beginning to lose traction. When this
happens, the system reduces engine power and may
also upshift the transaxle to limit wheel spin. Also,
the traction control system activates the appropriate
corner brakes to gain even quicker control to limit
wheel spin.
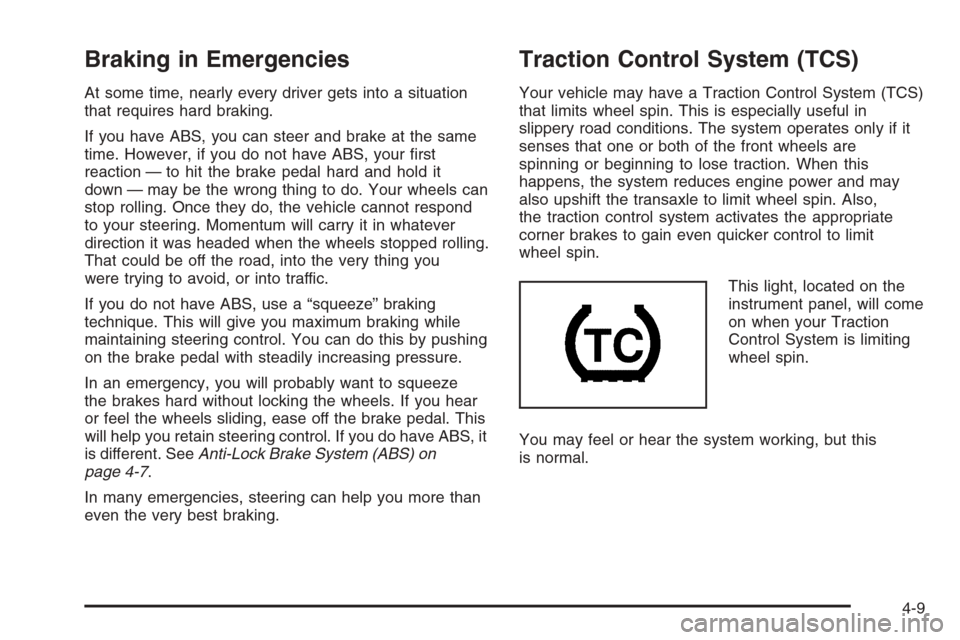
This light, located on the
instrument panel, will come
on when your Traction
Control System is limiting
wheel spin.
You may feel or hear the system working, but this
is normal.
4-9
Page 250 of 442
If your vehicle is in cruise control when the traction
control system begins to limit wheel spin, the cruise
control will automatically disengage. When road
conditions allow you to safely use it again, you may
re-engage the cruise control. SeeCruise Control
on page 3-11.
The Traction Control System operates in all transaxle
shift lever positions except park or neutral. But the
system can upshift the transaxle only as high as the
shift lever position you’ve chosen, so you should use
the lower gears only when necessary. SeeAutomatic
Transaxle Operation (Base Models) on page 2-27
orAutomatic Transaxle Operation (SS Models)
on page 2-30.
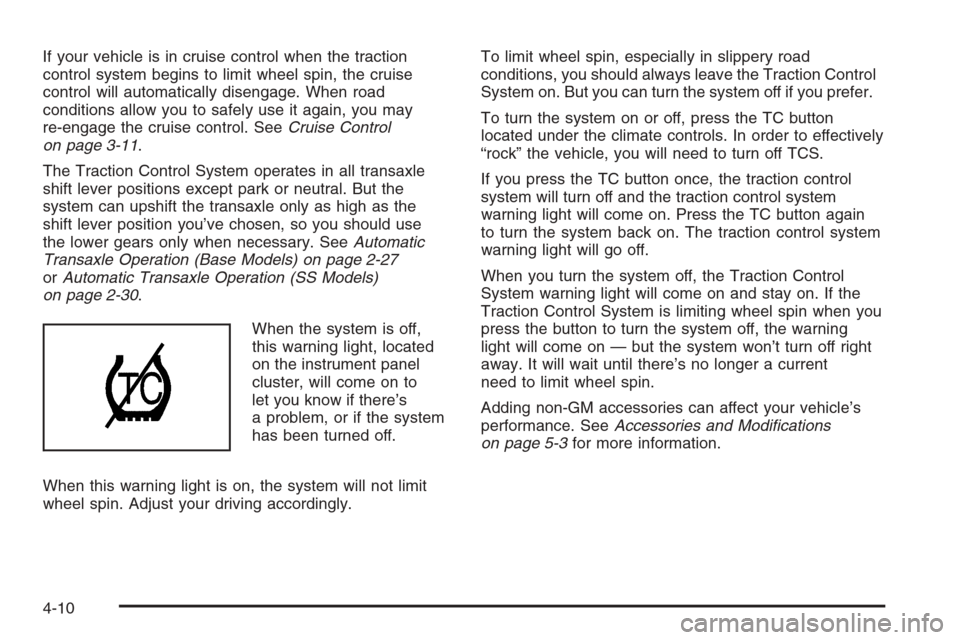
When the system is off,
this warning light, located
on the instrument panel
cluster, will come on to
let you know if there’s
a problem, or if the system
has been turned off.
When this warning light is on, the system will not limit
wheel spin. Adjust your driving accordingly.To limit wheel spin, especially in slippery road
conditions, you should always leave the Traction Control
System on. But you can turn the system off if you prefer.
To turn the system on or off, press the TC button
located under the climate controls. In order to effectively
“rock” the vehicle, you will need to turn off TCS.
If you press the TC button once, the traction control
system will turn off and the traction control system
warning light will come on. Press the TC button again
to turn the system back on. The traction control system
warning light will go off.
When you turn the system off, the Traction Control
System warning light will come on and stay on. If the
Traction Control System is limiting wheel spin when you
press the button to turn the system off, the warning
light will come on — but the system won’t turn off right
away. It will wait until there’s no longer a current
need to limit wheel spin.
Adding non-GM accessories can affect your vehicle’s
performance. SeeAccessories and Modi�cations
on page 5-3for more information.
4-10