2006 CHEVROLET IMPALA clock
[x] Cancel search: clockPage 86 of 394

Doors and Locks
Door Locks
{CAUTION:
Unlocked doors can be dangerous.
Passengers, especially children, can easily
open the doors and fall out of a moving
vehicle. When a door is locked, the handle
will not open it. You increase the chance
of being thrown out of the vehicle in a
crash if the doors are not locked. So, wear
safety belts properly and lock the doors
whenever you drive.
Young children who get into unlocked
vehicles may be unable to get out. A child
can be overcome by extreme heat and can
suffer permanent injuries or even death
from heat stroke. Always lock your vehicle
whenever you leave it.
Outsiders can easily enter through an
unlocked door when you slow down or
stop your vehicle. Locking your doors can
help prevent this from happening.There are several ways to lock and unlock your vehicle.
From the outside, use your key in the driver’s door or
use the remote keyless entry transmitter. From the
inside, use the manual or power door locks.
To unlock the driver’s side door from the outside with
the key, insert the key and turn it counterclockwise.
To lock the driver’s side door from the outside with your
key, insert the key and turn it clockwise.
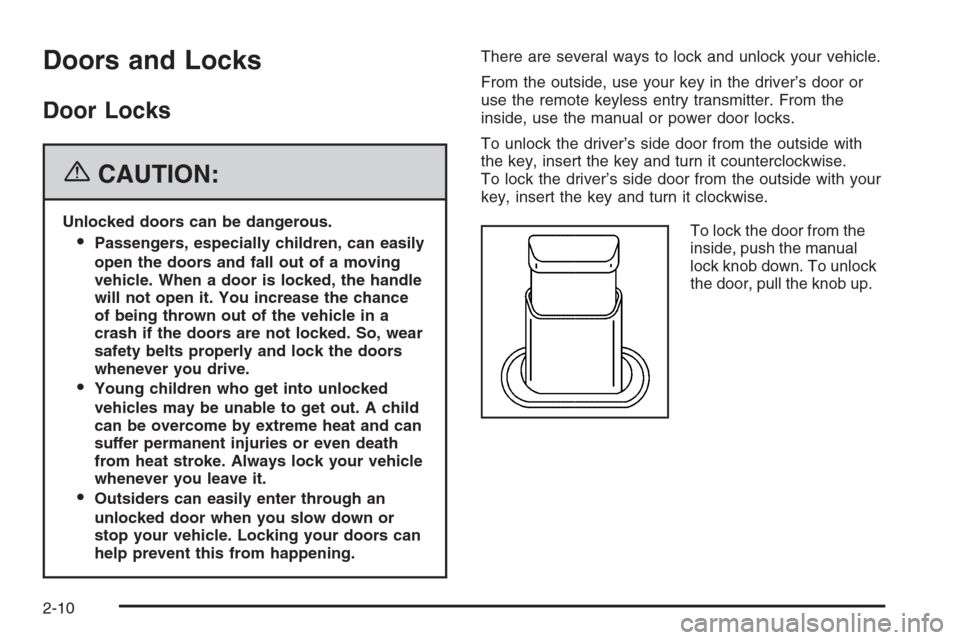
To lock the door from the
inside, push the manual
lock knob down. To unlock
the door, pull the knob up.
2-10
Page 97 of 394

Ignition Positions
With the ignition key in the ignition, the key can be
turned to four different positions:
Notice:Using a tool to force the key from the
ignition switch could cause damage or break the
key. Use the correct key and turn the key only with
your hand. Make sure the key is in all the way. If
none of this works, then your vehicle needs service.A (OFF):This is the only position in which the ignition
key can be inserted or removed. This position locks
the ignition and transaxle. It is a theft-deterrent feature.
B (ACCESSORY):This position lets the radio and
windshield wipers operate while the engine is off. To use
ACCESSORY, turn the key clockwise.
C (RUN):This position is where the key returns to after
the vehicle is started. This position displays some of
the warning and indicator lights.
The battery could be drained if you leave the key in the
ACCESSORY or RUN position with the engine off.
You may not be able to start your vehicle if the battery
is allowed to drain for an extended period of time.
D (START):This position starts the engine.
A warning chime will sound and the Driver Information
Center (DIC) will display DRIVER’S DOOR OPEN when
the driver’s door is opened if the ignition is in OFF,
ACCESSORY and the key is in the ignition. SeeDIC
Warnings and Messages on page 3-45for more
information.
2-21
Page 135 of 394

Fog Lamps
-(Fog Lamps):If your vehicle has fog lamps, the
control is located on the exterior lamps control. The
exterior lamps control is located on the instrument panel
to the left of the steering column.
Your ignition must be in the RUN position for the fog
lamps to come on.
To turn the fog lamps on, press the exterior lamps button.
A light will come on in the instrument panel cluster to let
you know that the fog lamps are on. Press the exterior
lamps button again to turn the fog lamps off.
When the headlamps are changed to high-beam, the
fog lamps also go off.
Some localities have laws that require the headlamps to
be on along with the fog lamps.
Instrument Panel Brightness
D(Instrument Panel Brightness):The knob with this
symbol on it is located next to the exterior lamps
control. Press the knob until it pops out and then turn
the knob clockwise to brighten or counterclockwise
to dim the lights.
Courtesy Lamps
When a door is opened, the courtesy lamps
automatically come on. They make it easy for you to
enter and leave your vehicle. You can also manually turn
these lamps on by turning the instrument panel
brightness control clockwise all the way.
The reading lamps, located on the rearview mirror, can
be turned on or off independent of the automatic
courtesy lamps, when the doors are closed.
Dome Lamp
The dome lamp will come on when you open a door.
You can also turn this lamp on by turning the instrument
panel brightness control clockwise.
3-15
Page 139 of 394

Climate Controls
Climate Control System
Your vehicle may be equipped with a dual or single
climate control system. With this system you can control
the heating, cooling, defrost, defog and ventilation for
your vehicle.
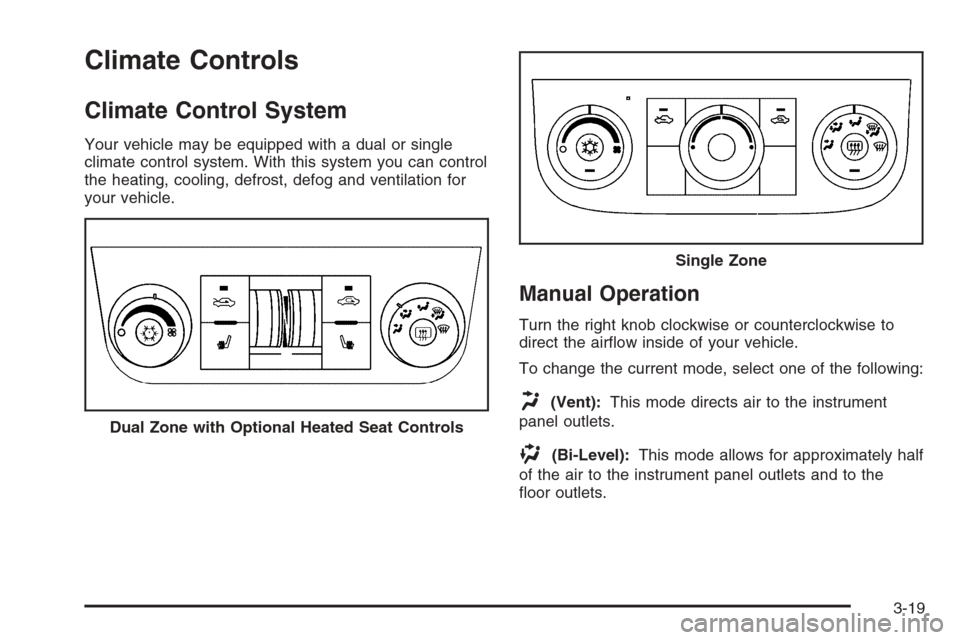
Manual Operation
Turn the right knob clockwise or counterclockwise to
direct the air�ow inside of your vehicle.
To change the current mode, select one of the following:
H(Vent):This mode directs air to the instrument
panel outlets.
)(Bi-Level):This mode allows for approximately half
of the air to the instrument panel outlets and to the
�oor outlets. Dual Zone with Optional Heated Seat Controls
Single Zone
3-19
Page 140 of 394

6(Floor):This mode directs most of the air to the
�oor outlets, with some of the air directed to the
windshield and side window outlets. In this mode, the
system will automatically select Outside Air.
The right knob can also be used to select defog or
defrost mode. For more information, see “Defogging and
Defrosting” later in this section.
By positioning the right knob between two modes, a
combination of those two modes is selected.
It should be noted, that the air conditioning compressor
will be engaged unless the outside temperature is
40°F (4°C) or below. Recirculation cannot be selected
when in Floor Mode.
9(Fan):Turn the left knob clockwise or
counterclockwise to increase or decrease the fan speed.
If the air�ow seems low when the fan is at the highest
setting, the passenger compartment air �lter, if
equipped, may need to be replaced. For more
information, seePassenger Compartment Air Filter on
page 3-23andScheduled Maintenance on page 6-4.
:(Outside Air):Press this button to turn the
outside air mode on. When this mode is on, outside air
will circulate throughout your vehicle. When the
button is pressed, an indicator light in the button will
come on to let you know that it is activated. The outside
air mode can be used with all modes, but it cannot
be used with the recirculation mode.
?(Recirculation):Press this button to turn the
recirculation mode on. When the button is pressed, an
indicator light will come on.
This mode keeps outside air from entering the vehicle.
It can be used to prevent outside air and odors from
entering your vehicle. Recirculation may also help heat
or cool the air inside your vehicle more quickly once
the temperature inside the vehicle is equal to or better
than the outside temperature. The recirculation mode
cannot be used with outside air, �oor, defrost, or
defogging modes.
Temperature Control:Rotate the thumbwheels up or
down to increase or decrease the temperature on
the driver’s side or the passenger side of the vehicle for
the dual zone system. Turn the center knob clockwise
or counterclockwise to increase or decrease the
temperature for the single zone system.
#(Air Conditioning):Press this button to turn the
air conditioning system on or off. When A/C is pressed,
an indicator light will come on to let you know that
the air conditioning has been activated.
On hot days, open the windows to let hot inside air
escape; then close them. This helps to reduce the time
it takes for your vehicle to cool down. It also helps
the system to operate more efficiently.
3-20
Page 141 of 394

For quick cool down on hot days, do the following:
1. Select the vent mode.
2. Select the outside air.
3. Select A/C.
4. Select the coolest temperature for both zones.
5. Select the highest fan speeds.
6. Once the vehicle’s interior temperature is below the
outside temperature, select recirculation mode for
enhanced cooling.
Using these settings together for long periods of time
may cause the air inside of your vehicle to become
too dry. To prevent this from happening, after the
air inside of your vehicle has cooled, turn the
recirculation mode off.
The air conditioning system removes moisture from
the air, so you may sometimes notice a small amount
of water dripping underneath your vehicle while idling
or after turning off the engine. This is normal.Defogging and Defrosting
Fog on the inside of the windows is a result of high
humidity (moisture) condensing on the cool window
glass. This can be minimized if the climate control
system is used properly. There are two modes to clear
fog or frost from your windshield. Use the defog
mode to clear the windows of fog or moisture and warm
the passengers. Use the defrost mode to remove fog
or frost from the windshield more quickly.
Turn the right knob clockwise to select the defog or
defrost mode. Do not drive the vehicle until all the
windows are clear.
-(Defog):This mode directs air equally to the
windshield and the �oor outlets. When you select this
mode, the system turns off recirculation and runs the air
conditioning compressor unless the outside temperature
is below 40°F (4°C). The recirculation mode cannot
be selected while in the defog mode.
0(Defrost):This mode directs a portion of the air
to the windshield and side window vents and some
to the �oor vents. In this mode, the system will
automatically force outside air into your vehicle.
The recirculation mode cannot be selected while in
the defog mode. The air conditioning compressor will
run automatically in this setting, unless the outside
temperature is below 40°F (4°C).
3-21
Page 180 of 394

Setting the Time (Without Date
Display)
If your vehicle has an AM/FM base radio with a single
CD player and preset buttons numbered one through
six, the radio will have a clock button for setting the time.
You can set the time by following these steps:
1. Press the clock button until the hour numbers begin
�ashing on the display. Press the clock button a
second time and the minute numbers will begin
�ashing on the display.
2. While either the hour or the minute numbers are
�ashing, turn the tune knob, located on the upper
right side of the radio, clockwise or counterclockwise
to increase or decrease the time.
3. Press the clock button again until the clock display
stops �ashing to set the currently displayed time;
otherwise, the �ashing will stop after �ve seconds
and the current time displayed will be
automatically set.
To change the time default setting from 12 hour to 24
hour, press the clock button and then the pushbutton
located under the forward arrow label. Once the
time 12H and 24H are displayed, press the pushbutton
located under the desired option to select the default.
Press the clock button again to apply the selected
default, or let the screen time out.
Setting the Time (With Date Display)
If your vehicle has a radio with a single CD player,
the radio has a clock button for setting the time
and date.
To set the time and date, follow these instructions:
1. Turn the radio on.
2. Press the clock button and the HR, MIN, MM, DD,
YYYY (hour, minute, month, day, and year)
displays.
3. Press the pushbutton located under any one of the
labels that you want to change. Every time the
pushbutton is pressed again, the time or the date if
selected, increases by one.
Another way to increase the time or date, is to
press the right SEEK arrow or FWD (forward)
button.
To decrease, press the left SEEK arrow or REV
(reverse) button. You can also turn the tune
knob, located on the upper right side of the radio,
to adjust the selected setting.
The date does not automatically display. The only way
to see the date is by pressing the clock button when
the radio is on. The date with display times out after a
few seconds and goes back to the normal radio and
time display.
3-60
Page 181 of 394

If your vehicle has a radio with a six-disc CD player, the
radio has a MENU button instead of the clock button
to set the time and date.
To set the time and date, follow these instructions:
1. Turn the radio on.
2. Press the MENU button. Once the clock option is
displayed.
3. Press the pushbutton located under that label.
The HR, MIN, MM, DD, YYYY displays.
4. Press the pushbutton located under any one of the
labels that you want to change. Every time the
pushbutton is pressed again, the time or the date if
selected, increases by one.
Another way to increase the time or date, is to
press the right SEEK arrow or FWD (forward)
button.
To decrease, press the left SEEK arrow or REV
(reverse) button. You can also turn the tune
knob, located on the upper right side of the radio,
to adjust the selected setting.The date does not automatically display. The only way
to see the date is by pressing the MENU button and
then the clock button when the radio is on. The date with
display times out after a few seconds and goes back
to the normal radio and time display.
To change the time default setting from 12 hour to
24 hour or to change the date default setting from
month/day/year to day/month/year, follow these
instructions:
1. Press the clock button and then the pushbutton
located under the forward arrow label. Once the
time 12H and 24H, and the date MM/DD/YYYY
(month, day, and year) and DD/MM/YYYY (day,
month, and year) displays.
2. Press the pushbutton located under the desired
option.
3. Press the clock or MENU button again to apply the
selected default, or let the screen time out.
3-61