2006 CHEVROLET EQUINOX radio controls
[x] Cancel search: radio controlsPage 108 of 382
OnStar®Virtual Advisor
Your vehicle may have Virtual Advisor. It is a feature of
OnStar®Personal Calling that uses minutes to access
weather, local traffic reports, and stock quotes.
By pressing the phone button and giving a few simple
voice commands, you can browse through the
various topics. Customize your information pro�le at
www.myonstar.com. See the OnStar
®User’s Guide for
more information.
OnStar®Steering Wheel Controls
0
:For vehicles equipped with a Talk/Mute button,
it can be used to interact with OnStar®. SeeAudio
Steering Wheel Controls on page 3-81,Radio with
CD (Base Level) on page 3-40orRadio with CD (MP3)
on page 3-51orRadio with Six-Disc CD on page 3-67
for more information.
When calling into voice mail systems, or to dial directory
numbers, press this button once, wait for the response,
say the number(s) to be dialed, wait for the number(s)
to be repeated and then say “dial”. See the OnStar
®
User’s Guide for more information.
Storage Areas
Glove Box
To open the glove box, pull the handle to the left and pull
the glove box door down until it stops and is fully open.
Cupholder(s)
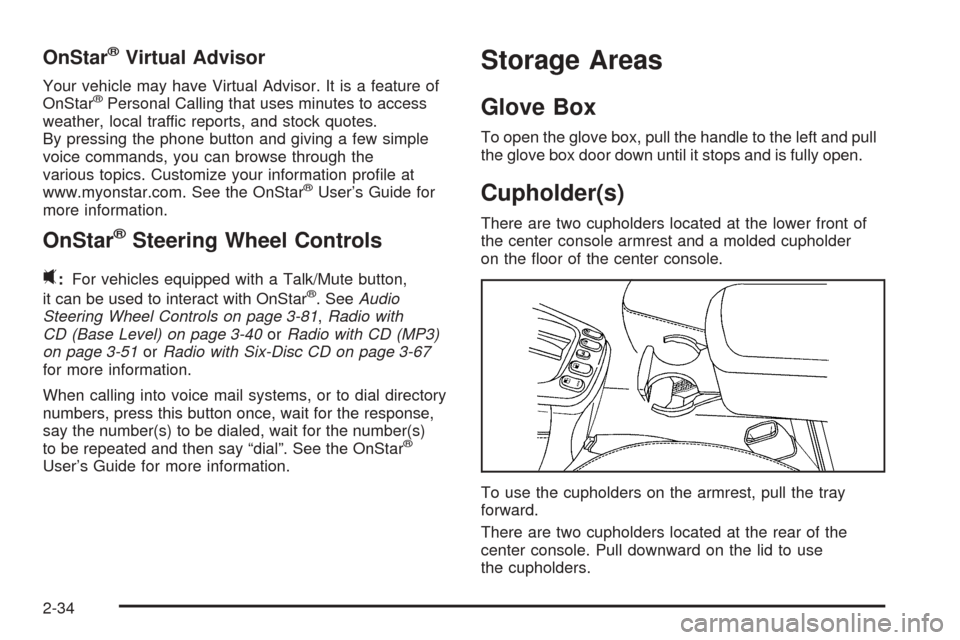
There are two cupholders located at the lower front of
the center console armrest and a molded cupholder
on the �oor of the center console.
To use the cupholders on the armrest, pull the tray
forward.
There are two cupholders located at the rear of the
center console. Pull downward on the lid to use
the cupholders.
2-34
Page 118 of 382
Engine Coolant Temperature Warning Light......3-30
Engine Coolant Temperature Gage..................3-31
Malfunction Indicator Lamp.............................3-31
Oil Pressure Light.........................................3-34
Change Engine Oil Light................................3-35
Security Light...............................................3-35
Reduced Engine Power Light.........................3-35
Highbeam On Light.......................................3-36
Daytime Running Lamps (DRL)
Indicator Light...........................................3-36
Gate Ajar Light.............................................3-36
Fuel Gage...................................................3-36
Low Fuel Warning Light.................................3-37Audio System(s).............................................3-38
Setting the Time...........................................3-39
Radio with CD (Base Level)...........................3-40
Radio with CD (MP3)....................................3-51
Radio with Six-Disc CD.................................3-67
Theft-Deterrent Feature..................................3-81
Audio Steering Wheel Controls.......................3-81
Radio Reception...........................................3-82
Care of Your CDs.........................................3-83
Care of the CD Player...................................3-83
Fixed Mast Antenna......................................3-83
XM™ Satellite Radio Antenna System.............3-84
Chime Level Adjustment................................3-84
Section 3 Instrument Panel
3-2
Page 131 of 382
Fog Lamps
If your vehicle has this feature, use your fog lamps for
better visibility in foggy or misty conditions.
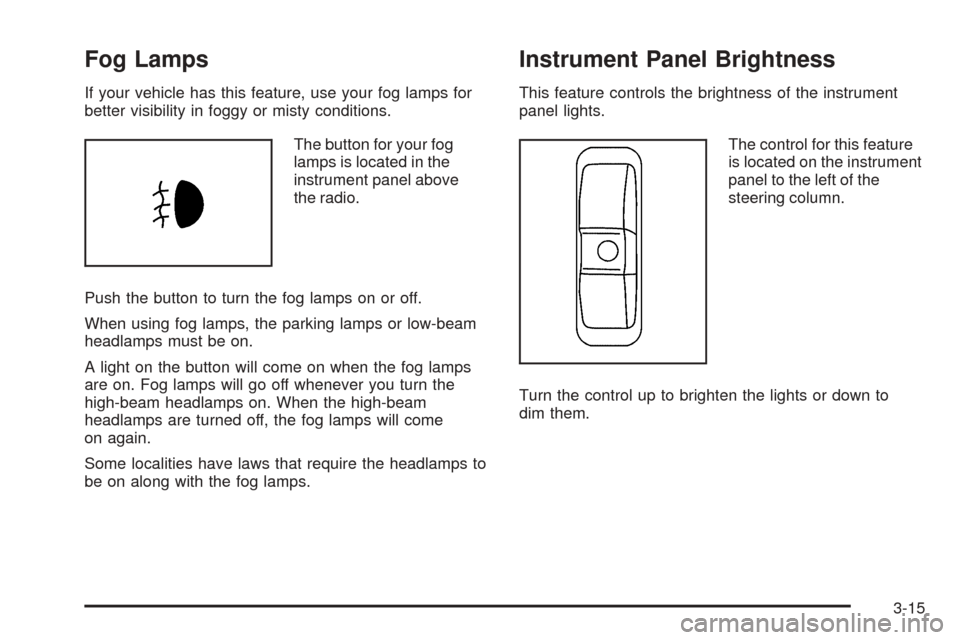
The button for your fog
lamps is located in the
instrument panel above
the radio.
Push the button to turn the fog lamps on or off.
When using fog lamps, the parking lamps or low-beam
headlamps must be on.
A light on the button will come on when the fog lamps
are on. Fog lamps will go off whenever you turn the
high-beam headlamps on. When the high-beam
headlamps are turned off, the fog lamps will come
on again.
Some localities have laws that require the headlamps to
be on along with the fog lamps.
Instrument Panel Brightness
This feature controls the brightness of the instrument
panel lights.
The control for this feature
is located on the instrument
panel to the left of the
steering column.
Turn the control up to brighten the lights or down to
dim them.
3-15
Page 154 of 382
Audio System(s)
Determine which radio your vehicle has and then read the
pages following to familiarize yourself with its features.
Driving without distraction is a necessity for a safer
driving experience. SeeDefensive Driving on page 4-2.
By taking a few moments to read this manual and
get familiar with your vehicle’s audio system, you can
use it with less effort, as well as take advantage of
its features. While your vehicle is parked, set up your
audio system by presetting your favorite radio stations,
setting the tone, and adjusting the speakers. Then,
when driving conditions permit, you can tune to
your favorite stations using the presets and steering
wheel controls if the vehicle has them.
{CAUTION:
This system provides you with a far greater
access to audio stations and song listings.
Giving extended attention to entertainment
tasks while driving can cause a crash and you
or others can be injured or killed. Always keep
your eyes on the road and your mind on the
drive — avoid engaging in extended searching
while driving.Keeping your mind on the drive is important for safe
driving. For more information, seeDefensive Driving on
page 4-2.
Here are some ways in which you can help avoid
distraction while driving.
While your vehicle is parked:
Familiarize yourself with all of its controls.
Familiarize yourself with its operation.
Set up your audio system by presetting your
favorite radio stations, setting the tone, and
adjusting the speakers. Then, when driving
conditions permit, you can tune to your favorite
radio stations using the presets and steering wheel
controls if the vehicle has them.
3-38
Page 159 of 382
Setting Preset Stations
Up to 30 stations (six FM1, six FM2, and six AM,
six XM1 and six XM2 (if equipped)), can be programmed
on the six numbered pushbuttons, by performing the
following steps:
1. Turn the radio on.
2. Press AM/FM to select FM1, FM2 or AM.
Press XM/AUX to select XM1 or XM2.
3. Tune in the desired station.
4. Press EQ to select the equalization.
5. Press and hold one of the six numbered
pushbuttons until you hear a beep. Whenever that
numbered pushbutton is pressed, the station
that was set will return and the equalization that
was selected will be stored for that pushbutton.
6. Repeat the steps for each pushbutton.
Setting the Tone
(Bass/Midrange/Treble)
P
/Q(Bass/Treble):Press this button until BASS, MID,
or TREBLE appears on the display. Turn the ADJ
knob to increase or to decrease. The display will show
the bass, mid, or treble level. If a station is weak or
noisy, decrease the treble.
To adjust bass, midrange, or treble to the middle
position, select BASS, MID, or TREBLE. Then press
and hold this button for more than two seconds. You will
hear one beep and the tone control will be adjusted to
the middle position.
To adjust all tone controls to the middle position, push
and hold the tone button when no tone control is
displayed. ALL CENTERED will appear on the display
and you will hear one beep. The bass, midrange,
and treble will be adjusted to the middle position.
EQ (Equalizer):Press this button to select customized
equalization settings designed for country, jazz, talk,
pop, rock, and classical.
To return to the manual mode, press and release the
EQ button until TONE Custom appears on the display.
You can also manually adjust the bass, midrange,
and treble using the Bass/Treble button.
3-43
Page 160 of 382
Adjusting the Speakers (Balance/Fade)
S
(Balance/Fade):To adjust the balance
between the right and the left speakers, push and
release the balance and fade button until BAL appears
on the display. Turn the ADJ knob to move the
sound toward the right or the left speakers.
To adjust the fade between the front and the rear
speakers, push and release the balance and fade button
until FADE appears on the display. Turn the ADJ
knob to move the sound toward the front or the rear
speakers.
To adjust the balance and the fade to the middle
position, select BAL or FADE. Then press and hold this
button for more than two seconds. You will hear a
beep and the speaker control will be adjusted to the
middle position.
To adjust both speaker controls to the middle position,
push and hold the tone button for more than
four seconds when no speaker control is displayed. ALL
CENTERED will appear on the display and you will
hear a beep. The balance and fade will be adjusted to
the middle position.
Finding a Program Type (PTY) Station
(RDS and XM™)
To select and �nd a desired PTY perform the following:
1. Press the P-TYPE button to activate program
type select mode. P-TYPE and a program type
will appear on the display.
2. Turn the ADJ knob to select a PTY.
3. Once the desired PTY is displayed, press the
SEEK right arrow to select the PTY and to take you
to the PTYs �rst station.
4. To go to another station within that PTY press the
SEEK right arrow again. If the radio cannot �nd the
desired PTY, NOT FOUND will appear on the
display and the radio will return to the last station
you were listening to.
5. Press the P-TYPE button or wait 15 seconds, to
exit program type select mode.
If PTY times out and is no longer on the display, go
back to Step 1.
If PTY is on, the radio will search for stations with the
selected PTY.
3-44
Page 170 of 382
Setting Preset Stations
Up to 30 stations (six FM1, six FM2, and six AM,
six XM1 and six XM2 (if equipped)), can be programmed
on the six numbered pushbuttons, by performing the
following steps:
1. Turn the radio on.
2. Press AM/FM to select FM1, FM2 or AM.
Press XM/AUX to select XM1 or XM2 (if equipped).
3. Tune in the desired station.
4. Press EQ to select the equalization.
5. Press and hold one of the six numbered pushbuttons
until you hear a beep. Whenever that numbered
pushbutton is pressed, the station that was set will
return and the equalization that was selected will be
stored for that pushbutton.
6. Repeat the steps for each pushbutton.
Setting the Tone
(Bass/Midrange/Treble)
P
/Q(Bass/Treble):Press this button until BASS, MID,
or TREBLE appears on the display. Turn the ADJ
knob to increase or to decrease. The display will show
the bass, mid, or treble level. If a station is weak or
noisy, decrease the treble.
To adjust bass, midrange, or treble to the middle
position, select BASS, MID, or TREBLE. Then press
and hold this button for more than two seconds. You will
hear one beep and the tone control will be adjusted to
the middle position.
To adjust all tone controls to the middle position, push
and hold the tone button when no tone control is
displayed. ALL CENTERED will appear on the display
and you will hear one beep. The bass, midrange,
and treble will be adjusted to the middle position.
EQ (Equalizer):Press this button to select customized
equalization settings designed for country, jazz, talk,
pop, rock, and classical.
To return to the manual mode, press and release the
EQ button until TONE Custom appears on the display.
You can also manually adjust the bass, midrange,
and treble using the Bass/Treble button.
3-54
Page 171 of 382

Adjusting the Speakers (Balance/Fade)
S
(Balance/Fade):To adjust the balance
between the right and the left speakers, push and
release the balance and fade button until BAL appears
on the display. Turn the ADJ knob to move the
sound toward the right or the left speakers.
To adjust the fade between the front and the rear
speakers, push and release the balance and fade button
until FADE appears on the display. Turn the ADJ knob to
move the sound toward the front or the rear speakers.
To adjust the balance or the fade to the middle position,
select BAL or FADE. Then press and hold this button for
more than two seconds. You will hear one beep and the
speaker control will be adjusted to the middle position.
To adjust both speaker controls to the middle position,
push and hold the tone button for more than four seconds
when no speaker control is displayed. ALL CENTERED
will appear on the display and you will hear one beep.
The balance and the fade will be adjusted to the middle
position.
Finding a Program Type (PTY) Station
(RDS and XM™)
To select and �nd a desired PTY perform the following:
1. Press the P-TYPE button to activate program
type select mode. P-TYPE and a program type
will appear on the display.
2. Turn the ADJ knob to select a PTY.
3. Once the desired PTY is displayed, press the
SEEK right arrow to take you to the PTYs �rst
station.
4. To go to another station within that PTY press the
SEEK right arrow again. If the radio cannot �nd the
desired PTY, NOT FOUND will appear on the
display and the radio will return to the last station
that was playing.
5. Press the P-TYPE button or wait 15 seconds, to
exit program type select mode.
If PTY times out and is not longer on the display, go
back to Step 1.
If PTY is on, the radio will search for stations with the
selected PTY.
3-55