2006 CHEVROLET EPICA oil change
[x] Cancel search: oil changePage 108 of 368
Traction Control System
Active Light..............................................3-38
Traction Off Light..........................................3-39
Hold Mode Light...........................................3-39
Engine Coolant Temperature Gage..................3-40
Malfunction Indicator Lamp.............................3-40
Oil Pressure Light.........................................3-43
Cruise Control Light......................................3-43
Highbeam On Light.......................................3-44
Daytime Running Lamps (DRL)
Indicator Light...........................................3-44
Door Ajar Light.............................................3-44
Trunk Ajar Light............................................3-44
Fuel Gage...................................................3-45
Low Fuel Warning Light.................................3-46Audio System(s).............................................3-46
Radio with CD
(Single Display, Base Level).......................3-48
Radio with CD
(Single Display, MP3).................................3-52
Radio with CD
(Double Display, MP3/WMA).......................3-59
Radio with Six-Disc CD
(Double Display, MP3/WMA).......................3-67
Trunk-Mounted CD Changer...........................3-75
Audio Steering Wheel Controls.......................3-78
Radio Reception...........................................3-79
Care of Your CDs.........................................3-80
Care of the CD Player...................................3-80
Backglass Antenna (Sedan Models).................3-80
Integrated Windshield Antenna
(Hatchback and Wagon Models)..................3-81
Section 3 Instrument Panel
3-2
Page 171 of 368
Playing an MP3/WMA
With the ignition on, insert a CD partway into the slot,
label side up. The player will pull it in, Loading, then
Filecheck, and then MP3 or WMA will appear on
the display. The CD should begin playing. You cannot
insert a CD with the ACC off.
As each new track starts to play, the track number,
and the song name will appear on the display.
If the ignition or radio is turned off with a CD in the
player, it will stay in the player. When a CD is in
the player and the ignition is turned on, the radio
must be turned on before the CD will start playback.
When the ignition and radio are turned on, the CD
will start playing where it stopped, if it was the
last selected audio source.
The CD player can play the smaller 3 inch (8 cm)
single CDs with an adapter ring. Full-size CDs and
the smaller CDs are loaded in the same manner.
If playing a CD-R, the sound quality may be reduced
due to CD-R quality, the method of recording, the
quality of the music that has been recorded, and the
way the CD-R has been handled. There may be
an increase in skipping, difficulty in finding tracks,
and/or difficulty in loading and ejecting. If these
problems occur, check the bottom surface of the CD.If the surface of the CD is damaged, such as cracked,
broken, or scratched, the CD will not play properly. If the
surface of the CD is soiled, seeCare of Your CDs on
page 3-80for more information.
If there is no apparent damage, try a known good CD.
Do not add any label to a CD, it could get caught in the
CD player. If a CD is recorded on a personal computer
and a description label is needed, try labeling the top of
the recorded CD with a marking pen instead.
Notice:If you add any label to a CD, insert more
than one CD into the slot at a time, or attempt to play
scratched or damaged CDs, you could damage the
CD player. When using the CD player, use only CDs
in good condition without any label, load one CD at a
time, and keep the CD player and the loading slot free
of foreign materials, liquids, and debris.
If an error appears on the display, see “CD Messages”
later in this section.
All of the CD functions work the same while playing an
MP3/WMA, except for those listed here. See “Playing
a CD” earlier for more information.
SCROLL (MP3/WMA Mode Only):Press the SOUND
button for longer than two seconds. The song title or
other available information of a song will scroll on/off.
The offset is scroll on. The scroll mode can be changed
only when the SOUND button is pressed for longer
than two seconds.
3-65
Page 240 of 368
When to Change Engine Oil
If any one of these is true for you, use the short trip/city
maintenance schedule:
•Most trips are less than 5 miles (8 km). This is
particularly important when outside temperatures
are below freezing.
•Most trips include extensive idling, such as frequent
driving in stop-and-go traffic.
•You frequently tow a trailer or use a carrier on top
of your vehicle.
•The vehicle is used for delivery service, police, taxi,
or other commercial application.
Driving under these conditions causes engine oil to
break down sooner. If any one of these is true for your
vehicle, then you need to change your oil and filter
every 3,000 miles (5 000 km) or 3 months — whichever
occurs first.
If none of them is true, use the long trip/highway
maintenance schedule. Change oil and filter every
7,500 miles (12 500 km) or 12 months — whichever
occurs first. Driving a vehicle with a fully warmed engine
under highway conditions will cause engine oil to
break down slower.
What to Do with Used Oil
Used engine oil contains certain elements that may be
unhealthy for your skin and could even cause cancer.
Do not let used oil stay on your skin for very long. Clean
your skin and nails with soap and water, or a good
hand cleaner. Wash or properly dispose of clothing or
rags containing used engine oil. See the manufacturer’s
warnings about the use and disposal of oil products.
Used oil can be a threat to the environment. If you
change your own oil, be sure to drain all the oil from
the filter before disposal. Never dispose of oil by putting
it in the trash, pouring it on the ground, into sewers,
or into streams or bodies of water. Instead, recycle it
by taking it to a place that collects used oil. If you
have a problem properly disposing of your used oil,
ask your dealer, a service station or a local recycling
center for help.
5-16
Page 241 of 368
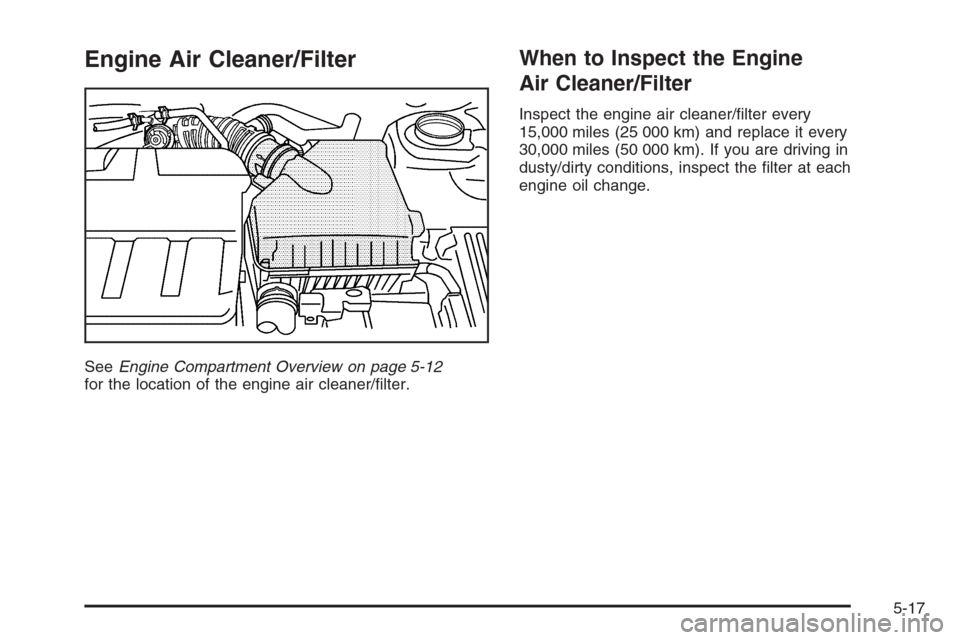
Engine Air Cleaner/Filter
SeeEngine Compartment Overview on page 5-12
for the location of the engine air cleaner/filter.
When to Inspect the Engine
Air Cleaner/Filter
Inspect the engine air cleaner/filter every
15,000 miles (25 000 km) and replace it every
30,000 miles (50 000 km). If you are driving in
dusty/dirty conditions, inspect the filter at each
engine oil change.
5-17
Page 243 of 368
Automatic Transaxle Fluid
It is not necessary to check the transaxle fluid level. If a
leak occurs, take the vehicle to the dealership service
department and have it repaired as soon as possible.
Have your dealer or service center change both the fluid
and filter every 50,000 miles (83 000 km) if the vehicle
is mainly driven under one or more of these conditions:
•In heavy city traffic where the outside temperature
regularly reaches 90°F (32°C) or higher.
•In hilly or mountainous terrain.
•Uses such as found in taxi, police or delivery
service.
If you do not use your vehicle under any of these
conditions, the fluid and filter do not require changing.
Notice:Use of automatic transaxle �uid labeled
other than ESSO LT71141 or TOTAL ATF H50235
may damage your vehicle, and the damages may
not be covered by your warranty. Always use
ESSO LT71141 or TOTAL ATF H50235 labeled
automatic transaxle �uid.
Engine Coolant
The following explains your cooling system and how
to add coolant when it is low. If you have a problem
with engine overheating, seeEngine Overheating
on page 5-22.
A 50/50 mixture of clean, drinkable water and proper
coolant will:
•Give freezing protection down to−34°F (−37°C).
•Give boiling protection up to 265°F (129°C).
•Protect against rust and corrosion.
•Help keep the proper engine temperature.
•Let the warning lights and gages work as
they should.
5-19
Page 289 of 368
{CAUTION:
Rust or dirt on the wheel, or on the parts to
which it is fastened, can make the wheel nuts
become loose after a time. The wheel could
come off and cause an accident. When you
change a wheel, remove any rust or dirt from
the places where the wheel attaches to the
vehicle. In an emergency, you can use a cloth
or a paper towel to do this; but be sure to use
a scraper or wire brush later, if needed, to get
all the rust or dirt off.
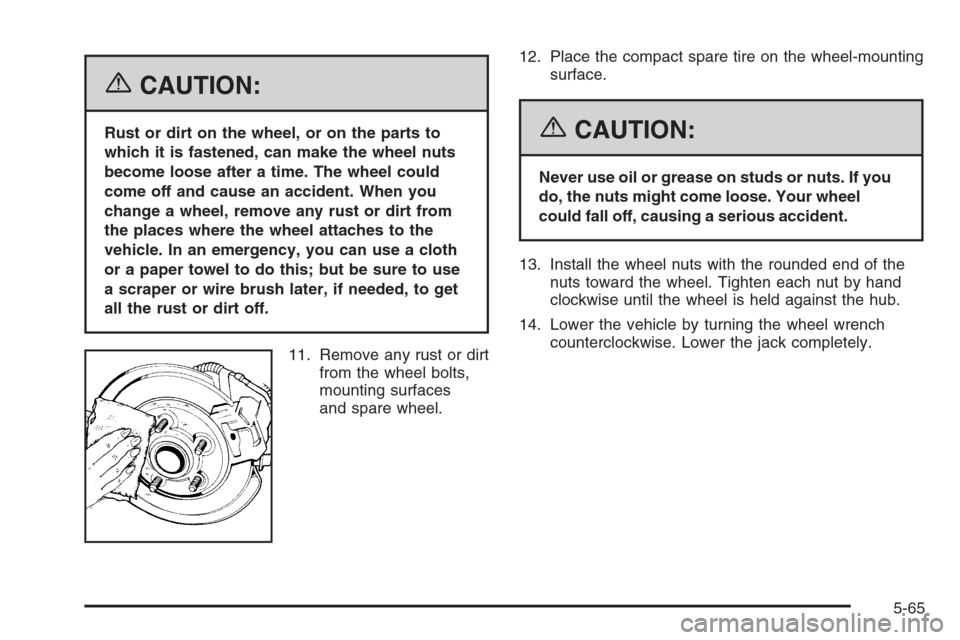
11. Remove any rust or dirt
from the wheel bolts,
mounting surfaces
and spare wheel.12. Place the compact spare tire on the wheel-mounting
surface.{CAUTION:
Never use oil or grease on studs or nuts. If you
do, the nuts might come loose. Your wheel
could fall off, causing a serious accident.
13. Install the wheel nuts with the rounded end of the
nuts toward the wheel. Tighten each nut by hand
clockwise until the wheel is held against the hub.
14. Lower the vehicle by turning the wheel wrench
counterclockwise. Lower the jack completely.
5-65
Page 310 of 368
Maintenance Schedule
Introduction
Important: Keep engine oil at the proper level and
change as recommended.
Have you purchased the GM Protection Plan? The Plan
supplements your new vehicle warranties. See your
Warranty and Owner Assistance booklet or your dealer
for details.
Maintenance Requirements
Maintenance intervals, checks, inspections and
recommended fluids and lubricants as prescribed in
this manual are necessary to keep your vehicle in good
working condition. Any damage caused by failure to
follow scheduled maintenance may not be covered
by warranty.
Your Vehicle and the Environment
Proper vehicle maintenance not only helps to keep your
vehicle in good working condition, but also helps the
environment. Improper vehicle maintenance can
even affect the quality of the air we breathe. Improper
fluid levels or the wrong tire inflation can increase
the level of emissions from your vehicle. To help protect
our environment, and to keep your vehicle in good
condition, be sure to maintain your vehicle properly.
6-2
Page 313 of 368
Selecting the Right Schedule
First you will need to decide which of the two schedules
is right for your vehicle. Here is how to decide which
schedule to follow:
Short Trip/City De�nition
Follow the Short Trip/City Scheduled Maintenance if any
one of these conditions is true for your vehicle:
•Most trips are less than 5 miles (8 km). This is
particularly important when outside temperatures
are below freezing.
•Most trips include extensive idling, such as frequent
driving in stop-and-go traffic.
•If the vehicle is used for delivery service, police,
taxi or other commercial application.
One of the reasons you should follow this schedule if
you operate your vehicle under any of these conditions
is that these conditions cause engine oil to break
down sooner.
Short Trip/City Intervals
Every 3,000 Miles (5 000 km):Engine Oil and Filter
Change (or 3 months, whichever occurs first).
Every 6,000 Miles (10 000 km):Tire Rotation.
Every 15,000 Miles (25 000 km):Engine Air Cleaner
Filter Inspection. Passenger Compartment Air Filter
Replacement. Drive Belts Inspection.
Every 30,000 Miles (50 000 km):Engine Air Cleaner
Filter Replacement. Fuel Filter Replacement. Cooling
System Service. EVAP System Service. PCV System
Service. Brake Fluid Change (or 24 months, whichever
occurs first).
Every 42,000 Miles (70 000 km):Engine Oil Pan Drain
Plug Washer Replacement.
Every 50,000 Miles (83 000 km):Automatic Transaxle
Service (severe conditions only).
Every 60,000 Miles (100 000 km):EVAP System
Solenoid Valve Replacement.
Every 100,000 Miles (166 000 km):Spark Plug
Replacement.
These intervals only summarize maintenance services.
Be sure to follow the complete scheduled maintenance
on the following pages.
6-5