2006 CHEVROLET EPICA 3-8
[x] Cancel search: 3-8Page 107 of 368
Instrument Panel Overview...............................3-4
Hazard Warning Flashers................................3-6
Other Warning Devices...................................3-6
Horn .............................................................3-6
Tilt Wheel.....................................................3-6
Turn Signal/Multifunction Lever.........................3-7
Turn and Lane-Change Signals........................3-7
Headlamp High/Low-Beam Changer..................3-8
Flash-to-Pass.................................................3-8
Windshield Wipers..........................................3-8
Windshield Washer.........................................3-9
Cruise Control..............................................3-10
Exterior Lamps.............................................3-12
Headlamps on Reminder................................3-13
Daytime Running Lamps (DRL).......................3-13
Fog Lamps ..................................................3-14
Instrument Panel Brightness...........................3-15
Dome Lamp .................................................3-15
Entry Lighting...............................................3-16
Map Lamps .................................................3-16
Accessory Power Outlet(s).............................3-16
Ashtray(s) and Cigarette Lighter......................3-17
Clock..........................................................3-18Climate Controls............................................3-19
Climate Control System.................................3-19
Automatic Climate Control System...................3-22
Outlet Adjustment.........................................3-27
Passenger Compartment Air Filter...................3-28
Warning Lights, Gages, and Indicators............3-29
Instrument Panel Cluster................................3-30
Speedometer and Odometer...........................3-31
Trip Odometer..............................................3-31
Tachometer.................................................3-31
Safety Belt Reminder Light.............................3-32
Safety Belt Reminder Tone............................3-32
Airbag Readiness Light..................................3-32
Passenger Airbag Status Indicator...................3-33
Charging System Light..................................3-35
Brake System Warning Light..........................3-36
Anti-Lock Brake System
Warning Light...........................................3-37
Speed Sensitive Power
Steering (SSPS) Warning Light....................3-37
Traction Control System (TCS)
Warning Light...........................................3-38
Section 3 Instrument Panel
3-1
Page 108 of 368
Traction Control System
Active Light..............................................3-38
Traction Off Light..........................................3-39
Hold Mode Light...........................................3-39
Engine Coolant Temperature Gage..................3-40
Malfunction Indicator Lamp.............................3-40
Oil Pressure Light.........................................3-43
Cruise Control Light......................................3-43
Highbeam On Light.......................................3-44
Daytime Running Lamps (DRL)
Indicator Light...........................................3-44
Door Ajar Light.............................................3-44
Trunk Ajar Light............................................3-44
Fuel Gage...................................................3-45
Low Fuel Warning Light.................................3-46Audio System(s).............................................3-46
Radio with CD
(Single Display, Base Level).......................3-48
Radio with CD
(Single Display, MP3).................................3-52
Radio with CD
(Double Display, MP3/WMA).......................3-59
Radio with Six-Disc CD
(Double Display, MP3/WMA).......................3-67
Trunk-Mounted CD Changer...........................3-75
Audio Steering Wheel Controls.......................3-78
Radio Reception...........................................3-79
Care of Your CDs.........................................3-80
Care of the CD Player...................................3-80
Backglass Antenna (Sedan Models).................3-80
Integrated Windshield Antenna
(Hatchback and Wagon Models)..................3-81
Section 3 Instrument Panel
3-2
Page 111 of 368
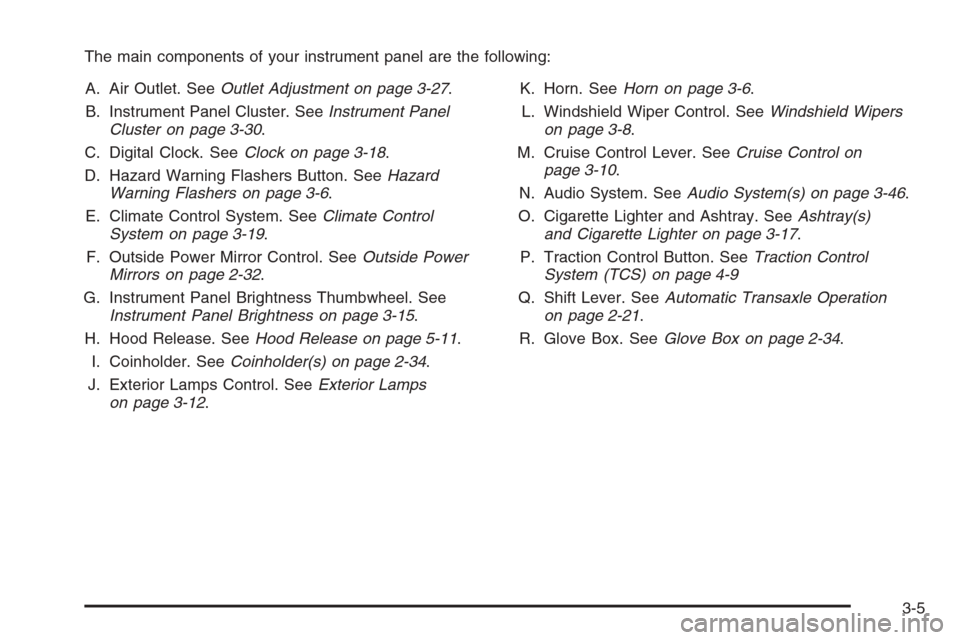
The main components of your instrument panel are the following:
A. Air Outlet. SeeOutlet Adjustment on page 3-27.
B. Instrument Panel Cluster. SeeInstrument Panel
Cluster on page 3-30.
C. Digital Clock. SeeClock on page 3-18.
D. Hazard Warning Flashers Button. SeeHazard
Warning Flashers on page 3-6.
E. Climate Control System. SeeClimate Control
System on page 3-19.
F. Outside Power Mirror Control. SeeOutside Power
Mirrors on page 2-32.
G. Instrument Panel Brightness Thumbwheel. See
Instrument Panel Brightness on page 3-15.
H. Hood Release. SeeHood Release on page 5-11.
I. Coinholder. SeeCoinholder(s) on page 2-34.
J. Exterior Lamps Control. SeeExterior Lamps
on page 3-12.K. Horn. SeeHorn on page 3-6.
L. Windshield Wiper Control. SeeWindshield Wipers
on page 3-8.
M. Cruise Control Lever. SeeCruise Control on
page 3-10.
N. Audio System. SeeAudio System(s) on page 3-46.
O. Cigarette Lighter and Ashtray. SeeAshtray(s)
and Cigarette Lighter on page 3-17.
P. Traction Control Button. SeeTraction Control
System (TCS) on page 4-9
Q. Shift Lever. SeeAutomatic Transaxle Operation
on page 2-21.
R. Glove Box. SeeGlove Box on page 2-34.
3-5
Page 113 of 368
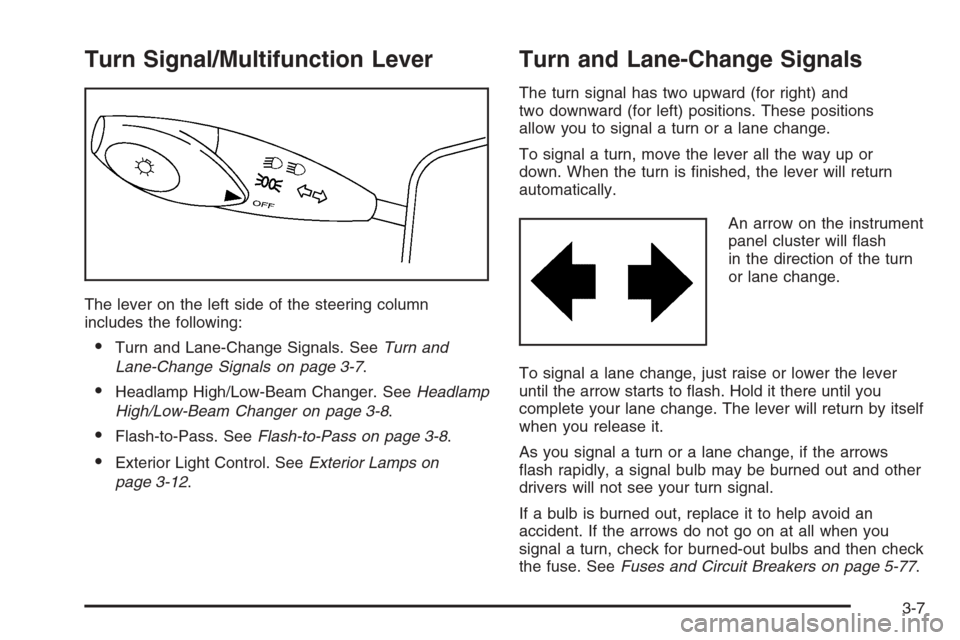
Turn Signal/Multifunction Lever
The lever on the left side of the steering column
includes the following:
•Turn and Lane-Change Signals. SeeTurn and
Lane-Change Signals on page 3-7.
•Headlamp High/Low-Beam Changer. SeeHeadlamp
High/Low-Beam Changer on page 3-8.
•Flash-to-Pass. SeeFlash-to-Pass on page 3-8.
•Exterior Light Control. SeeExterior Lamps on
page 3-12.
Turn and Lane-Change Signals
The turn signal has two upward (for right) and
two downward (for left) positions. These positions
allow you to signal a turn or a lane change.
To signal a turn, move the lever all the way up or
down. When the turn is finished, the lever will return
automatically.
An arrow on the instrument
panel cluster will flash
in the direction of the turn
or lane change.
To signal a lane change, just raise or lower the lever
until the arrow starts to flash. Hold it there until you
complete your lane change. The lever will return by itself
when you release it.
As you signal a turn or a lane change, if the arrows
flash rapidly, a signal bulb may be burned out and other
drivers will not see your turn signal.
If a bulb is burned out, replace it to help avoid an
accident. If the arrows do not go on at all when you
signal a turn, check for burned-out bulbs and then check
the fuse. SeeFuses and Circuit Breakers on page 5-77.
3-7
Page 114 of 368
Headlamp High/Low-Beam Changer
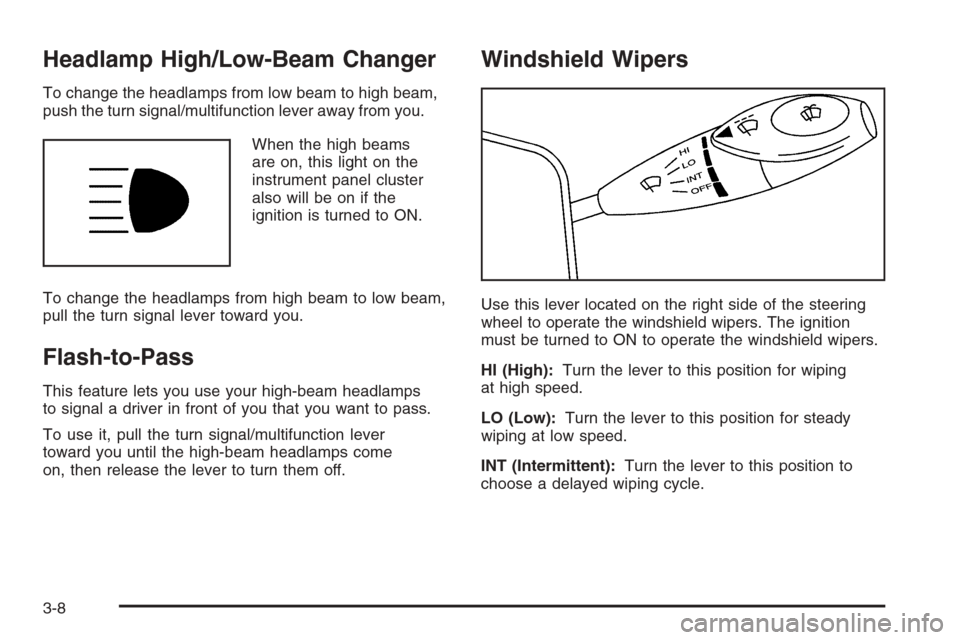
To change the headlamps from low beam to high beam,
push the turn signal/multifunction lever away from you.
When the high beams
are on, this light on the
instrument panel cluster
also will be on if the
ignition is turned to ON.
To change the headlamps from high beam to low beam,
pull the turn signal lever toward you.
Flash-to-Pass
This feature lets you use your high-beam headlamps
to signal a driver in front of you that you want to pass.
To use it, pull the turn signal/multifunction lever
toward you until the high-beam headlamps come
on, then release the lever to turn them off.
Windshield Wipers
Use this lever located on the right side of the steering
wheel to operate the windshield wipers. The ignition
must be turned to ON to operate the windshield wipers.
HI (High):Turn the lever to this position for wiping
at high speed.
LO (Low):Turn the lever to this position for steady
wiping at low speed.
INT (Intermittent):Turn the lever to this position to
choose a delayed wiping cycle.
3-8
Page 150 of 368
Highbeam On Light
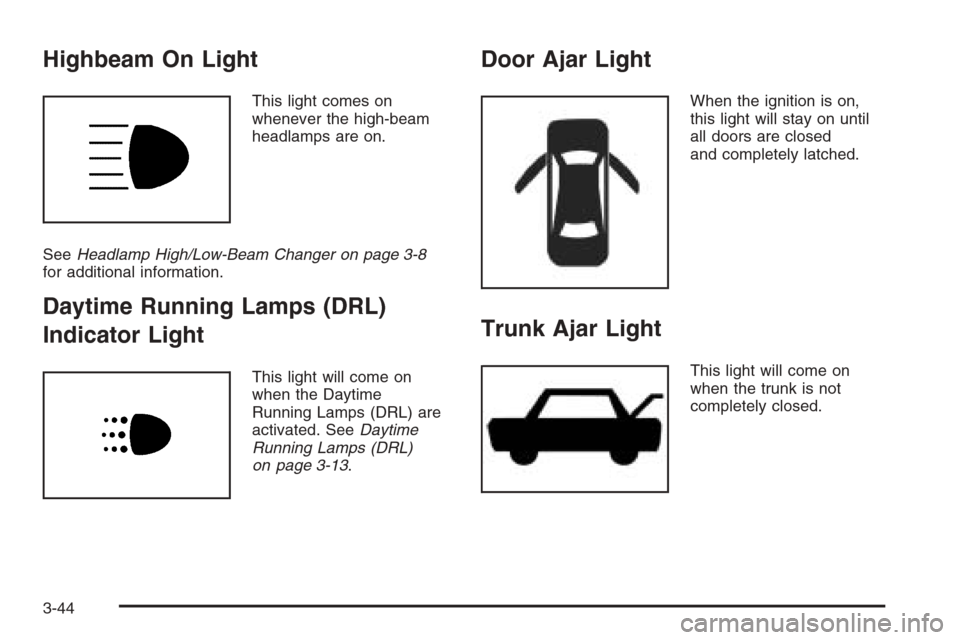
This light comes on
whenever the high-beam
headlamps are on.
SeeHeadlamp High/Low-Beam Changer on page 3-8
for additional information.
Daytime Running Lamps (DRL)
Indicator Light
This light will come on
when the Daytime
Running Lamps (DRL) are
activated. SeeDaytime
Running Lamps (DRL)
on page 3-13.
Door Ajar Light
When the ignition is on,
this light will stay on until
all doors are closed
and completely latched.
Trunk Ajar Light
This light will come on
when the trunk is not
completely closed.
3-44
Page 156 of 368
Playing a CD
Insert a CD partway into the slot, label side up. The
player will pull it in and the CD should begin playing.
You can insert a CD with the ignition off.
When the CD is inserted, CDP will appear on the
display. As the CD is loading Filecheck will appear on
the display. As each new track starts to play, Track
and the track number will appear on the display.
If the ignition or radio is turned off with a CD in the
player, it will stay in the player. When a CD is in
the player and the ignition is turned on, the radio
must be turned on before the CD will start playback.
When the ignition and radio are turned on, the CD
will start playing where it stopped, if it was the
last selected audio source.
The CD player can play the smaller 3 inch (8 cm)
single CDs with an adapter ring. Full-size CDs and
the smaller CDs are loaded in the same manner.
If playing a CD-R, the sound quality may be reduced
due to CD-R quality, the method of recording, the
quality of the music that has been recorded, and the
way the CD-R has been handled. There may be
an increase in skipping, difficulty in finding tracks,
and/or difficulty in loading and ejecting. If these
problems occur, check the bottom surface of the CD.If the surface of the CD is damaged, such as cracked,
broken, or scratched, the CD will not play properly. If the
surface of the CD is soiled, seeCare of Your CDs on
page 3-80for more information.
If there is no apparent damage, try a known good CD.
Do not add any label to a CD, it could get caught in the
CD player. If a CD is recorded on a personal computer
and a description label is needed, try labeling the top of
the recorded CD with a marking pen instead.
Notice:If you add any label to a CD, insert more
than one CD into the slot at a time, or attempt to play
scratched or damaged CDs, you could damage the
CD player. When using the CD player, use only CDs
in good condition without any label, load one CD at a
time, and keep the CD player and the loading slot free
of foreign materials, liquids, and debris.
If an error appears on the display, see “CD Messages”
later in this section.
2 RPT (Repeat):Press this pushbutton to repeat the
current track. RPT will appear on the display. Press this
pushbutton again to turn off repeat play.
3 INT (SCAN):Press this button to listen to the first
few seconds of each track on each CD inserted. INTRO
will appear on the display. To stop scanning press
this button again. The current track will begin to play.
3-50
Page 160 of 368
Playing a CD
Insert a CD partway into the slot, label side up. The
player will pull it in and the CD should begin playing.
You can insert a CD with the ignition off.
When the CD is inserted, CDP will appear on the
display. As the CD is loading Filecheck will appear on
the display. As each new track starts to play, Track
and the track number will appear on the display.
If the ignition or radio is turned off with a CD in the
player, it will stay in the player. When a CD is in
the player and the ignition is turned on, the radio must
be turned on before the CD will start playback. When
the ignition and radio are turned on, the CD will
start playing where it stopped, if it was the last
selected audio source.
The CD player can play the smaller 3 inch (8 cm)
single CDs with an adapter ring. Full-size CDs and
the smaller CDs are loaded in the same manner.
If playing a CD-R, the sound quality may be reduced
due to CD-R quality, the method of recording, the
quality of the music that has been recorded, and the
way the CD-R has been handled. There may be
an increase in skipping, difficulty in finding tracks,
and/or difficulty in loading and ejecting. If these
problems occur, check the bottom surface of the CD.If the surface of the CD is damaged, such as cracked,
broken, or scratched, the CD will not play properly. If the
surface of the CD is soiled, seeCare of Your CDs on
page 3-80for more information.
If there is no apparent damage, try a known good CD.
Do not add any label to a CD, it could get caught in the
CD player. If a CD is recorded on a personal computer
and a description label is needed, try labeling the top of
the recorded CD with a marking pen instead.
Notice:If you add any label to a CD, insert more
than one CD into the slot at a time, or attempt to play
scratched or damaged CDs, you could damage the
CD player. When using the CD player, use only CDs
in good condition without any label, load one CD at a
time, and keep the CD player and the loading slot free
of foreign materials, liquids, and debris.
If an error appears on the display, see “CD Messages”
later in this section.
2 RPT (Repeat):Press this pushbutton to repeat the
current track. RPT will appear on the display. Press this
pushbutton again to turn off repeat play.
3 INT (Scan):Press this button to listen to the first
few seconds of each track on each loaded CD. INTRO
will appear on the display. To stop scanning press
this button again. The current track will begin to play.
3-54