2006 CHEVROLET CORVETTE change wheel
[x] Cancel search: change wheelPage 59 of 426

Adding Equipment to Your
Airbag-Equipped Vehicle
Q:Is there anything I might add to the front or
sides of the vehicle that could keep the
airbags from working properly?
A:Yes. If you add things that change your vehicle’s
frame, bumper system, height, front end or side
sheet metal, they may keep the airbag system
from working properly. Also, the airbag system may
not work properly if you relocate any of the airbag
sensors. If you have any questions about this,
you should contact Customer Assistance before
you modify your vehicle. The phone numbers
and addresses for Customer Assistance are in
Step Two of the Customer Satisfaction Procedure
in this manual. SeeCustomer Satisfaction
Procedure on page 7-2.
Q:Because I have a disability, I have to get my
vehicle modi�ed. How can I �nd out whether
this will affect my advanced airbag system?
A:Changing or moving any parts of the front seats,
safety belts, the airbag sensing and diagnostic
module, steering wheel, instrument panel, the inside
review mirror, or airbag wiring can affect the
operation of the airbag system. If you have
questions, call Customer Assistance. The phone
numbers and addresses for Customer Assistance
are in Step Two of the Customer Satisfaction
Procedure in this manual. SeeCustomer Satisfaction
Procedure on page 7-2.
1-53
Page 137 of 426

Instrument Panel Overview...............................3-4
Hazard Warning Flashers................................3-6
Other Warning Devices...................................3-6
Horn .............................................................3-6
Tilt Wheel.....................................................3-6
Turn Signal/Multifunction Lever.........................3-8
Turn and Lane-Change Signals (Auto Signal).....3-8
Headlamp High/Low-Beam Changer..................3-9
Flash-to-Pass.................................................3-9
Windshield Wipers..........................................3-9
Windshield Washer.......................................3-10
Cruise Control..............................................3-11
Exterior Lamps.............................................3-15
Wiper Activated Headlamps............................3-16
Headlamps on Reminder................................3-16
Daytime Running Lamps (DRL).......................3-16
Fog Lamps ..................................................3-17
Twilight Sentinel
®..........................................3-18
Exterior Lighting Battery Saver........................3-19
Instrument Panel Brightness...........................3-19
Courtesy Lamps...........................................3-19
Entry/Exit Lighting.........................................3-19
Reading Lamps............................................3-20
Battery Run-Down Protection..........................3-20
Head-Up Display (HUD).................................3-20
Accessory Power Outlet(s).............................3-24
Ashtray(s) and Cigarette Lighter......................3-25Climate Controls............................................3-25
Dual Automatic Climate Control System...........3-25
Outlet Adjustment.........................................3-30
Passenger Compartment Air Filter...................3-31
Warning Lights, Gages, and Indicators............3-32
Instrument Panel Cluster................................3-33
Speedometer and Odometer...........................3-34
Tachometer.................................................3-34
Safety Belt Reminder Light.............................3-34
Airbag Readiness Light..................................3-34
Passenger Airbag Status Indicator...................3-35
Voltmeter Gage............................................3-37
One-to-Four Shift Light
(Manual Transmission)...............................3-38
Brake System Warning Light..........................3-38
Anti-Lock Brake System Warning Light.............3-39
Traction Control System (TCS) Warning Light . . .3-40
Active Handling System Light.........................3-40
Engine Coolant Temperature Gage..................3-41
Tire Pressure Light.......................................3-42
Malfunction Indicator Lamp.............................3-42
Engine Oil Pressure Gage.............................3-45
Security Light...............................................3-46
Fog Lamp Light............................................3-46
Lights On Reminder......................................3-46
Highbeam On Light.......................................3-46
Fuel Gage...................................................3-47
Section 3 Instrument Panel
3-1
Page 147 of 426
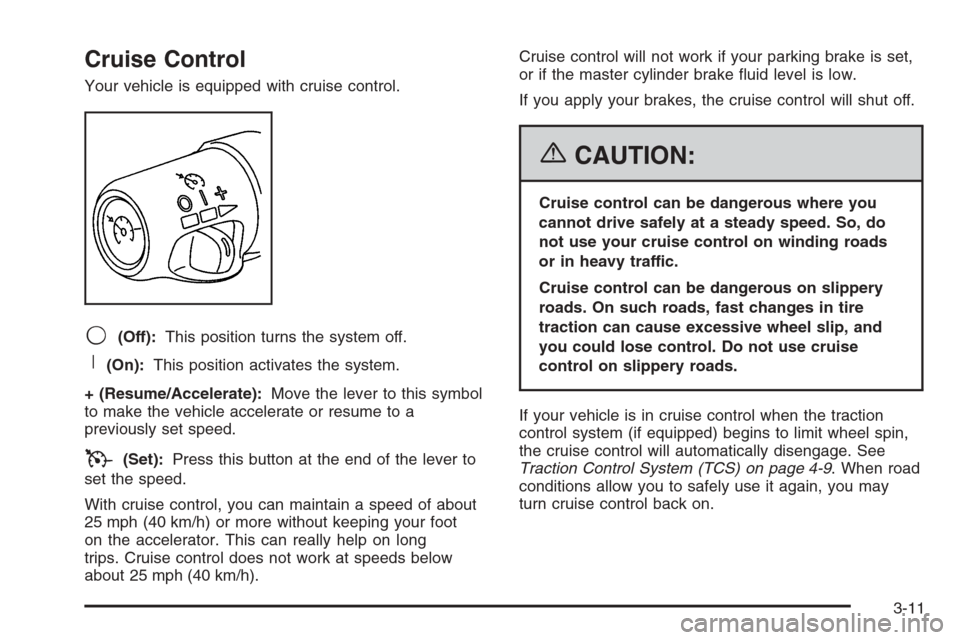
Cruise Control
Your vehicle is equipped with cruise control.
9(Off):This position turns the system off.
R(On):This position activates the system.
+ (Resume/Accelerate):Move the lever to this symbol
to make the vehicle accelerate or resume to a
previously set speed.
T(Set):Press this button at the end of the lever to
set the speed.
With cruise control, you can maintain a speed of about
25 mph (40 km/h) or more without keeping your foot
on the accelerator. This can really help on long
trips. Cruise control does not work at speeds below
about 25 mph (40 km/h).Cruise control will not work if your parking brake is set,
or if the master cylinder brake �uid level is low.
If you apply your brakes, the cruise control will shut off.
{CAUTION:
Cruise control can be dangerous where you
cannot drive safely at a steady speed. So, do
not use your cruise control on winding roads
or in heavy traffic.
Cruise control can be dangerous on slippery
roads. On such roads, fast changes in tire
traction can cause excessive wheel slip, and
you could lose control. Do not use cruise
control on slippery roads.
If your vehicle is in cruise control when the traction
control system (if equipped) begins to limit wheel spin,
the cruise control will automatically disengage. See
Traction Control System (TCS) on page 4-9. When road
conditions allow you to safely use it again, you may
turn cruise control back on.
3-11
Page 159 of 426

The HUD controls are
located to the left of the
steering wheel.
To adjust the HUD so you can see it properly, do the
following:
1. Start your engine and press the HUD dimmer
control all the way up by pressing the (+) button.
The brightness of the HUD image is determined by
the light conditions in the direction your vehicle is
facing and where you have the HUD dimmer control
set. If you are facing a dark object or a heavily
shaded area, your HUD may anticipate that you are
entering a dark area and may begin to dim.
It is possible for sunlight to enter the HUD making
it difficult to see the image. The display will return
to normal when the sunlight is no longer entering
the HUD.2. Adjust the seat to a comfortable driving position.
If you change your seat position later, you may
have to re-adjust your HUD.
3. Press the up or down arrows to center the HUD
image in your view.
The HUD image can only be adjusted up and down,
not side-to-side.
4. Press the dimmer control downward until the HUD
image is no brighter than necessary.
To turn HUD off, press and hold the (–) button until the
HUD display turns off.
If the sun comes out or it becomes cloudy, you may need
to adjust the HUD brightness again using the dimmer
control. Polarized sunglasses could make the HUD image
harder to see.
The HUD information can be displayed in one of
six languages including English, Spanish, French,
German, Italian or Japanese. The speedometer can
be displayed in either English or Metric units.
To change the language and unit selections, see
“OPTION” underDIC Controls and Displays on
page 3-48.
Clean the inside of the windshield as needed to remove
any dirt or �lm that reduces the sharpness or clarity
of the HUD image.
3-23
Page 192 of 426
CLOSE TRUNK TO MOVE TOP:This message will
display and a chime will sound if the trunk is open while
you are trying to operate the convertible top. Make
sure the trunk is closed before operating the convertible
top. SeeConvertible Top (Manual) on page 2-60or
Convertible Top (Power) on page 2-67.
COMPETITIVE DRIVING MODE:When the Competitive
Driving mode is selected, this message will be
displayed in the DIC and a short chime will sound.
The instrument panel cluster light will not be on when
the Competitive Driving mode is selected. The Traction
Control System will not be operating while in the
Competitive Driving mode. You should adjust your
driving accordingly. SeeRacing or Other Competitive
Driving on page 4-18for more information.
COOLANT OVER TEMPERATURE:You will hear a
chime when this message is displayed. To acknowledge
the warning, press the RESET button. After you press
the RESET button, a message will be displayed and
you will hear a chime every minute until this condition
changes. If you do not press the RESET button,
the message will remain on the digital display until the
condition changes.If the engine coolant exceeds 255°F (124°C), this
message is displayed. If you have been operating your
vehicle under normal driving conditions, you should
pull off the road, stop your vehicle and turn off the
engine as soon as possible. You can monitor the coolant
temperature with the GAGES button on the DIC or
the engine coolant gage on the instrument panel cluster.
SeeEngine Overheating on page 5-32.
CRUISE DISENGAGED:This message will momentarily
appear when you disengage the cruise control system
by stepping on the brake on an automatic transmission
vehicle or the clutch on a manual transmission vehicle
or by turning off the cruise control switch. SeeCruise
Control on page 3-11for more information.
ENGINE DRAG CONTROL ACTIVE:This message
displays when engine drag control is active. When
driving in a lower gear in rainy, snowy or icy conditions,
and then letting up on the accelerator or downshifting,
the rear wheels may begin to slip and this message
appears. This message will stay on for a few seconds
following the engine drag control event.
ENGINE OVERHEATED – STOP ENGINE:This
message will appear along with a continuous chime when
the engine has overheated. Stop and turn the engine off
immediately to avoid severe engine damage. SeeEngine
Overheating on page 5-32.
3-56
Page 214 of 426
Here are some ways in which you can help avoid
distraction while driving.
While your vehicle is parked:
Familiarize yourself with all of its controls.
Familiarize yourself with its operation.
Set up your audio system by presetting your
favorite radio stations, setting the tone, and
adjusting the speakers. Then, when driving
conditions permit, you can tune to your favorite
radio stations using the presets and steering wheel
controls if the vehicle has them.
Notice:Before adding any sound equipment to
your vehicle, such as an audio system, CD player,
CB radio, mobile telephone, or two-way radio, make
sure that it can be added by checking with your
dealer. Also, check federal rules covering mobile
radio and telephone units. If sound equipment can
be added, it is very important to do it properly.
Added sound equipment may interfere with
the operation of your vehicle’s engine, radio, or
other systems, and even damage them. Your
vehicle’s systems may interfere with the operation
of sound equipment that has been added.Notice:The chime signals related to safety belts,
parking brake, and other functions of your vehicle
operate through the radio/entertainment system.
If that equipment is replaced or additional equipment
is added to your vehicle, the chimes may not
work. Make sure that replacement or additional
equipment is compatible with your vehicle before
installing it. SeeAccessories and Modifications
on page 5-3.
Your vehicle may have a feature called Retained
Accessory Power (RAP). With RAP, the audio system
can be played even after the ignition is turned off.
SeeRetained Accessory Power (RAP) on page 2-23
for more information.
Setting the Time
With the ignition on and the radio off, press the H or the
M button to enter clock mode. Press and hold H until
the correct hour appears on the display. Press and
hold M until the correct minute appears on the display.
To change the time default setting from 12 hour to
24 hour, press either the H or the M button for
two seconds to enter the clock mode. Press the tune
knob to select between the 12 or 24 hour display format.
The clock mode will automatically time out with the
changed display format set as the current default setting.
3-78
Page 246 of 426
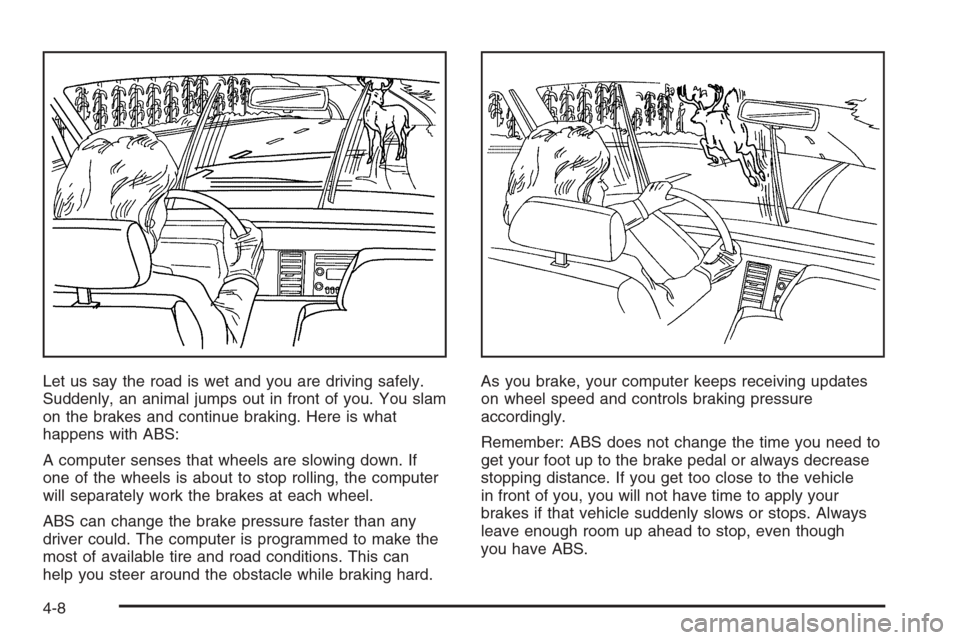
Let us say the road is wet and you are driving safely.
Suddenly, an animal jumps out in front of you. You slam
on the brakes and continue braking. Here is what
happens with ABS:
A computer senses that wheels are slowing down. If
one of the wheels is about to stop rolling, the computer
will separately work the brakes at each wheel.
ABS can change the brake pressure faster than any
driver could. The computer is programmed to make the
most of available tire and road conditions. This can
help you steer around the obstacle while braking hard.As you brake, your computer keeps receiving updates
on wheel speed and controls braking pressure
accordingly.
Remember: ABS does not change the time you need to
get your foot up to the brake pedal or always decrease
stopping distance. If you get too close to the vehicle
in front of you, you will not have time to apply your
brakes if that vehicle suddenly slows or stops. Always
leave enough room up ahead to stop, even though
you have ABS.
4-8
Page 251 of 426
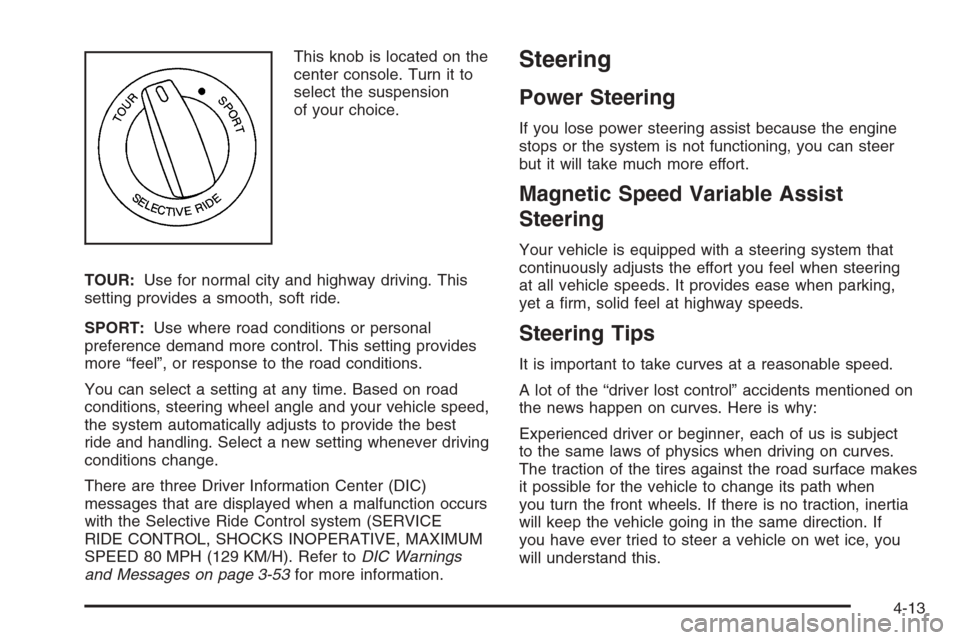
This knob is located on the
center console. Turn it to
select the suspension
of your choice.
TOUR:Use for normal city and highway driving. This
setting provides a smooth, soft ride.
SPORT:Use where road conditions or personal
preference demand more control. This setting provides
more “feel”, or response to the road conditions.
You can select a setting at any time. Based on road
conditions, steering wheel angle and your vehicle speed,
the system automatically adjusts to provide the best
ride and handling. Select a new setting whenever driving
conditions change.
There are three Driver Information Center (DIC)
messages that are displayed when a malfunction occurs
with the Selective Ride Control system (SERVICE
RIDE CONTROL, SHOCKS INOPERATIVE, MAXIMUM
SPEED 80 MPH (129 KM/H). Refer toDIC Warnings
and Messages on page 3-53for more information.Steering
Power Steering
If you lose power steering assist because the engine
stops or the system is not functioning, you can steer
but it will take much more effort.
Magnetic Speed Variable Assist
Steering
Your vehicle is equipped with a steering system that
continuously adjusts the effort you feel when steering
at all vehicle speeds. It provides ease when parking,
yet a �rm, solid feel at highway speeds.
Steering Tips
It is important to take curves at a reasonable speed.
A lot of the “driver lost control” accidents mentioned on
the news happen on curves. Here is why:
Experienced driver or beginner, each of us is subject
to the same laws of physics when driving on curves.
The traction of the tires against the road surface makes
it possible for the vehicle to change its path when
you turn the front wheels. If there is no traction, inertia
will keep the vehicle going in the same direction. If
you have ever tried to steer a vehicle on wet ice, you
will understand this.
4-13