2006 CHEVROLET CORVETTE change time
[x] Cancel search: change timePage 255 of 426
Check your mirrors, glance over your shoulder,
and start your left lane change signal before moving
out of the right lane to pass. When you are far
enough ahead of the passed vehicle to see its front in
your inside mirror, activate your right lane change
signal and move back into the right lane. Remember
that your passenger side outside mirror is convex.
The vehicle you just passed may seem to be farther
away from you than it really is.
Try not to pass more than one vehicle at a time on
two-lane roads. Reconsider before passing the next
vehicle.
Do not overtake a slowly moving vehicle too rapidly.
Even though the brake lamps are not �ashing, it may
be slowing down or starting to turn.
If you are being passed, make it easy for the
following driver to get ahead of you. Perhaps
you can ease a little to the right.
Loss of Control
Let us review what driving experts say about what
happens when the three control systems — brakes,
steering, and acceleration — do not have enough
friction where the tires meet the road to do what the
driver has asked.In any emergency, do not give up. Keep trying to
steer and constantly seek an escape route or area
of less danger.
Skidding
In a skid, a driver can lose control of the vehicle.
Defensive drivers avoid most skids by taking reasonable
care suited to existing conditions, and by not overdriving
those conditions. But skids are always possible.
The three types of skids correspond to your vehicle’s
three control systems. In the braking skid, your wheels
are not rolling. In the steering or cornering skid, too much
speed or steering in a curve causes tires to slip and lose
cornering force. And in the acceleration skid, too much
throttle causes the driving wheels to spin.
A cornering skid is best handled by easing your foot off
the accelerator pedal.
Remember: Any traction control system helps avoid only
the acceleration skid. If your traction control system is
off, then an acceleration skid is also best handled
by easing your foot off the accelerator pedal.
If your vehicle starts to slide, ease your foot off the
accelerator pedal and quickly steer the way you want
the vehicle to go. If you start steering quickly enough,
your vehicle may straighten out. Always be ready
for a second skid if it occurs.
4-17
Page 299 of 426
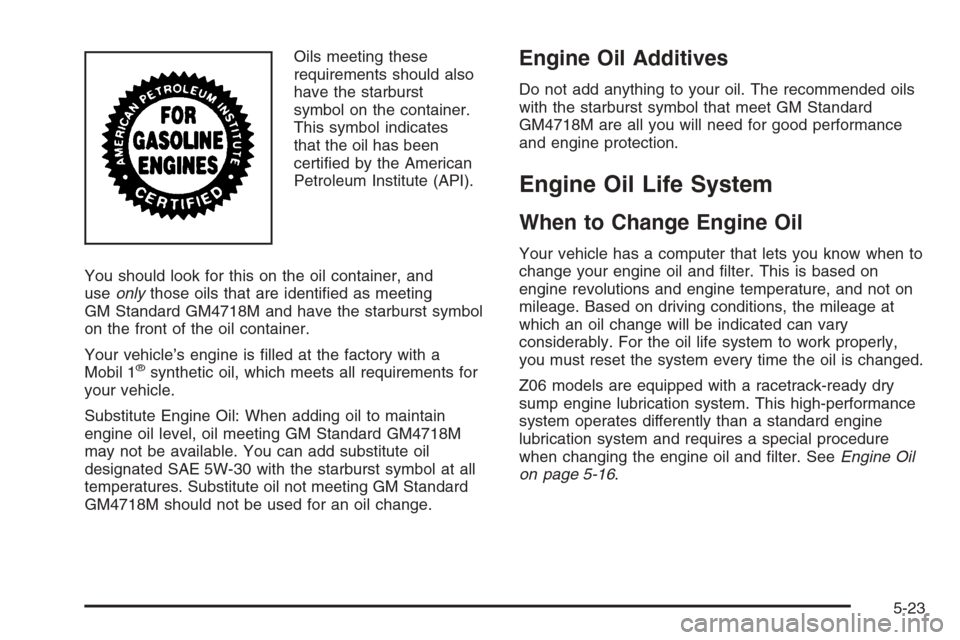
Oils meeting these
requirements should also
have the starburst
symbol on the container.
This symbol indicates
that the oil has been
certi�ed by the American
Petroleum Institute (API).
You should look for this on the oil container, and
useonlythose oils that are identi�ed as meeting
GM Standard GM4718M and have the starburst symbol
on the front of the oil container.
Your vehicle’s engine is �lled at the factory with a
Mobil 1
®synthetic oil, which meets all requirements for
your vehicle.
Substitute Engine Oil: When adding oil to maintain
engine oil level, oil meeting GM Standard GM4718M
may not be available. You can add substitute oil
designated SAE 5W-30 with the starburst symbol at all
temperatures. Substitute oil not meeting GM Standard
GM4718M should not be used for an oil change.
Engine Oil Additives
Do not add anything to your oil. The recommended oils
with the starburst symbol that meet GM Standard
GM4718M are all you will need for good performance
and engine protection.
Engine Oil Life System
When to Change Engine Oil
Your vehicle has a computer that lets you know when to
change your engine oil and �lter. This is based on
engine revolutions and engine temperature, and not on
mileage. Based on driving conditions, the mileage at
which an oil change will be indicated can vary
considerably. For the oil life system to work properly,
you must reset the system every time the oil is changed.
Z06 models are equipped with a racetrack-ready dry
sump engine lubrication system. This high-performance
system operates differently than a standard engine
lubrication system and requires a special procedure
when changing the engine oil and �lter. SeeEngine Oil
on page 5-16.
5-23
Page 300 of 426
When the system has calculated that oil life has been
diminished, it will indicate that an oil change is
necessary. A CHANGE ENGINE OIL message will
come on. Change your oil as soon as possible within
the next 600 miles (1 000 km). It is possible that, if you
are driving under the best conditions, the oil life
system may not indicate that an oil change is necessary
for over a year. However, your engine oil and �lter
must be changed at least once a year and at this time
the system must be reset. Your dealer has GM-trained
service people who will perform this work using
genuine GM parts and reset the system. It is also
important to check your oil regularly and keep it at the
proper level.
If the system is ever reset accidentally, you must
change your oil at 3,000 miles (5 000 km) since your
last oil change. Remember to reset the oil life system
whenever the oil is changed.How to Reset the Engine Oil Life
System
The Engine Oil Life System calculates when to change
your engine oil and �lter based on vehicle use.
Anytime your oil is changed, reset the system so it can
calculate when the next oil change is required. If a
situation occurs where you change your oil prior to a
CHANGE ENGINE OIL message being turned on, reset
the system.
To reset the CHANGE ENGINE OIL message after an
oil change, do the following:
1. Press the TRIP button so the OIL LIFE percentage
is displayed.
2. Press RESET and hold for two seconds. OIL LIFE
REMAINING 100% will appear.
If the CHANGE ENGINE OIL message comes back on
when you start your vehicle, the engine oil life system
has not reset. Repeat the procedure.
5-24
Page 320 of 426
Brake Wear
Your vehicle has four-wheel disc brakes.
Disc brake pads have built-in wear indicators that make
a high-pitched warning sound when the brake pads
are worn and new pads are needed. The sound
may come and go or be heard all the time your vehicle
is moving, except when you are pushing on the
brake pedal �rmly.
{CAUTION:
The brake wear warning sound means that soon
your brakes will not work well. That could lead
to an accident. When you hear the brake wear
warning sound, have your vehicle serviced.
Notice:Continuing to drive with worn-out brake
pads could result in costly brake repair.
Some driving conditions or climates may cause a brake
squeal when the brakes are �rst applied or lightly
applied. This does not mean something is wrong with
your brakes.
Brake linings should always be replaced as complete
axle sets.
Brake Pedal Travel
See your dealer if the brake pedal does not return to
normal height, or if there is a rapid increase in
pedal travel. This could be a sign of brake trouble.
Brake Adjustment
As you make brake stops, your disc brakes
automatically adjust for wear.
Replacing Brake System Parts
The braking system on a vehicle is complex. Its many
parts have to be of top quality and work well together if
the vehicle is to have really good braking. Your vehicle
was designed and tested with top-quality GM brake parts.
When you replace parts of your braking system — for
example, when your brake linings wear down and you
need new ones put in — be sure you get new approved
GM replacement parts. If you do not, your brakes may no
longer work properly. For example, if someone puts in
brake linings that are wrong for your vehicle, the balance
between your front and rear brakes can change — for the
worse. The braking performance you have come to
expect can change in many other ways if someone puts
in the wrong replacement brake parts.
5-44
Page 338 of 426

Tread:The portion of a tire that comes into contact
with the road.
Treadwear Indicators:Narrow bands, sometimes
called wear bars, that show across the tread of a tire
when only 1/16 inch (1.6 mm) of tread remains.
SeeWhen It Is Time for New Tires on page 5-69.
UTQGS (Uniform Tire Quality Grading Standards):
A tire information system that provides consumers
with ratings for a tire’s traction, temperature, and
treadwear. Ratings are determined by tire manufacturers
using government testing procedures. The ratings are
molded into the sidewall of the tire. SeeUniform
Tire Quality Grading on page 5-72.
Vehicle Capacity Weight:The number of designated
seating positions multiplied by 150 lbs (68 kg) plus
the rated cargo load. SeeLoading Your Vehicle
on page 4-33.
Vehicle Maximum Load on the Tire:Load on an
individual tire due to curb weight, accessory weight,
occupant weight, and cargo weight.
Vehicle Placard:A label permanently attached to a
vehicle showing the vehicle’s capacity weight and
the original equipment tire size and recommended
in�ation pressure. See “Tire and Loading Information
Label” underLoading Your Vehicle on page 4-33.Extended Mobility Tires
Your vehicle, when new, had Goodyear Extended
Mobility Tires (EMT). There’s no spare tire, no tire
changing equipment and no place to store a tire in
the vehicle. Extended Mobility Tires perform so well
without any air that a Tire Pressure Monitor (TPM) is
used to alert you if a tire has lost pressure.
If a tire goes �at, you won’t need to stop on the side of
the road to change the tire. You can just keep on
driving. The shorter the distance you drive and the
slower the speed, the greater the chance that the tire will
not have to be replaced. If you drive on a de�ated
EMT for 25 miles (40 km) or less and at speeds
of 55 mph (90 km/h) or less, there is a good chance that
the tire can be repaired. The tire can operate effectively
with no air pressure for up to 100 miles (160 km) at
speeds up to 55 mph (90 km/h), but the tire would then
have to be replaced. When a tire is �lled with air, it
provides a cushion between the road and the wheel.
Because you won’t have this cushion when driving on a
de�ated tire, try to avoid potholes that could damage
your wheel and require replacement of it.
Some road hazards can damage a tire beyond repair.
This damage could occur even before you’ve driven on
the tire in a de�ated condition.
5-62
Page 344 of 426
The Tire and Loading Information Label (tire information
placard) is attached to the vehicle’s b-pillar. This label
shows the size of your vehicle’s original tires and the
correct in�ation pressure for your vehicle’s tires when
they are cold. SeeLoading Your Vehicle on page 4-33.
Your vehicle’s TPMS can alert you about a low or high
tire pressure condition but it does not replace normal tire
maintenance. SeeIn�ation - Tire Pressure on page 5-64
andWhen It Is Time for New Tires on page 5-69.
The SERVICE TIRE MONITOR message, in the DIC,
is displayed when the TPMS is malfunctioning.
For example, one or more TPMS sensors may be
inoperable or missing. Also, the active handling system
will be affected, seeActive Handling System on
page 4-10. See your dealer for service.
TPMS Sensor Identi�cation Codes
Each TPMS sensor has a unique identi�cation code.
Any time you replace one or more of the TPMS sensors,
the identi�cation codes will need to be matched to the
new tire/wheel position. The sensors are matched, to the
tire/wheel positions, in the following order: driver’s
side front tire, passenger’s side front tire, passenger’s
side rear tire, and driver’s side rear tire using a
TPMS diagnostic tool. See your GM dealer for service.
Federal Communications Commission
(FCC) and Industry and Science
Canada
The Tire Pressure Monitor System (TPMS) operates on
a radio frequency and complies with Part 15 of the
FCC Rules. Operation is subject to the following
two conditions:
1. This device may not cause harmful interference.
2. This device must accept any interference received,
including interference that may cause undesired
operation.
The Tire Pressure Monitor System (TPMS) operates
on a radio frequency and complies with RSS-210
of Industry and Science Canada. Operation is subject
to the following two conditions:
1. This device may not cause interference.
2. This device must accept any interference received,
including interference that may cause undesired
operation of the device.
Changes or modi�cations to this system by other than
an authorized service facility could void authorization to
use this equipment.
5-68
Page 350 of 426
Each new wheel should have the same load-carrying
capacity, diameter, width, offset and be mounted
the same way as the one it replaces.
If you need to replace any of your wheels, wheel bolts
or wheel nuts, replace them only with new GM
original equipment parts. This way, you will be sure to
have the right wheel, wheel bolts and wheel nuts
for your vehicle.
{CAUTION:
Using the wrong replacement wheels, wheel
bolts, or wheel nuts on your vehicle can be
dangerous. It could affect the braking and
handling of your vehicle, make your tires lose
air and make you lose control. You could have
a collision in which you or others could be
injured. Always use the correct wheel, wheel
bolts, and wheel nuts for replacement.Notice:The wrong wheel can also cause problems
with bearing life, brake cooling, speedometer or
odometer calibration, headlamp aim, bumper height,
vehicle ground clearance, and tire clearance to
the body and chassis.
{CAUTION:
Rust or dirt on a wheel, or on the parts to which
it is fastened, can make wheel nuts become
loose after a time. The wheel could come off and
cause a crash. When you change a wheel,
remove any rust or dirt from places where the
wheel attaches to the vehicle. In an emergency,
you can use a cloth or a paper towel to do this;
but be sure to use a scraper or wire brush later,
if you need to, to get all the rust or dirt off.
5-74
Page 360 of 426
To clean, use the following instructions:
1. Saturate a lint-free, clean white cloth with water or
club soda.
2. Wring the cloth to remove excess moisture.
3. Start on the outside edge of the soil and gently rub
toward the center. Continue cleaning, using a clean
area of the cloth each time it becomes soiled.
4. Continue to gently rub the soiled area until the
cleaning cloth remains clean.
5. If the soil is not completely removed, use a mild
soap solution and repeat the cleaning process
that was used with plain water.
If any of the soil remains, a commercial fabric cleaner or
spot lifter may be necessary. When a commercial
upholstery cleaner or spot lifter is to be used, test a
small hidden area for colorfastness �rst. If the locally
cleaned area gives any impression that a ring formation
may result, clean the entire surface.
After the cleaning process has been completed, a paper
towel can be used to blot excess moisture from the
fabric or carpet.Coated Moldings
These moldings are around the hatch opening in the
rear area.
When lightly soiled, wipe with a sponge or soft
lint-free cloth dampened with water.
When heavily soiled, use warm soapy water.
Leather
A soft cloth dampened with water may be used to
remove dust. If a more thorough cleaning is necessary,
a soft cloth dampened with a mild soap solution can
be used. Allow the leather to dry naturally. Do not
use heat to dry. Never use steam to clean leather.
Never use spot lifters or spot removers on leather.
Many commercial leather cleaners and coatings that are
sold to preserve and protect leather may permanently
change the appearance and feel of your leather and are
not recommended. Do not use silicone or wax-based
products, or those containing organic solvents to clean
your vehicle’s interior because they can alter the
appearance by increasing the gloss in a non-uniform
manner. Never use shoe polish on your leather.
5-84