2006 CHEVROLET CORVETTE brake
[x] Cancel search: brakePage 141 of 426

The main components of your instrument panel are the following:
A. Air Outlet. SeeOutlet Adjustment on page 3-30.
B. Head-Up Display Controls (If Equipped). SeeHead-Up
Display (HUD) on page 3-20.
C. Turn Signal/Multifunction Lever. SeeTurn
Signal/Multifunction Lever on page 3-8. Cruise Control.
SeeCruise Control on page 3-11. Fog Lamps. See
Fog Lamps on page 3-17. Headlamp Controls.
SeeExterior Lamps on page 3-15.
D. Manual Shift Paddles (If Equipped). SeeAutomatic
Transmission Operation on page 2-26.
E. Driver Information Center (DIC). SeeDriver
Information Center (DIC) on page 3-48.
F. Instrument Panel Cluster. SeeInstrument Panel
Cluster on page 3-33.
G. Windshield Wiper/Washer Lever. SeeWindshield
Wipers on page 3-9andWindshield Washer on
page 3-10.
H. Driver Information Center (DIC) Controls. SeeDIC
Controls and Displays on page 3-48.
I. Center Air Outlets. SeeOutlet Adjustment on page 3-30.
J. Hazard Warning Flasher Button. SeeHazard Warning
Flashers on page 3-6.
K. Audio System. SeeAudio System(s) on page 3-77.
L. Climate Controls. SeeDual Automatic Climate Control
System on page 3-25.
M. Fuel Door Release Button. SeeFilling the Tank on
page 5-7. Hatch/Trunk Release Button. See “Hatch/
Trunk Lid Release” underHatch/Trunk on page 2-14.N. Instrument Panel Brightness Control. SeeInstrument
Panel Brightness on page 3-19.
O. Power Folding Top Switch (If Equipped). See
Convertible Top (Manual) on page 2-60orConvertible
Top (Power) on page 2-67.
P. Tilt Wheel Lever. SeeTilt Wheel on page 3-6.
Q. Telescopic Wheel Button (If Equipped). SeeTilt Wheel
on page 3-6.
R. Ignition Switch. SeeIgnition Positions on page 2-22.
S. Heated Seat Controls (If Equipped). SeeHeated Seats
on page 1-4.
T. Shift Lever (Automatic Shown). SeeAutomatic
Transmission Operation on page 2-26orManual
Transmission Operation on page 2-30.
U. Active Handling Button. SeeActive Handling System on
page 4-10.
V. Accessory Power Outlet. SeeAccessory Power
Outlet(s) on page 3-24.
W. Center Console Cupholder. SeeCupholder(s) on
page 2-51.
X. Ashtray and Cigarette Lighter. SeeAshtray(s) and
Cigarette Lighter on page 3-25.
Y. Parking Brake. SeeParking Brake on page 2-33.
Z. Glove Box. SeeGlove Box on page 2-51.
AA. Instrument Panel Fuse Block. SeeInstrument Panel
Fuse Block on page 5-94.
3-5
Page 147 of 426
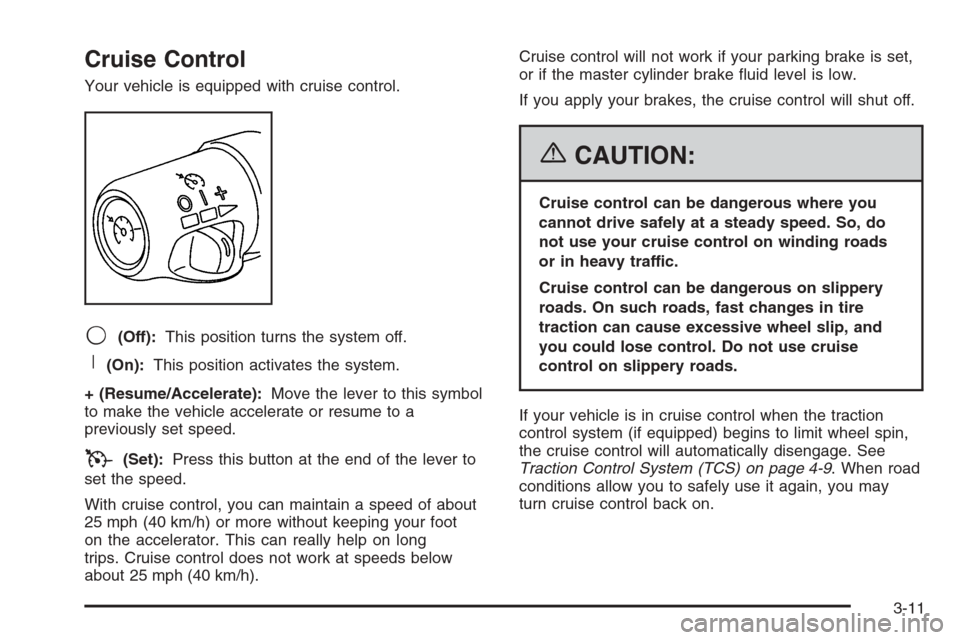
Cruise Control
Your vehicle is equipped with cruise control.
9(Off):This position turns the system off.
R(On):This position activates the system.
+ (Resume/Accelerate):Move the lever to this symbol
to make the vehicle accelerate or resume to a
previously set speed.
T(Set):Press this button at the end of the lever to
set the speed.
With cruise control, you can maintain a speed of about
25 mph (40 km/h) or more without keeping your foot
on the accelerator. This can really help on long
trips. Cruise control does not work at speeds below
about 25 mph (40 km/h).Cruise control will not work if your parking brake is set,
or if the master cylinder brake uid level is low.
If you apply your brakes, the cruise control will shut off.
{CAUTION:
Cruise control can be dangerous where you
cannot drive safely at a steady speed. So, do
not use your cruise control on winding roads
or in heavy traffic.
Cruise control can be dangerous on slippery
roads. On such roads, fast changes in tire
traction can cause excessive wheel slip, and
you could lose control. Do not use cruise
control on slippery roads.
If your vehicle is in cruise control when the traction
control system (if equipped) begins to limit wheel spin,
the cruise control will automatically disengage. See
Traction Control System (TCS) on page 4-9. When road
conditions allow you to safely use it again, you may
turn cruise control back on.
3-11
Page 148 of 426
Setting Cruise Control
{CAUTION:
If you leave your cruise control on when you
are not using cruise, you might hit a button
and go into cruise when you do not want to.
You could be startled and even lose control.
Keep the cruise control switch off until you
want to use cruise control.
1. Move the cruise control switch to on.
2. Get up to the speed you want.
3. Press in the set button at the end of the lever and
release it.
4. Take your foot off the accelerator pedal.
When the cruise control is engaged, the CRUISE SET
TO XX MPH message will display on the Driver
Information Center (DIC). SeeOther Messages on
page 3-67.
Resuming a Set Speed
Suppose you set your cruise control at a desired
speed and then you apply the brake. This, of course,
disengages the cruise control. But you don’t need
to reset it.
Once you’re going about 25 mph (40 km/h) or more, you
can move the cruise control switch briey from on to
resume/accelerate.
You’ll go right back up to your chosen speed and stay
there.
If you hold the switch at resume/accelerate the vehicle
will keep going faster until you release the switch or
apply the brake. So unless you want to go faster, don’t
hold the switch at resume/accelerate.
3-12
Page 149 of 426
Increasing Speed While Using
Cruise Control
There are two ways to go to a higher speed:
Use the accelerator pedal to get to the higher speed.
Press the set button at the end of the lever, then
release the button and the accelerator pedal. You’ll
now cruise at the higher speed. If the accelerator
pedal is held longer than 60 seconds, cruise control
will turn off.
Move the cruise switch from on to resume/
accelerate. Hold it there until you get up to the speed
you want, and then release the switch. To increase
your speed in very small amounts, move the switch
briey to resume/accelerate. Each time you do this,
your vehicle will go about 1 mph (1.6 km/h) faster.
Reducing Speed While Using
Cruise Control
Press and hold the set button until you reach the
lower speed you want, then release it.
To slow down in very small amounts, briey press
the set button. Each time you do this, you’ll go
about 1 mph (1.6 km/h) slower.
Passing Another Vehicle While Using
Cruise Control
Use the accelerator pedal to increase your speed.
When you take your foot off the pedal, your vehicle will
slow down to the cruise control speed you set earlier.
Using Cruise Control on Hills
How well your cruise control will work on hills depends
upon your speed, load and the steepness of the
hills. When going up steep hills, you may want to step
on the accelerator pedal to maintain your speed.
When going downhill, you may have to brake or shift to
a lower gear to keep your speed down. Of course,
applying the brake takes you out of cruise control. Many
drivers nd this to be too much trouble and don’t use
cruise control on steep hills.
3-13
Page 150 of 426

Cruise Control in Sport (S) and Manual
Paddle Shift Gear Selection
When your vehicle is in Sport (S) and the manual
paddle shift controls are not being used, cruise control
will operate in the same manner as Drive (D).
When your vehicle is in Sport (S) and the manual
paddle shift controls are being used, cruise control will
operate as follows:
If cruise control is active and a gear is selected with
the manual paddle shift controls, the vehicle will
maintain vehicle speed in the driver selected gear
and will not automatically up-shift or down-shift
the transmission while the driver’s gear selection
is active.
If driving in hilly terrain, cruise control may not be
able to maintain vehicle speed if an up-shift or
down-shift is not selected by the driver. While
driving on hilly terrain and cruise control is active
with a manual paddle shift gear selection, the driver
must select the proper gear for the terrain or
select Drive (D) on the gear range selector for full
automatic transmission operation.
Ending Cruise Control
To end a cruise control session, step lightly on the
brake pedal. If your vehicle has a manual transmission,
lightly tapping the clutch will also end a cruise control
session.
Move the cruise control switch to off to turn the system
completely off.
When cruise control is disengaged, the CRUISE
DISENGAGED message will display on the Driver
Information Center (DIC). SeeDIC Warnings and
Messages on page 3-53.
Erasing Speed Memory
When you turn off the cruise control or the ignition, your
cruise control set speed memory is erased.
3-14
Page 151 of 426
Exterior Lamps
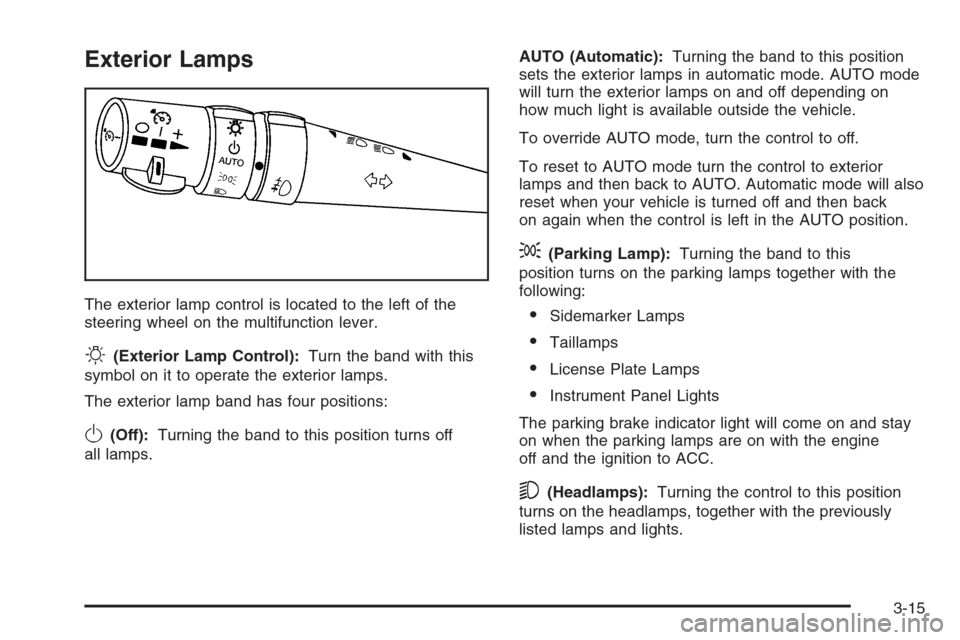
The exterior lamp control is located to the left of the
steering wheel on the multifunction lever.
O(Exterior Lamp Control):Turn the band with this
symbol on it to operate the exterior lamps.
The exterior lamp band has four positions:
O(Off):Turning the band to this position turns off
all lamps.AUTO (Automatic):Turning the band to this position
sets the exterior lamps in automatic mode. AUTO mode
will turn the exterior lamps on and off depending on
how much light is available outside the vehicle.
To override AUTO mode, turn the control to off.
To reset to AUTO mode turn the control to exterior
lamps and then back to AUTO. Automatic mode will also
reset when your vehicle is turned off and then back
on again when the control is left in the AUTO position.
;(Parking Lamp):Turning the band to this
position turns on the parking lamps together with the
following:
Sidemarker Lamps
Taillamps
License Plate Lamps
Instrument Panel Lights
The parking brake indicator light will come on and stay
on when the parking lamps are on with the engine
off and the ignition to ACC.
5(Headlamps):Turning the control to this position
turns on the headlamps, together with the previously
listed lamps and lights.
3-15
Page 174 of 426
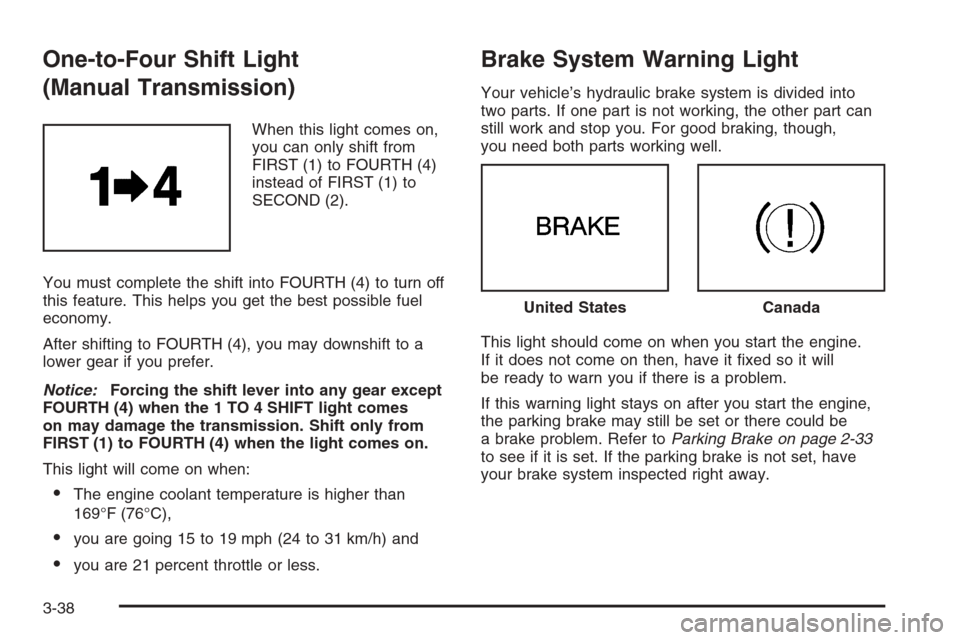
One-to-Four Shift Light
(Manual Transmission)
When this light comes on,
you can only shift from
FIRST (1) to FOURTH (4)
instead of FIRST (1) to
SECOND (2).
You must complete the shift into FOURTH (4) to turn off
this feature. This helps you get the best possible fuel
economy.
After shifting to FOURTH (4), you may downshift to a
lower gear if you prefer.
Notice:Forcing the shift lever into any gear except
FOURTH (4) when the 1 TO 4 SHIFT light comes
on may damage the transmission. Shift only from
FIRST (1) to FOURTH (4) when the light comes on.
This light will come on when:
The engine coolant temperature is higher than
169°F (76°C),
you are going 15 to 19 mph (24 to 31 km/h) and
you are 21 percent throttle or less.
Brake System Warning Light
Your vehicle’s hydraulic brake system is divided into
two parts. If one part is not working, the other part can
still work and stop you. For good braking, though,
you need both parts working well.
This light should come on when you start the engine.
If it does not come on then, have it xed so it will
be ready to warn you if there is a problem.
If this warning light stays on after you start the engine,
the parking brake may still be set or there could be
a brake problem. Refer toParking Brake on page 2-33
to see if it is set. If the parking brake is not set, have
your brake system inspected right away.
United StatesCanada
3-38
Page 175 of 426

If the light comes on while you are driving and you have
a CHECK BRAKE FLUID message showing on the
DIC, pull off the road and stop carefully. You may notice
that the pedal is harder to push or the pedal may go
closer to the oor. It may take longer to stop. If the light
is still on, have the vehicle towed for service. See
Towing Your Vehicle on page 4-38andDIC Warnings
and Messages on page 3-53for more information.
{CAUTION:
Your brake system may not be working properly
if the brake system warning light is on. Driving
with the brake system warning light on can lead
to an accident. If the light is still on after you
have pulled off the road and stopped carefully,
have the vehicle towed for service.
Anti-Lock Brake System
Warning Light
With the anti-lock brake
system, the light will come
on when your engine is
started and may stay on
for several seconds.
That is normal.
If the light stays on, turn the ignition off. Or, if the light
comes on when you are driving, stop as soon as
possible and turn the ignition off. Then start the engine
again to reset the system. If the light still stays on,
or comes on again while you are driving, your vehicle
needs service. If the regular brake system warning light
is not on, you still have brakes, but you do not have
anti-lock brakes. If the regular brake system warning
light is also on, you do not have anti-lock brakes
and there is a problem with your regular brakes. See
“SERVICE ANTILOCK BRAKES” underDIC Warnings
and Messages on page 3-53.
The anti-lock brake system warning light will come on
briey when you turn the ignition on. This is normal.
If the light does not come on then, have it xed so it will
be ready to warn you if there is a problem.
3-39