2006 CHEVROLET COLORADO instrument cluster
[x] Cancel search: instrument clusterPage 150 of 434

There is a delay in the transition between the daytime
and nighttime operation of the Daytime Running
Lamps (DRL) and the automatic headlamp system so
that driving under bridges or bright overhead street lights
does not affect the system. The DRL and automatic
headlamp system will only be affected when the
light sensor sees a change in lighting lasting longer
than the delay.
If you start your vehicle in a dark garage, the automatic
headlamp system will come on immediately. Once
you leave the garage, it will take approximately
one minute for the automatic headlamp system to
change to DRL if it is light outside. During that delay,
your instrument panel cluster may not be as bright
as usual. Make sure your instrument panel brightness
control is in the full bright position. SeeInstrument
Panel Brightness on page 3-17.Fog Lamps
If your vehicle has fog lamps, you can use them for
better vision in foggy or misty conditions. Your parking
lamps and/or low-beam headlamps must be on for
your fog lamps to work.
The fog lamp button is
located near the exterior
lamps control.
Press the button to turn the fog lamps on while the
headlamps or parking lamps are on. Press the button
again to turn them off. An indicator light will glow in the
button when the fog lamps are on.
Remember, fog lamps alone will not give off as much
light as your headlamps. Never use your fog lamps
in the dark without turning on the headlamps.
The fog lamps will go off whenever your high-beam
headlamps come on. When the high beams go off, the
fog lamps will come on again.
Some localities have laws that require the headlamps
to be on along with the fog lamps.
3-16
Page 157 of 434
Instrument Panel Cluster
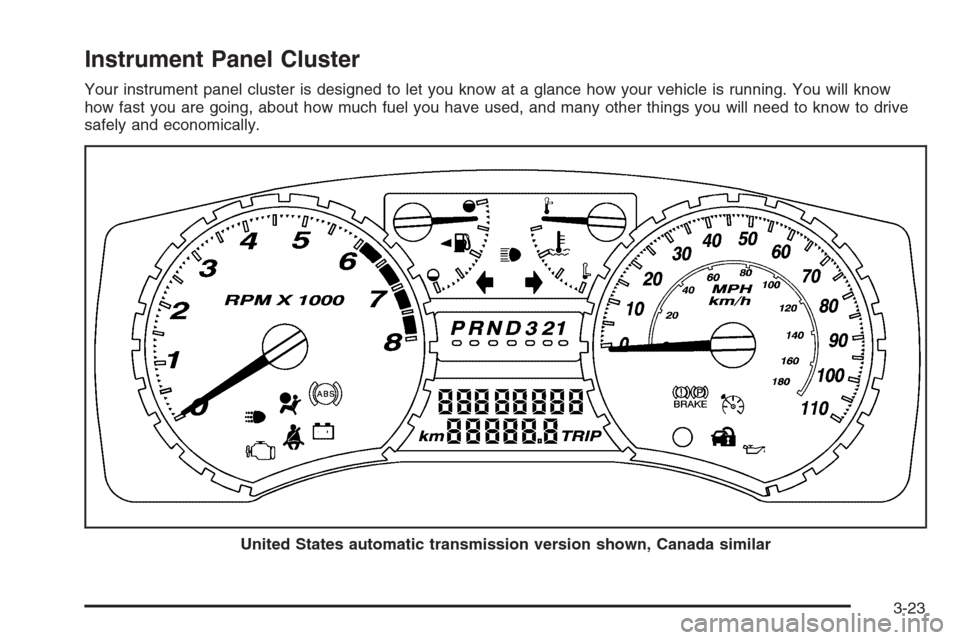
Your instrument panel cluster is designed to let you know at a glance how your vehicle is running. You will know
how fast you are going, about how much fuel you have used, and many other things you will need to know to drive
safely and economically.
United States automatic transmission version shown, Canada similar
3-23
Page 172 of 434
Driver Information Center (DIC)
The Driver Information Center (DIC) displays information
such as the trip odometer, personalization features,
and warning messages. The DIC display is located on
the instrument panel cluster.
DIC Controls and Displays
The Driver Information Center (DIC) comes on when the
ignition is on.
If a problem is detected, a warning message will appear
on the display. Pressing and releasing the trip odometer
reset stem on the DIC will acknowledge some current
warnings or service messages. Some messages will only
clear after the required action has been taken.
The DIC has different modes which can be accessed
by pressing the trip odometer reset stem on the
DIC. These modes are explained in the following
section. The DIC trip odometer reset stem is located
on the instrument panel cluster next to the DIC display.
To scroll through the available functions, press and
release the reset stem.
Trip Information
Odometer
The odometer is automatically displayed on the DIC
when you start the vehicle. The odometer shows
the total distance the vehicle has been driven in either
miles for the United States or kilometers for Canada.
Trip Odometer
Press and release the reset stem until TRIP appears
on the DIC display. This shows the current distance
traveled since the last reset of the trip odometer in either
miles for the United States or kilometers for Canada.
Press and hold the reset stem for approximately
four seconds to reset the trip odometer.
Engine Oil Life System
Press the reset stem until OIL LIFE RESET
appears — alternating between OIL LIFE and
RESET — on the DIC display. The engine oil life
system calculates an estimate of the oil’s remaining
useful life. The CHANGE OIL message will alert you
to change your oil on a schedule consistent with
your driving conditions. Always reset the OIL LIFE
message after an oil change. To reset the message,
seeEngine Oil Life System on page 5-16.
3-38
Page 177 of 434

ENG (Engine) HOT
This message will be displayed when your engine
coolant temperature is hot. Check your engine coolant
temperature gage. SeeEngine Coolant Temperature
Gage on page 3-32for more information. You should
have your vehicle serviced by your GM dealer as soon
as possible if you suspect your engine is overheating.
SeeEngine Overheating on page 5-27for more
information.
FLUID
This message will be displayed if your brake �uid is low.
Check the brake �uid as soon as possible and have
your vehicle serviced by your GM dealer. SeeBrakes
on page 5-35for more information. Press the reset stem
to acknowledge the message and clear it from the
DIC display.
FUEL CAP
This message will be displayed if your vehicle’s fuel cap
is either off or loose. You should pull over and check
to see if your vehicle’s fuel cap is secure as soon
as possible. You may also see the check engine light
on the instrument panel cluster. SeeMalfunction
Indicator Lamp on page 3-32for more information.
Press the reset stem to acknowledge the message
and clear it from the display.
LOW FUEL
This message will be displayed if the level of fuel in
your vehicle is low. You should also check your
fuel gage. SeeFuel Gage on page 3-37for more
information. You should �ll your vehicle’s tank as
soon as possible.
LOW TRAC (Traction)
If you have the Traction Control System (TCS), you
will see this message when a low traction condition
is detected. SeeTraction Control System (TCS)
on page 4-9for more information. Press and release
the reset stem to acknowledge the message and clear
it from the DIC display.
OIL
This message will be displayed when your oil pressure
is low. SeeOil Pressure Light on page 3-35and
Engine Oil on page 5-13for more information.
PARK BRK (Brake)
This message will be displayed when the parking
brake is set. SeeParking Brake on page 2-30and
Brake System Warning Light on page 3-30for more
information. The message will clear from the display
after the parking brake is released or by pressing
and releasing the reset stem.
3-43
Page 291 of 434
{CAUTION:
If you spill fuel and then something ignites it,
you could be badly burned. Fuel can spray out
on you if you open the fuel cap too quickly.
This spray can happen if your tank is nearly
full, and is more likely in hot weather. Open
the fuel cap slowly and wait for any hiss noise
to stop. Then unscrew the cap all the way.
Be careful not to spill fuel. Do not top off or over�ll the
tank and wait a few seconds after you have �nished
pumping before removing the nozzle. Clean fuel from
painted surfaces as soon as possible. SeeWashing
Your Vehicle on page 5-92.
When replacing the fuel cap, turn it clockwise
until it clicks. Make sure the cap is fully installed.
The diagnostic system can determine if the fuel
cap has been left off or improperly installed.This would allow fuel to evaporate into the atmosphere.
If the fuel cap is not properly installed, the FUEL CAP
message will appear on the Driver Information Center
(DIC) and the check engine light will be lit on the
instrument panel cluster. SeeDIC Warnings and
Messages on page 3-41andMalfunction Indicator
Lamp on page 3-32for more information.
{CAUTION:
If a �re starts while you are refueling, do not
remove the nozzle. Shut off the �ow of fuel
by shutting off the pump or by notifying the
station attendant. Leave the area immediately.
Notice:If you need a new fuel cap, be sure to get the
right type. Your dealer can get one for you. If you get
the wrong type, it may not �t properly. This may
cause your malfunction indicator lamp to light and
may damage your fuel tank and emissions system.
SeeMalfunction Indicator Lamp on page 3-32.
5-9
Page 299 of 434
How to Reset the Engine Oil Life
System
The Engine Oil Life System calculates when to change
your engine oil and �lter based on vehicle use. Anytime
your oil is changed, reset the system so it can calculate
when the next oil change is required. If a situation occurs
where you change your oil prior to a CHANGE OIL
message being turned on, reset the system.
To reset the Engine Oil Life system, do the following:
1. With the engine off, turn the ignition to ON.
2. Press and release the stem in the lower center of
the instrument cluster until the OIL LIFE message
is displayed.
3. Once the alternating OIL LIFE and RESET
messages appear, press and hold the stem
until several beeps sound. This con�rms that
the oil life system has been reset.
4. Turn the key to LOCK.
If the CHANGE OIL message comes back on when you
start your vehicle, the engine oil life system has not reset.
Repeat the procedure. SeeDIC Warnings and Messages
on page 3-41.
What to Do with Used Oil
Used engine oil contains certain elements that may be
unhealthy for your skin and could even cause cancer.
Do not let used oil stay on your skin for very long. Clean
your skin and nails with soap and water, or a good hand
cleaner. Wash or properly dispose of clothing or rags
containing used engine oil. See the manufacturer’s
warnings about the use and disposal of oil products.
Used oil can be a threat to the environment. If you
change your own oil, be sure to drain all the oil from
the �lter before disposal. Never dispose of oil by putting
it in the trash, pouring it on the ground, into sewers, or
into streams or bodies of water. Instead, recycle it by
taking it to a place that collects used oil. If you have a
problem properly disposing of your used oil, ask your
dealer, a service station, or a local recycling center
for help.
5-17
Page 427 of 434
I
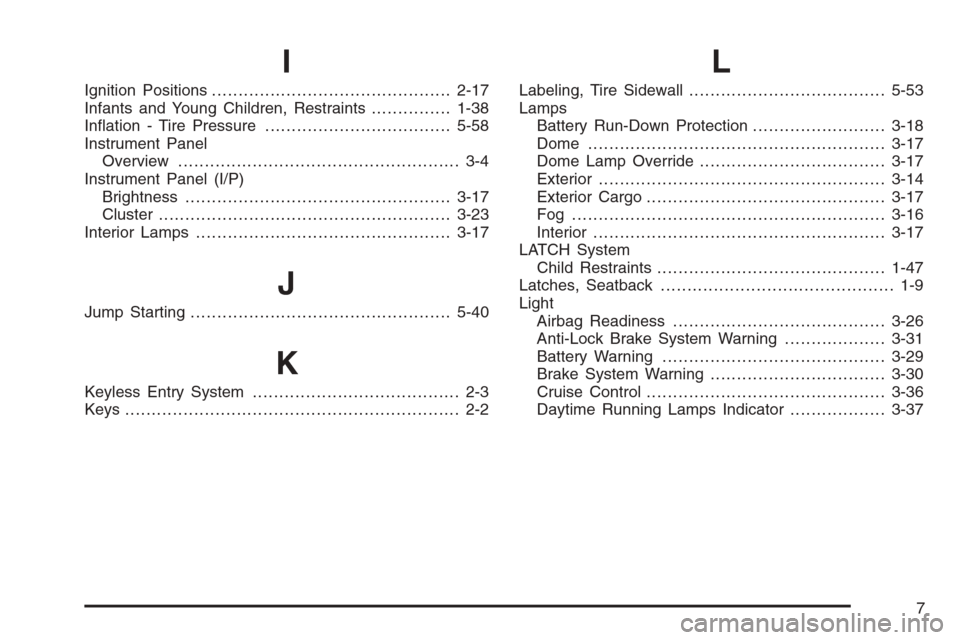
Ignition Positions.............................................2-17
Infants and Young Children, Restraints...............1-38
In�ation - Tire Pressure...................................5-58
Instrument Panel
Overview..................................................... 3-4
Instrument Panel (I/P)
Brightness..................................................3-17
Cluster.......................................................3-23
Interior Lamps................................................3-17
J
Jump Starting.................................................5-40
K
Keyless Entry System....................................... 2-3
Keys............................................................... 2-2
L
Labeling, Tire Sidewall.....................................5-53
Lamps
Battery Run-Down Protection.........................3-18
Dome ........................................................3-17
Dome Lamp Override...................................3-17
Exterior......................................................3-14
Exterior Cargo.............................................3-17
Fog ...........................................................3-16
Interior.......................................................3-17
LATCH System
Child Restraints...........................................1-47
Latches, Seatback............................................ 1-9
Light
Airbag Readiness........................................3-26
Anti-Lock Brake System Warning...................3-31
Battery Warning..........................................3-29
Brake System Warning.................................3-30
Cruise Control.............................................3-36
Daytime Running Lamps Indicator..................3-37
7