2006 CHEVROLET AVEO change time
[x] Cancel search: change timePage 183 of 362
1 DIR (Directory):Press this button to repeat the
tracks in the current directory. DIR will appear on the
display.
Press this button again to repeat the tracks in all of the
directories. ALL will appear on the display.
Press this button again to turn off repeat play.
¦¥SEEK (Previous/Next Folder) (in MP3/WMA
Mode):Press the up or down arrows to change
the folder. If CD-R don’t have any folder, “ROOT” will
flash on display for a short time.
()TUNE (Previous/Next Track):Press the down
arrows to go to the start of the current track or press
the up arrows to go to the next track. The track number
will appear on the display. The player will continue
moving backward or forward through the CD with each
press of the up or down arrows.
INFO/DISP (Information/Display):Press this button to
display additional text information related to the
current MP3/WMA song. A choice of additional
information such as: Song Title, Album Title, and Artist.
Bit rate may also appear on display.
When information is not available, No Info will appear
on the display.
Press this button for longer than two seconds to change
display mode.
CD Messages
CHECK CD:If this message appears on the display
and/or the CD comes out, it could be for one of the
following reasons:
•It is very hot. When the temperature returns to
normal, the CD should play.
•You are driving on a very rough road. When the
road becomes smoother, the CD should play.
•The CD is dirty, scratched, wet, or upside down.
•The air is very humid. If so, wait about an hour and
try again.
•The format of the CD may not be compatible. See
“MP3 Format” earlier in this section.
•There may have been a problem while burning
the CD.
•The label may be caught in the CD player.
If the CD is not playing correctly, for any other reason,
try a known good CD.
If any error occurs repeatedly or if an error cannot be
corrected, contact your dealer. If the radio displays
an error message, write it down and provide it to your
dealer when reporting the problem.
3-69
Page 184 of 362

Using the Auxiliary Input Jack
Your radio system has an auxiliary input jack located on
the lower right side of the faceplate. This is not an
audio output; do not plug the headphone set into the
front auxiliary input jack. You can however, connect an
external audio device such as an iPod, laptop
computer, MP3 player, CD changer, or cassette tape
player, etc. to the auxiliary input jack for use as another
source for audio listening.
The auxiliary input jack will also accept cell phone
connectors. Plug the cell phone connector into
the auxiliary input jack to hear the other side of a cell
phone’s conversation through the vehicle sound system.
To use a portable audio player, connect a 3.5 mm
(1/8 inch) cable to the radio’s front auxiliary input jack.
When a device is connected, press the radio CD/AUX
button as needed to begin playing audio from the device
over the car speakers.
CD/AUX (CD/Auxiliary):Press this button once to play
a CD while a portable audio device is playing. Press
this button a second time for the system will begin
playing audio from the connected portable audio player.
Once in this mode, “Auxinput” will appear on display.
If the auxiliary jack does not detect the presence of an
output jack, the aux mode will be prevented from
coming up.
O(Power/Volume):Turn this knob clockwise or
counterclockwise to increase or decrease the volume of
the portable player. You may need to do additional
volume adjustments from the portable device if
the volume does not go loud or soft enough.
Radio Reception
You may experience frequency interference and static
during normal radio reception if items such as cellphone
chargers, vehicle convenience accessories, and
external electronic devices are plugged into the
accessory power outlet. If there is interference or static,
unplug the item from the accessory power outlet.
AM
The range for most AM stations is greater than for FM,
especially at night. The longer range can cause
station frequencies to interfere with each other. For
better radio reception, most AM radio stations will boost
the power levels during the day, and then reduce
these levels during the night. Static can also occur when
things like storms and power lines interfere with radio
reception. When this happens, try reducing the treble on
your radio.
3-70
Page 194 of 362
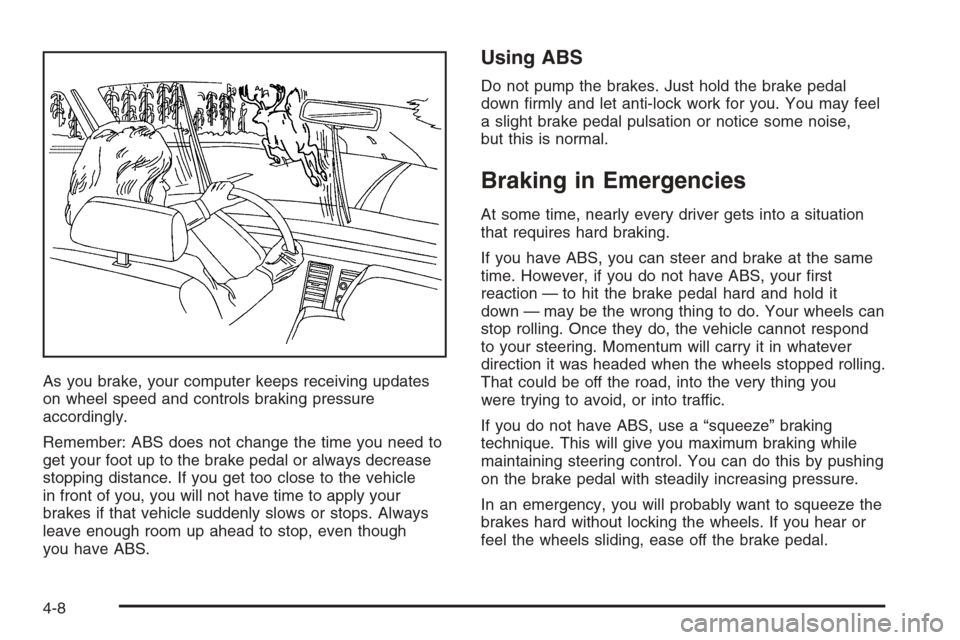
As you brake, your computer keeps receiving updates
on wheel speed and controls braking pressure
accordingly.
Remember: ABS does not change the time you need to
get your foot up to the brake pedal or always decrease
stopping distance. If you get too close to the vehicle
in front of you, you will not have time to apply your
brakes if that vehicle suddenly slows or stops. Always
leave enough room up ahead to stop, even though
you have ABS.
Using ABS
Do not pump the brakes. Just hold the brake pedal
down firmly and let anti-lock work for you. You may feel
a slight brake pedal pulsation or notice some noise,
but this is normal.
Braking in Emergencies
At some time, nearly every driver gets into a situation
that requires hard braking.
If you have ABS, you can steer and brake at the same
time. However, if you do not have ABS, your first
reaction — to hit the brake pedal hard and hold it
down — may be the wrong thing to do. Your wheels can
stop rolling. Once they do, the vehicle cannot respond
to your steering. Momentum will carry it in whatever
direction it was headed when the wheels stopped rolling.
That could be off the road, into the very thing you
were trying to avoid, or into traffic.
If you do not have ABS, use a “squeeze” braking
technique. This will give you maximum braking while
maintaining steering control. You can do this by pushing
on the brake pedal with steadily increasing pressure.
In an emergency, you will probably want to squeeze the
brakes hard without locking the wheels. If you hear or
feel the wheels sliding, ease off the brake pedal.
4-8
Page 198 of 362
•Do not get too close to the vehicle you want to
pass while you are awaiting an opportunity. For one
thing, following too closely reduces your area of
vision, especially if you are following a larger
vehicle. Also, you will not have adequate space if
the vehicle ahead suddenly slows or stops.
Keep back a reasonable distance.
•When it looks like a chance to pass is coming up,
start to accelerate but stay in the right lane and
do not get too close. Time your move so you will be
increasing speed as the time comes to move into
the other lane. If the way is clear to pass, you
will have a running start that more than makes up
for the distance you would lose by dropping
back. And if something happens to cause you to
cancel your pass, you need only slow down
and drop back again and wait for another
opportunity.
•If other vehicles are lined up to pass a slow vehicle,
wait your turn. But take care that someone is not
trying to pass you as you pull out to pass the slow
vehicle. Remember to glance over your shoulder
and check the blind spot.
•Check your mirrors, glance over your shoulder, and
start your left lane change signal before moving out
of the right lane to pass. When you are far
enough ahead of the passed vehicle to see its front
in your inside mirror, activate your right lane
change signal and move back into the right lane.
Remember that your passenger side outside mirror
is convex. The vehicle you just passed may
seem to be farther away from you than it really is.
•Try not to pass more than one vehicle at a time on
two-lane roads. Reconsider before passing the
next vehicle.
•Do not overtake a slowly moving vehicle too rapidly.
Even though the brake lamps are not flashing, it
may be slowing down or starting to turn.
•If you are being passed, make it easy for the
following driver to get ahead of you. Perhaps
you can ease a little to the right.
4-12
Page 257 of 362
Replacing Brake System Parts
The braking system on a vehicle is complex. Its many
parts have to be of top quality and work well together if
the vehicle is to have really good braking. Your
vehicle was designed and tested with top-quality GM
brake parts. When you replace parts of your braking
system — for example, when your brake linings
wear down and you need new ones put in — be sure
you get new approved GM replacement parts. If you do
not, your brakes may no longer work properly. For
example, if someone puts in brake linings that are wrong
for your vehicle, the balance between your front and
rear brakes can change — for the worse. The braking
performance you have come to expect can change
in many other ways if someone puts in the wrong
replacement brake parts.
Battery
Your vehicle has a maintenance free battery. When it is
time for a new battery, get one that has the replacement
number shown on the original battery’s label. SeeEngine
Compartment Overview on page 5-12for battery location.
Warning:Battery posts, terminals, and related
accessories contain lead and lead compounds,
chemicals known to the State of California to cause
cancer and reproductive harm. Wash hands after
handling.
Vehicle Storage
If you are not going to drive your vehicle for 25 days
or more, remove the black, negative (−) cable from
the battery. This will help keep your battery from
running down.
{CAUTION:
Batteries have acid that can burn you and gas
that can explode. You can be badly hurt if you
are not careful. SeeJump Starting on
page 5-36for tips on working around a battery
without getting hurt.
5-35
Page 275 of 362
Make certain that all wheel nuts are properly tightened.
See “Wheel Nut Torque” underCapacities and
Specifications on page 5-80.
{CAUTION:
Rust or dirt on a wheel, or on the parts to
which it is fastened, can make wheel nuts
become loose after a time. The wheel could
come off and cause an accident. When you
change a wheel, remove any rust or dirt from
places where the wheel attaches to the vehicle.
In an emergency, you can use a cloth or a
paper towel to do this; but be sure to use a
scraper or wire brush later, if needed, to get all
the rust or dirt off. SeeChanging a Flat Tire on
page 5-58.
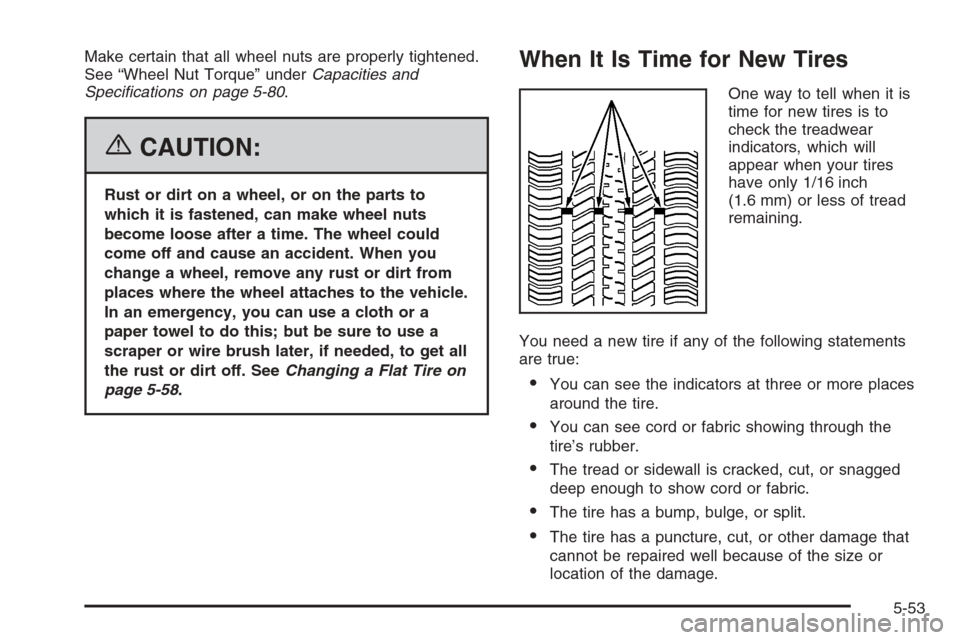
When It Is Time for New Tires
One way to tell when it is
time for new tires is to
check the treadwear
indicators, which will
appear when your tires
have only 1/16 inch
(1.6 mm) or less of tread
remaining.
You need a new tire if any of the following statements
are true:
•You can see the indicators at three or more places
around the tire.
•You can see cord or fabric showing through the
tire’s rubber.
•The tread or sidewall is cracked, cut, or snagged
deep enough to show cord or fabric.
•The tire has a bump, bulge, or split.
•The tire has a puncture, cut, or other damage that
cannot be repaired well because of the size or
location of the damage.
5-53
Page 285 of 362
{CAUTION:
Raising your vehicle with the jack improperly
positioned can damage the vehicle and even
make the vehicle fall. To help avoid personal
injury and vehicle damage, be sure to �t the
jack lift head into the proper location before
raising the vehicle.
8. Raise the vehicle by turning the wheel wrench
clockwise. Raise the vehicle far enough off the
ground so there is enough room for the compact
spare tire to fit underneath the wheel well.
9. Remove all of the wheel nuts by turning them
counterclockwise.
10. Remove the flat tire.
{CAUTION:
Rust or dirt on the wheel, or on the parts to
which it is fastened, can make the wheel nuts
become loose after a time. The wheel could
come off and cause an accident. When you
change a wheel, remove any rust or dirt from
the places where the wheel attaches to the
vehicle. In an emergency, you can use a cloth
or a paper towel to do this; but be sure to use
a scraper or wire brush later, if needed, to get
all the rust or dirt off.
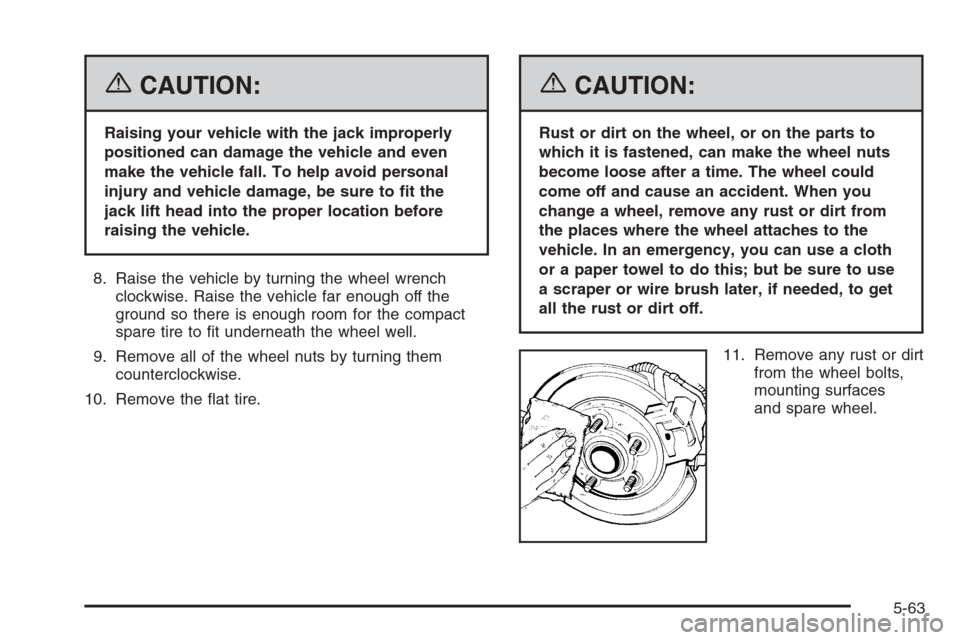
11. Remove any rust or dirt
from the wheel bolts,
mounting surfaces
and spare wheel.
5-63
Page 290 of 362

To clean, use the following instructions:
1. Saturate a lint-free, clean white cloth with water or
club soda.
2. Wring the cloth to remove excess moisture.
3. Start on the outside edge of the soil and gently rub
toward the center. Continue cleaning, using a clean
area of the cloth each time it becomes soiled.
4. Continue to gently rub the soiled area until the
cleaning cloth remains clean.
5. If the soil is not completely removed, use a mild
soap solution and repeat the cleaning process
that was used with plain water.
If any of the soil remains, a commercial fabric cleaner or
spot lifter may be necessary. When a commercial
upholstery cleaner or spot lifter is to be used, test a
small hidden area for colorfastness first. If the locally
cleaned area gives any impression that a ring formation
may result, clean the entire surface.
After the cleaning process has been completed, a paper
towel can be used to blot excess moisture from the
fabric or carpet.Instrument Panel, Vinyl, and Other
Plastic Surfaces
A soft cloth dampened with water may be used to
remove dust. If a more thorough cleaning is necessary,
a clean soft cloth dampened with a mild soap solution
can be used to gently remove dust and dirt. Never use
spot lifters or removers on plastic surfaces. Many
commercial cleaners and coatings that are sold to
preserve and protect soft plastic surfaces may
permanently change the appearance and feel of your
interior and are not recommended. Do not use silicone
or wax-based products, or those containing organic
solvents to clean your vehicle’s interior because
they can alter the appearance by increasing the gloss in
a non-uniform manner.
Some commercial products may increase gloss on your
instrument panel. The increase in gloss may cause
annoying reflections in the windshield and even make it
difficult to see through the windshield under certain
conditions.
5-68