2006 CHEVROLET AVALANCHE fuel cap
[x] Cancel search: fuel capPage 361 of 532

Service............................................................5-3
Accessories and Modi�cations..........................5-3
California Proposition 65 Warning.....................5-4
Doing Your Own Service Work.........................5-4
Adding Equipment to the Outside of
Your Vehicle..............................................5-5
Fuel................................................................5-5
Gasoline Octane............................................5-5
Gasoline Speci�cations....................................5-6
California Fuel...............................................5-6
Additives.......................................................5-6
Fuel E85 (85% Ethanol)..................................5-7
Fuels in Foreign Countries...............................5-8
Filling the Tank..............................................5-9
Filling a Portable Fuel Container.....................5-11
Checking Things Under the Hood....................5-11
Hood Release..............................................5-12
Engine Compartment Overview.......................5-14
Engine Oil...................................................5-18
Engine Oil Life System..................................5-21
Engine Air Cleaner/Filter................................5-23
Automatic Transmission Fluid.........................5-25
Engine Coolant.............................................5-28
Coolant Surge Tank Pressure Cap..................5-30
Engine Overheating.......................................5-30Overheated Engine Protection
Operating Mode........................................5-32
Cooling System............................................5-32
Engine Fan Noise.........................................5-38
Power Steering Fluid.....................................5-39
Windshield Washer Fluid................................5-40
Brakes........................................................5-41
Battery........................................................5-44
Jump Starting...............................................5-45
Rear Axle.......................................................5-51
Four-Wheel Drive............................................5-52
Front Axle......................................................5-53
Bulb Replacement..........................................5-54
Halogen Bulbs..............................................5-54
Headlamps..................................................5-55
Front Turn Signal, Sidemarker and
Parking Lamps..........................................5-57
Front Turn Signal, Sidemarker and
Daytime Running Lamps.............................5-59
Daytime Running Lamps (DRL).......................5-61
Taillamps, Turn Signal, Stoplamps and
Back-up Lamps.........................................5-61
License Plate Lamp......................................5-62
Replacement Bulbs.......................................5-63
Windshield Wiper Blade Replacement..............5-63
Section 5 Service and Appearance Care
5-1
Page 369 of 532

Filling the Tank
{CAUTION:
Fuel vapor burns violently and a fuel �re can
cause bad injuries. To help avoid injuries to
you and others, read and follow all the
instructions on the pump island. Turn off your
engine when you are refueling. Do not smoke
if you are near fuel or refueling your vehicle.
Keep sparks, �ames, and smoking materials
away from fuel. Do not leave the fuel pump
unattended when refueling your vehicle — this
is against the law in some places. Keep
children away from the fuel pump; never let
children pump fuel.
The tethered fuel cap is located behind a hinged fuel
door on the driver’s side of the vehicle.To remove the fuel cap, turn it slowly counterclockwise.
It will require more effort to turn the fuel cap on the
last turn as you loosen it.
{CAUTION:
If you spill fuel and then something ignites it,
you could be badly burned. Fuel can spray out
on you if you open the fuel cap too quickly.
This spray can happen if your tank is nearly
full, and is more likely in hot weather. Open
the fuel cap slowly and wait for any hiss noise
to stop. Then unscrew the cap all the way.
Be careful not to spill fuel. Do not top off or over�ll the
tank and wait a few seconds after you have �nished
pumping before removing the nozzle. Clean fuel
from painted surfaces as soon as possible. See
Washing Your Vehicle on page 5-107.
5-9
Page 370 of 532

When replacing the fuel cap, turn it clockwise until it
clicks. It will require more effort to turn the fuel cap on
the last turn as you tighten it. Make sure the cap is
fully installed. The diagnostic system can determine if
the fuel cap has been left off or improperly installed.
This would allow fuel to evaporate into the atmosphere.
SeeMalfunction Indicator Lamp on page 3-43.
The TIGHTEN FUEL CAP message will be displayed on
the Driver Information Center (DIC) if the fuel cap is
not properly installed. SeeDIC Warnings and Messages
on page 3-53for more information.
{CAUTION:
If a �re starts while you are refueling, do not
remove the nozzle. Shut off the �ow of fuel by
shutting off the pump or by notifying the
station attendant. Leave the area immediately.
Notice:If you need a new fuel cap, be sure to get
the right type. Your dealer can get one for you.
If you get the wrong type, it may not �t properly.
This may cause your malfunction indicator lamp to
light and may damage your fuel tank and emissions
system. SeeMalfunction Indicator Lamp on
page 3-43.
5-10
Page 398 of 532

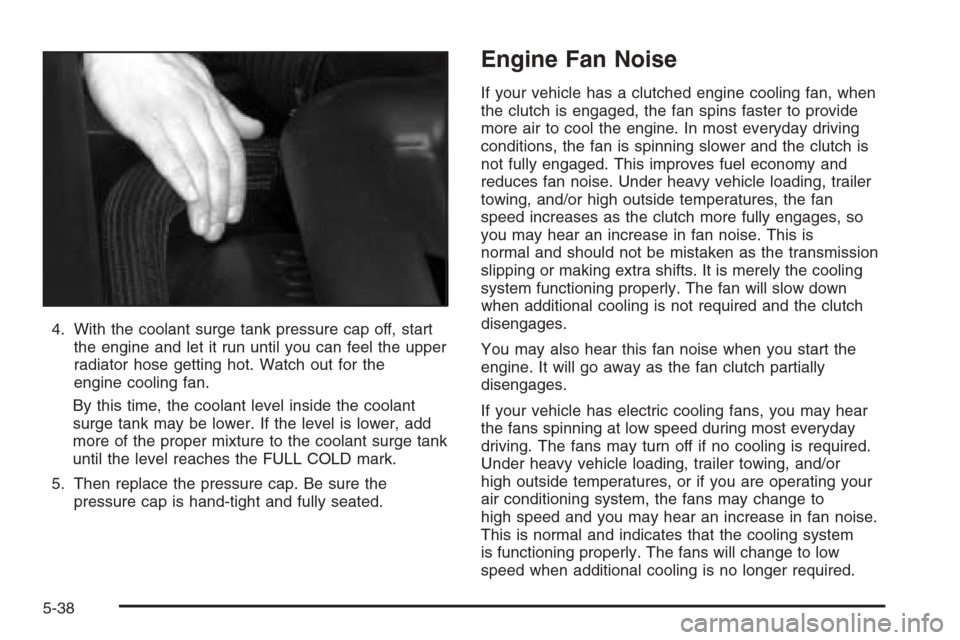
4. With the coolant surge tank pressure cap off, start
the engine and let it run until you can feel the upper
radiator hose getting hot. Watch out for the
engine cooling fan.
By this time, the coolant level inside the coolant
surge tank may be lower. If the level is lower, add
more of the proper mixture to the coolant surge tank
until the level reaches the FULL COLD mark.
5. Then replace the pressure cap. Be sure the
pressure cap is hand-tight and fully seated.
Engine Fan Noise
If your vehicle has a clutched engine cooling fan, when
the clutch is engaged, the fan spins faster to provide
more air to cool the engine. In most everyday driving
conditions, the fan is spinning slower and the clutch is
not fully engaged. This improves fuel economy and
reduces fan noise. Under heavy vehicle loading, trailer
towing, and/or high outside temperatures, the fan
speed increases as the clutch more fully engages, so
you may hear an increase in fan noise. This is
normal and should not be mistaken as the transmission
slipping or making extra shifts. It is merely the cooling
system functioning properly. The fan will slow down
when additional cooling is not required and the clutch
disengages.
You may also hear this fan noise when you start the
engine. It will go away as the fan clutch partially
disengages.
If your vehicle has electric cooling fans, you may hear
the fans spinning at low speed during most everyday
driving. The fans may turn off if no cooling is required.
Under heavy vehicle loading, trailer towing, and/or
high outside temperatures, or if you are operating your
air conditioning system, the fans may change to
high speed and you may hear an increase in fan noise.
This is normal and indicates that the cooling system
is functioning properly. The fans will change to low
speed when additional cooling is no longer required.
5-38
Page 429 of 532

Curb Weight:This means the weight of a motor
vehicle with standard and optional equipment including
the maximum capacity of fuel, oil, and coolant, but
without passengers and cargo.
DOT Markings:A code molded into the sidewall of a
tire signifying that the tire is in compliance with the U.S.
Department of Transportation (DOT) motor vehicle
safety standards. The DOT code includes the Tire
Identi�cation Number (TIN), an alphanumeric designator
which can also identify the tire manufacturer, production
plant, brand, and date of production.
GVWR:Gross Vehicle Weight Rating. SeeLoading
Your Vehicle on page 4-46.
GAWR FRT:Gross Axle Weight Rating for the front
axle. SeeLoading Your Vehicle on page 4-46.
GAWR RR:Gross Axle Weight Rating for the rear axle.
SeeLoading Your Vehicle on page 4-46.
Intended Outboard Sidewall:The side of an
asymmetrical tire, that must always face outward when
mounted on a vehicle.
Kilopascal (kPa):The metric unit for air pressure.
Light Truck (LT-Metric) Tire:A tire used on light duty
trucks and some multipurpose passenger vehicles.Load Index:An assigned number ranging from
1 to 279 that corresponds to the load carrying capacity
of a tire.
Maximum In�ation Pressure:The maximum air
pressure to which a cold tire may be in�ated. The
maximum air pressure is molded onto the sidewall.
Maximum Load Rating:The load rating for a tire at the
maximum permissible in�ation pressure for that tire.
Maximum Loaded Vehicle Weight:The sum of curb
weight, accessory weight, vehicle capacity weight,
and production options weight.
Normal Occupant Weight:The number of occupants a
vehicle is designed to seat multiplied by 150 lbs (68 kg).
SeeLoading Your Vehicle on page 4-46.
Occupant Distribution:Designated seating positions.
Outward Facing Sidewall:The side of an
asymmetrical tire that has a particular side that faces
outward when mounted on a vehicle. The side of the tire
that contains a whitewall, bears white lettering, or
bears manufacturer, brand, and/or model name molding
that is higher or deeper than the same moldings on
the other sidewall of the tire.
5-69
Page 431 of 532

In�ation - Tire Pressure
Tires need the correct amount of air pressure to operate
effectively.
Notice:Do not let anyone tell you that
under-in�ation or over-in�ation is all right. It is not.
If your tires do not have enough air (under-in�ation),
you can get the following:
Too much �exing
Too much heat
Tire overloading
Premature or irregular wear
Poor handling
Reduced fuel economy
If your tires have too much air (over-in�ation), you
can get the following:
Unusual wear
Poor handling
Rough ride
Needless damage from road hazardsA Tire and Loading Information label is attached to the
vehicle’s center pillar (B-pillar), below the driver’s
door lock post (striker). This label lists your vehicle’s
original equipment tires and their recommended cold tire
in�ation pressures. The recommended cold tire
in�ation pressure, shown on the label, is the minimum
amount of air pressure needed to support your vehicle’s
maximum load carrying capacity.
For additional information regarding how much weight
your vehicle can carry, and an example of the tire
and loading information label, seeLoading Your Vehicle
on page 4-46.
When to Check
Check your tires once a month or more. Do not forget to
check the spare tire. For additional information
regarding the spare tire, seeSpare Tire on page 5-102.
5-71
Page 483 of 532

ApplicationCapacities
English Metric
Fuel Tank Capacity
1500 31.0 gal 117.0 L
2500 37.5 gal 142.0 L
Transfer Case Fluid 2.0 qt 1.9 L
Wheel Nut Torque 140 lb ft 190Y
All capacities are approximate. When adding, be sure to �ll to the approximate level as recommended in this
manual. Recheck �uid level after �lling.
Engine Speci�cations
Engine VIN Code Transmission Spark Plug Gap
VORTEC™ 5.3L V8 T Automatic 0.040 inches (1.01 mm)
VORTEC™ 5.3L V8 Z Automatic 0.040 inches (1.01 mm)
VORTEC™ 8.1L V8 G Automatic 0.060 inches (1.52 mm)
5-123
Page 492 of 532

(c)Visually inspect hoses and have them replaced if
they are cracked, swollen, or deteriorated. Inspect
all pipes, �ttings, and clamps; replace with genuine
GM parts as needed. To help ensure proper operation,
a pressure test of the cooling system and pressure
cap and cleaning the outside of the radiator and
air conditioning condenser is recommended at least
once a year.
(d)Visually inspect wiper blades for wear or cracking.
Replace wiper blades that appear worn or damaged
or that streak or miss areas of the windshield.
(e)Make sure the safety belt reminder light and all your
belts, buckles, latch plates, retractors, and anchorages
are working properly. Look for any other loose or
damaged safety belt system parts. If you see anything
that might keep a safety belt system from doing its
job, have it repaired. Have any torn or frayed safety belts
replaced. Also look for any opened or broken airbag
coverings, and have them repaired or replaced.
The airbag system does not need regular maintenance.
(f)Lubricate all key lock cylinders, hood latch
assembly, secondary latch, pivots, spring anchor,
release pawl, midgate hinges, side storage box door
hinges, tailgate hinges, tailgate linkage, outer tailgate
handle pivot points, latch bolt, fuel door hinge, locks, and
folding seat hardware. More frequent lubrication may
be required when exposed to a corrosive environment.Applying silicone grease on weatherstrips with a clean
cloth will make them last longer, seal better, and
not stick or squeak.
(g)Check vent hose at transfer case for kinks and
proper installation.
(h)Change automatic transmission �uid and �lter if the
vehicle is mainly driven under one or more of these
conditions:
�In heavy city traffic where the outside temperature
regularly reaches 90°F (32°C) or higher.
�In hilly or mountainous terrain.
�When doing frequent trailer towing.
�Uses such as found in taxi, police, or delivery
service.
(i)Drain, �ush, and re�ll cooling system. This service
can be complex; you should have your dealer perform
this service. See Engine Coolant on page 5-28 for
what to use. Inspect hoses. Clean radiator, condenser,
pressure cap, and �ller neck. Pressure test the
cooling system and pressure cap.
(j)A �uid loss in any vehicle system could indicate a
problem. Have the system inspected and repaired and
the �uid level checked. Add �uid if needed.
6-8