Page 18 of 35
3. If you are not currently driving on a route, the system will automatically create a
route with the voice tag destination as the final destination. If you are currently
driving on a route, the system will automatically add the voice tag destination as a
waypoint. Up to three waypoints can be created.
Refer to the following for further info:
Deleting a Destination
Storing Voice Tags
Using Voice Commands
Troubleshooting Voice Recognition
Deleting a Destination
1. Press the DEST hard key. The ROUTE screen will appear.
2. Touch the C
ANCEL GUIDANCE screen button to cancel the current route.
Adding a Stopover
This feature allows you to add up to 3 stopovers between your start point and final
destination.
1. Press the DEST hard key. The ROUTE screen will appear.
2. Touch the A
DD STOPOVER screen button. This button will only appear if a route
has been calculated.
Page 19 of 35
3. Enter a destination using any available method.
4. Select the route preference (F
ASTEST, SHORTEST, or OTHER). The system will
calculate and highlight the route.
5. Select the S
TART GUIDANCE screen button. You are now ready to start your
route.
To add the second and third stopovers, do the following:
a. Press the DEST hard key. The ROUTE screen will appear.
b. Press the ADD screen button where you would like the next stopover to fall on
your route.
c. Enter a destination using any available method.
d. Select the route preference (F
ASTEST, SHORTEST, or OTHER). The system will
calculate and highlight the route.
e. Select the S
TART GUIDANCE screen button. You are now ready to start your
route.
Refer to the following for further info:
Deleting a Stopover
Page 20 of 35
Deleting a Stopover
1. Press the DEST hard key. The ROUTE screen will appear.
2. Select the D
ELETE screen button for the stopover that you wish to delete.
3. A pop-up confirmation message will appear. Touch the Y
ES screen button to
confirm.
4. Select the route preference (F
ASTEST, SHORTEST, or OTHER). The system will
calculate and highlight the route.
5. Select the S
TART GUIDANCE screen button. You are now ready to start your
route.
Section IV: Other Nav Features
Displaying POI Icons on Screen
You can display icons for up to 5 POI categories on the screen at a time.
1. From the map screen, touch the POI screen button. The SHOW POI ICONS screen
will appear.
Page 25 of 35

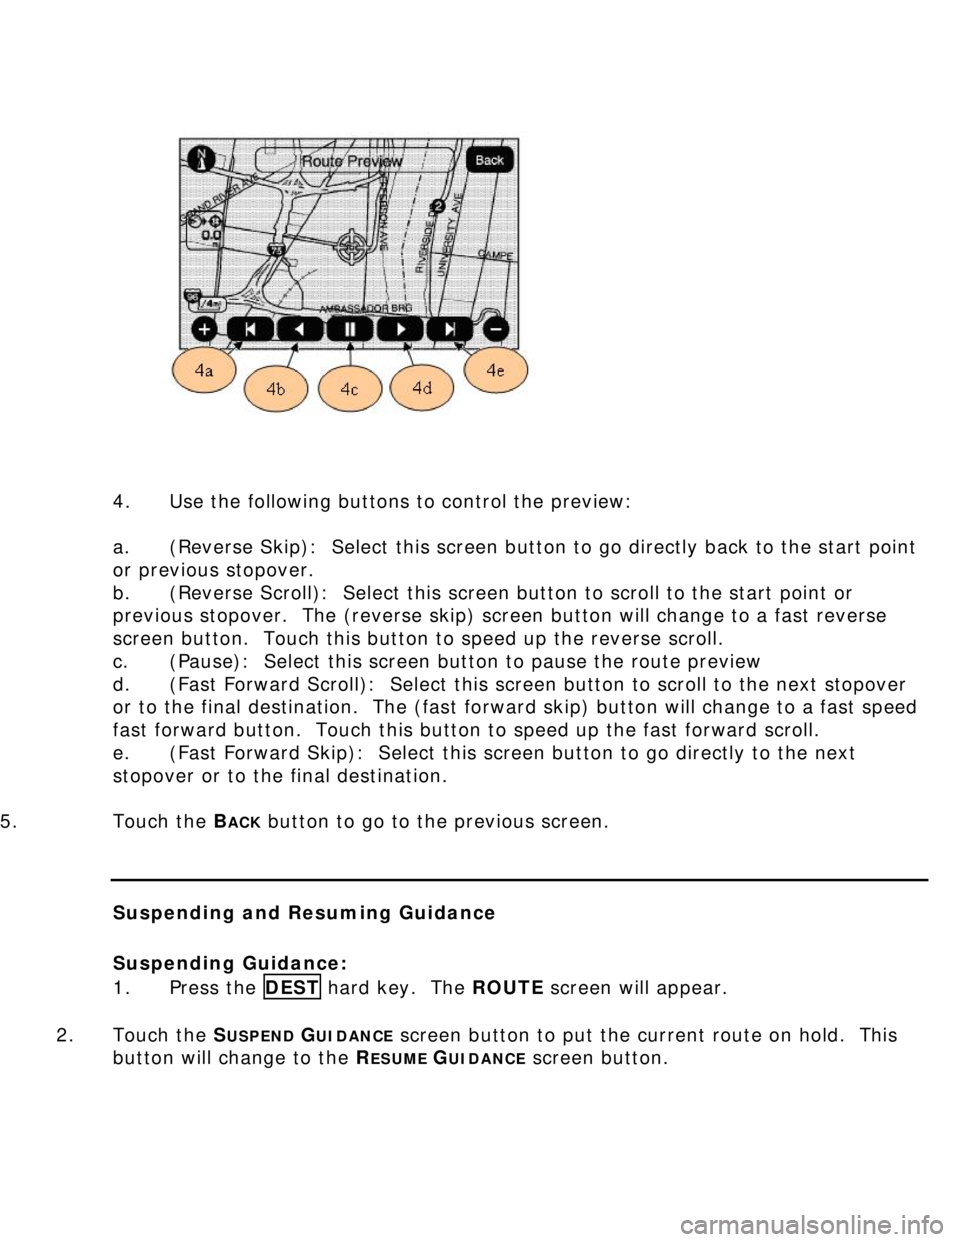
4. Use the following buttons to control the preview:
a. (Reverse Skip): Select this screen button to go directly back to the start point
or previous stopover.
b. (Reverse Scroll): Select this screen button to scroll to the start point or
previous stopover. The (reverse skip) screen button will change to a fast reverse
screen button. Touch this button to speed up the reverse scroll.
c. (Pause): Select this screen button to pause the route preview
d. (Fast Forward Scroll): Select this screen button to scroll to the next stopover
or to the final destination. The (fast forward skip) button will change to a fast speed
fast forward button. Touch this button to speed up the fast forward scroll.
e. (Fast Forward Skip): Select this screen button to go directly to the next
stopover or to the final destination.
5. Touch the B
ACK button to go to the previous screen.
Suspending and Resuming Guidance
Suspending Guidance:
1. Press the DEST hard key. The ROUTE screen will appear.
2. Touch the S
USPEND GUIDANCE screen button to put the current route on hold. This
button will change to the R
ESUME GUIDANCE screen button.