2006 BUICK LACROSSE heating
[x] Cancel search: heatingPage 299 of 444

Turn Signals When Towing a Trailer
When towing a trailer, the vehicle may need a different
turn signal �asher and/or extra wiring. Check with your
dealer. The arrows on the instrument panel will �ash
whenever signaling a turn or lane change. Properly
hooked up, the trailer lamps will also �ash, telling other
drivers you are about to turn, change lanes or stop.
When towing a trailer, the arrows on the instrument
panel will �ash for turns even if the bulbs on the trailer
are burned out. You may think drivers behind you
are seeing your signal when they are not. It is important
to check occasionally to be sure the trailer bulbs are
still working.
Driving On Grades
Reduce speed and shift to a lower gearbeforestarting
down a long hill or steep downgrade. If the vehicle
is not shifted down, the brakes might have to be
used so much that they would get hot and no longer
work well.
On a long uphill grade, shift down and reduce the
vehicle’s speed to around 45 mph (70 km/h) to reduce
the possibility of engine and transaxle overheating.
If towing a trailer, you may want to drive in THIRD (3)
instead of AUTOMATIC OVERDRIVE (D). Shift to
a lower gear as needed.
Parking on Hills
{CAUTION:
You really should not park your vehicle, with
a trailer attached, on a hill. If something goes
wrong, your rig could start to move. People
can be injured, and both your vehicle and the
trailer can be damaged.
But if the rig ever has to be parked on a hill, here is
how to do it:
1. Apply the regular brakes, but do not shift into
PARK (P) yet.
2. Have someone place chocks under the trailer’s
wheels.
3. When the wheel chocks are in place, release the
regular brakes until the chocks absorb the load.
4. Reapply the regular brakes. Then apply the parking
brake, and shift to PARK (P).
5. Release the regular brakes.
4-43
Page 300 of 444

When You Are Ready to Leave After
Parking on a Hill
1. Apply the regular brakes and hold the pedal down
while you:
Start the engine.
Shift into a gear.
Release the parking brake.
2. Let up on the brake pedal.
3. Drive slowly until the trailer is clear of the chocks.
4. Stop and have someone pick up and store the
chocks.
Maintenance When Trailer Towing
The vehicle will need service more often when it pulls a
trailer. SeeScheduled Maintenance on page 6-4for more
information. Things that are especially important in trailer
operation are automatic transaxle �uid; which should not
be over�lled; engine oil, drive belt(s), and cooling and
brake systems. Each of these is covered in this manual,
and the Index will help you �nd them quickly. If trailering,
it is a good idea to review this information before starting
on a trip.
Check periodically to see that all hitch nuts and bolts
are tight.
Engine Cooling When Trailer Towing
The cooling system may temporarily overheat during
severe operating conditions. SeeEngine Overheating
on page 5-27.
4-44
Page 301 of 444

Service............................................................5-3
Accessories and Modi�cations..........................5-3
California Proposition 65 Warning.....................5-4
Doing Your Own Service Work.........................5-4
Adding Equipment to the Outside of
Your Vehicle..............................................5-5
Fuel................................................................5-5
Gasoline Octane............................................5-5
Gasoline Speci�cations....................................5-6
California Fuel...............................................5-6
Additives.......................................................5-6
Fuels in Foreign Countries...............................5-7
Filling the Tank..............................................5-8
Filling a Portable Fuel Container.....................5-10
Checking Things Under the Hood....................5-10
Hood Release..............................................5-11
Engine Compartment Overview.......................5-12
Engine Oil...................................................5-15
Engine Oil Life System..................................5-18
Engine Air Cleaner/Filter................................5-20
Automatic Transaxle Fluid..............................5-21
Engine Coolant.............................................5-24
Radiator Pressure Cap..................................5-27
Engine Overheating.......................................5-27
Overheated Engine Protection
Operating Mode........................................5-29Cooling System............................................5-30
Power Steering Fluid.....................................5-37
Windshield Washer Fluid................................5-38
Brakes........................................................5-39
Battery........................................................5-42
Jump Starting...............................................5-42
Headlamp Aiming...........................................5-48
Bulb Replacement..........................................5-51
Halogen Bulbs..............................................5-51
Headlamps and Sidemarker Lamps.................5-51
Front Turn Signal and Parking Lamps..............5-53
Taillamps, Turn Signal, Sidemarker,
Stoplamps and Back-up Lamps...................5-54
Replacement Bulb..........................................5-56
Windshield Replacement.................................5-56
Windshield Wiper Blade Replacement..............5-56
Tires..............................................................5-57
Tire Sidewall Labeling...................................5-58
Tire Terminology and De�nitions.....................5-60
In�ation - Tire Pressure.................................5-63
Tire Inspection and Rotation...........................5-64
When It Is Time for New Tires.......................5-66
Buying New Tires.........................................5-66
Different Size Tires and Wheels......................5-68
Uniform Tire Quality Grading..........................5-68
Section 5 Service and Appearance Care
5-1
Page 324 of 444

Engine Coolant
The cooling system in the vehicle is �lled with
DEX-COOL®engine coolant. This coolant is designed
to remain in the vehicle for �ve years or 150,000 miles
(240 000 km), whichever occurs �rst, if only DEX-COOL
®
extended life coolant is added.
The following explains the cooling system and how
to add coolant when it is low. If there is a problem with
engine overheating or if coolant needs to be added
to the radiator, seeEngine Overheating on page 5-27.
A 50/50 mixture of clean, drinkable water and
DEX-COOL
®engine coolant will:
Give freezing protection down to−34°F (−37°C).
Give boiling protection up to 265°F (129°C).
Protect against rust and corrosion.
Help keep the proper engine temperature.
Let the warning lights and gages work as
they should.Notice:Using coolant other than DEX-COOL
®may
cause premature engine, heater core, or radiator
corrosion. In addition, the engine coolant may
require changing sooner, at the �rst maintenance
service after each 30,000 miles (50 000 km) or
24 months, whichever occurs �rst. Any repairs
would not be covered by your warranty. Always use
DEX-COOL
®(silicate-free) coolant in your vehicle.
What to Use
Use a mixture of one-half clean, drinkable water and
one-half DEX-COOL®engine coolant which will not
damage aluminum parts. If this coolant mixture is used,
nothing else needs to be added.
5-24
Page 326 of 444

Checking Coolant
The coolant recovery tank
is located in the engine
compartment toward
the rear of the engine on
the passenger’s side of
the vehicle. SeeEngine
Compartment Overview
on page 5-12for more
information on location.
The vehicle must be on a level surface when checking
the coolant level.
When the engine is cold, the coolant level should be
at the cold �ll line or a little higher. The cold �ll line
is near the bottom of the surge tank and has an arrow
pointing down at it.
Adding Coolant
If more coolant is needed, add the proper DEX-COOL®
coolant mixture at the coolant recovery tank, but be
careful not to spill it.
If the coolant recovery tank is completely empty, add
coolant to the radiator. SeeEngine Overheating
on page 5-27.
{CAUTION:
Turning the radiator pressure cap when the
engine and radiator are hot can allow steam
and scalding liquids to blow out and burn
you badly. With the coolant recovery tank,
you will almost never have to add coolant at
the radiator. Never turn the radiator pressure
cap — even a little — when the engine and
radiator are hot. 3.8L V6 Engine shown,
3.6L V6 Engine
similar
5-26
Page 327 of 444

{CAUTION:
You can be burned if you spill coolant on hot
engine parts. Coolant contains ethylene glycol,
and it will burn if the engine parts are hot
enough. Do not spill coolant on a hot engine.
Occasionally check the coolant level in the radiator.
For information on how to add coolant to the radiator,
seeCooling System on page 5-30.
Radiator Pressure Cap
Notice:If the pressure cap is not tightly installed,
coolant loss and possible engine damage may
occur. Be sure the cap is properly and tightly
secured.
The radiator pressure cap is located in the front of the
engine compartment on the passenger’s side of the
vehicle. SeeEngine Compartment Overview on
page 5-12for more information on location.
Engine Overheating
There is a coolant temperature gage and a warning
light on the instrument panel cluster that indicate
an overheated engine condition. SeeEngine Coolant
Temperature Gage on page 3-41andEngine Coolant
Temperature Warning Light on page 3-40for more
information.
In addition, if your vehicle is equipped with a Driver
Information Center (DIC), you will �nd an ENGINE
COOLANT HOT and a REDUCED POWER STOP
WHEN SAFE message displayed on the DIC.
SeeDIC Warnings and Messages on page 3-59
for more information.
5-27
Page 331 of 444

If the coolant inside the coolant recovery tank is boiling,
do not do anything else until it cools down. The
vehicle should be parked on a level surface.
When the engine is cold, the coolant level should be
at or above the cold �ll line on the coolant recovery tank.
If it is not, there may be a leak at the pressure cap or
in the radiator hoses, heater hoses, radiator, water
pump, or somewhere else in the cooling system.
{CAUTION:
Heater and radiator hoses, and other engine
parts, can be very hot. Do not touch them.
If you do, you can be burned.
Do not run the engine if there is a leak. If you
run the engine, it could lose all coolant. That
could cause an engine �re, and you could be
burned. Get any leak �xed before you drive the
vehicle.If there seems to be no leak, with the engine on, check
to see if the electric engine cooling fans are running.
If the engine is overheating, the fans should be running.
If the fans are not running, the vehicle needs service.
Notice:Engine damage from running your engine
without coolant is not covered by your warranty. See
Overheated Engine Protection Operating Mode on
page 5-29for information on driving to a safe place
in an emergency.
Notice:Using coolant other than DEX-COOL
®may
cause premature engine, heater core or radiator
corrosion. In addition, the engine coolant may
require changing sooner, at 30,000 miles (50 000 km)
or 24 months, whichever occurs �rst. Any repairs
would not be covered by your warranty. Always use
DEX-COOL
®(silicate-free) coolant in your vehicle.
5-31
Page 357 of 444

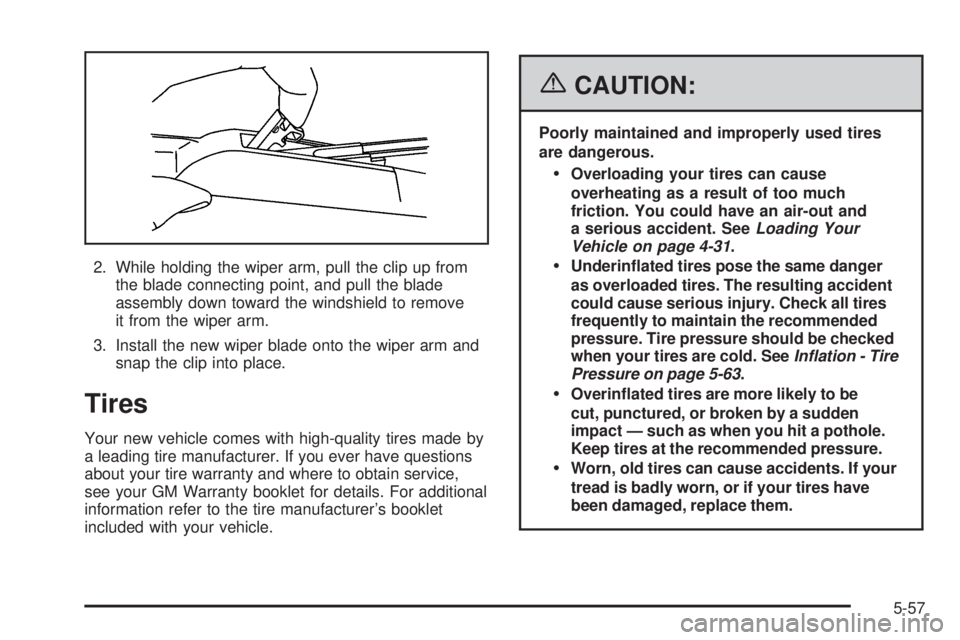
2. While holding the wiper arm, pull the clip up from
the blade connecting point, and pull the blade
assembly down toward the windshield to remove
it from the wiper arm.
3. Install the new wiper blade onto the wiper arm and
snap the clip into place.
Tires
Your new vehicle comes with high-quality tires made by
a leading tire manufacturer. If you ever have questions
about your tire warranty and where to obtain service,
see your GM Warranty booklet for details. For additional
information refer to the tire manufacturer’s booklet
included with your vehicle.
{CAUTION:
Poorly maintained and improperly used tires
are dangerous.
Overloading your tires can cause
overheating as a result of too much
friction. You could have an air-out and
a serious accident. SeeLoading Your
Vehicle on page 4-31.
Underin�ated tires pose the same danger
as overloaded tires. The resulting accident
could cause serious injury. Check all tires
frequently to maintain the recommended
pressure. Tire pressure should be checked
when your tires are cold. SeeInflation - Tire
Pressure on page 5-63.
Overin�ated tires are more likely to be
cut, punctured, or broken by a sudden
impact — such as when you hit a pothole.
Keep tires at the recommended pressure.
Worn, old tires can cause accidents. If your
tread is badly worn, or if your tires have
been damaged, replace them.
5-57