2006 BMW M5 change wheel
[x] Cancel search: change wheelPage 76 of 231

Technology for comfort, convenience and safety
74 a signal tone sounds. The setting is stored for
the remote control currently in use.
iDrive, for explanation of principle, refer to
page16.
1.Open the start menu.
2.Press the controller to open the menu.
3.Select "Vehicle settings" and press the
controller.
4.Change to upper field if necessary. Turn the
controller until "PDC" is selected and press
the controller.
5.Select "PDC display on" and press the con-
troller.
The PDC screen is activated.
The display appears on the Control Display as
soon as PDC is activated.
System limits
Even with PDC, final responsibility for
estimating the distance between the
vehicle and any obstructions always remains
with the driver. Even when sensors are pro-
vided, there is a blind spot in which objects can
no longer be detected. This applies especially
in those cases where the system approaches
the physical constraints of ultrasonic measure-
ment, as occurs with tow bars and trailer cou-
plings, and in the vicinity of thin or wedge-
shaped objects. Low objects already displayed,
e.g. a curb, can disappear from the detection
area of the sensors again before a continuous
tone sounds. Higher, protruding objects, e.g.
ledges, cannot be detected. Loud sources of
sound, inside and outside the vehicle, could
drown out the PDC signal tone.<
Driving stability control
systems
Your BMW is equipped with an extended array
of systems designed to enhance and maintain
vehicle stability under extreme conditions.
ABS Antilock Brake System
ABS prevents locking of the wheels during
braking. Safe steering response is maintained
even during full braking. Active safety is thus
increased.
The ABS is operational every time you start the
engine. Braking safely refer to page106.
CBC Cornering Brake Control
When braking during curves or when braking
during a lane change, driving stability and steer-
ing response are improved further.
Electronic brake-force distribution
The system controls the brake pressure in the
rear wheels to ensure stable braking behavior.
DBC Dynamic Brake Control
When you apply the brakes rapidly, this system
automatically produces the maximum braking
force boost and thus helps to achieve the short-
est possible braking distance during full brak-
ing. This system exploits all of the benefits pro-
vided by ABS.
Do not reduce the pressure on the brake pedal
for the duration of the full braking.
DSC Dynamic Stability Control
DSC optimizes the vehicle stability and traction.
It also detects unstable driving states such as
understeering and oversteering, and helps
keep the vehicle on course within the physical
limits by reducing the engine output and by
braking at the wheels.
The DSC is operational every time you start the
engine.
The laws of physics cannot be repealed,
even with DSC. An appropriate driving
style always remains the responsibility of the
Page 77 of 231
Controls
75Reference
At a glance
Driving tips
Communications
Navigation
Entertainment
Mobility
driver. Therefore, do not reduce the additional
safety margin further by taking risks.<
DSC indicator lamp
The indicator lamp goes out shortly
after the engine is started.
The indicator lamp flashes: DSC con-
trols the drive forces and brake forces.
The indicator lamp stays lit: DSC is deactivated.
MDynamic Mode MDM
The M Dynamic Mode is a mode of the DSC
Dynamic Stability Control. It enables driving
with greater longitudinal and lateral accelera-
tion on dry road surfaces, however with limited
vehicle stability. The system does not provide
stabilizing intervention by reducing the engine
output and braking at the wheels until the abso-
lute driving limit is reached. Steering correc-
tions by the driver may also be required in this
driving state.
The M Dynamic Mode is deactivated each time
the engine is started.
With the M Dynamic Mode activated, sta-
bilizing interventions are only carried out
to a reduced degree.<
To maintain vehicle stability, drive with
DSC activated and the M Dynamic Mode
deactivated whenever possible.<
MDM indicator lamp
The indicator lamp goes out shortly
after the engine is started. The indica-
tor lamp stays lit: M Dynamic Mode is
activated.
The indicator lamp lights up continuously and
the DSC indicator lamp flashes: the M Dynamic
Mode is active and controls the drive and brak-
ing forces.
Activating MDM
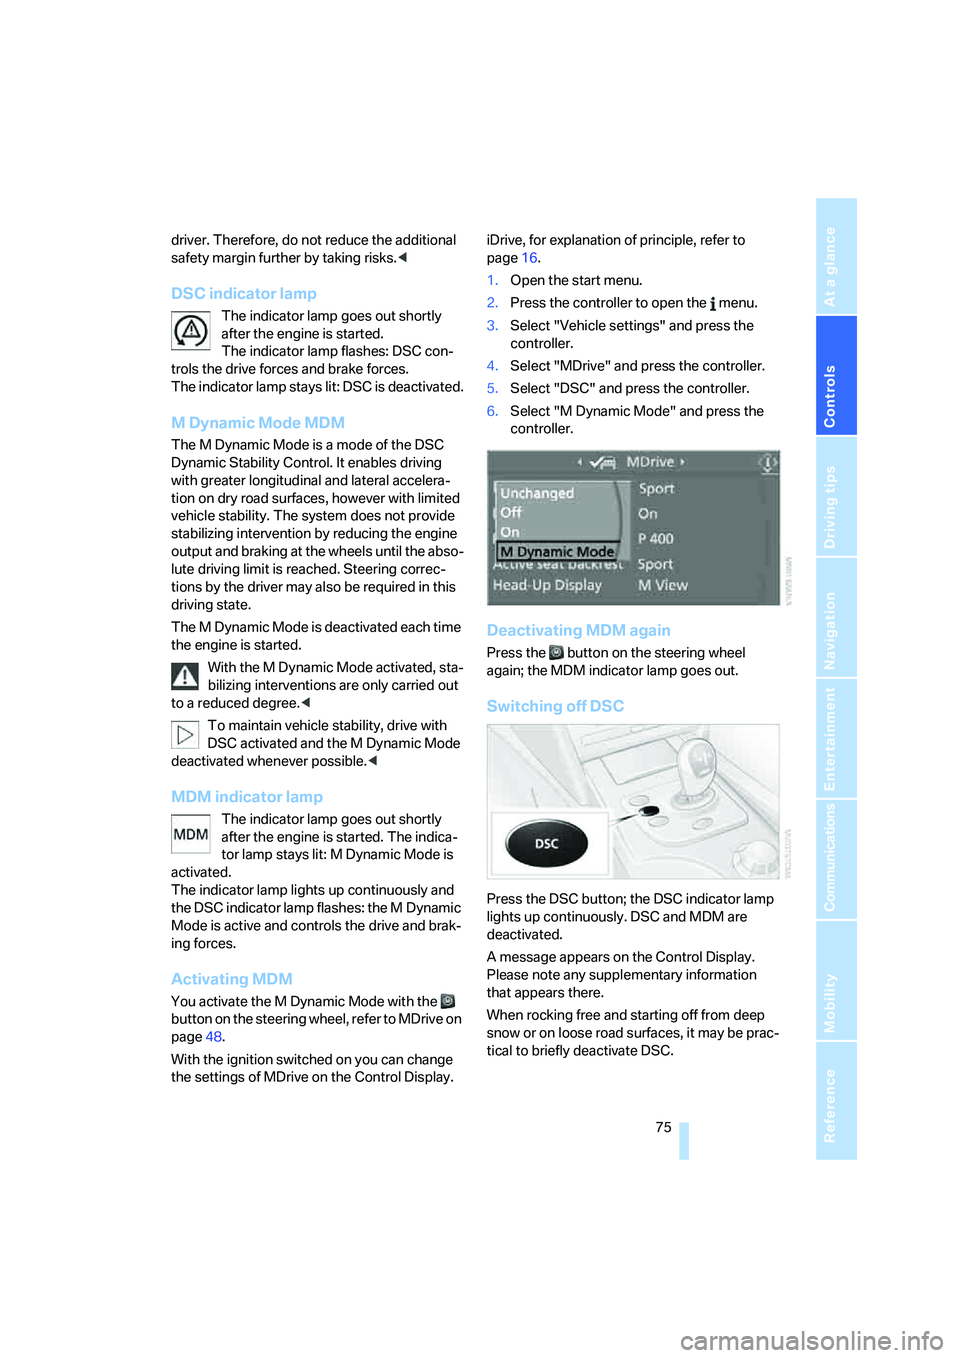
You activate the M Dynamic Mode with the
button on the steering wheel, refer to MDrive on
page48.
With the ignition switched on you can change
the settings of MDrive on the Control Display.iDrive, for explanation of principle, refer to
page16.
1.Open the start menu.
2.Press the controller to open the menu.
3.Select "Vehicle settings" and press the
controller.
4.Select "MDrive" and press the controller.
5.Select "DSC" and press the controller.
6.Select "M Dynamic Mode" and press the
controller.
Deactivating MDM again
Press the button on the steering wheel
again; the MDM indicator lamp goes out.
Switching off DSC
Press the DSC button; the DSC indicator lamp
lights up continuously. DSC and MDM are
deactivated.
A message appears on the Control Display.
Please note any supplementary information
that appears there.
When rocking free and starting off from deep
snow or on loose road surfaces, it may be prac-
tical to briefly deactivate DSC.
Page 78 of 231
Technology for comfort, convenience and safety
76 To maintain vehicle stability, always drive
with the system switched on when possi-
ble.<
Reactivating DSC
Press the DSC button; the indicator lamp in the
instrument cluster goes out.
You can also activate and deactivate DSC with
the button on the steering wheel, refer to
MDrive on page48.
EDC Electronic Damping
Control
The concept
If the influencing variables such as road surface
quality or operating conditions such as steer-
ing, braking etc. change, the damping automat-
ically adjusts to the new conditions within a
fraction of a second.
You can choose from three programs.
"Comfort" program
Select the "Comfort" program if you want com-
fort-oriented coordination of shock absorbers
and steering.
"Normal" program
The "Normal" program offers a balanced mix-
ture of the comfort and the sport program.
"Sport" program
Select the "Sport" program if you want a con-
sistently sporty coordination of shock absorb-
ers and steering.
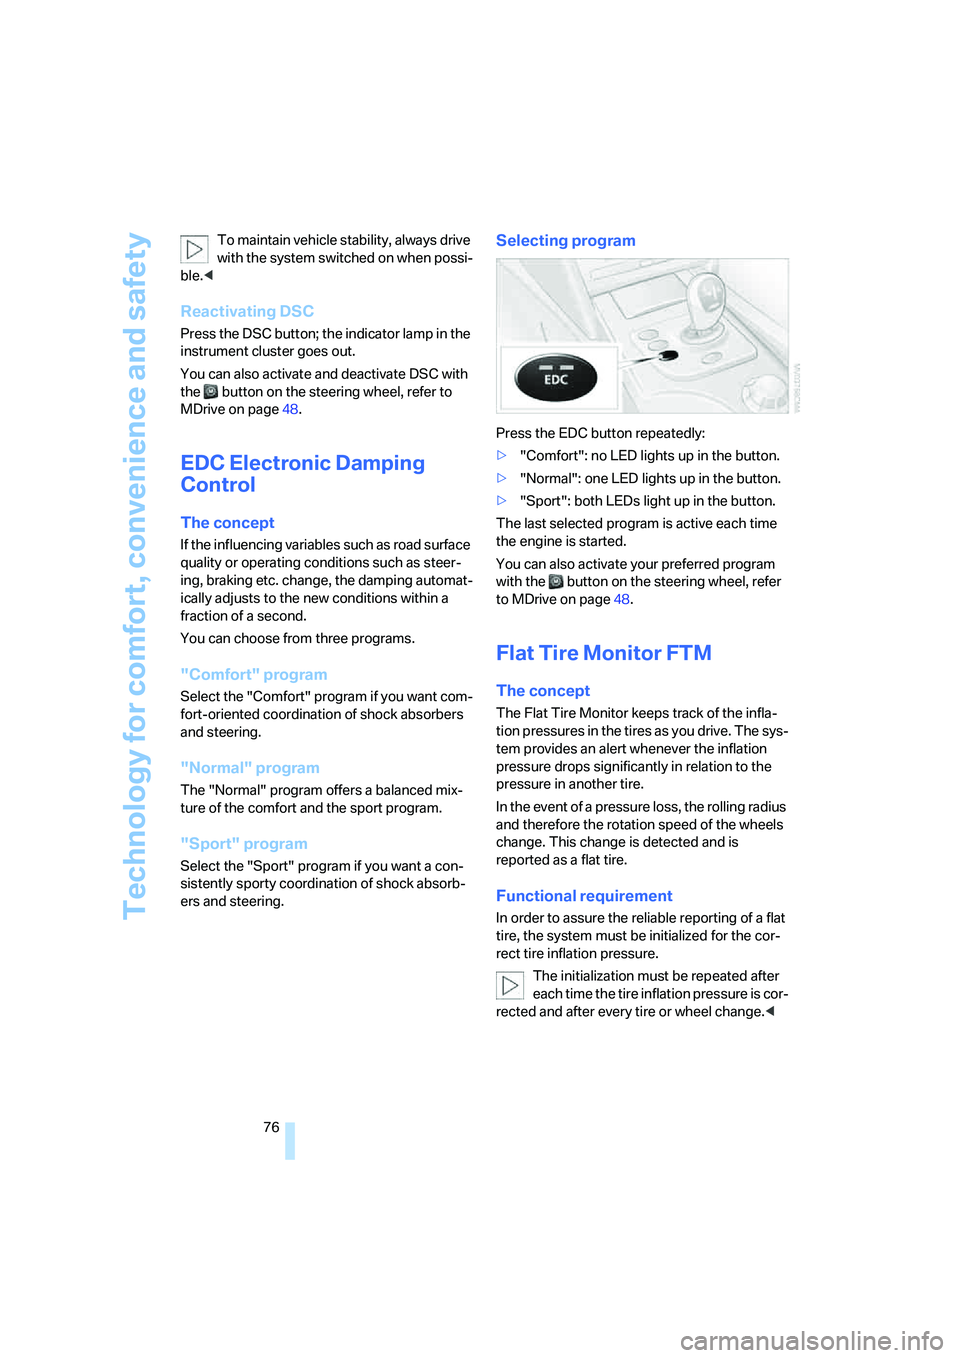
Selecting program
Press the EDC button repeatedly:
>"Comfort": no LED lights up in the button.
>"Normal": one LED lights up in the button.
>"Sport": both LEDs light up in the button.
The last selected program is active each time
the engine is started.
You can also activate your preferred program
with the button on the steering wheel, refer
to MDrive on page48.
Flat Tire Monitor FTM
The concept
The Flat Tire Monitor keeps track of the infla-
tion pressures in the tires as you drive. The sys-
tem provides an alert whenever the inflation
pressure drops significantly in relation to the
pressure in another tire.
In the event of a pressure loss, the rolling radius
and therefore the rotation speed of the wheels
change. This change is detected and is
reported as a flat tire.
Functional requirement
In order to assure the reliable reporting of a flat
tire, the system must be initialized for the cor-
rect tire inflation pressure.
The initialization must be repeated after
each time the tire inflation pressure is cor-
rected and after every tire or wheel change.<
Page 83 of 231

Controls
81Reference
At a glance
Driving tips
Communications
Navigation
Entertainment
Mobility
5.Select desired information of Head-Up Dis-
play.
6.Press the controller.
The information is shown on the Head-
Up Display.
"M View": the M view is shown in the
Head-Up Display. Information unavailable in
the M view appears on the Control Display
in gray and cannot be selected.
"M View": the default view is displayed.
The M view for the Head-Up Display can also be
selected with the button on the steering
wheel, refer to MDrive on page48.
The settings are stored for the remote key cur-
rently in use.
Default view
1Navigation instructions
2Stored desired speed of cruise control
3Speed
M view
1Current engine speed, highlighted
2Advance warning field of tachometer
3Red warning field of tachometer, also refer
to Tachometer on page62
4Speed
5Gear display
For information on the shift lights in the
tachometer, refer to page58.
Setting brightness
The brightness of the display is automatically
adapted to the ambient lighting conditions.
However, you can change the base setting.
With the low beams switched on, the brightness
can also be adjusted with the knurled wheel of
the instrument lighting.
iDrive, for explanation of principle, refer to
page16.
1.Open the start menu.
2.Press the controller to open the menu.
3.Select "Display settings" and press the
controller.
4.Select "Brightness" and press the control-
ler.
Page 92 of 231
Climate
90 body. Therefore, open these vents for maxi-
mum cooling.
AUC Automatic recirculated-air
control/recirculated-air mode
You can respond to pollutants or
unpleasant odors in the immediate
environment by suspending the
supply of outside air. The system then recircu-
lates the air currently within the vehicle. During
AUC operation, a sensor detects pollutants in
the outside air and controls the shut-off auto-
matically.
By pressing the button repeatedly, you can
request three operating modes:
>LED off: outside air flows in continuously.
>Right LED on, AUC mode: the system
detects pollutants in the outside air and
shuts off the supply as needed.
>Left LED on, recirculated-air mode: the
supply of outside air is permanently shut off.
If condensation starts to form on the
inside window surfaces during operation
in the recirculated-air mode, you should switch
it off while also increasing the air volume as
required.
The recirculated-air mode should not be used
over an extended period of time, as the air qual-
ity inside the vehicle deteriorates continu-
ously.<
Residual heat
The heat stored in the engine is
used to heat the passenger com-
partment, e.g. while stopped at a
school to pick up a child.
The function can be switched on when the fol-
lowing conditions are met:
>up to 15 minutes after switching off the
engine
>with engine at operating temperature
>with sufficient battery voltage
>at an outside temperature below 777/
256The LED lights up when the function is
switched on.
From radio readiness the interior temperature,
the air volume and the air distribution can be
set.
Switching off automatic climate control
The air volume, the heater and the
cooling function are all switched
off.
You can restart the automatic cli-
mate control by pressing any of its buttons
except the REST button.
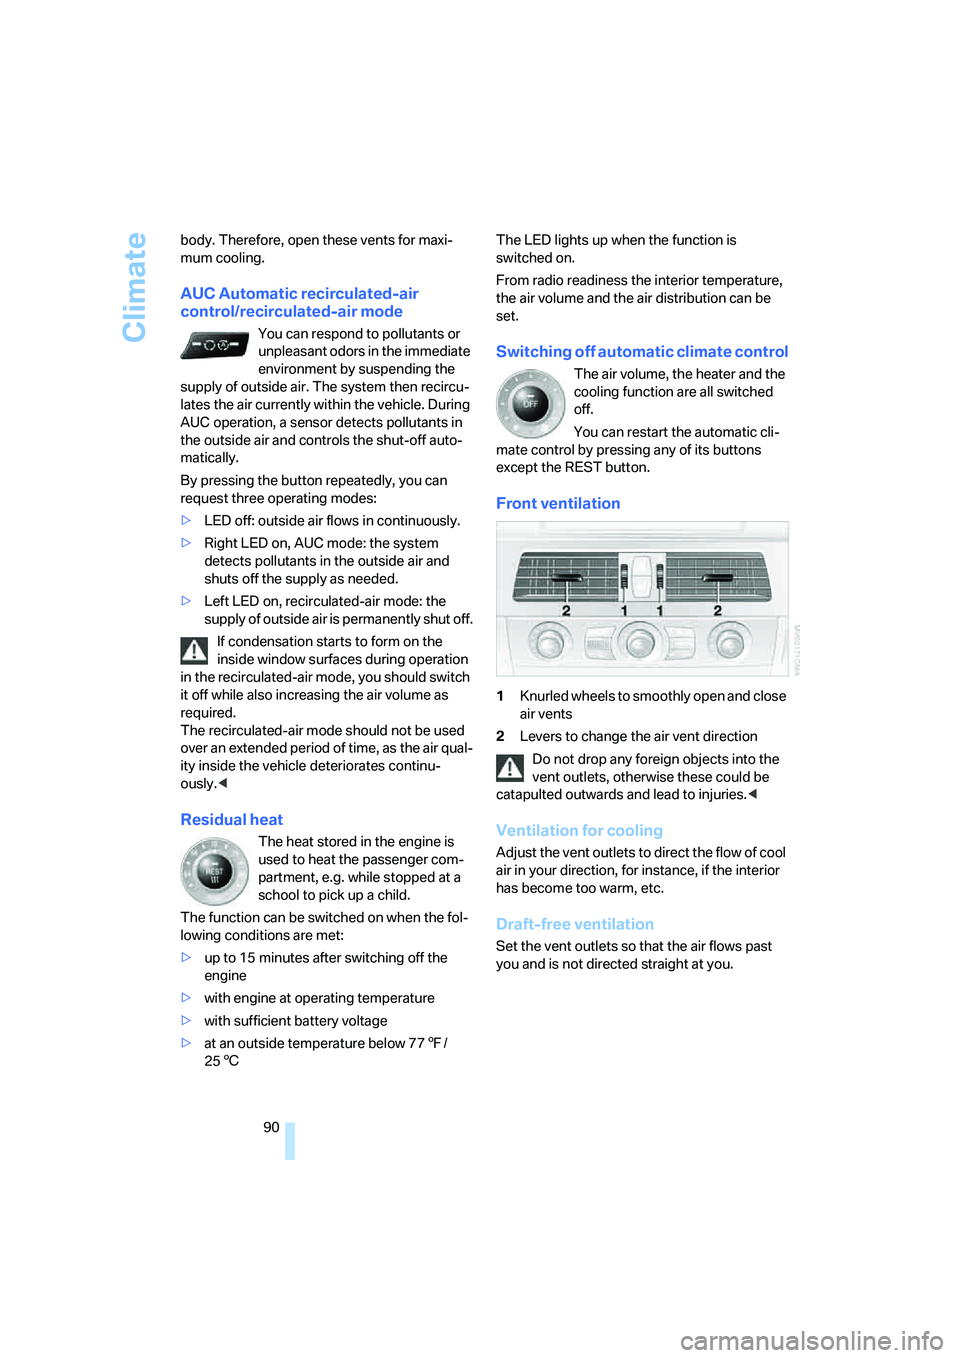
Front ventilation
1Knurled wheels to smoothly open and close
air vents
2Levers to change the air vent direction
Do not drop any foreign objects into the
vent outlets, otherwise these could be
catapulted outwards and lead to injuries.<
Ventilation for cooling
Adjust the vent outlets to direct the flow of cool
air in your direction, for instance, if the interior
has become too warm, etc.
Draft-free ventilation
Set the vent outlets so that the air flows past
you and is not directed straight at you.
Page 93 of 231
Controls
91Reference
At a glance
Driving tips
Communications
Navigation
Entertainment
Mobility
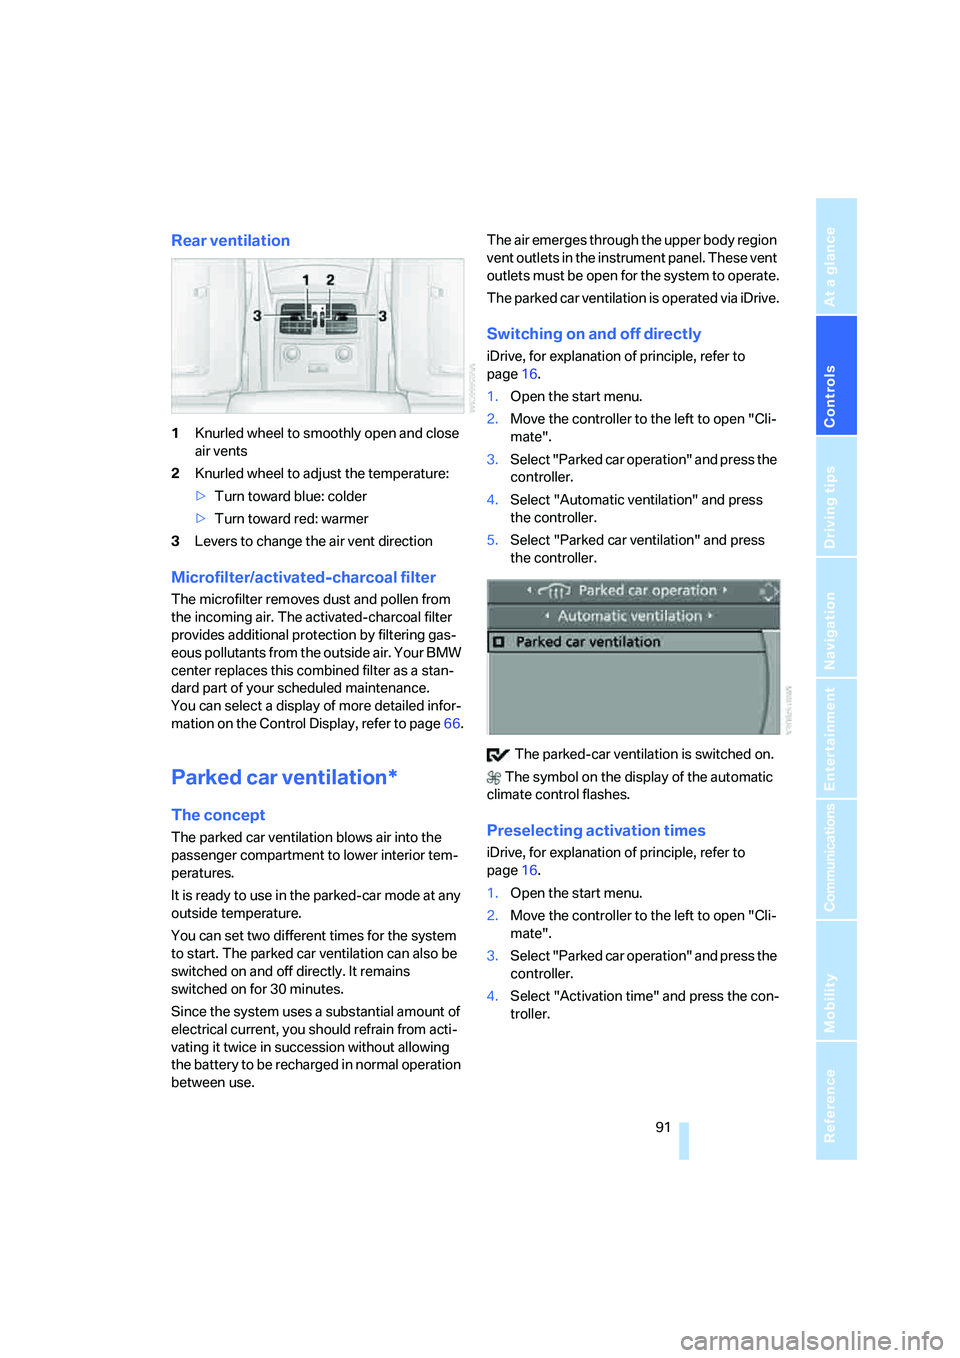
Rear ventilation
1Knurled wheel to smoothly open and close
air vents
2Knurled wheel to adjust the temperature:
>Turn toward blue: colder
>Turn toward red: warmer
3Levers to change the air vent direction
Microfilter/activated-charcoal filter
The microfilter removes dust and pollen from
the incoming air. The activated-charcoal filter
provides additional protection by filtering gas-
eous pollutants from the outside air. Your BMW
center replaces this combined filter as a stan-
dard part of your scheduled maintenance.
You can select a display of more detailed infor-
mation on the Control Display, refer to page66.
Parked car ventilation*
The concept
The parked car ventilation blows air into the
passenger compartment to lower interior tem-
peratures.
It is ready to use in the parked-car mode at any
outside temperature.
You can set two different times for the system
to start. The parked car ventilation can also be
switched on and off directly. It remains
switched on for 30 minutes.
Since the system uses a substantial amount of
electrical current, you should refrain from acti-
vating it twice in succession without allowing
the battery to be recharged in normal operation
between use.The air emerges through the upper body region
vent outlets in the instrument panel. These vent
outlets must be open for the system to operate.
The parked car ventilation is operated via iDrive.
Switching on and off directly
iDrive, for explanation of principle, refer to
page16.
1.Open the start menu.
2.Move the controller to the left to open "Cli-
mate".
3.Select "Parked car operation" and press the
controller.
4.Select "Automatic ventilation" and press
the controller.
5.Select "Parked car ventilation" and press
the controller.
The parked-car ventilation is switched on.
The symbol on the display of the automatic
climate control flashes.
Preselecting activation times
iDrive, for explanation of principle, refer to
page16.
1.Open the start menu.
2.Move the controller to the left to open "Cli-
mate".
3.Select "Parked car operation" and press the
controller.
4.Select "Activation time" and press the con-
troller.
Page 107 of 231
Driving tips
105Reference
At a glance
Controls
Communications
Navigation
Entertainment
Mobility
the risk of serious property damage as well as
personal injury.<
Mobile communications devices in
vehicle
BMW discourages the use of mobile
communications devices, e. g. mobile
phones, inside the vehicle without a direct con-
nection to an outside antenna. Otherwise, the
vehicle electronics and mobile communication
device can influence one another. In addition,
there is no assurance that the radiation which
results from transmission will be dissipated
from the vehicle interior.<
Interior and exterior mirrors,
automatic dimming feature*
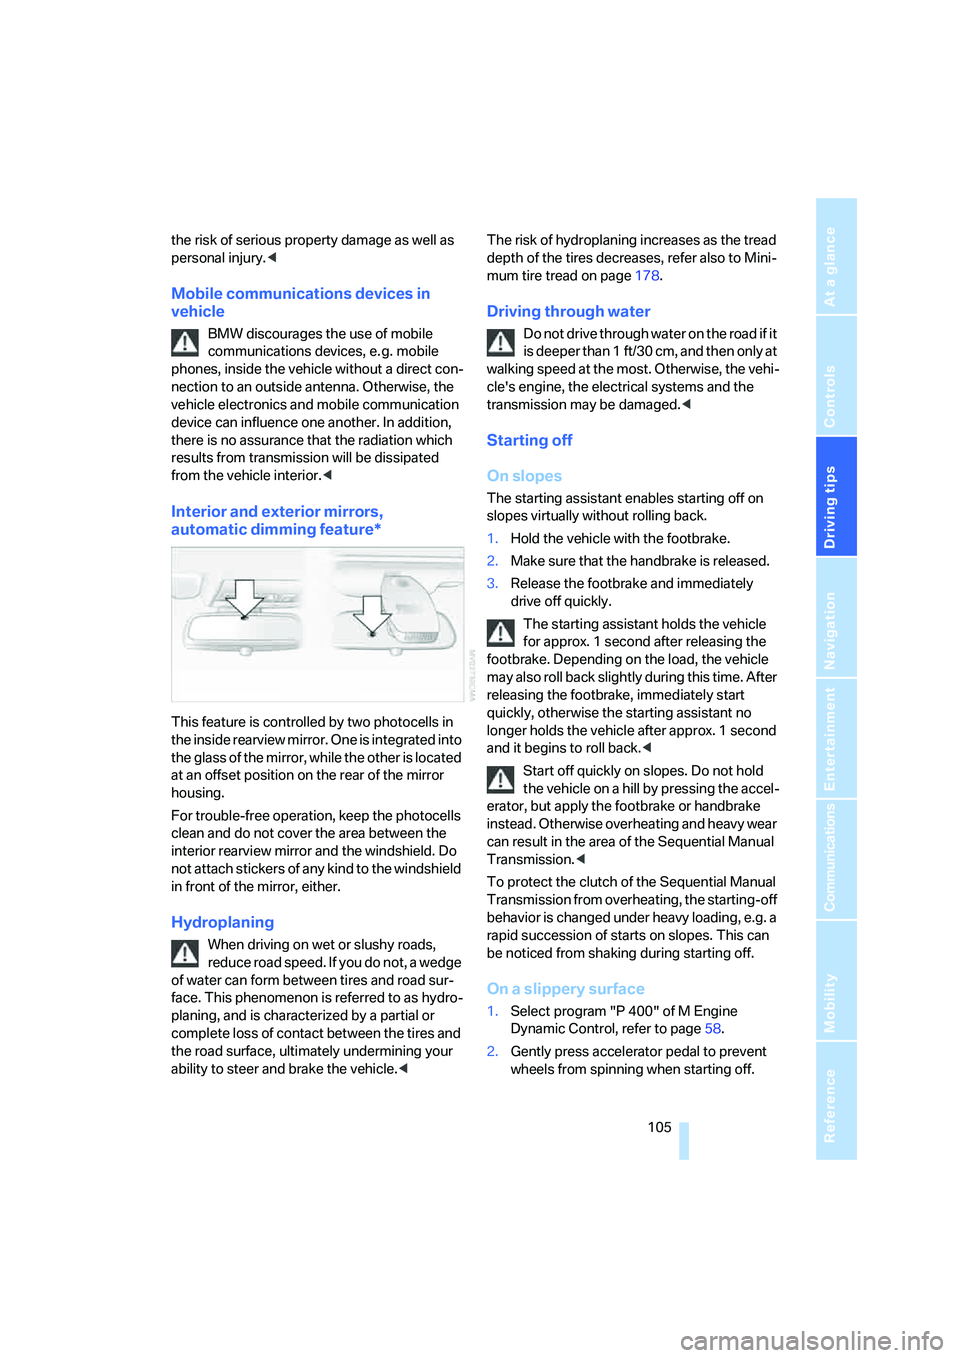
This feature is controlled by two photocells in
the inside rearview mirror. One is integrated into
the glass of the mirror, while the other is located
at an offset position on the rear of the mirror
housing.
For trouble-free operation, keep the photocells
clean and do not cover the area between the
interior rearview mirror and the windshield. Do
not attach stickers of any kind to the windshield
in front of the mirror, either.
Hydroplaning
When driving on wet or slushy roads,
reduce road speed. If you do not, a wedge
of water can form between tires and road sur-
face. This phenomenon is referred to as hydro-
planing, and is characterized by a partial or
complete loss of contact between the tires and
the road surface, ultimately undermining your
ability to steer and brake the vehicle.
mum tire tread on page178.
Driving through water
Do not drive through water on the road if it
is deeper than 1 ft/30 cm, and then only at
walking speed at the most. Otherwise, the vehi-
cle's engine, the electrical systems and the
transmission may be damaged.<
Starting off
On slopes
The starting assistant enables starting off on
slopes virtually without rolling back.
1.Hold the vehicle with the footbrake.
2.Make sure that the handbrake is released.
3.Release the footbrake and immediately
drive off quickly.
The starting assistant holds the vehicle
for approx. 1 second after releasing the
footbrake. Depending on the load, the vehicle
m a y a l s o ro l l b a ck s li g h t ly d u ri n g t h is t im e . A f t er
releasing the footbrake, immediately start
quickly, otherwise the starting assistant no
longer holds the vehicle after approx. 1 second
and it begins to roll back.<
Start off quickly on slopes. Do not hold
the vehicle on a hill by pressing the accel-
erator, but apply the footbrake or handbrake
instead. Otherwise overheating and heavy wear
can result in the area of the Sequential Manual
Transmission.<
To protect the clutch of the Sequential Manual
Transmission from overheating, the starting-off
behavior is changed under heavy loading, e.g. a
rapid succession of starts on slopes. This can
be noticed from shaking during starting off.
On a slippery surface
1.Select program "P 400" of M Engine
Dynamic Control, refer to page58.
2.Gently press accelerator pedal to prevent
wheels from spinning when starting off.
Page 118 of 231
Destination entry
116 The related town/city is displayed after the
street name.
If a town/city has already been entered, you can
undo this entry. This may be practical if the
desired street does not exist in the entered des-
tination, because, for example, it belongs to
another part of the town/city.
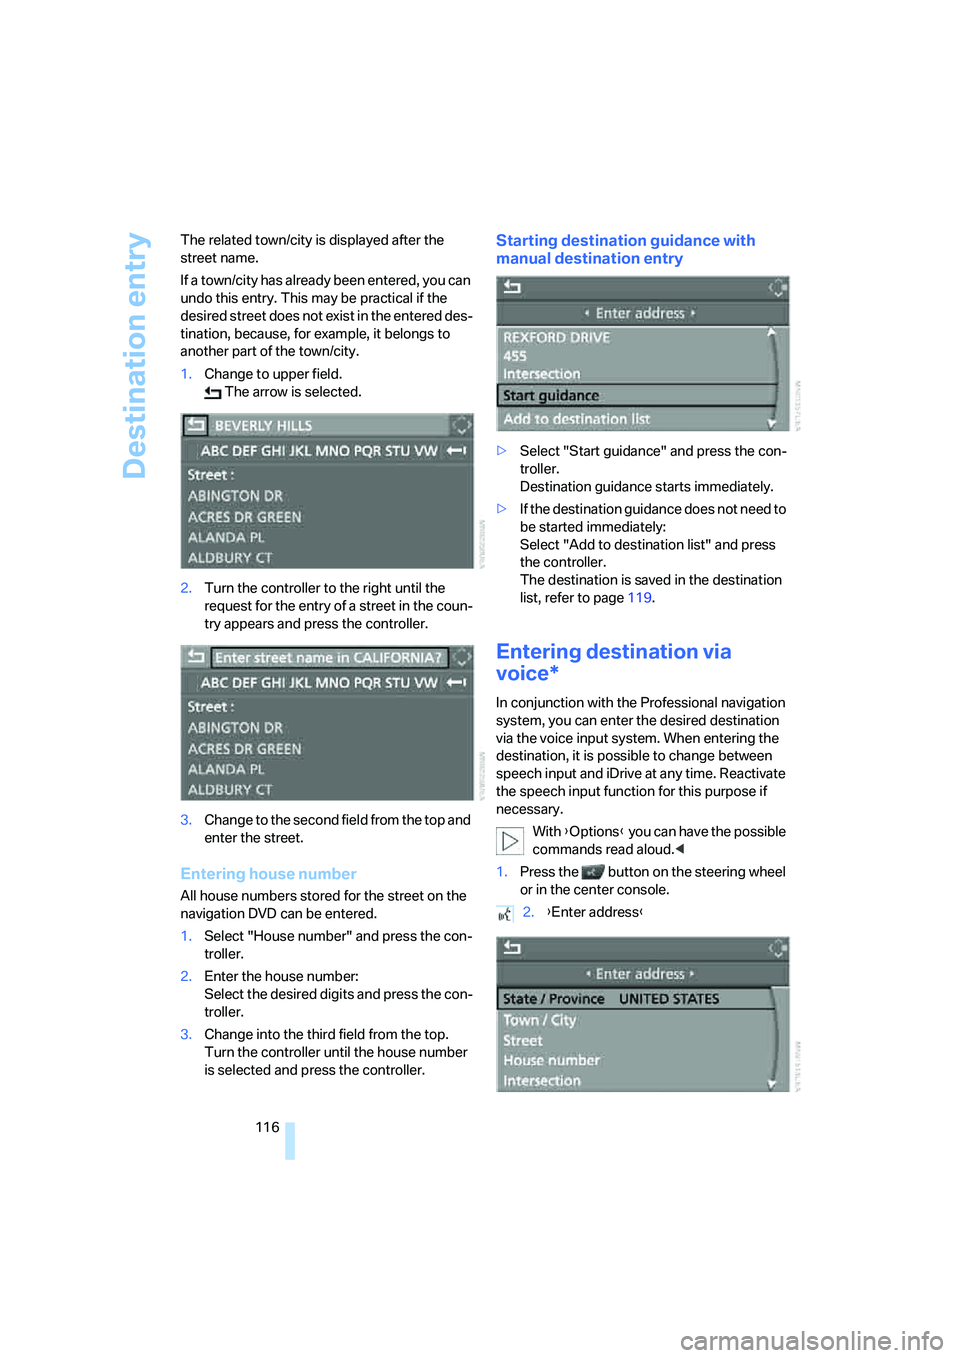
1.Change to upper field.
The arrow is selected.
2.Turn the controller to the right until the
request for the entry of a street in the coun-
try appears and press the controller.
3.Change to the second field from the top and
enter the street.
Entering house number
All house numbers stored for the street on the
navigation DVD can be entered.
1.Select "House number" and press the con-
troller.
2.Enter the house number:
Select the desired digits and press the con-
troller.
3.Change into the third field from the top.
Turn the controller until the house number
is selected and press the controller.
Starting destination guidance with
manual destination entry
>Select "Start guidance" and press the con-
troller.
Destination guidance starts immediately.
>If the destination guidance does not need to
be started immediately:
Select "Add to destination list" and press
the controller.
The destination is saved in the destination
list, refer to page119.
Entering destination via
voice*
In conjunction with the Professional navigation
system, you can enter the desired destination
via the voice input system. When entering the
destination, it is possible to change between
speech input and iDrive at any time. Reactivate
the speech input function for this purpose if
necessary.
With {Options} you can have the possible
commands read aloud.<
1.Press the button on the steering wheel
or in the center console.
2.{Enter address}