Page 84 of 170

84
The system could issue a false warning
or function in a delayed manner in the
following situations:
>System was not initialized
>You are driving on a snow-covered or
slippery road surface
>Performance-oriented driving: slip at
the drive wheels, high levels of lateral
acceleration
>You are driving with snow chainsInitializing the system
The initialization is completed
while you are driving, and can be
interrupted at any time. Initialization is
automatically continued when you con-
tinue driving. When driving with snow
chains, do not initialize the system.<
1. Before driving off, start the engine
but do not start driving
2. Press the button as long as you need
to, but no more than 8 seconds, until
the indicator lamp in the instrument
cluster lights up in yellow for several
seconds
3. Drive off. Initialization is completed
during the drive without any feed-
back issued.
When driving with snow chains,
do not initialize the system.<
To activate/deactivate the systemThe system is automatically activated in
ignition key position 2 and conse-
quently is on whenever the vehicle is
operated.
To deactivate the system: tap the but-
ton, the indicator lamp will light up yel-
low.
To activate the system: tap the button
again; the indicator lamp goes out.
Deactivate the system when snow
chains are mounted, since false warn-
ings and undetected losses in pressure
are possible under these kinds of con-
ditions.
Flat Tire Monitor
Page 85 of 170

85
Flat tire
The indicator lamp in the instru-
ment cluster lights up red. In
addition, an acoustic signal is
sounded.
1. Carefully reduce speed and come to
a stop. Avoid sudden braking and
steering maneuvers
2. Determine which wheel is damaged
If this cannot be determined, con-
tact your BMW center.<
3. Fix the flat tire using the M Mobility
system, refer to page 137
4. Press the button for approx.
4 seconds. The red indicator lamp
goes out.
After replacing the damaged tire, initial-
ize the system.
System malfunction
The indicator lamp in the instru-
ment cluster lights up yellow.
The Flat Tire Monitor is malfunc-
tioning or out of order. Please contact
your BMW center for additional infor-
mation.
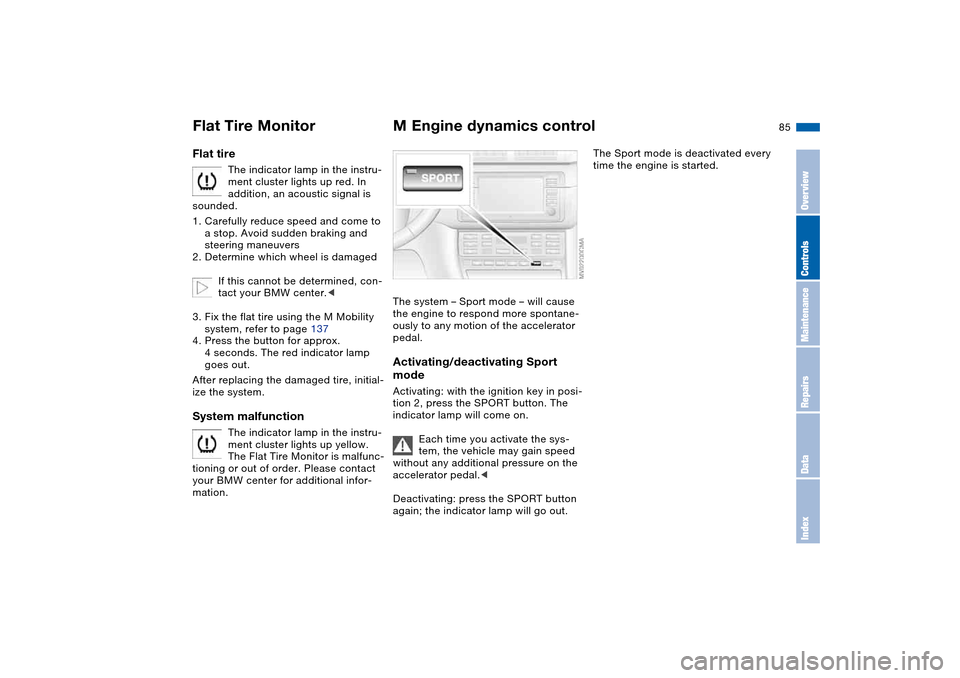
M Engine dynamics controlThe system – Sport mode – will cause
the engine to respond more spontane-
ously to any motion of the accelerator
pedal.Activating/deactivating Sport
modeActivating: with the ignition key in posi-
tion 2, press the SPORT button. The
indicator lamp will come on.
Each time you activate the sys-
tem, the vehicle may gain speed
without any additional pressure on the
accelerator pedal.<
Deactivating: press the SPORT button
again; the indicator lamp will go out.
The Sport mode is deactivated every
time the engine is started.
Flat Tire Monitor
OverviewControlsMaintenanceRepairsDataIndex
Page 87 of 170

87 Lamps
Parking lamps/Low beamsParking lamps
The front, rear and side vehicle
lighting is switched on. You can
use this to signal the position of
the vehicle when it is parked. For light-
ing on one side for parking as an addi-
tional feature refer to page 88.
Low beams
When you switch the ignition off
with the low-beam headlamps
on, only the parking lamps will
remain on.
Follow me home lampsWhen you activate the headlamp
flasher after parking the vehicle and
switching off the lights, the low beams
will come on for a brief period.
You can also have this function
deactivated.<
LIGHTS ON warningWhenever you open the driver's door
after having turned the ignition key to
position 0, you will hear an acoustic
signal for a few seconds to remind you
that the lamps have not been switched
off.Daytime driving lamps*If you desire, the light switch can be left
in the low-beam position: when the
ignition is switched off, the external
lighting is also switched off.
When required, switch on the parking
lamps as usual as described under
Parking lamps.
You can have the activation set-
tings for the daytime driving lamps
programmed on your vehicle.
When the switch is in this posi-
tion the system automatically
responds to changes in ambient
light, for example in tunnels, at dusk
and when it is raining or snowing, by
switching the low beams on or off.
The low-beam headlamps remain
on, regardless of the ambient
light, when you switch on the fog
lamps.<
Automatic headlamp control can-
not serve as a substitute for your
personal judgement in determining
when the lamps should be switched on.
For example, the sensors are not able
to detect fog. In such situations switch
on the lamp manually, as otherwise a
safety hazard will result.<
You can have the sensitivity of
your vehicle's automatic head-
lamp control adjusted.<
OverviewControlsMaintenanceRepairsDataIndex
Page 88 of 170
88
Instrument lightingTurn the rotary dial with the parking/low
beam lamps on to adjust the illumina-
tion intensity.
High beams/Standing lamps1High beams
2Headlamp flasher
3Standing lampsStanding lamps, left or rightAs an additional feature, you can illumi-
nate your vehicle on either side for
parking, if you wish to do so:
With the ignition key in position 0, push
the lever in the appropriate direction.
The lever engages in the turn signal
position.
The standing lamps discharge the
battery. Avoid using them for
longer periods of time; otherwise, you
may not be able to start the engine.<
Page 89 of 170

89
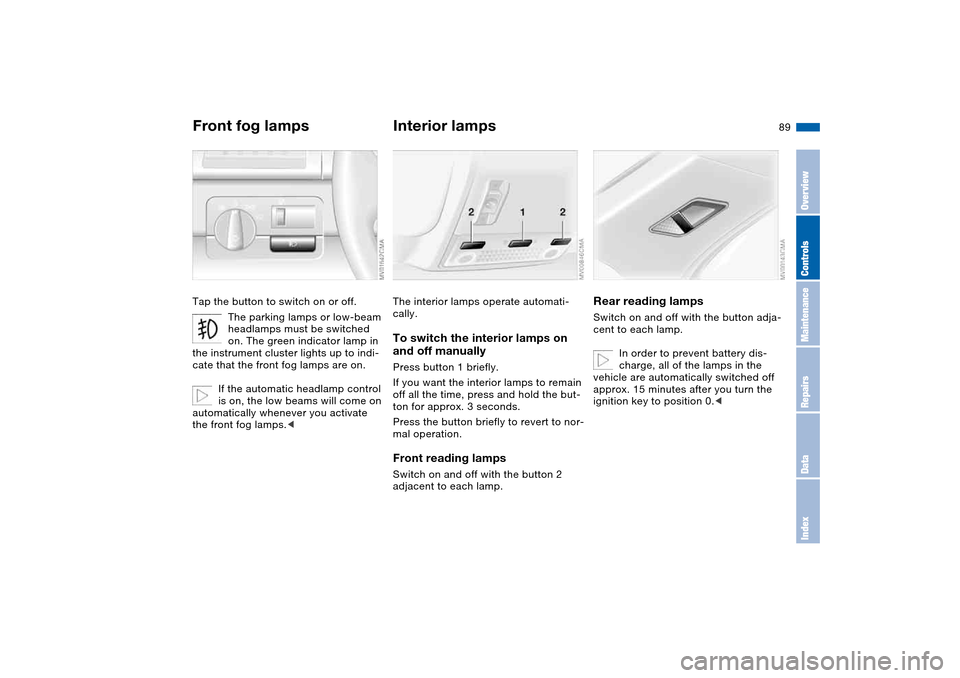
Front fog lampsTap the button to switch on or off.
The parking lamps or low-beam
headlamps must be switched
on. The green indicator lamp in
the instrument cluster lights up to indi-
cate that the front fog lamps are on.
If the automatic headlamp control
is on, the low beams will come on
automatically whenever you activate
the front fog lamps.<
Interior lampsThe interior lamps operate automati-
cally.To switch the interior lamps on
and off manuallyPress button 1 briefly.
If you want the interior lamps to remain
off all the time, press and hold the but-
ton for approx. 3 seconds.
Press the button briefly to revert to nor-
mal operation.Front reading lampsSwitch on and off with the button 2
adjacent to each lamp.
Rear reading lampsSwitch on and off with the button adja-
cent to each lamp.
In order to prevent battery dis-
charge, all of the lamps in the
vehicle are automatically switched off
approx. 15 minutes after you turn the
ignition key to position 0.<
OverviewControlsMaintenanceRepairsDataIndex
Page 92 of 170

92
Tips for pleasant drivingUse the automatic mode – switch on
with AUTO button 6. Select the desired
interior temperature.
Detailed setting options are described
for you in the following sections.
You can make the settings of your
vehicle in such a manner that,
when you unlock the vehicle with the
remote control of your personal key,
your own personalized setting for the
automatic climate control is initiated.
The AUTO program adjusts the
air supply and the air distribu-
tion to the windshield and the side win-
dows, towards the upper body and to
the footwells, and in addition adapts
the temperature to external influences:
summer, winter.
The cooling function is automatically
switched on when you are using the
AUTO program.
Individual air distribution
You can cancel the AUTO pro-
gram by selecting specific dis-
tribution patterns to suit your
own individual requirements.
While the AUTO program is then deacti-
vated, the automatic airflow control
remains in operation. Air flows onto
the windows , toward the upper
body , and into the footwell . You
can reactivate the automatic air supply
by pressing the AUTO button.Temperature
The interior temperature that
appears in the display panel is a
general figure intended for refer-
ence purposes. We recommend 727/
+226 as a comfortable setting, even if
the air conditioning is on. When you
start the vehicle, the system ensures
that the selected temperature is
reached as quickly as possible. It then
maintains this temperature, regardless
of the season.
To select the units of measure 7/6 of
the display, refer to page 79.
Air supply/Blower
By pressing the upper or lower
button, you can vary the air sup-
ply. This deactivates the auto-
matic air supply – the AUTO display dis-
appears from the panel. Nevertheless,
the automatic air distribution remains
unchanged. You can reactivate the
automatic air supply by pressing the
AUTO button.
When the lowest blower speed is set
and you press the lower button, all of
the displays are canceled: the blower,
heating and air conditioner are
switched off, and the air supply is
stopped. You can reactivate the system
by pressing any button for the auto-
matic climate control.To defrost windows and remove
condensation
This program quickly removes
ice and condensation from the
windshield and the side windows.
Air conditioning
The air is cooled and dehumidi-
fied and – depending on the
temperature setting – rewarmed.
Depending on the weather, the wind-
shield may fog over briefly when the
engine is started. Air conditioning helps
prevent the windows from fogging up.
The cooling function is automatically
switched on when you are using the
AUTO program.
Automatic climate control
Page 94 of 170
94
Microfilter/Activated-charcoal
filterThe built-in microfilter removes dust
and pollen from the incoming air. The
activated-charcoal filter provides addi-
tional protection by filtering gaseous
pollutants from the outside air. Your
BMW center will replace the combined
filter as a standard part of your sched-
uled maintenance. A substantial reduc-
tion in airflow indicates that the filter
needs to be replaced early.
Roller sun blind*To activate, press the button briefly
with ignition key in position 1 or higher.
Automatic climate control
Page 95 of 170
95 Interior conveniences
Premium sound system*Harman Kardon premium sound
systemWhen the system is activated, the
impression of a significantly larger pas-
senger compartment is created at all
seating areas, together with an
improvement of the stereo effect.
The system responds to poor reception
conditions by repeatedly alternating
between the stereo and monophonic
modes. You should then switch the sys-
tem off.
Glove compartmentTo openPull the handle. The glove compartment
will light up.To closeFold up cover.
To prevent injury in the event of an
accident, close the glove com-
partment immediately after use.
master key can also be used for unlock-
ing.
OverviewControlsMaintenanceRepairsDataIndex