2006 BMW 760Li lock
[x] Cancel search: lockPage 78 of 247

Everything under control
76
Coolant temperature
Should the coolant, and with it the engine
become too hot, a warning lamp lights up. In
addition, a message appears on the Control
Display.
Checking coolant level, refer to page203.
Computer
Requesting functions
With the ignition lock in radio ready state or
higher, you can use the buttons in the turn sig-
nal lever to display the computer information on
the Info Display.
1Info Display on left
2Info Display on right
A new function appears each time you briefly
press the button.
Displays on Info Display
The display sequence:
>Fuel gauge
>Range and distance to destinationThe display sequence:
>Odometer
>Energy Control/current fuel consumption
>Average fuel consumption
>Average speed
>Time of arrival
Hiding messages
Maintain pressure on button1 to hide the com-
puter display. Briefly press the button again to
return to the last display.
It is not possible, though, to hide a Check
Control message.<
Fuel gauge
The fuel gauge mode appears automatically
once the fuel level falls into the reserve range.
The tanks still contains the following quantities
of fuel:
>750i/Li: approx. 2.6 gallons/10 liters.
>760i/Li: approx. 3.1 gallons/12 liters.
If the tilt of the vehicle varies, when you are driv-
ing in mountainous areas, for example, the indi-
cator may fluctuate slightly.
After reaching the reserve quantity, the
Info Display can no longer be hidden.
However, you can still display the remaining
range.<
Fuel tank capacity: approx. 23.2 gallons/
88 liters. You can find information on refueling
on page192.
Refuel well before the tank is empty. If
you drive down to the last drop, engine
functions are no longer assured and damage
can occur.<
Page 86 of 247

Everything under control
84
Settings on Control Display
Setting units of measure and display
format
You can change the units of measure used in
the displays of fuel consumption, distances and
temperatures as well as the display format for
the time and date.
iDrive, for principle details, refer to page16.
1.Press the button to open the start
menu.
2.Move the controller toward "Settings".
3.Select "Units" and press the controller.
4.Select the menu item that you wish to
adjust. Press repeatedly to view a listing of
your selection options.
The setting is stored for the remote control cur-
rently in use.
Setting language
You can select a different language for the text
displays.
iDrive, for principle details, refer to page16.
1.Press the button to open the start
menu.
2.Move the controller toward "Settings".3.Select "Language" and press the controller.
4.Select and activate the desired language.
The setting is stored for the remote control cur-
rently in use.
Time and date
iDrive, for principle details, refer to page16.
1.Press the button to open the start
menu.
2.Move the controller toward "Settings".
3.Select "Clock" and press the controller.
Setting time
1.Select "Time" and press the controller.
The first time setting is activated.
2.Turn to adjust the setting.
3.Press the controller to adopt the setting.
The next setting is selected.
4.Adjust the remaining settings. After the last
adjustment, the time is stored.
Page 89 of 247
Controls
87Reference
At a glance
Driving tips
Communications
Navigation
Entertainment
Mobility
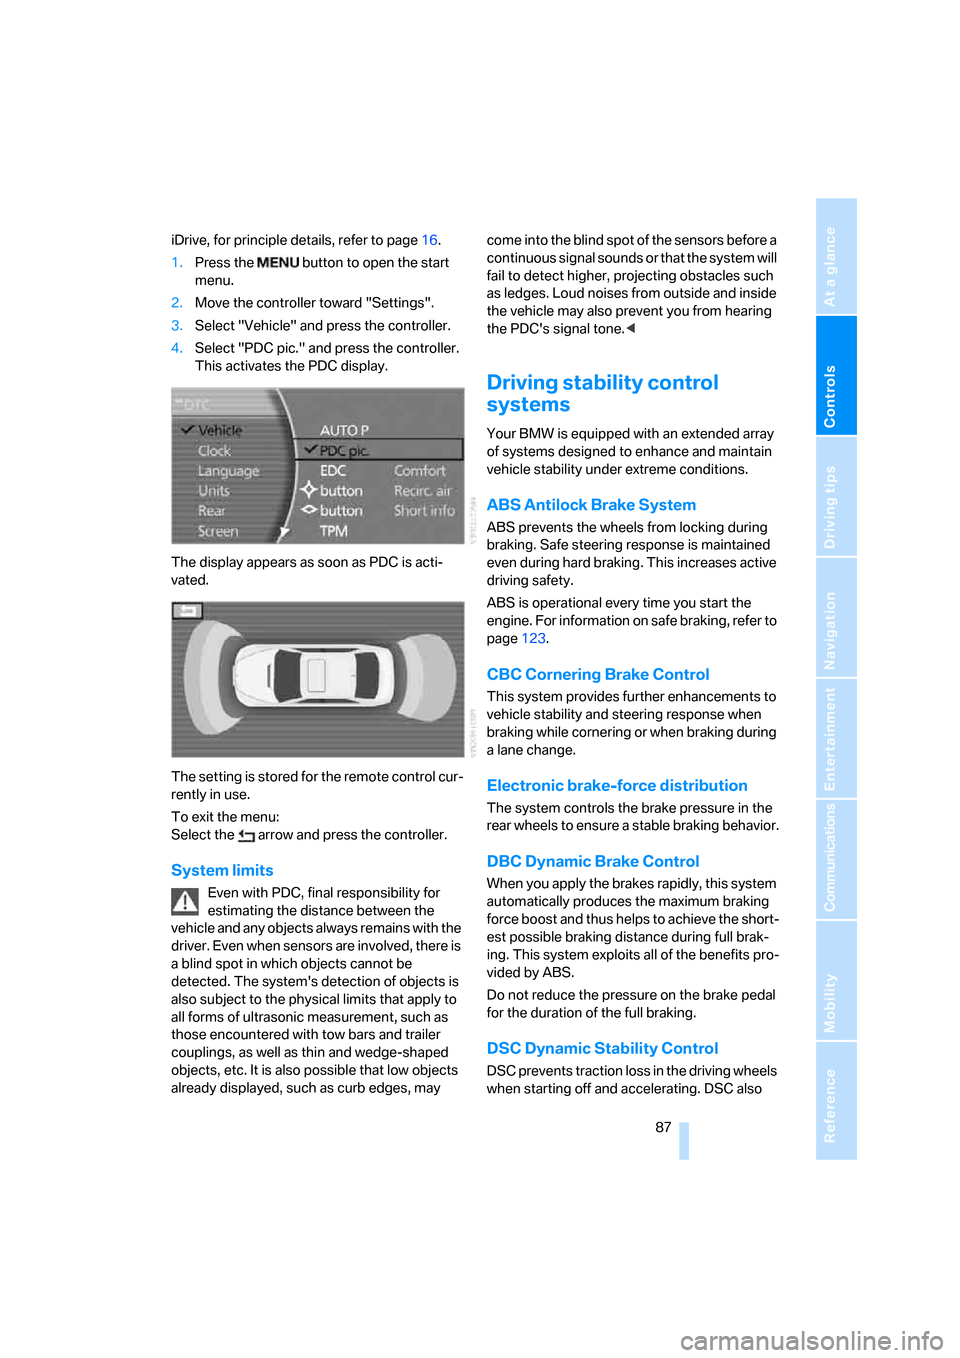
iDrive, for principle details, refer to page16.
1.Press the button to open the start
menu.
2.Move the controller toward "Settings".
3.Select "Vehicle" and press the controller.
4.Select "PDC pic." and press the controller.
This activates the PDC display.
The display appears as soon as PDC is acti-
vated.
The setting is stored for the remote control cur-
rently in use.
To exit the menu:
Select the arrow and press the controller.
System limits
Even with PDC, final responsibility for
estimating the distance between the
vehicle and any objects always remains with the
driver. Even when sensors are involved, there is
a blind spot in which objects cannot be
detected. The system's detection of objects is
also subject to the physical limits that apply to
all forms of ultrasonic measurement, such as
those encountered with tow bars and trailer
couplings, as well as thin and wedge-shaped
objects, etc. It is also possible that low objects
already displayed, such as curb edges, may come into the blind spot of the sensors before a
continuous signal sounds or that the system will
fail to detect higher, projecting obstacles such
as ledges. Loud noises from outside and inside
the vehicle may also prevent you from hearing
the PDC's signal tone.<
Driving stability control
systems
Your BMW is equipped with an extended array
of systems designed to enhance and maintain
vehicle stability under extreme conditions.
ABS Antilock Brake System
ABS prevents the wheels from locking during
braking. Safe steering response is maintained
even during hard braking. This increases active
driving safety.
ABS is operational every time you start the
engine. For information on safe braking, refer to
page123.
CBC Cornering Brake Control
This system provides further enhancements to
vehicle stability and steering response when
braking while cornering or when braking during
a lane change.
Electronic brake-force distribution
The system controls the brake pressure in the
rear wheels to ensure a stable braking behavior.
DBC Dynamic Brake Control
When you apply the brakes rapidly, this system
automatically produces the maximum braking
force boost and thus helps to achieve the short-
est possible braking distance during full brak-
ing. This system exploits all of the benefits pro-
vided by ABS.
Do not reduce the pressure on the brake pedal
for the duration of the full braking.
DSC Dynamic Stability Control
DSC prevents traction loss in the driving wheels
when starting off and accelerating. DSC also
Page 98 of 247
Technology for comfort, convenience and safety
96 the operational readiness of the entire airbag
system and the safety belt tensioners.
Airbag system malfunction
>Warning lamp does not light up from radio
ready state.
>Warning lamp lights up continuously.
Have the airbag system checked immedi-
ately in case of a malfunction; otherwise,
there is a danger that the airbag system may not
respond in the expected manner in an accident
despite an impact of corresponding intensity.<
BMW Night Vision*
The concept
BMW Night Vision is a driver assistance system
that is designed to provide enhanced vision for
certain objects at night. This can be especially
helpful for detecting people and larger animals.
When objects are detected, the driver may be
able to take appropriate action sooner. For
example, the driver may identify and detect the
presence of persons or animals in the road
ahead or off to the sides and can be more alert,
slow down or stop, blow the horn, etc. The
driver can decide which actions are appropriate
and then react accordingly.
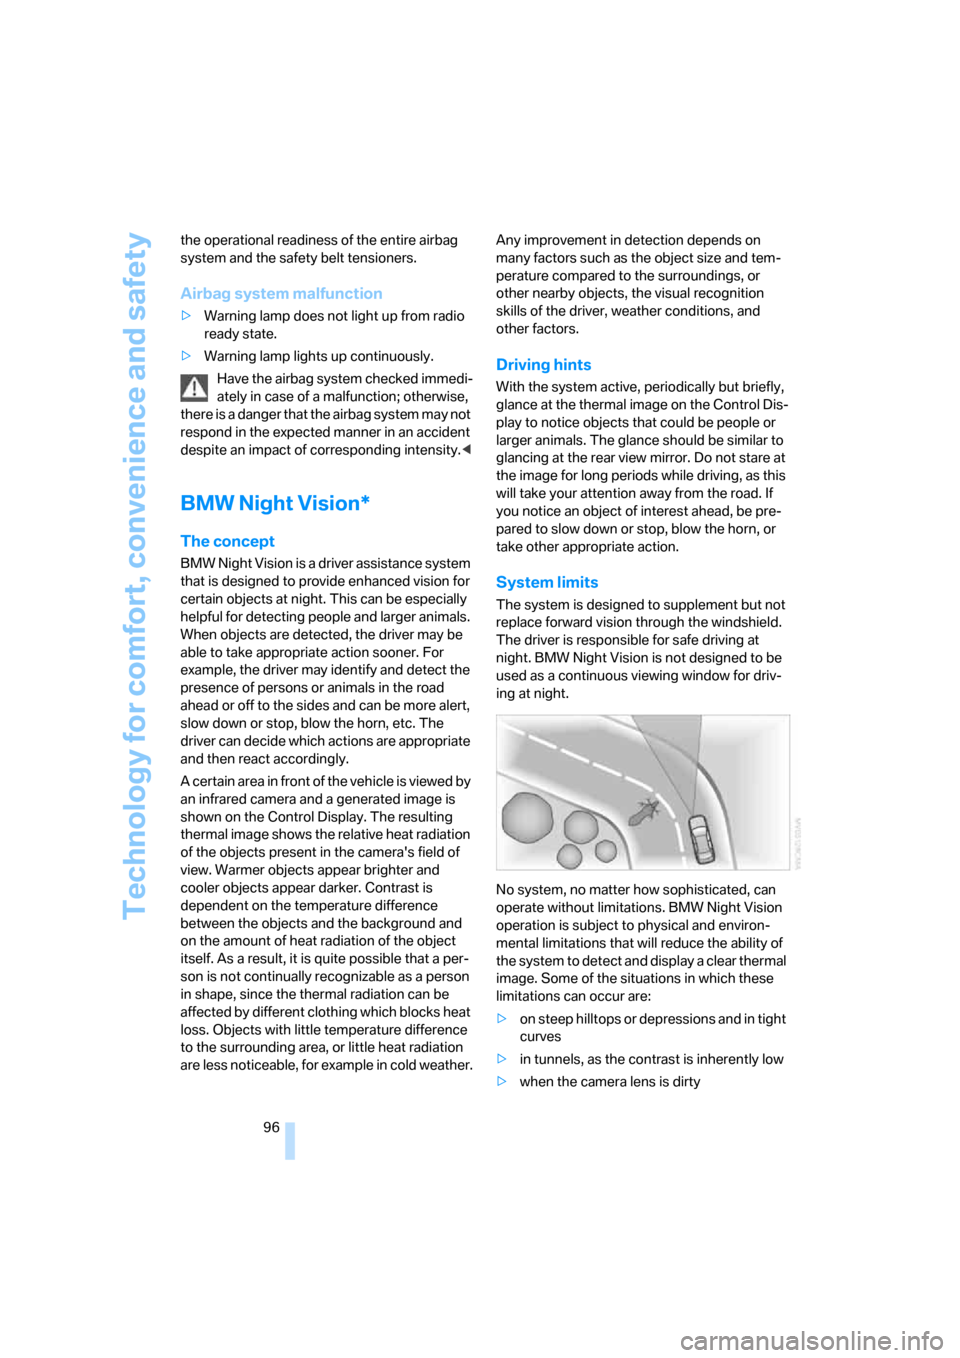
A certain area in front of the vehicle is viewed by
an infrared camera and a generated image is
shown on the Control Display. The resulting
thermal image shows the relative heat radiation
of the objects present in the camera's field of
view. Warmer objects appear brighter and
cooler objects appear darker. Contrast is
dependent on the temperature difference
between the objects and the background and
on the amount of heat radiation of the object
itself. As a result, it is quite possible that a per-
son is not continually recognizable as a person
in shape, since the thermal radiation can be
affected by different clothing which blocks heat
loss. Objects with little temperature difference
to the surrounding area, or little heat radiation
are less noticeable, for example in cold weather.Any improvement in detection depends on
many factors such as the object size and tem-
perature compared to the surroundings, or
other nearby objects, the visual recognition
skills of the driver, weather conditions, and
other factors.
Driving hints
With the system active, periodically but briefly,
glance at the thermal image on the Control Dis-
play to notice objects that could be people or
larger animals. The glance should be similar to
glancing at the rear view mirror. Do not stare at
the image for long periods while driving, as this
will take your attention away from the road. If
you notice an object of interest ahead, be pre-
pared to slow down or stop, blow the horn, or
take other appropriate action.
System limits
The system is designed to supplement but not
replace forward vision through the windshield.
The driver is responsible for safe driving at
night. BMW Night Vision is not designed to be
used as a continuous viewing window for driv-
ing at night.
No system, no matter how sophisticated, can
operate without limitations. BMW Night Vision
operation is subject to physical and environ-
mental limitations that will reduce the ability of
the system to detect and display a clear thermal
image. Some of the situations in which these
limitations can occur are:
>on steep hilltops or depressions and in tight
curves
>in tunnels, as the contrast is inherently low
>when the camera lens is dirty
Page 107 of 247

Controls
105Reference
At a glance
Driving tips
Communications
Navigation
Entertainment
Mobility
You can also adjust the intensity of the AUTO
program via iDrive.
iDrive, for principle details, refer to page16.
1.Press the button to open the start
menu.
2.Move the controller toward "Climate".
3.Turn the controller to select driver's side or
passenger side.
4.Turn the controller to select the field.
5.Press the controller repeatedly until the
desired program is displayed:
>"low"
>"medium"
>"high"
Automatic recirculated air control/
recirculated air mode
You can respond to unpleasant
odors or pollutants in the immedi-
ate environment by temporarily
suspending the supply of outside air. The sys-
tem then recirculates the air currently within the
vehicle. In AUC mode, a sensor detects pollut-
ants in the outside air and controls the shut-off
automatically.
Press the button repeatedly to run through the
following control sequence:
>LEDs off: outside air flows into the vehicle
continuously.
>Left LED on, AUC mode: the system
detects pollutants in the outside air and
responds by blocking the supply of outside
air when required.
>Right LED on, recirculated-air mode: the
supply of outside air into the vehicle is con-
tinuously blocked.If condensation starts to form on the
inside window surfaces during operation
in the recirculated-air mode, you should switch
it off while also increasing air supply as
required. Make sure that air can flow to the
windshield, e.g. by pressing the AUTO button.
The recirculated-air mode should not be used
over a longer period of time, as the air quality
inside the vehicle deteriorates continuously.<
Switching off automatic climate control
The air volume, the heater, and the
air conditioner mode are all
switched off.
You can restart the automatic climate control by
pressing any of its buttons except the REST
button.
Temperature adjustment
You can turn to select the desired
temperatures for the driver's and
passenger sides. Your settings
appear on the status line of the
Control Display. The number
shown in the display provides a general indica-
tion of interior temperature.
The automatic climate control adjusts this tem-
perature as quickly as possible at any time of
year, if necessary with the maximum cooling or
heating capacity, and then keeps it constant.
When switching between different tem-
perature settings in rapid succession, the
automatic climate control does not have suffi-
cient time to achieve the set temperature.<
Using iDrive
1.Open the start menu.
2.Open "Climate".
3.Turn the controller to select driver's side or
passenger side.
4.Turn the controller to select the field and
press the controller.
Page 115 of 247
Controls
113Reference
At a glance
Driving tips
Communications
Navigation
Entertainment
Mobility
To avoid injuries, make sure that the clos-
ing region of the roller blind is clear.
Press the safety switch on the driver's door,
refer to page40. The LED must light up. This
precaution prevents children from operating
the sun blinds using the rear switches, etc.
When leaving the vehicle parked, remove the
remote control from the ignition lock and close
the doors; this precaution prevents children
from operating the roller sun blinds and injuring
themselves.<
Automatically extending and retracting
sun blinds
You can run the sun blinds up and down
together when you press and hold the button3
longer.
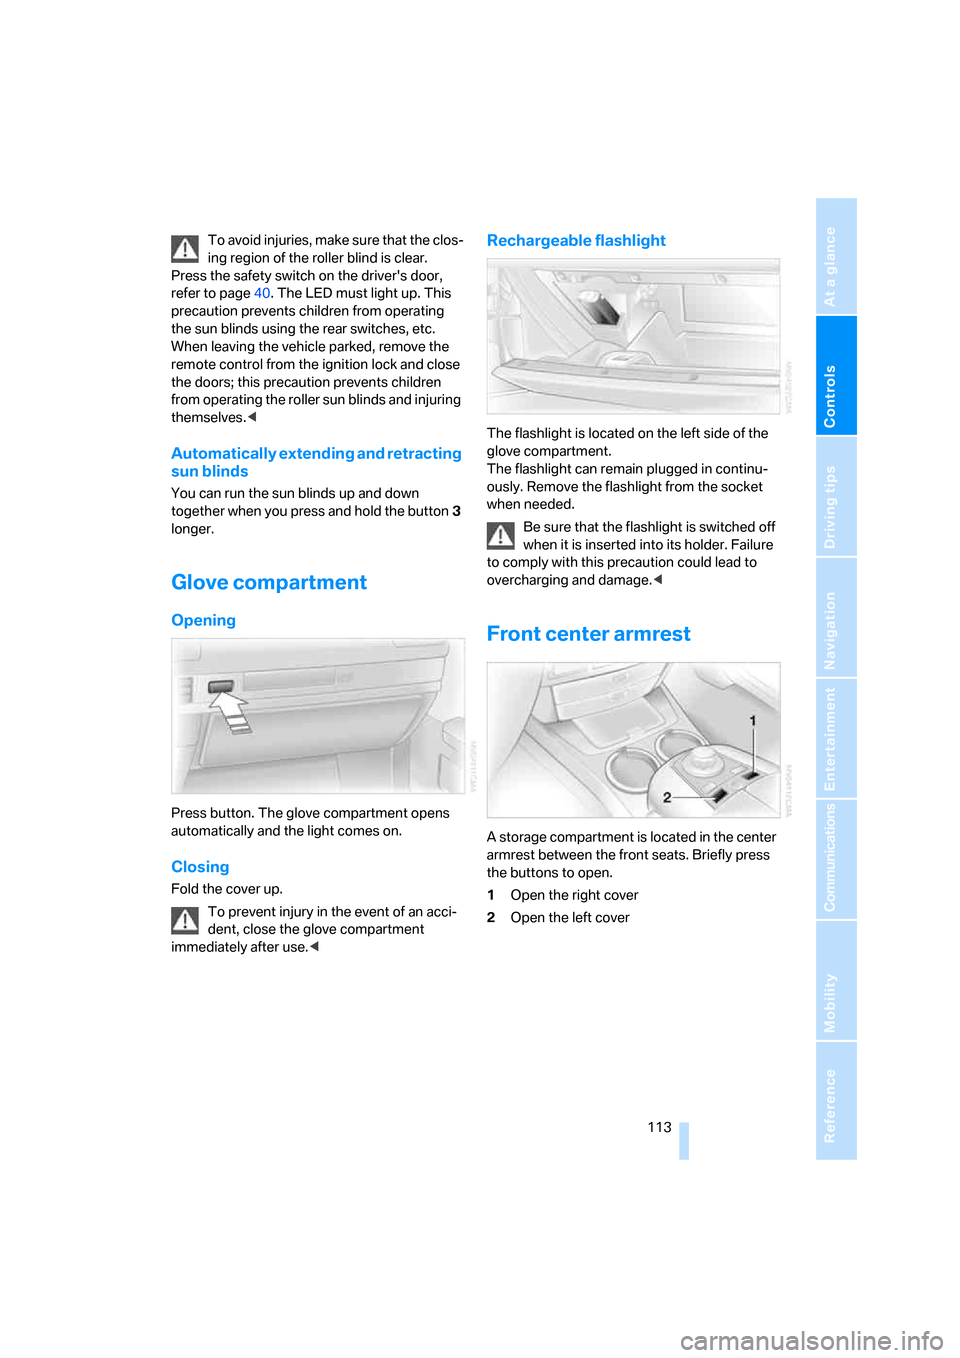
Glove compartment
Opening
Press button. The glove compartment opens
automatically and the light comes on.
Closing
Fold the cover up.
To prevent injury in the event of an acci-
dent, close the glove compartment
immediately after use.<
Rechargeable flashlight
The flashlight is located on the left side of the
glove compartment.
The flashlight can remain plugged in continu-
ously. Remove the flashlight from the socket
when needed.
Be sure that the flashlight is switched off
when it is inserted into its holder. Failure
to comply with this precaution could lead to
overcharging and damage.<
Front center armrest
A storage compartment is located in the center
armrest between the front seats. Briefly press
the buttons to open.
1Open the right cover
2Open the left cover
Page 116 of 247
Practical interior accessories
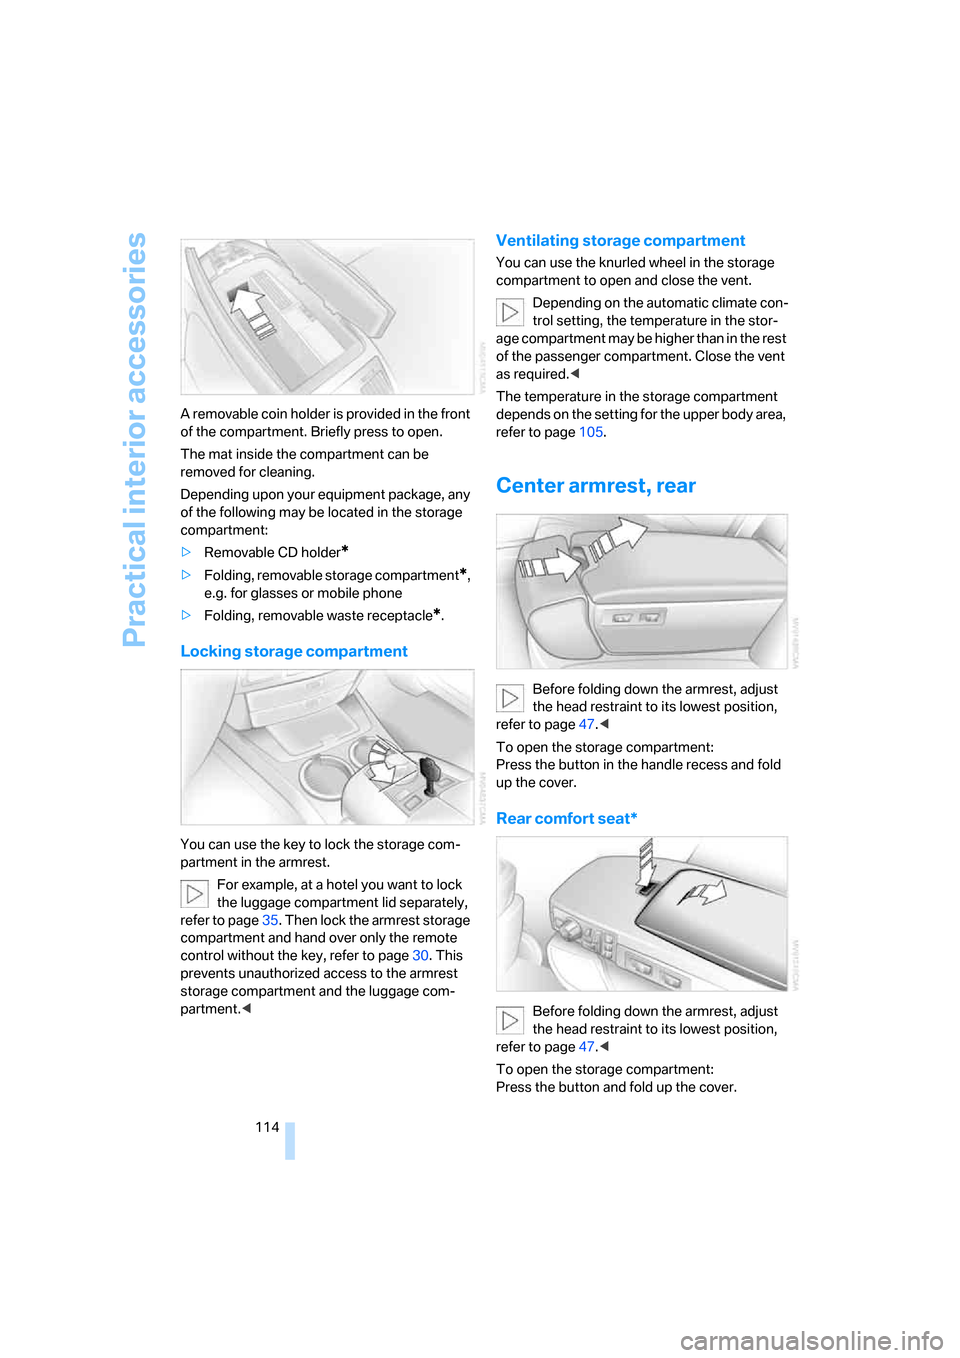
114 A removable coin holder is provided in the front
of the compartment. Briefly press to open.
The mat inside the compartment can be
removed for cleaning.
Depending upon your equipment package, any
of the following may be located in the storage
compartment:
>Removable CD holder
*
>Folding, removable storage compartment*,
e.g. for glasses or mobile phone
>Folding, removable waste receptacle
*.
Locking storage compartment
You can use the key to lock the storage com-
partment in the armrest.
For example, at a hotel you want to lock
the luggage compartment lid separately,
refer to page35. Then lock the armrest storage
compartment and hand over only the remote
control without the key, refer to page30. This
prevents unauthorized access to the armrest
storage compartment and the luggage com-
partment.<
Ventilating storage compartment
You can use the knurled wheel in the storage
compartment to open and close the vent.
Depending on the automatic climate con-
trol setting, the temperature in the stor-
age compartment may be higher than in the rest
of the passenger compartment. Close the vent
as required.<
The temperature in the storage compartment
depends on the setting for the upper body area,
refer to page105.
Center armrest, rear
Before folding down the armrest, adjust
the head restraint to its lowest position,
refer to page47.<
To open the storage compartment:
Press the button in the handle recess and fold
up the cover.
Rear comfort seat*
Before folding down the armrest, adjust
the head restraint to its lowest position,
refer to page47.<
To open the storage compartment:
Press the button and fold up the cover.
Page 186 of 247
Using the phone
184 The connection can also be established
via the button on the steering wheel or the
telephone keypad.<
Dialing phone numbers stored in a list
To select an entry and establish a connection:
1.Select the list and press the controller.
>"TOP 8"
>"Last"
>"Missed"
2.Select the desired entry and press the con-
troller.
3.Select the symbol and press the control-
ler.
The system dials the number.
The phone number is displayed in the top sta-
tus line as this happens.
The connection can also be established
via the button on the steering wheel or the
telephone keypad.<
Deleting entries in lists
You can delete the lists of the most frequently
called phone numbers, missed calls and the last
subscribers called.
1.Select the desired list and press the con-
troller.
The stored entries are shown on the right
side of the Control Displays.
2.Select the symbol and press the con-
troller to delete all existing entries.
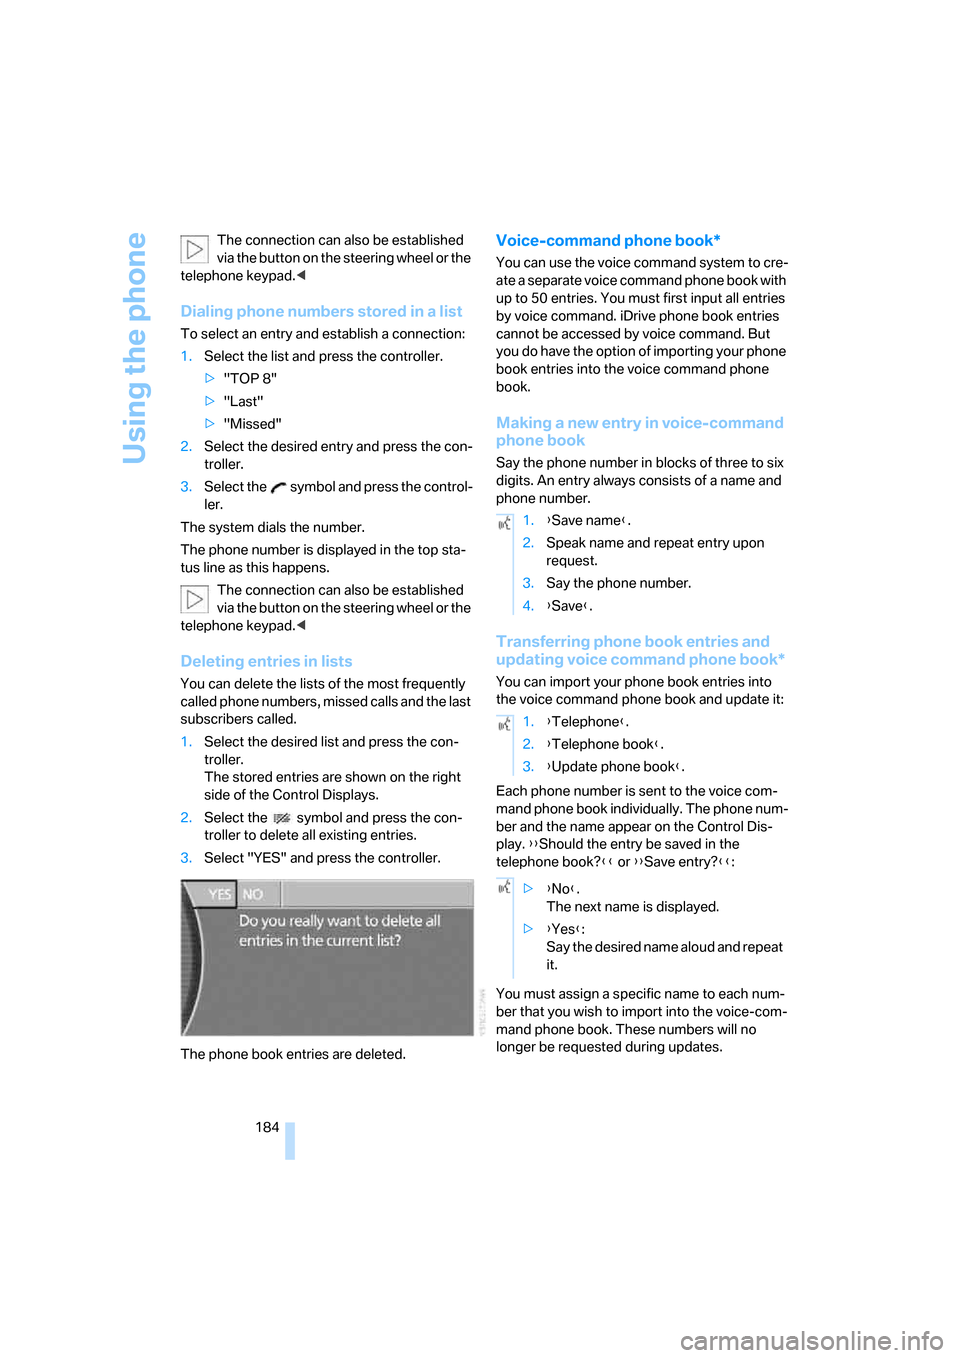
3.Select "YES" and press the controller.
The phone book entries are deleted.
Voice-command phone book*
You can use the voice command system to cre-
ate a separate voice command phone book with
up to 50 entries. You must first input all entries
by voice command. iDrive phone book entries
cannot be accessed by voice command. But
you do have the option of importing your phone
book entries into the voice command phone
book.
Making a new entry in voice-command
phone book
Say the phone number in blocks of three to six
digits. An entry always consists of a name and
phone number.
Transferring phone book entries and
updating voice command phone book*
You can import your phone book entries into
the voice command phone book and update it:
Each phone number is sent to the voice com-
mand phone book individually. The phone num-
ber and the name appear on the Control Dis-
play. {{Should the entry be saved in the
telephone book?}} or {{Save entry?}}:
You must assign a specific name to each num-
ber that you wish to import into the voice-com-
mand phone book. These numbers will no
longer be requested during updates.
1.{Save name}.
2.Speak name and repeat entry upon
request.
3.Say the phone number.
4.{Save}.
1.{Telephone}.
2.{Telephone book}.
3.{Update phone book}.
>{No}.
The next name is displayed.
>{Yes}:
Say the desired name aloud and repeat
it.