2006 BMW 750LI seats
[x] Cancel search: seatsPage 17 of 247

At a glance
15Reference
Controls
Driving tips
Communications
Navigation
Entertainment
Mobility
1Glass sunroof, electric*41
2Memory buttons for integrated universal
remote control
*111
3Reading lamps102
4Interior lamps102
5Passenger airbag status lamp95
6Initiating an emergency call178
7Control Display16
8Temperature, left side of passenger
compartment: turn,
maximum cooling: press106
9Air volume, left side of passenger compart-
ment: turn106
Defrosting windows and removing conden-
sation: press106
10Hazard warning flashers
11Air volume, right side of passenger
compartment106
12Temperature, right side of passenger
compartment: rotate,
residual heat: press106
13Rear window defroster
14Air conditioner mode107
15Opening the glove compartment
16Automatic air distribution and airflow as
well as intensity of the AUTO program,
right side of passenger compartment104
17Starting scan
>for stations152
>for tracks152
18Central locking system34
19Selecting AM or FM waveband
20Selecting radio, CD player, and CD changer
21Controller16
22 button and programmable
button16
23Snap-in adapter17924Seat adjustment44
25Glasses compartment115
26Storage compartments115
27Switching audio sources on/off and
adjusting volume153
28Retracting telephone keypad177
29Automatic air distribution and airflow as
well as intensity of the AUTO program,
left side of passenger compartment104
30Outside air/AUC Automatic recirculated-air
control/recirculated air105
31Switching off automatic climate
control105
Heated seats*49
Active seat ventilation
*50
Active seat for driver
*50
Seat, mirror and steering wheel
memory46
Page 20 of 247
iDrive
18 5Help
>Brief help text displays20
>Menu name for menu change19
6Entertainment
>Radio155
>CD player
*162
>CD changer
*164
>DVD changer
*168
It is only possible to play a DVD on the
rear seat screen, refer to Rear seat
screen
* on page21.<
7Settings
>Parking brake58
>PDC Park Distance Control86
>EDC Electronic Damping Control89
>Programmable buttons52
>FTM Flat Tire Monitor
*90
>TPM Tire Pressure Monitor
*91
>Time and date84
>Language84
>Units of measure and display format84
>Brightness85
>Rear seat screen
*21
8Climate
>Intensity of AUTO program104
>Air volume106
>Heated seats
*49
>Parked car ventilation109
>Extra, e.g. rear air conditioner108
Basic operation
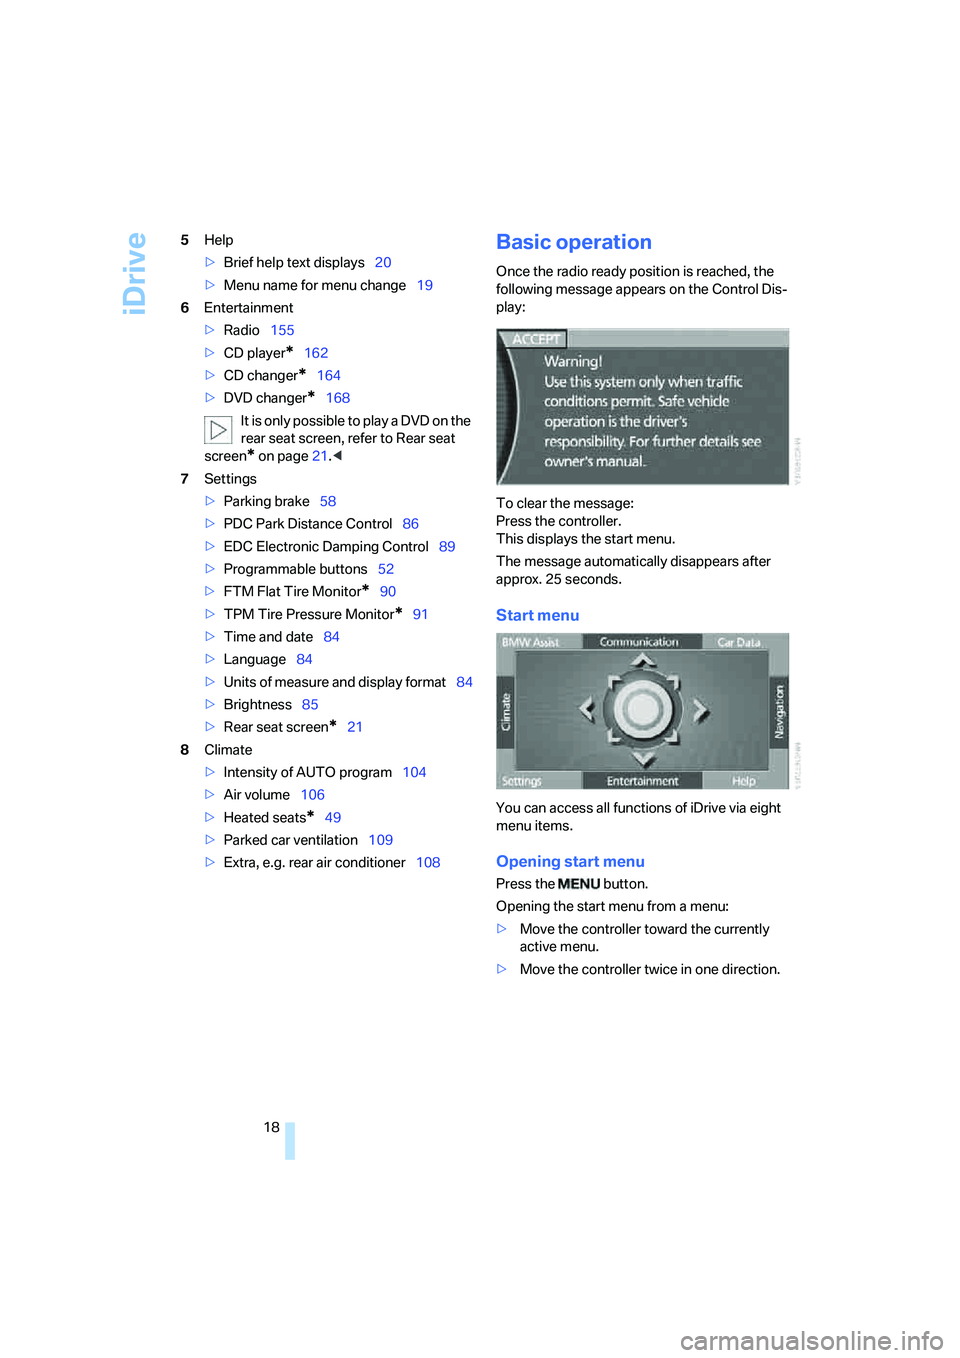
Once the radio ready position is reached, the
following message appears on the Control Dis-
play:
To clear the message:
Press the controller.
This displays the start menu.
The message automatically disappears after
approx. 25 seconds.
Start menu
You can access all functions of iDrive via eight
menu items.
Opening start menu
Press the button.
Opening the start menu from a menu:
>Move the controller toward the currently
active menu.
>Move the controller twice in one direction.
Page 24 of 247
iDrive
22 Press the controller again to switch the screen
back on.
Controller/buttons
The controller and buttons are located on the
center armrest.
Rear lock
The available functions are operated with the
respective controller.
Via iDrive you can limit the operation in the rear
or switch off the rear seat screen.
iDrive, for principle details, refer to page16.
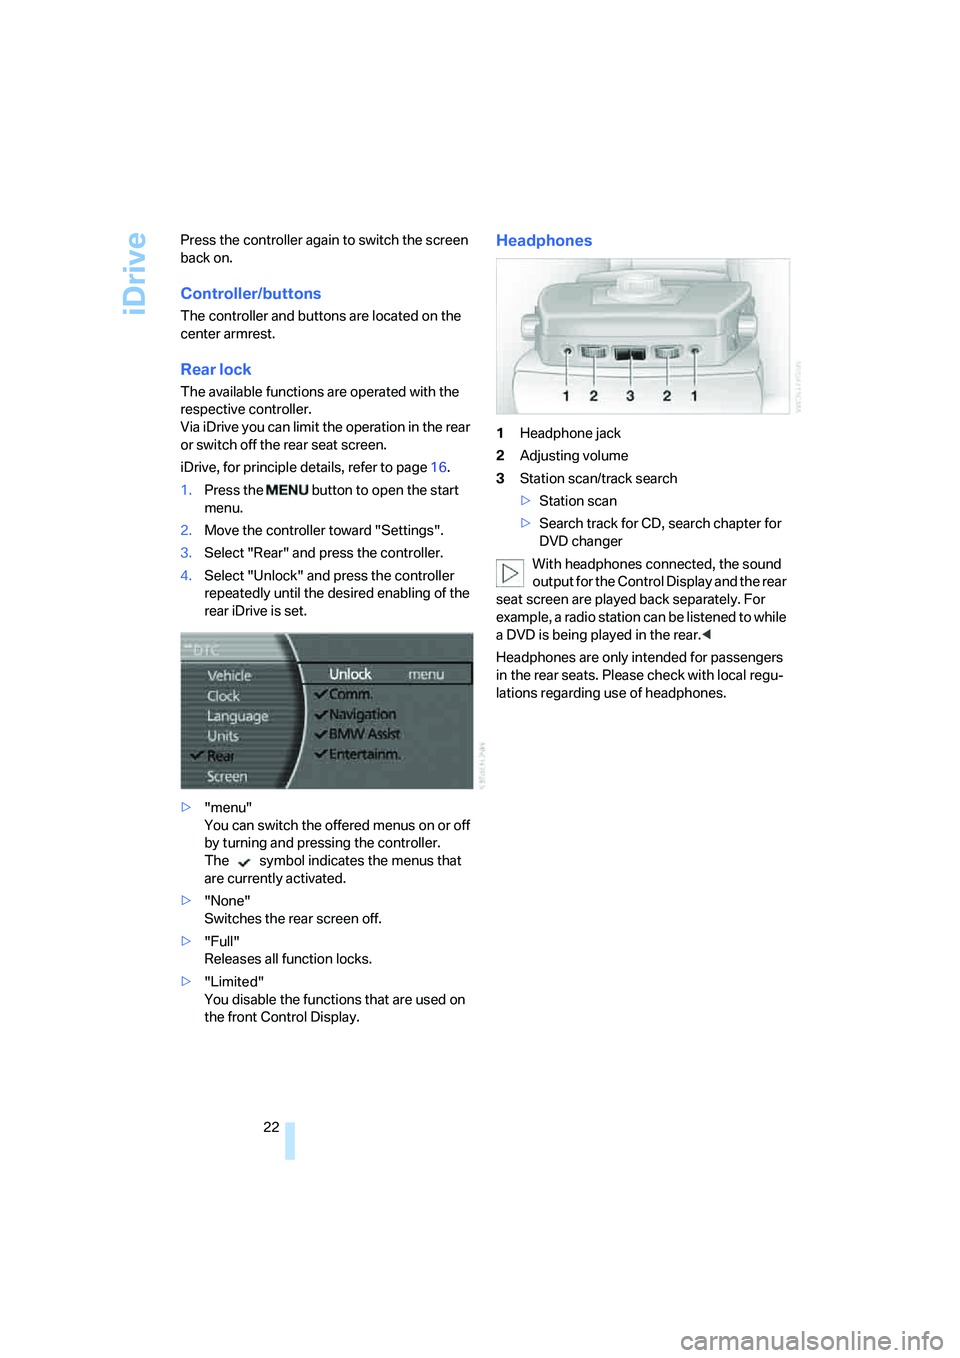
1.Press the button to open the start
menu.
2.Move the controller toward "Settings".
3.Select "Rear" and press the controller.
4.Select "Unlock" and press the controller
repeatedly until the desired enabling of the
rear iDrive is set.
>"menu"
You can switch the offered menus on or off
by turning and pressing the controller.
The symbol indicates the menus that
are currently activated.
>"None"
Switches the rear screen off.
>"Full"
Releases all function locks.
>"Limited"
You disable the functions that are used on
the front Control Display.
Headphones
1Headphone jack
2Adjusting volume
3Station scan/track search
>Station scan
>Search track for CD, search chapter for
DVD changer
With headphones connected, the sound
output for the Control Display and the rear
seat screen are played back separately. For
example, a radio station can be listened to while
a DVD is being played in the rear.<
Headphones are only intended for passengers
in the rear seats. Please check with local regu-
lations regarding use of headphones.
Page 42 of 247
Opening and closing
40
Opening and closing windows
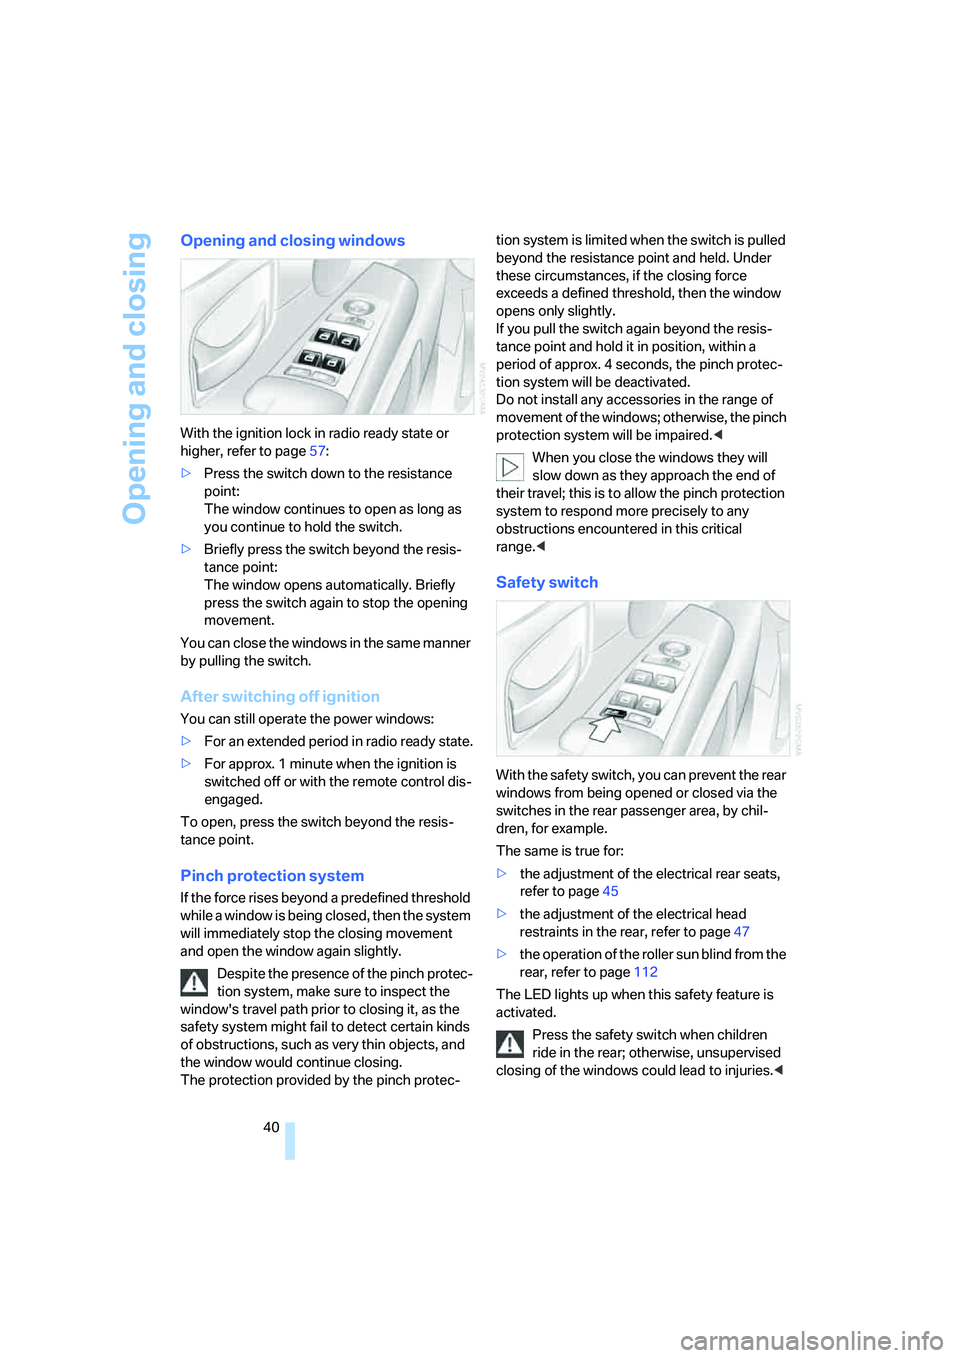
With the ignition lock in radio ready state or
higher, refer to page57:
>Press the switch down to the resistance
point:
The window continues to open as long as
you continue to hold the switch.
>Briefly press the switch beyond the resis-
tance point:
The window opens automatically. Briefly
press the switch again to stop the opening
movement.
You can close the windows in the same manner
by pulling the switch.
After switching off ignition
You can still operate the power windows:
>For an extended period in radio ready state.
>For approx. 1 minute when the ignition is
switched off or with the remote control dis-
engaged.
To open, press the switch beyond the resis-
tance point.
Pinch protection system
If the force rises beyond a predefined threshold
while a window is being closed, then the system
will immediately stop the closing movement
and open the window again slightly.
Despite the presence of the pinch protec-
tion system, make sure to inspect the
window's travel path prior to closing it, as the
safety system might fail to detect certain kinds
of obstructions, such as very thin objects, and
the window would continue closing.
The protection provided by the pinch protec-tion system is limited when the switch is pulled
beyond the resistance point and held. Under
these circumstances, if the closing force
exceeds a defined threshold, then the window
opens only slightly.
If you pull the switch again beyond the resis-
tance point and hold it in position, within a
period of approx. 4 seconds, the pinch protec-
tion system will be deactivated.
Do not install any accessories in the range of
movement of the windows; otherwise, the pinch
protection system will be impaired.<
When you close the windows they will
slow down as they approach the end of
their travel; this is to allow the pinch protection
system to respond more precisely to any
obstructions encountered in this critical
range.<
Safety switch
With the safety switch, you can prevent the rear
windows from being opened or closed via the
switches in the rear passenger area, by chil-
dren, for example.
The same is true for:
>the adjustment of the electrical rear seats,
refer to page45
>the adjustment of the electrical head
restraints in the rear, refer to page47
>the operation of the roller sun blind from the
rear, refer to page112
The LED lights up when this safety feature is
activated.
Press the safety switch when children
ride in the rear; otherwise, unsupervised
closing of the windows could lead to injuries.<
Page 45 of 247
Controls
43Reference
At a glance
Driving tips
Communications
Navigation
Entertainment
Mobility
Adjusting
Sitting safely
The ideal sitting position can make a vital con-
tribution to relaxed driving that is as fatigue-free
as possible. Together with the safety belts and
airbags, the sitting position plays an important
role in the event of an accident. To ensure that
the safety systems operate with optimized effi-
ciency, we strongly urge you to follow the
instructions contained in the section below.
For additional information on transporting chil-
dren safely, refer to page54.
Airbags
Always maintain an adequate distance
between yourself and the airbags. Always
hold the steering wheel by its rim with hands at
the 9 o'clock and 3 o'clock positions, to mini-
mize the risk of injuries to your hands and arms
in the event of airbag deployment. No one and
nothing is to come between the airbags and the
seat occupant.
Do not use the cover of the front airbag on the
front passenger side as a storage area. Make
sure that the front passenger is sitting correctly
and does not rest feet or legs on the instrument
panel; otherwise, leg injuries can occur if the
front airbag is triggered. Make sure that occu-
pants do not rest their head against the side or
head airbag; otherwise, injuries can occur if the
airbags are triggered.<
Even if you adhere to all of the instructions, inju-
ries resulting from contact with airbags cannot
be entirely ruled out, depending on the circum-
stances. The ignition and inflation noise may
provoke a mild – usually temporary – hearing
loss in extremely sensitive individuals.
For airbag locations and additional information
on airbags, refer to page94.
Head restraint
A correctly adjusted head restraint reduces the
risk of injury to cervical vertebrae in the event of
an accident.
Adjust the head restraint so that its center
is approx. at ear level. Otherwise, there is
increased danger of injury in the event of an
accident.<
Adjusting the head restraint, refer to page46.
Safety belt
Fasten safety belts on all occupied seats before
every trip. Although airbags enhance safety by
providing added protection, they are not a sub-
stitute for safety belts.
Your vehicle has five seats that are each
equipped with a safety belt.
Never allow more than one person to
wear a single safety belt. Never allow
infants or small children to ride on a passen-
ger's lap. Make sure that the belt lies low around
the hips in the lap area and does not press on
the abdomen. The safety belt must not lie
across the neck, rub on sharp edges, be routed
over solid or breakable objects or be pinched.
Wear the safety belt without twisting, snugly
across the lap and shoulders, as close to the
body as possible. Otherwise, the belt can slip
over the hips in the lap area in a frontal impact
and injure the abdomen. Avoid wearing clothing
that prevents the belt from fitting properly and
pull the shoulder belt periodically to readjust
the tension across your lap in order to avoid a
reduction in the retention effect of the safety
belt.<
For instructions on operating safety belts, refer
to page48.
Page 46 of 247
Adjusting
44
Seats
Note before adjusting
Never attempt to adjust your seat while
operating the vehicle. The seat could
respond with unexpected movement and the
ensuing loss of vehicle control could lead to an
accident.
Also on the passenger side, do not recline the
backrest too far to the rear while the vehicle is
being driven; otherwise, there is a danger in the
event of an accident of 'sliding under' the safety
belt, eliminating the protection normally pro-
vided by the belt.<
Please note the information on damage to
safety belts provided on page49 and the infor-
mation on the active head restraints on
page47.
The concept
You adjust the seat in two stages:
1Preselect the function: the button lights up
brightly
2Adjustments: control knob
>slide forward or back
>slide up or down
>turn
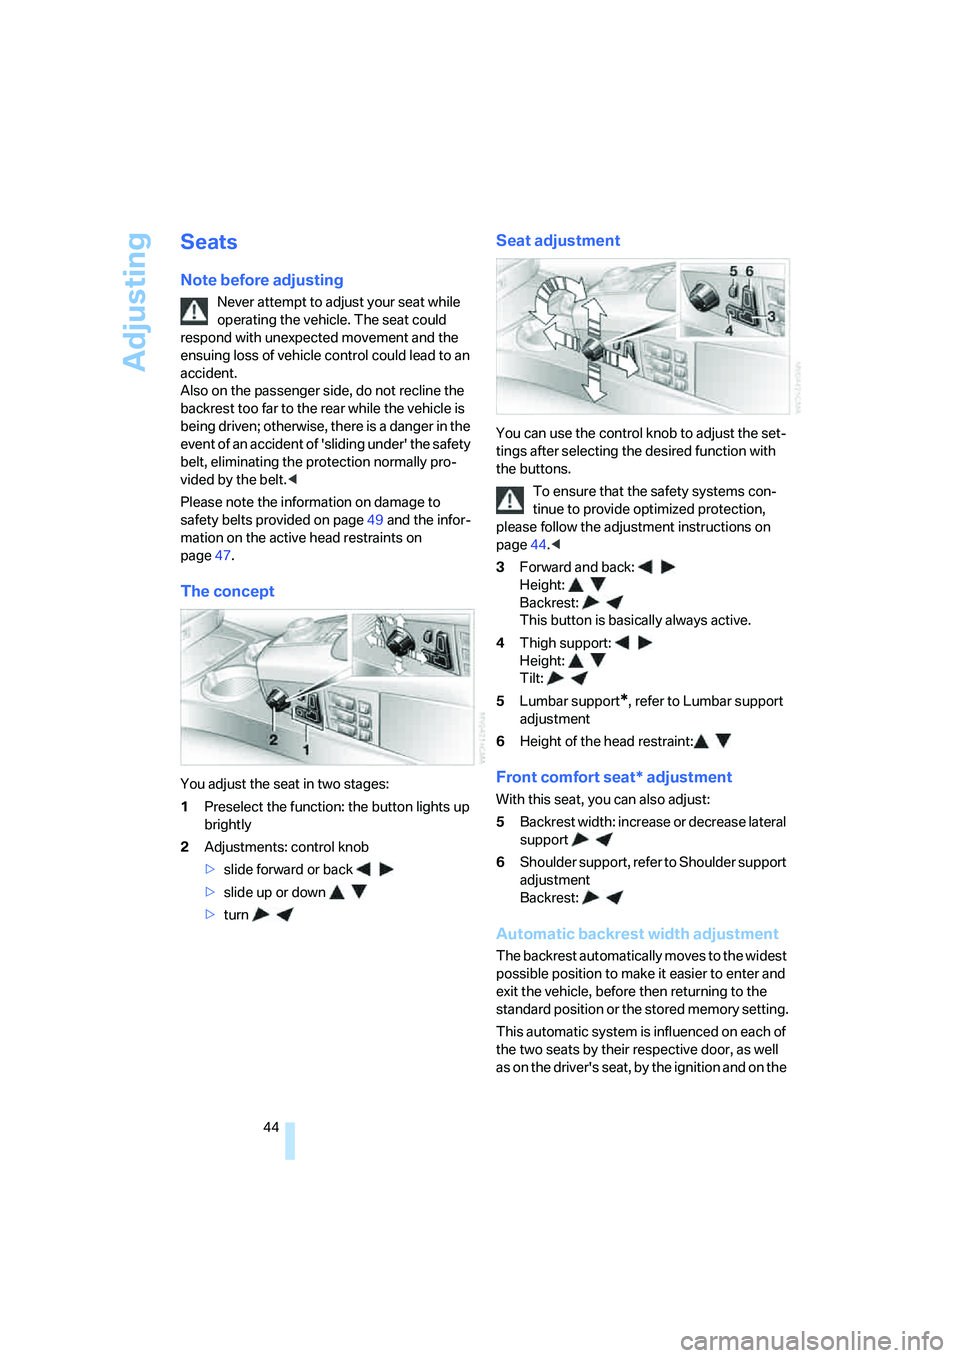
Seat adjustment
You can use the control knob to adjust the set-
tings after selecting the desired function with
the buttons.
To ensure that the safety systems con-
tinue to provide optimized protection,
please follow the adjustment instructions on
page44.<
3Forward and back:
Height:
Backrest:
This button is basically always active.
4Thigh support:
Height:
Tilt:
5Lumbar support
*, refer to Lumbar support
adjustment
6Height of the head restraint:
Front comfort seat* adjustment
With this seat, you can also adjust:
5Backrest width: increase or decrease lateral
support
6Shoulder support, refer to Shoulder support
adjustment
Backrest:
Automatic backrest width adjustment
The backrest automatically moves to the widest
possible position to make it easier to enter and
exit the vehicle, before then returning to the
standard position or the stored memory setting.
This automatic system is influenced on each of
the two seats by their respective door, as well
as on the driver's seat, by the ignition and on the
Page 47 of 247
Controls
45Reference
At a glance
Driving tips
Communications
Navigation
Entertainment
Mobility
front passenger's seat, by the safety belt
buckle.
Lumbar support adjustment
5Lumbar support
You can also adjust the contour of the backrest
to obtain additional support in the lumbar
region.
The upper hips and spinal column receive sup-
plementary support to help you maintain a
relaxed, upright sitting position.
>Increase or decrease curvature
>Shift curvature up or down
Shoulder support adjustment
6Adjustment of the tilt angle of the shoulder
support:
You can use the adjustable upper backrest for
supplementary support in the shoulder region.
This provides a relaxed driving position and
helps relieve stress on the shoulder muscles.
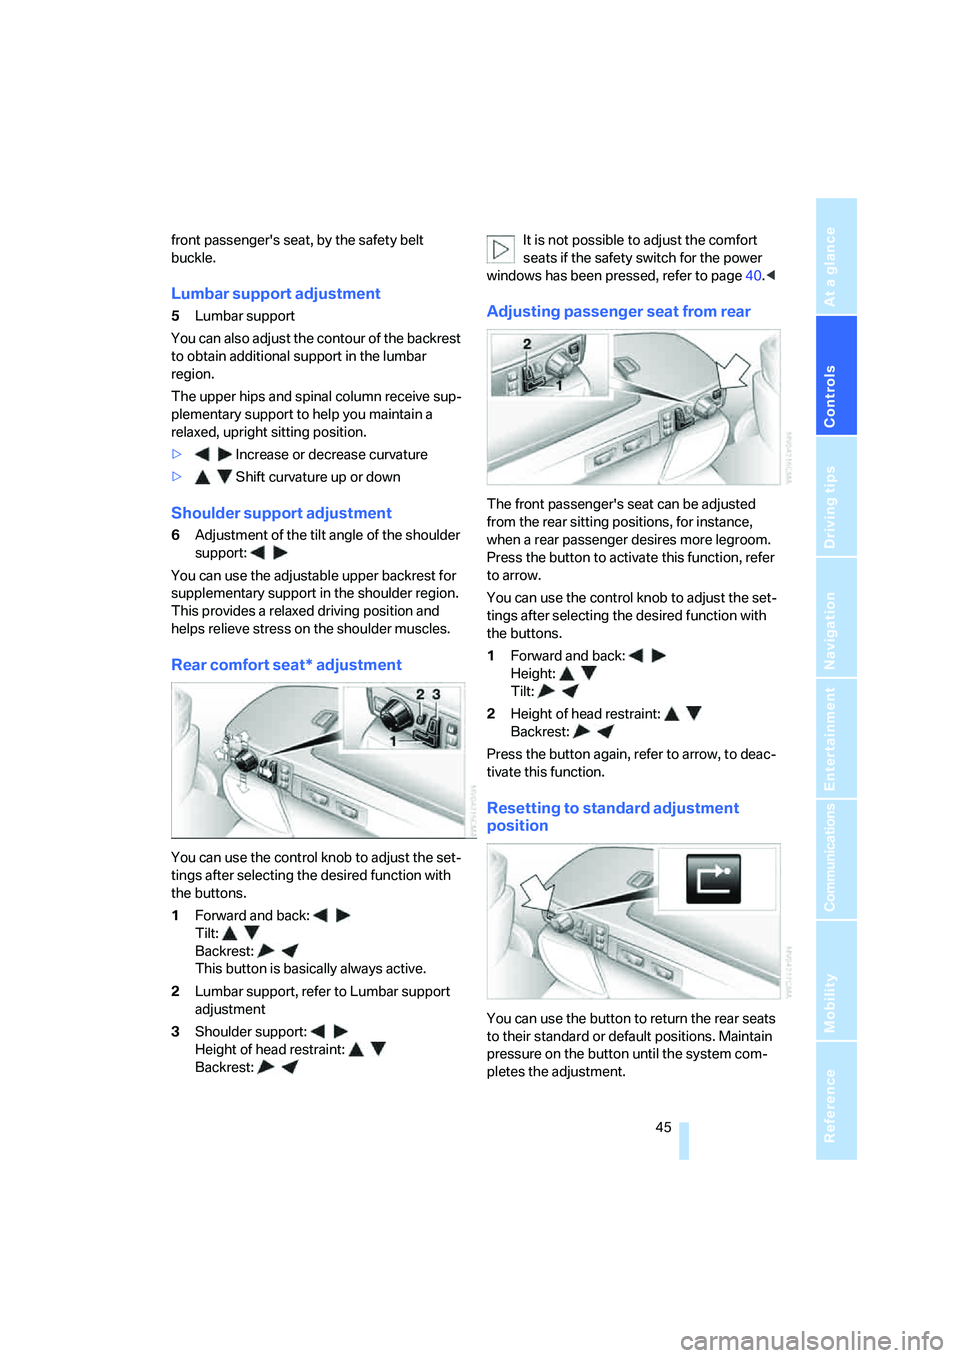
Rear comfort seat* adjustment
You can use the control knob to adjust the set-
tings after selecting the desired function with
the buttons.
1Forward and back:
Tilt:
Backrest:
This button is basically always active.
2Lumbar support, refer to Lumbar support
adjustment
3Shoulder support:
Height of head restraint:
Backrest:It is not possible to adjust the comfort
seats if the safety switch for the power
windows has been pressed, refer to page40.<
Adjusting passenger seat from rear
The front passenger's seat can be adjusted
from the rear sitting positions, for instance,
when a rear passenger desires more legroom.
Press the button to activate this function, refer
to arrow.
You can use the control knob to adjust the set-
tings after selecting the desired function with
the buttons.
1Forward and back:
Height:
Tilt:
2Height of head restraint:
Backrest:
Press the button again, refer to arrow, to deac-
tivate this function.
Resetting to standard adjustment
position
You can use the button to return the rear seats
to their standard or default positions. Maintain
pressure on the button until the system com-
pletes the adjustment.
Page 48 of 247
Adjusting
46 It will be necessary to return the rear seats
to their standard position before using a
child restraint system, for instance, refer to
page54.<
Seat, mirror and steering
wheel memory
You can store and select two different adjust-
ment settings for the driver's seat, exterior mir-
rors and steering wheel.
With comfort seats, you can also use the mem-
ory to store and recall two seat positions for
each additional seat.
The adjustment of the lumbar support is not
stored in the memory.
The setting is stored for the remote control cur-
rently in use.
Storing
1.Switch on radio ready state or ignition, refer
to page57.
2.Set desired seat position; for driver's seat
also set the exterior mirror and steering
wheel position.
3.Press
MEMORY button:
The LED in the button lights up.
4.Press the desired memory button1 or2:
The LED goes out.
Requesting manually
Do not request a position from the mem-
ory while the vehicle is moving. There is a
risk of accident from unexpected movement of
the seat or steering wheel.<
Comfort mode
1.With driver's door open after unlocking or
with radio ready state switched on.
2.Briefly press the desired memory button 1
or2.
The system immediately cancels the adjust-
ment procedure when you briefly press one of
the seat adjustment buttons or one of the mem-
ory buttons.
Safety mode
1.With driver's door closed and ignition
switched either on or off.
2.Press the desired memory button 1or2
and maintain pressure until the adjustment
process has been completed.
If you press the
MEMORY button accidentally:
Press the button again; the LED goes out.
Head restraints
A correctly adjusted head restraint reduces the
risk of injury to cervical vertebrae in the event of
an accident.
Adjust the head restraint so that its center
is approx. at ear level. Otherwise, there is
increased danger of injury in the event of an
accident.<
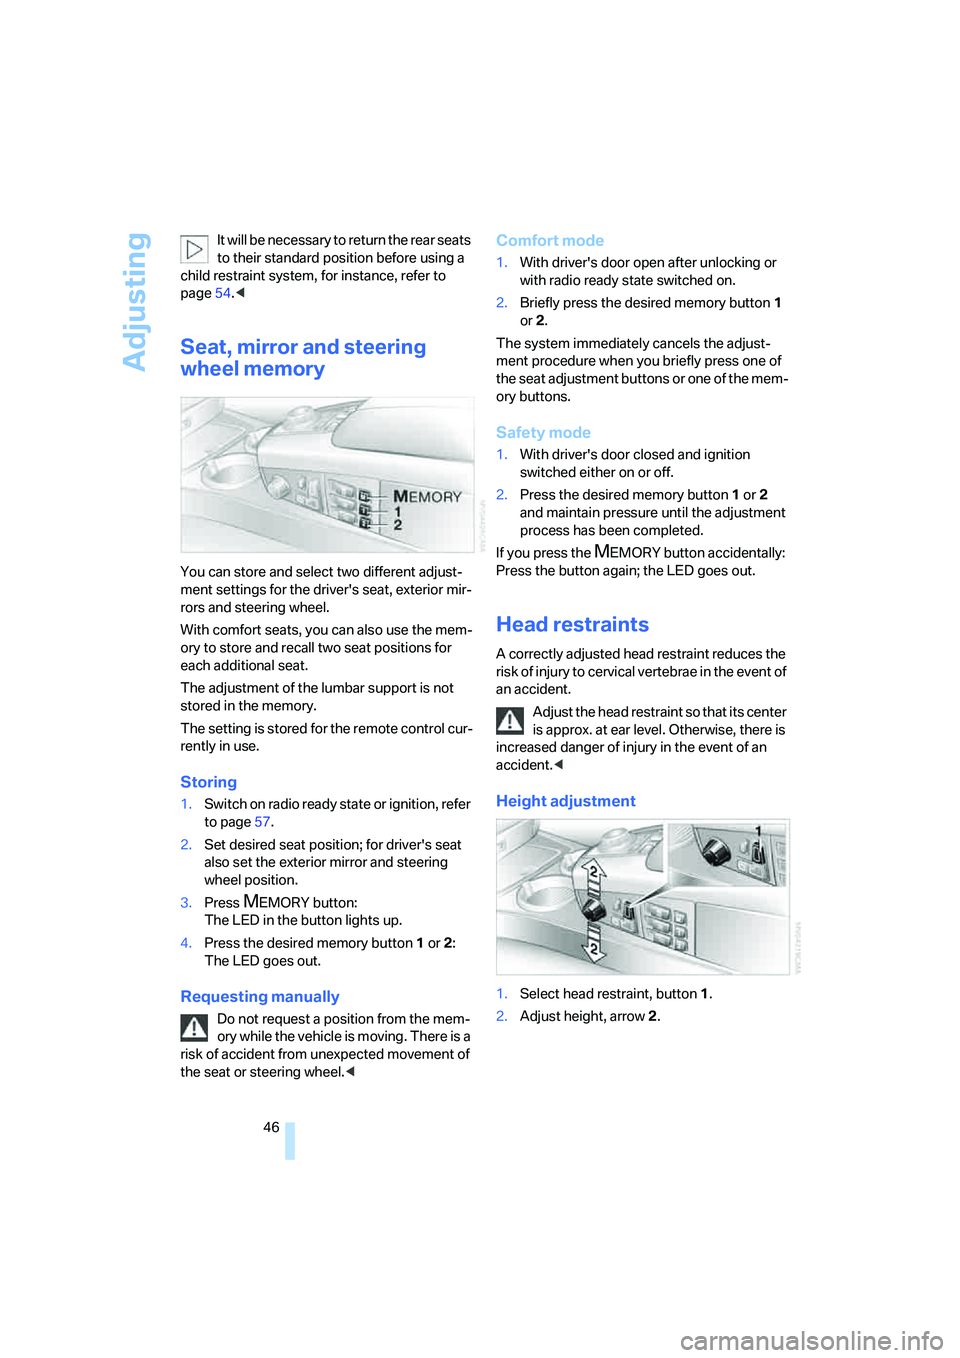
Height adjustment
1.Select head restraint, button1.
2.Adjust height, arrow2.