2006 BMW 750I display
[x] Cancel search: displayPage 73 of 247

Controls
71Reference
At a glance
Driving tips
Communications
Navigation
Entertainment
Mobility
Selecting distance
>Knurled wheel up:
To increase distance
>Knurled wheel down:
To decrease distance
The selected distance is displayed in the
speedometer.
Distance 1
Distance 2
Distance 3
This distance is always set when
the system is used for the first time
after starting the engine.
Distance 4
Use good judgment to select the appro-
priate following distance given road con-
ditions, traffic, applicable laws and driving rec-
ommendations for safe following distance.
Otherwise, a violation of the law or the danger of
an accident could result.<
Deactivating cruise control
Press the lever up or down. The displays in the
speedometer go out.
In addition, the system is automatically deacti-
vated:
>when the speed is reduced to below 20 mph
or 30 km/h due to a traffic situation
>when DTC is activated or DSC is deacti-
vated
>when the system does not recognize any
objects for an extended period of time, e.g.
on infrequently traveled roads without a
shoulder or guard rails, or if the radar sensor
is covered with dirt, refer to page72
>when you actuate the parking brake during
driving
>when you shift the transmission into the
Nposition
If the system is deactivated, then it is nec-
essary for the driver to actively intervene
by braking and possibly swerving. Otherwise,
there is the danger of an accident.<
Background lighting
You can switch off the backlighting of the
speedometer and tachometer when the system
is deactivated if no other functions are being
displayed, e.g. the pre-warning field in the
tachometer, refer to page75, or the route guid-
ance of the navigation system.
To do so, press the lever up or down for approx.
1second.
Page 74 of 247
Driving
72
Resuming stored desired speed and
distance
Press button4:
The displays appear in the speedometer.
When you switch off the ignition, the stored
desired speed is deleted.
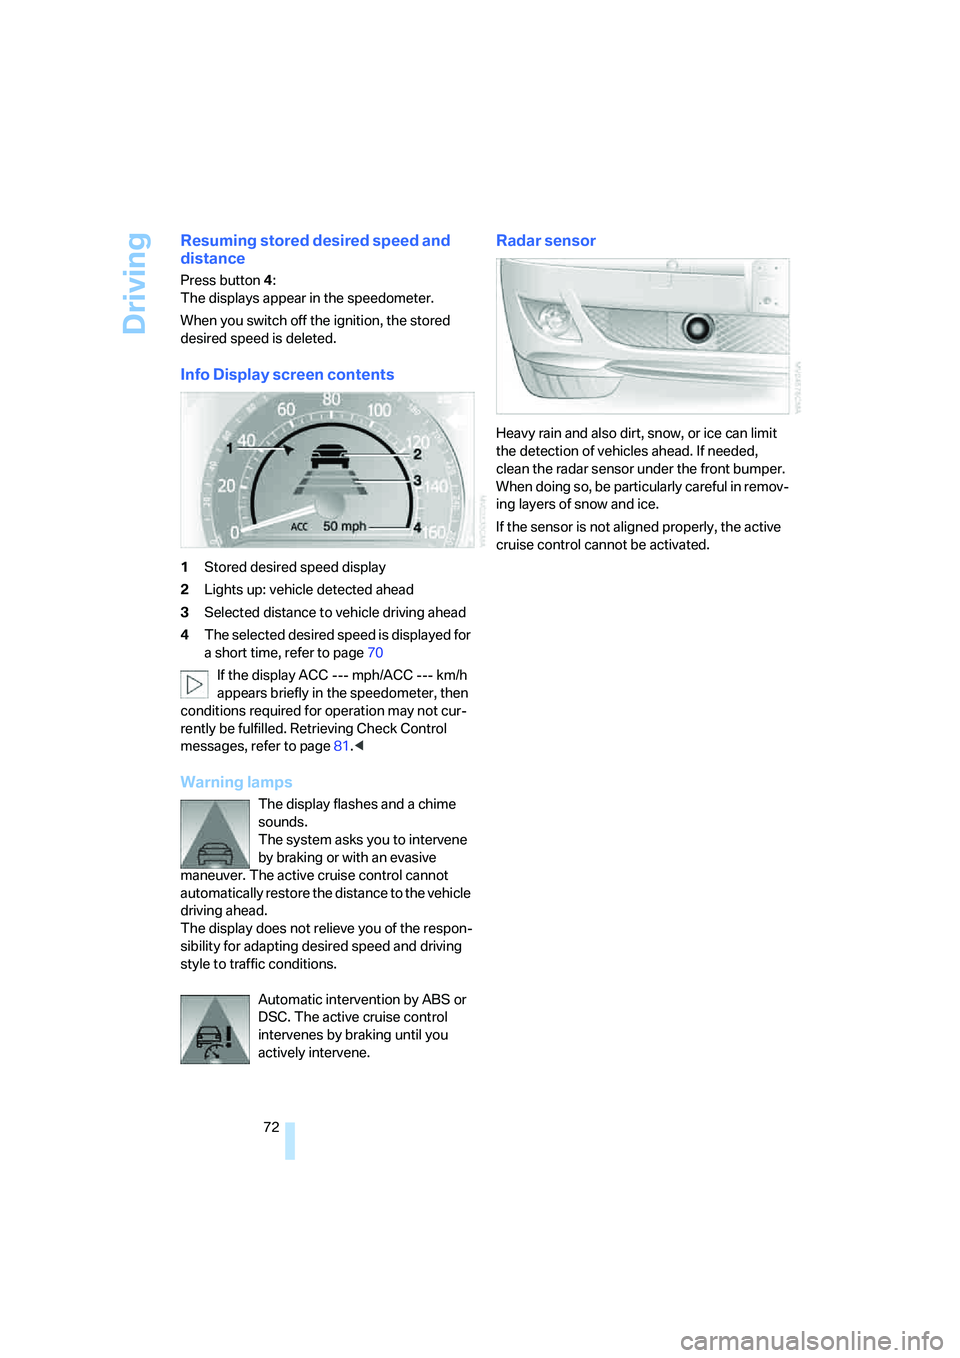
Info Display screen contents
1Stored desired speed display
2Lights up: vehicle detected ahead
3Selected distance to vehicle driving ahead
4The selected desired speed is displayed for
a short time, refer to page70
If the display ACC --- mph/ACC --- km/h
appears briefly in the speedometer, then
conditions required for operation may not cur-
rently be fulfilled. Retrieving Check Control
messages, refer to page81.<
Warning lamps
The display flashes and a chime
sounds.
The system asks you to intervene
by braking or with an evasive
maneuver. The active cruise control cannot
automatically restore the distance to the vehicle
driving ahead.
The display does not relieve you of the respon-
sibility for adapting desired speed and driving
style to traffic conditions.
Automatic intervention by ABS or
DSC. The active cruise control
intervenes by braking until you
actively intervene.
Radar sensor
Heavy rain and also dirt, snow, or ice can limit
the detection of vehicles ahead. If needed,
clean the radar sensor under the front bumper.
When doing so, be particularly careful in remov-
ing layers of snow and ice.
If the sensor is not aligned properly, the active
cruise control cannot be activated.
Page 77 of 247

Controls
75Reference
At a glance
Driving tips
Communications
Navigation
Entertainment
Mobility
Everything under control
Odometer, outside temperature display, clock
1Outside temperature display, clock
2Odometer
3Trip odometer
4Press button:
>with ignition switched on to reset trip
odometer
>with ignition switched off to briefly dis-
play odometer, outside temperature,
and time
Outside temperature display, clock
The outside temperature and the time displays
are active with the ignition lock in radio ready
state or higher.
You can change the units of measure, 7/6,
in the "Settings" menu, refer to page84.
Setting the clock, refer to page84.
Outside temperature warning
If the display drops to +377/+36, a signal
sounds and a message is shown on the Info Dis-
play. There is an increased danger of ice.
Even at temperatures above +377/
+36, ice can form. Therefore, drive care-
fully, e.g. on bridges and shaded roadways; oth-
erwise, there is an increased accident risk.<
Odometer and trip odometer
The display area is also used for the computer
and the Check Control.
Regardless of the current display, you can
briefly display the odometer by pressing the
button4.
You also reset the displayed trip odometer to
zero by pressing the button.
Check Control, refer to page80.
Computer, refer to page76.
Tachometer
The orange advance warning field, arrow, is dis-
played as a function of the engine temperature.
The segments disappear in sequence as the
engine temperature increases.
Avoid allowing the engine speed to rise as far as
the orange warning sector whenever possible.
Page 78 of 247

Everything under control
76
Coolant temperature
Should the coolant, and with it the engine
become too hot, a warning lamp lights up. In
addition, a message appears on the Control
Display.
Checking coolant level, refer to page203.
Computer
Requesting functions
With the ignition lock in radio ready state or
higher, you can use the buttons in the turn sig-
nal lever to display the computer information on
the Info Display.
1Info Display on left
2Info Display on right
A new function appears each time you briefly
press the button.
Displays on Info Display
The display sequence:
>Fuel gauge
>Range and distance to destinationThe display sequence:
>Odometer
>Energy Control/current fuel consumption
>Average fuel consumption
>Average speed
>Time of arrival
Hiding messages
Maintain pressure on button1 to hide the com-
puter display. Briefly press the button again to
return to the last display.
It is not possible, though, to hide a Check
Control message.<
Fuel gauge
The fuel gauge mode appears automatically
once the fuel level falls into the reserve range.
The tanks still contains the following quantities
of fuel:
>750i/Li: approx. 2.6 gallons/10 liters.
>760i/Li: approx. 3.1 gallons/12 liters.
If the tilt of the vehicle varies, when you are driv-
ing in mountainous areas, for example, the indi-
cator may fluctuate slightly.
After reaching the reserve quantity, the
Info Display can no longer be hidden.
However, you can still display the remaining
range.<
Fuel tank capacity: approx. 23.2 gallons/
88 liters. You can find information on refueling
on page192.
Refuel well before the tank is empty. If
you drive down to the last drop, engine
functions are no longer assured and damage
can occur.<
Page 79 of 247
Controls
77Reference
At a glance
Driving tips
Communications
Navigation
Entertainment
Mobility
Cruising range
Displays the estimated cruising range available
with the remaining fuel. It is projected by taking
into account the driving style over the last
20 miles/30 km.
When your cruising range falls below
30 miles/50 km, be sure to refuel. Other-
wise, engine functions are not ensured and
damage can occur.<
Refueling is only registered by the computer for
fuel amounts above approx. 1.3 gallons/5 liters.
Distance to destination
When you enter a destination into the naviga-
tion system or manually enter a distance in the
computer prior to departure, the system can
also display the distance remaining to your des-
tination, refer to page76 or131.
The system automatically applies the distance
to your destination using the route recom-
mended by the navigation system.
When you enter a destination into the
navigation system, any manual entries
will be overwritten once the vehicle has traveled
approx. 1,640 ft/500 m of the calculated dis-
tance.<
Energy Control/current fuel
consumption
Shows the current fuel consumption. This
allows you to see whether your current driving
style is conducive to fuel economy with mini-
mum exhaust emissions.
Average fuel consumption
The average fuel consumption is determined
for the time during which the engine is running.
You can use the Control Display to view your
fuel consumption rate over two different dis-
tances, refer to Computer on page76, or Trip
computer on page82.
Average speed
Periods with the vehicle parked and the engine
off are not included in the calculations of aver-
age speed.
Time of arrival
A display of your estimated time of arrival is
available whenever you enter a destination into
the navigation system, refer to page131, or
enter the distance manually into the computer,
refer to page76, prior to departure.
A prerequisite for this is that you have
correctly set the time via iDrive, refer to
page84.<
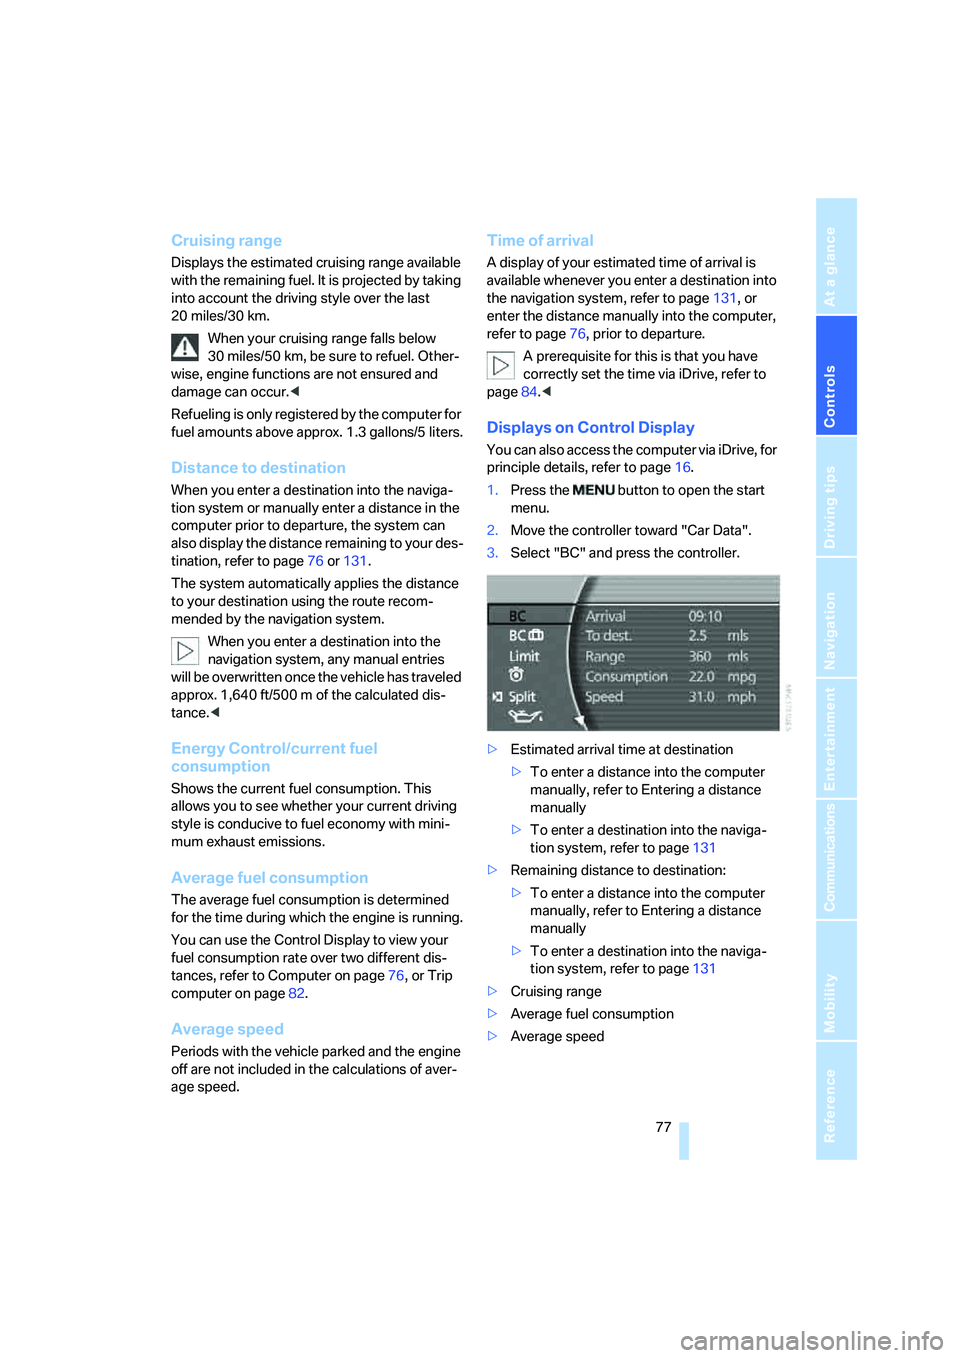
Displays on Control Display
You can also access the computer via iDrive, for
principle details, refer to page16.
1.Press the button to open the start
menu.
2.Move the controller toward "Car Data".
3.Select "BC" and press the controller.
>Estimated arrival time at destination
>To enter a distance into the computer
manually, refer to Entering a distance
manually
>To enter a destination into the naviga-
tion system, refer to page131
>Remaining distance to destination:
>To enter a distance into the computer
manually, refer to Entering a distance
manually
>To enter a destination into the naviga-
tion system, refer to page131
>Cruising range
>Average fuel consumption
>Average speed
Page 80 of 247
Everything under control
78
Resetting values
You can reset values for the average speed and
average fuel consumption:
1.Activate the relevant menu item and press
the controller.
2.To reset the values, press the controller
again.
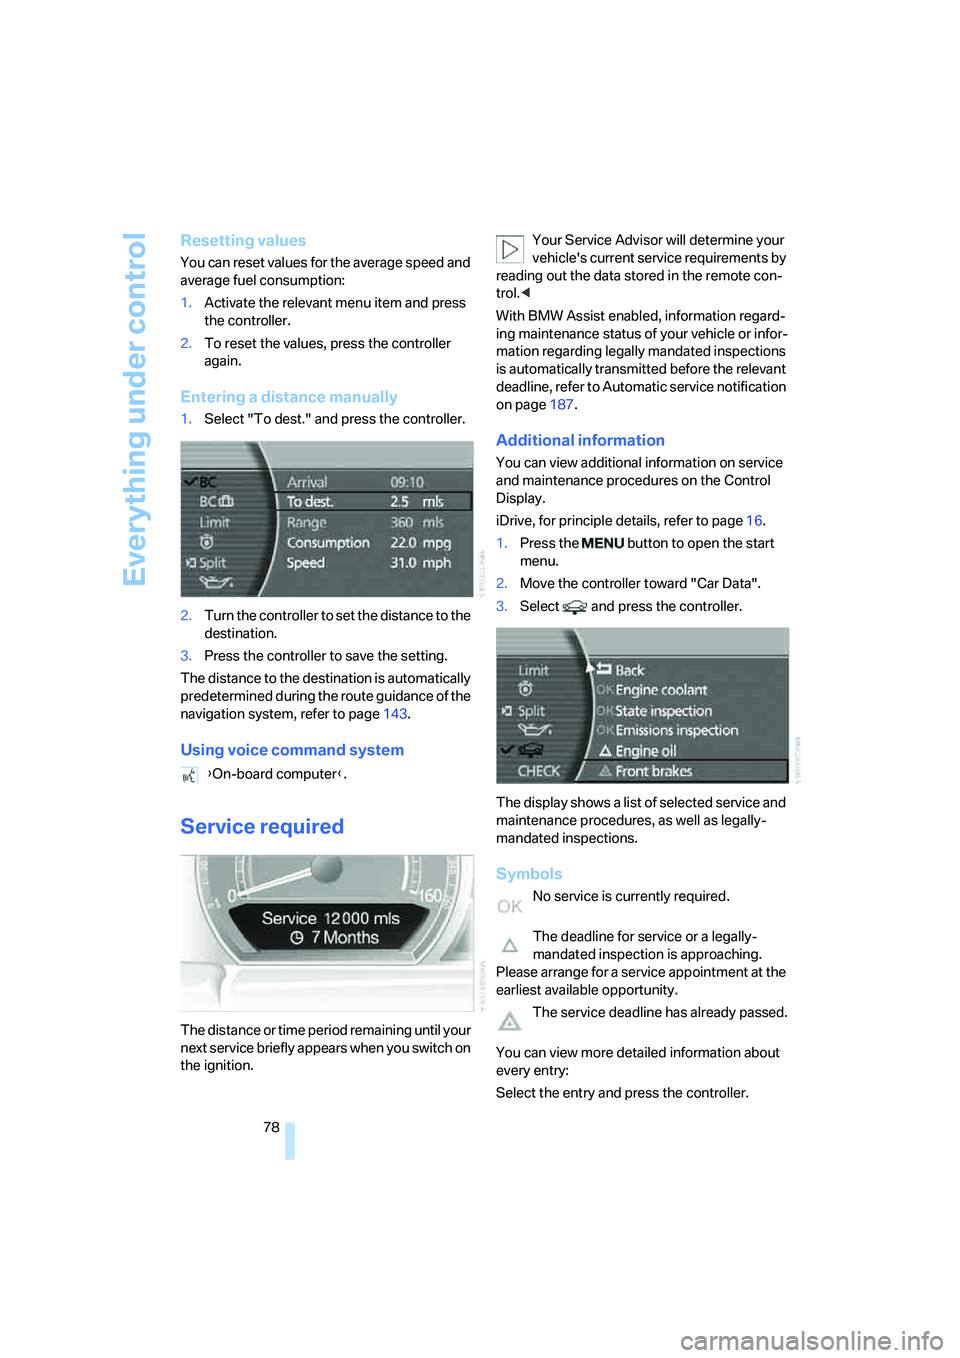
Entering a distance manually
1.Select "To dest." and press the controller.
2.Turn the controller to set the distance to the
destination.
3.Press the controller to save the setting.
The distance to the destination is automatically
predetermined during the route guidance of the
navigation system, refer to page143.
Using voice command system
Service required
The distance or time period remaining until your
next service briefly appears when you switch on
the ignition.Your Service Advisor will determine your
vehicle's current service requirements by
reading out the data stored in the remote con-
trol.<
With BMW Assist enabled, information regard-
ing maintenance status of your vehicle or infor-
mation regarding legally mandated inspections
is automatically transmitted before the relevant
deadline, refer to Automatic service notification
on page187.
Additional information
You can view additional information on service
and maintenance procedures on the Control
Display.
iDrive, for principle details, refer to page16.
1.Press the button to open the start
menu.
2.Move the controller toward "Car Data".
3.Select and press the controller.
The display shows a list of selected service and
maintenance procedures, as well as legally-
mandated inspections.
Symbols
No service is currently required.
The deadline for service or a legally-
mandated inspection is approaching.
Please arrange for a service appointment at the
earliest available opportunity.
The service deadline has already passed.
You can view more detailed information about
every entry:
Select the entry and press the controller. {On-board computer}.
Page 81 of 247
Controls
79Reference
At a glance
Driving tips
Communications
Navigation
Entertainment
Mobility
To exit the menu:
The arrow is selected. Press the controller.
Condition Based Service does not con-
tinue counting down to the next service
during periods when the vehicle is stored with
the battery disconnected or the battery switch
in the OFF position.
Therefore, make sure to have the brake fluid
changed at least every 2 years, regardless of
w h a t i s s h o w n o n t h e d is p la y, r e f e r t o p a g e204.
The same is true for other time-dependent ser-
vice requirements.<
Displaying and entering dates for
legally-mandated emissions and
vehicle inspections
Make sure the date and time are always set cor-
rectly via iDrive, refer to page84; otherwise,
CBS Condition Based Service cannot function
correctly.
iDrive, for principle details, refer to page16.
1.Press the button to open the start
menu.
2.Move the controller toward "Car Data".
3.Select and press the controller.
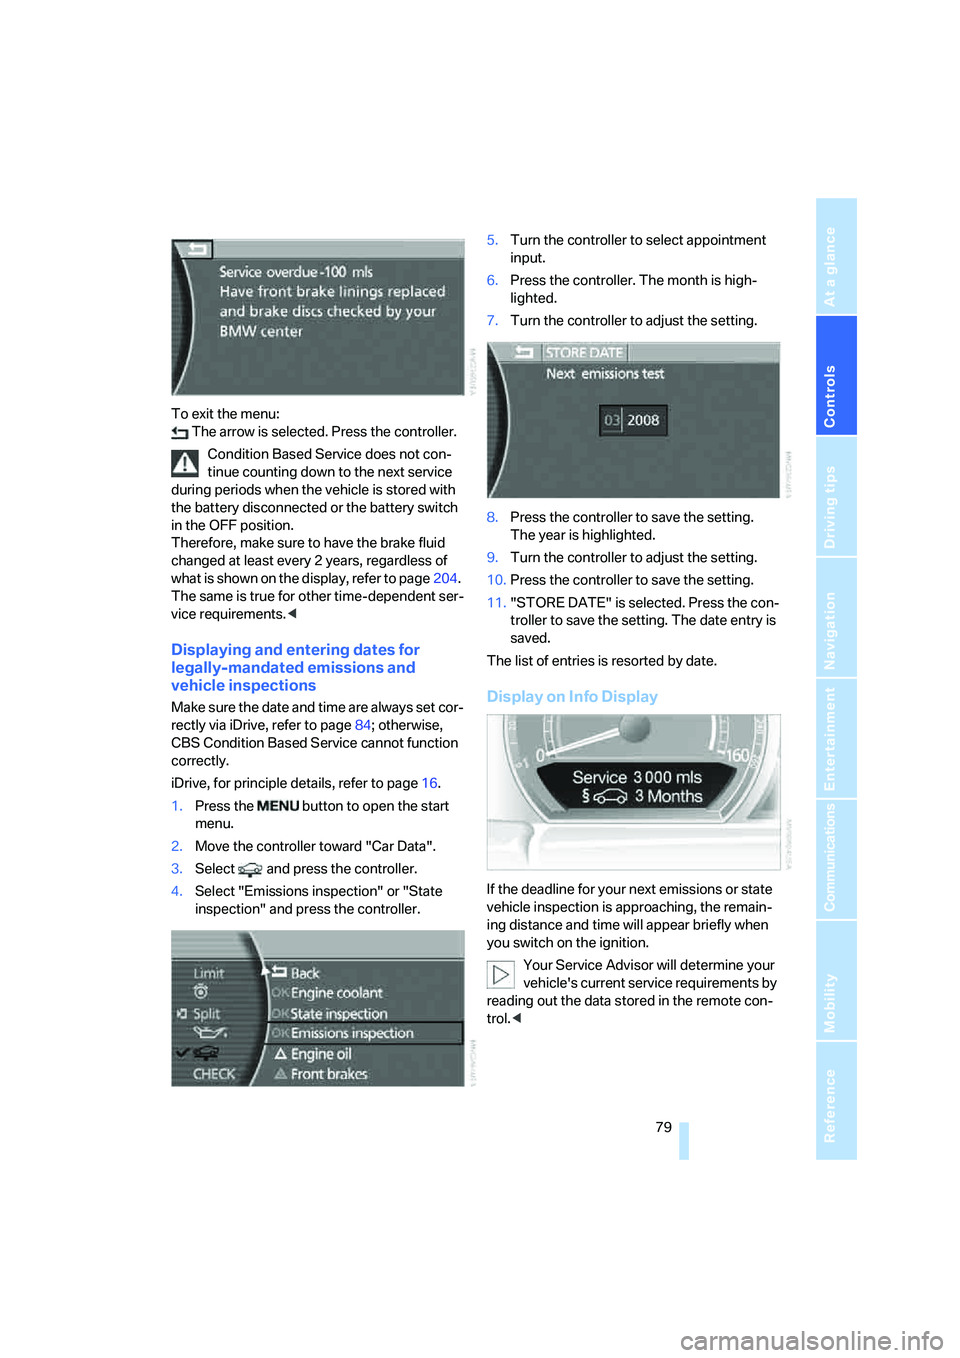
4.Select "Emissions inspection" or "State
inspection" and press the controller.5.Turn the controller to select appointment
input.
6.Press the controller. The month is high-
lighted.
7.Turn the controller to adjust the setting.
8.Press the controller to save the setting.
The year is highlighted.
9.Turn the controller to adjust the setting.
10.Press the controller to save the setting.
11."STORE DATE" is selected. Press the con-
troller to save the setting. The date entry is
saved.
The list of entries is resorted by date.Display on Info Display
If the deadline for your next emissions or state
vehicle inspection is approaching, the remain-
ing distance and time will appear briefly when
you switch on the ignition.
Your Service Advisor will determine your
vehicle's current service requirements by
reading out the data stored in the remote con-
trol.<
Page 82 of 247
Everything under control
80
Check Control
The concept
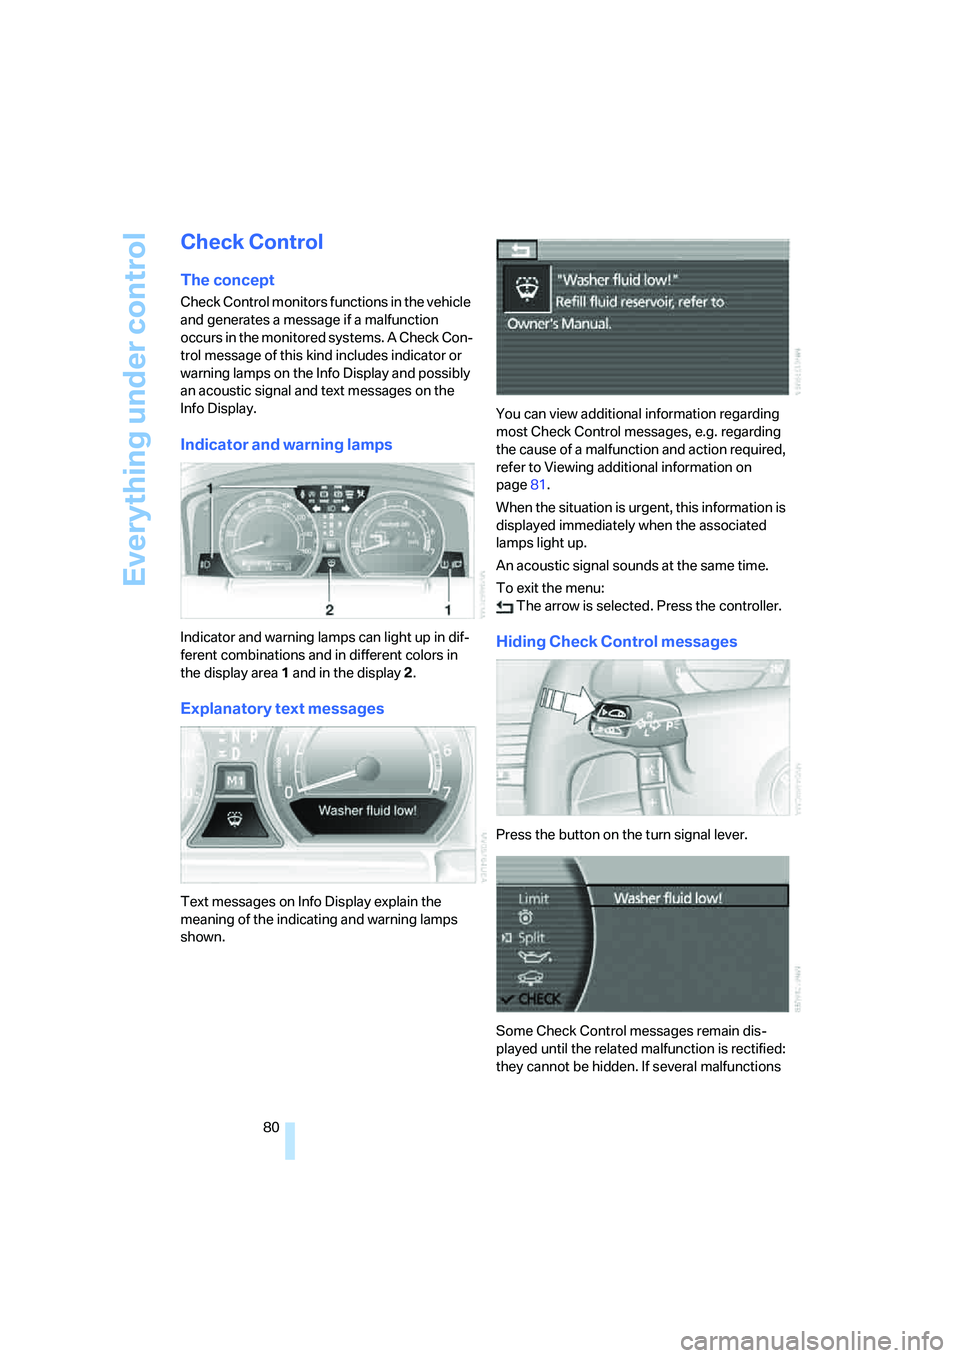
Check Control monitors functions in the vehicle
and generates a message if a malfunction
occurs in the monitored systems. A Check Con-
trol message of this kind includes indicator or
warning lamps on the Info Display and possibly
an acoustic signal and text messages on the
Info Display.
Indicator and warning lamps
Indicator and warning lamps can light up in dif-
ferent combinations and in different colors in
the display area1 and in the display2.
Explanatory text messages
Text messages on Info Display explain the
meaning of the indicating and warning lamps
shown.You can view additional information regarding
most Check Control messages, e.g. regarding
the cause of a malfunction and action required,
refer to Viewing additional information on
page81.
When the situation is urgent, this information is
displayed immediately when the associated
lamps light up.
An acoustic signal sounds at the same time.
To exit the menu:
The arrow is selected. Press the controller.
Hiding Check Control messages
Press the button on the turn signal lever.
Some Check Control messages remain dis-
played until the related malfunction is rectified:
they cannot be hidden. If several malfunctions