2006 BMW 745Li light
[x] Cancel search: lightPage 119 of 247

Controls
117Reference
At a glance
Driving tips
Communications
Navigation
Entertainment
Mobility
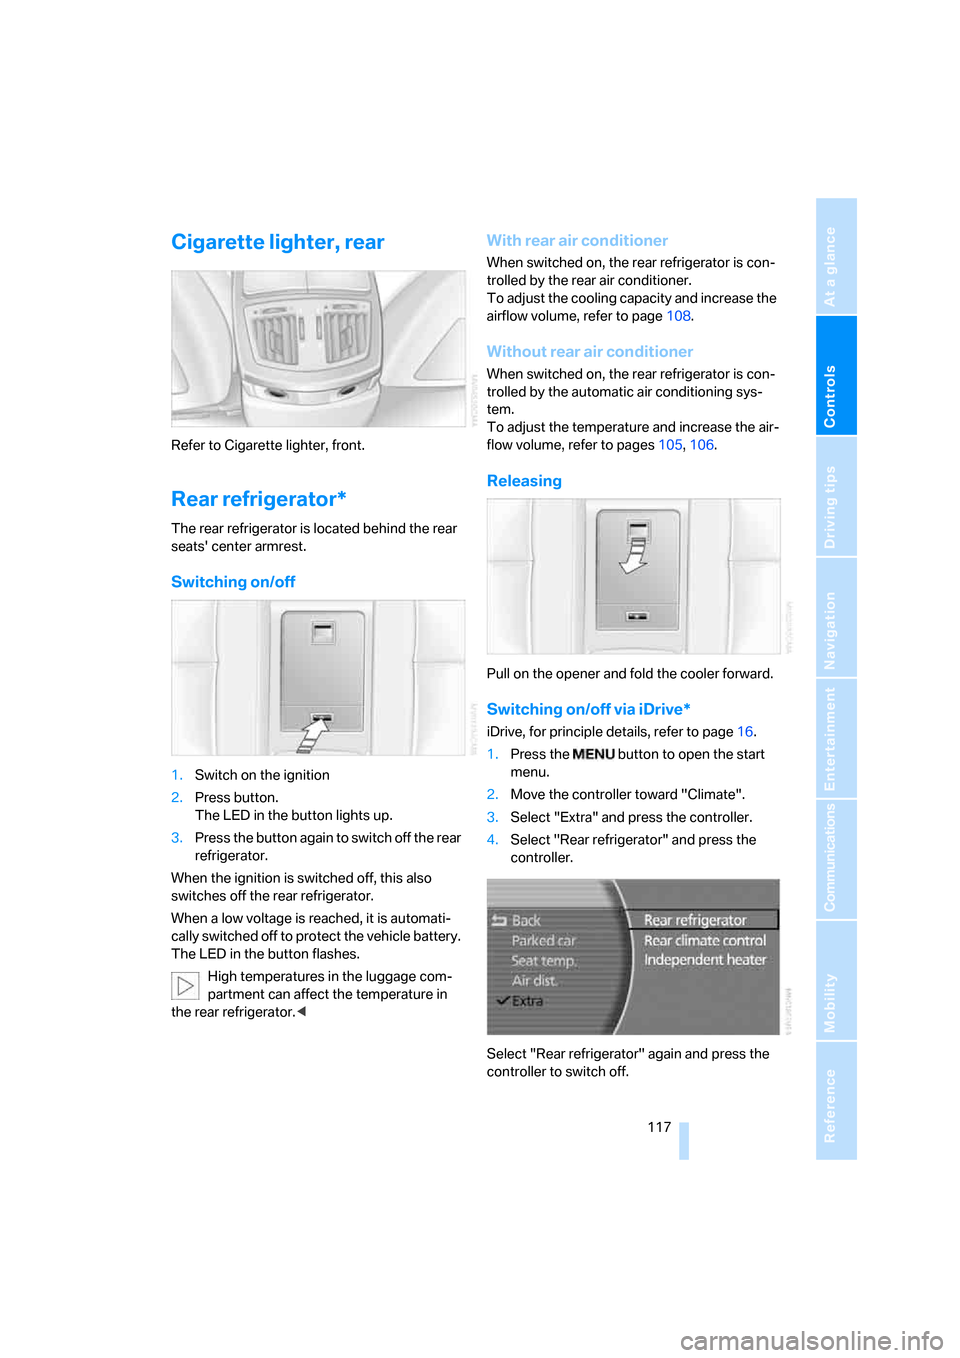
Cigarette lighter, rear
Refer to Cigarette lighter, front.
Rear refrigerator*
The rear refrigerator is located behind the rear
seats' center armrest.
Switching on/off
1.Switch on the ignition
2.Press button.
The LED in the button lights up.
3.Press the button again to switch off the rear
refrigerator.
When the ignition is switched off, this also
switches off the rear refrigerator.
When a low voltage is reached, it is automati-
cally switched off to protect the vehicle battery.
The LED in the button flashes.
High temperatures in the luggage com-
partment can affect the temperature in
the rear refrigerator.<
With rear air conditioner
When switched on, the rear refrigerator is con-
trolled by the rear air conditioner.
To adjust the cooling capacity and increase the
airflow volume, refer to page108.
Without rear air conditioner
When switched on, the rear refrigerator is con-
trolled by the automatic air conditioning sys-
tem.
To adjust the temperature and increase the air-
flow volume, refer to pages105, 106.
Releasing
Pull on the opener and fold the cooler forward.
Switching on/off via iDrive*
iDrive, for principle details, refer to page16.
1.Press the button to open the start
menu.
2.Move the controller toward "Climate".
3.Select "Extra" and press the controller.
4.Select "Rear refrigerator" and press the
controller.
Select "Rear refrigerator" again and press the
controller to switch off.
Page 125 of 247

Driving tips
123Reference
At a glance
Controls
Communications
Navigation
Entertainment
Mobility
Interior and exterior mirrors,
automatic dimming feature*
Two photocells in the interior rearview mirror
control this function. One is integrated into the
mirror's lens, the other is located offset from
this on the rear of the mirror housing.
For trouble-free operation, keep the photocells
clean and do not cover the area between the
interior rearview mirror and the windshield. Do
not attach any kind of stickers to the windshield
in front of the mirror either.
Hydroplaning
When driving on wet or slushy roads,
reduce road speed. If you do not, a wedge
of water can form between tires and road sur-
face. This phenomenon is referred to as hydro-
planing, and is characterized by a partial or
complete loss of contact between tires and
road surface, ultimately undermining your abil-
ity to steer and brake the vehicle.<
Driving through water
Only drive through water with a maximum
depth of 1 ft/30 cm, and then only at walk-
ing speed at the most. Otherwise, you run the
risk of damaging the vehicle's engine, electrical
systems, and transmission.<
Safe braking
Your BMW is equipped with ABS as standard
equipment. In situations that require it, it is best
to apply the brakes fully. Since the vehicle
maintains steering responsiveness, you can
nevertheless avoid possible obstacles with a
minimum of steering effort.Pulsation at the brake pedal combines with
sounds from the hydraulic circuits to indicate to
the driver that ABS is in its active mode.
Driving in wet conditions
When driving in wet conditions and in heavy
rain, it is a good idea to apply light pressure to
the brake pedal every few miles. Monitor traffic
conditions to ensure that this maneuver does
not endanger other road users. The heat gener-
ated helps dry the pads and rotors to ensure
that full braking efficiency will then be available
when you need it.
Hills
To prevent overheating and reduced effi-
ciency of the brake system, drive long or
steep downhill grades in the gear that requires
the least amount of braking. Otherwise, even
light but consistent pedal pressure can lead to
high temperatures, brake wear and possibly
even brake failure.<
You can further enhance the engine's braking
action by selecting a lower gear in the automatic
transmission's manual mode, downshifting as
far as first gear on extremely steep stretches,
refer to page63. This strategy helps you avoid
placing excessive loads on the brake system.
Do not drive in idle or with the engine
switched off; otherwise, there will be no
engine braking action or support of the braking
force and steering.
Never allow floor mats, carpets or any other
objects to protrude into the area of movement
of the pedals and impair their operation.<
Corrosion on brake rotors
When the vehicle is driven only occasionally,
during extended periods when the vehicle is not
used at all, and in operating conditions where
brake applications are less frequent, there is an
increased tendency for corrosion to form on
rotors, while contaminants accumulate on the
brake pads. This occurs because the minimal
pressure that must be exerted by the pads dur-
ing brake applications to clean the rotors is not
reached.
Page 127 of 247

Driving tips
125Reference
At a glance
Controls
Communications
Navigation
Entertainment
Mobility
Stowing cargo
>Place heavy cargo as far forward and as low
as possible, placing it directly behind the
bulkhead behind the rear seats.
>Cover sharp edges and corners.
>For very heavy cargo when the rear seat is
not occupied, secure each outside rear
safety belt in the opposite buckle.
Securing cargo
>Use the luggage net* or securing straps to
secure small and lightweight luggage and
cargo.
>Heavy-duty straps
* for securing larger and
heavier objects are available at your BMW
center. Four lashing eyes for attaching
these heavy-duty straps are provided in the
luggage compartment, refer to illustration.
>Please follow the special instructions sup-
plied with the heavy-duty straps.
Always position and secure the load as
described above. If you do not, it can
endanger the passengers, for example during
braking or evasive maneuvers.
Attach heavy-duty straps only to the lashing
eyes, refer to illustration, otherwise, the heavy-
duty straps could come loose or the vehicle
could be damaged.Never exceed either the approved gross vehicle
weight or either of the approved axle loads, refer
to page220, as excessive loads can impair the
operational safety of the vehicle and may also
put you in violation of highway safety laws.
You should never transport heavy or hard
objects unsecured in the passenger compart-
ment, as they could fly around and pose a safety
hazard to the vehicle's occupants during abrupt
braking or evasive maneuvers .<
Roof-mounted luggage rack*
A special rack system is available as an option
for your BMW. Please comply with the precau-
tions included with the installation instructions.
Anchorage points
The anchorage points are located inside the
door openings.
Loading roof rack
Because roof racks raise the vehicle's center of
gravity when loaded, they have a major effect on
its handling and steering response.
You should therefore always remember not to
exceed the approved roof load capacity, the
approved gross vehicle weight or the axle loads
when loading the rack.
You can find the specified weights under
Weights starting on page220.
Make sure that the roof load is distributed
evenly, and that it does not extend outward to
beyond the limits of the loading surface. Always
load the heaviest pieces first – on the bottom.
Be sure that adequate clearance is maintained
for raising the glass sunroof, and that objects do
Page 165 of 247

Navigation
Entertainment
Driving tips
163Reference
At a glance
Controls
Communications
Mobility
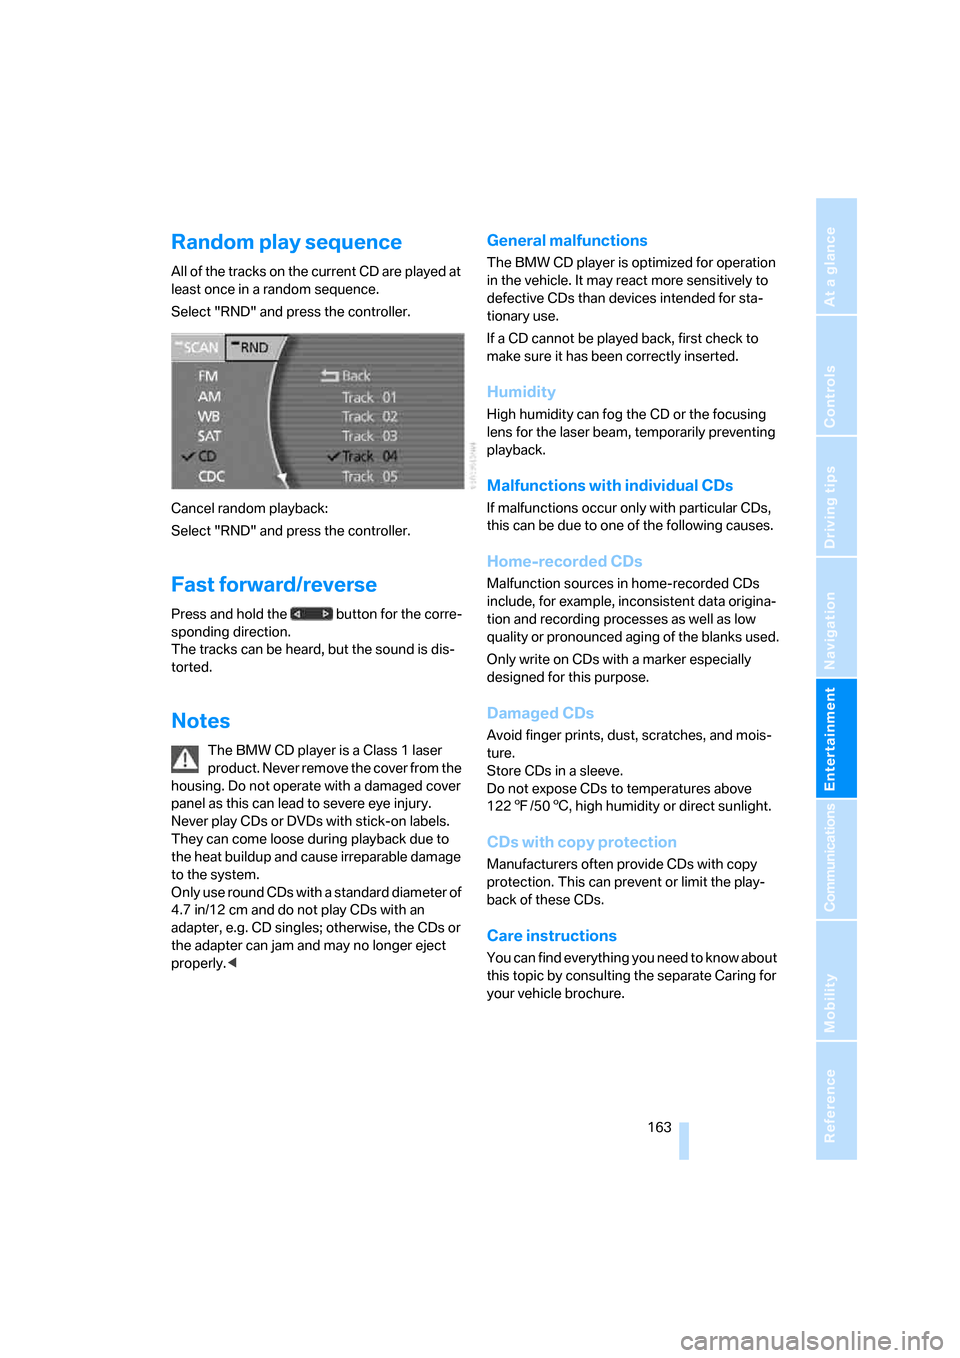
Random play sequence
All of the tracks on the current CD are played at
least once in a random sequence.
Select "RND" and press the controller.
Cancel random playback:
Select "RND" and press the controller.
Fast forward/reverse
Press and hold the button for the corre-
sponding direction.
The tracks can be heard, but the sound is dis-
torted.
Notes
The BMW CD player is a Class 1 laser
product. Never remove the cover from the
housing. Do not operate with a damaged cover
panel as this can lead to severe eye injury.
Never play CDs or DVDs with stick-on labels.
They can come loose during playback due to
the heat buildup and cause irreparable damage
to the system.
Only use round CDs with a standard diameter of
4.7 in/12 cm and do not play CDs with an
adapter, e.g. CD singles; otherwise, the CDs or
the adapter can jam and may no longer eject
properly.<
General malfunctions
The BMW CD player is optimized for operation
in the vehicle. It may react more sensitively to
defective CDs than devices intended for sta-
tionary use.
If a CD cannot be played back, first check to
make sure it has been correctly inserted.
Humidity
High humidity can fog the CD or the focusing
lens for the laser beam, temporarily preventing
playback.
Malfunctions with individual CDs
If malfunctions occur only with particular CDs,
this can be due to one of the following causes.
Home-recorded CDs
Malfunction sources in home-recorded CDs
include, for example, inconsistent data origina-
tion and recording processes as well as low
quality or pronounced aging of the blanks used.
Only write on CDs with a marker especially
designed for this purpose.
Damaged CDs
Avoid finger prints, dust, scratches, and mois-
ture.
Store CDs in a sleeve.
Do not expose CDs to temperatures above
1227/506, high humidity or direct sunlight.
CDs with copy protection
Manufacturers often provide CDs with copy
protection. This can prevent or limit the play-
back of these CDs.
Care instructions
You can find everything you need to know about
this topic by consulting the separate Caring for
your vehicle brochure.
Page 169 of 247

Navigation
Entertainment
Driving tips
167Reference
At a glance
Controls
Communications
Mobility
General malfunctions
The BMW CD changer is optimized for opera-
tion in the vehicle. It may react more sensitively
to defective CDs than devices intended for sta-
tionary use.
If a CD cannot be played back, first check to
make sure it has been correctly inserted.
Humidity
High humidity can fog the CD or the focusing
lens for the laser beam, temporarily preventing
playback.
Malfunctions with individual CDs
If malfunctions occur only with particular CDs,
this can be due to one of the following causes.
Home-recorded CDs
Malfunction sources in home-recorded CDs
include, for example, inconsistent data origina-
tion and recording processes as well as low
quality or pronounced aging of the blanks used.
Only write on CDs with a marker especially
designed for this purpose.
Damaged CDs
Avoid finger prints, dust, scratches, and mois-
ture.
Store CDs in a sleeve.
Do not expose CDs to temperatures above
1227/506, high humidity or direct sunlight.
CDs with copy protection
Manufacturers often provide CDs with copy
protection. This can prevent or limit the play-
back of these CDs.
Care instructions
You can find everything you need to know about
this topic by consulting the separate Caring for
your vehicle brochure.
Page 174 of 247

DVD changer
172
Notes
The DVD changer can play the following for-
mats:
>Video DVD
>CD-DA (audio CD)
The DVD Audio format is not supported by the
DVD changer. However, many audio DVDs
available in stores also contain a video track in
the DVD Video format in addition to the audio
track. These DVDs can be played back by the
DVD changer. Please refer to the information on
your DVD to determine whether your audio DVD
contains an additional video track.
DVDs are usually divided into tracks and chap-
ters and can contain different subtitles, camera
angles or sound tracks, languages and sound
formats. Depending on the version of the DVD,
these functions can be selected either directly
with the DVD control system or only via the
DVD-specific menu. Refer to the information on
your DVD for possible selections.
Dual-sided DVDs available from retail suppliers
are coated on both sides and bear no markings.
This means both sides are information carriers.
To play back the information on the other side,
remove the magazine and turn the DVD over.
Safety note
The BMW DVD changer is a Class 1 laser
product. Do not operate with a damaged
cover panel as this can lead to severe eye injury.
Never play CDs/DVDs with stick-on labels.
They can come loose during playback due to
the heat buildup and cause irreparable damage
to the system.
Only use round CDs/DVDs with a standard
diameter of 4.7 in/12 cm and do not play CDs/
DVDs with an adapter, e.g. CD singles; other-
wise, the CD/DVD or the adapter can jam and
may no longer eject properly.
Do not use combined CD/DVDs, e.g. DVD
Plus;
otherwise, the CD/DVD can jam, preventing it
from being ejected properly.<
General malfunctions
The BMW DVD changer is optimized for opera-
tion in the vehicle. It may react more sensitively
to defective CDs/DVDs than devices intended
for stationary use.
If a CD/DVD cannot be played back, first check
to make sure it has been correctly inserted.
Humidity
High humidity can fog the CD/DVD or the focus-
ing lens for the laser beam, temporarily prevent-
ing playback.
Malfunctions with particular CDs/DVDs
If malfunctions occur only with particular CDs/
DVDs, this can be due to one of the following
causes.
Home-recorded CDs/DVDs
Malfunction sources in home-recorded CDs/
DVDs include, for example, inconsistent data
origination and recording processes as well as
low quality or pronounced aging of the blanks
used.
Only write on CDs/DVDs with a marker espe-
cially designed for this purpose.
Damaged CDs/DVDs
Avoid finger prints, dust, scratches, and mois-
ture.
Store CDs/DVDs in a sleeve.
Do not expose CDs/DVDs to temperatures
above 1227/506, high humidity or direct
sunlight.
CDs/DVDs with copy protection
Manufacturers often provide CDs/DVDs with
copy protection. This can prevent or limit the
playback of these CDs/DVDs.
Care instructions
You can find everything you need to know about
this topic by consulting the separate Caring for
your vehicle brochure.
Page 180 of 247

Telephone overview
178
Touch tone dialing
The touch tone code is required for access to
network services or for controlling devices, e.g.
remote checking of an answering machine.
This function is available when a connection
has been established.
Emergency call with
emergency call button*
When the vehicle is equipped with the full
mobile phone preparation package, you can
trigger an emergency call via the emergency
call button on the headliner.
Conditions for an emergency call:
>BMW Assist is activated.
>Radio ready state is activated.
>The wireless communications network is
available.
>The emergency call system is operable.
Initiating an emergency call
1.To open the protective cover:
Briefly press the protective cover.
2.Press the emergency call button for at least
2seconds.The LED in the button lights up. As soon as the
voice connection to the BMW Assist response
center has been established, the LED flashes.
An additional speaker is integrated in the front
passenger footwell for emergency calls.
If conditions allow, remain in the vehicle
until the connection has been estab-
lished. You will then be able to provide a
detailed description of the situation.<
On vehicles with BMW Assist enabled, a tele-
phone connection to the BMW Assist response
center is established. If the current vehicle posi-
tion can be determined, this is conveyed to the
response center.
A navigation CD/DVD must be inserted
and the GPS signal must be received.
Otherwise, the current vehicle position cannot
be transferred.
If the navigation system is inoperative, the cur-
rent position of the vehicle is not transmitted.<
Upon receipt of the data, a confirmation report
will appear on the Control Display. The BMW
Assist response center can initiate immediate
action for emergency assistance.
Under certain conditions, an emergency call is
initiated automatically immediately after a
severe accident. An automatic emergency call
is not affected by the emergency call button
being pressed.
For technical reasons, the emergency call
cannot be guaranteed under unfavorable
conditions.< 5Entering digits 1 - 9.
6Entering special characters.
7Entering the digit 0.
8Press briefly: entering special
characters.
Press and hold
*: pause for touch
tone dialing.
Page 183 of 247

181
Entertainment
Reference
At a glance
Controls
Driving tips Communications
Navigation
Mobility
4.Select "Phone" and press the controller.
5.Select "BLUETOOTH" and press the con-
troller.
>The LED next to "BLUETOOTH" lights up
in green:
The Bluetooth connection is activated.
>The LED next to "BLUETOOTH" does not
light up:
The Bluetooth connection is deactivated.
Snap-in adapter*
The snap-in adapter is inserted into the rear
inside of the center armrest.
Inserting
1.Press buttons to open cover of center arm-
rest.2.Press area around button, arrows1, and
take out the cover, arrow2.
3.Insert top of snap-in adapter, arrow3, and
press lower region forward, arrow4.
Removing
Press area around button, arrows1, and take
out snap-in adapter, arrow2.