2006 BMW 745Li light
[x] Cancel search: lightPage 103 of 247

Controls
101Reference
At a glance
Driving tips
Communications
Navigation
Entertainment
Mobility
Manually switching between high and
low beams
You can intervene at any time you wish or the
situation requires.
>If the high-beam assistant has switched on
the high beams, but you want to use the low
beams, simply switch to the low beams with
the turn signal lever. The high-beam assis-
tant is deactivated in the process.
To reactivate the system, briefly press the
turn signal lever in the high beam direction
again.
>If the high-beam assistant has switched on
the low beams, but you want to use the high
beams, switch to the high beams in the
accustomed manner. The system is deacti-
vated in the process and you must switch to
the low beams manually.
To reactivate the system, briefly press the
turn signal lever in the high beam direction
again.
>You use the headlamp flasher as usual with
low beams.
System limits
The high-beam assistant cannot replace
personal decisions on the benefits of
using the high beams. In situations which
require this, you should therefore switch to the
low beams manually to avoid a safety risk.<
In the following example situations, the system
either does not operate or only operates to a
limited degree and a personal reaction may be
required:
>Under extremely unfavorable weather con-
ditions, such as heavy fog or precipitation.
>For perceiving road users with poor lighting
of their own, e.g. pedestrians, cyclists, peo-
ple on horseback, horse-drawn vehicles,
with train or ship traffic close to the road and
wild animals crossing the road.
>In tight curves, on steep crowns or depres-
sions, with cross traffic or partially con-
cealed oncoming traffic on the freeway.
>In poorly lit places and with highly reflective
signs.>In the low speed range.
>When the windshield is dirty or covered with
stickers, decals etc. in the area of the inside
rearview mirror.
>When the sensor is dirty. Clean the sensor
on the front side of the inside rearview mir-
ror with a cloth moistened with a small
amount of glass cleaner.
Fog lamps
Briefly press the button to switch on/off.
Front fog lamps
The parking lamps or low beams must be
switched on for the fog lamps to operate. The
green indicator lamp on the Info Display lights
up whenever the fog lamps are on.
If the automatic headlamp control is acti-
vated, the low beams will come on auto-
matically when you switch on the fog lamps.<
Instrument lighting
You can adjust the lighting intensity with the
knurled wheel.
Page 104 of 247
Lamps
102
Interior lamps
The interior lamps, footwell lamps, door entry
lighting and the perimeter lighting are con-
trolled automatically.
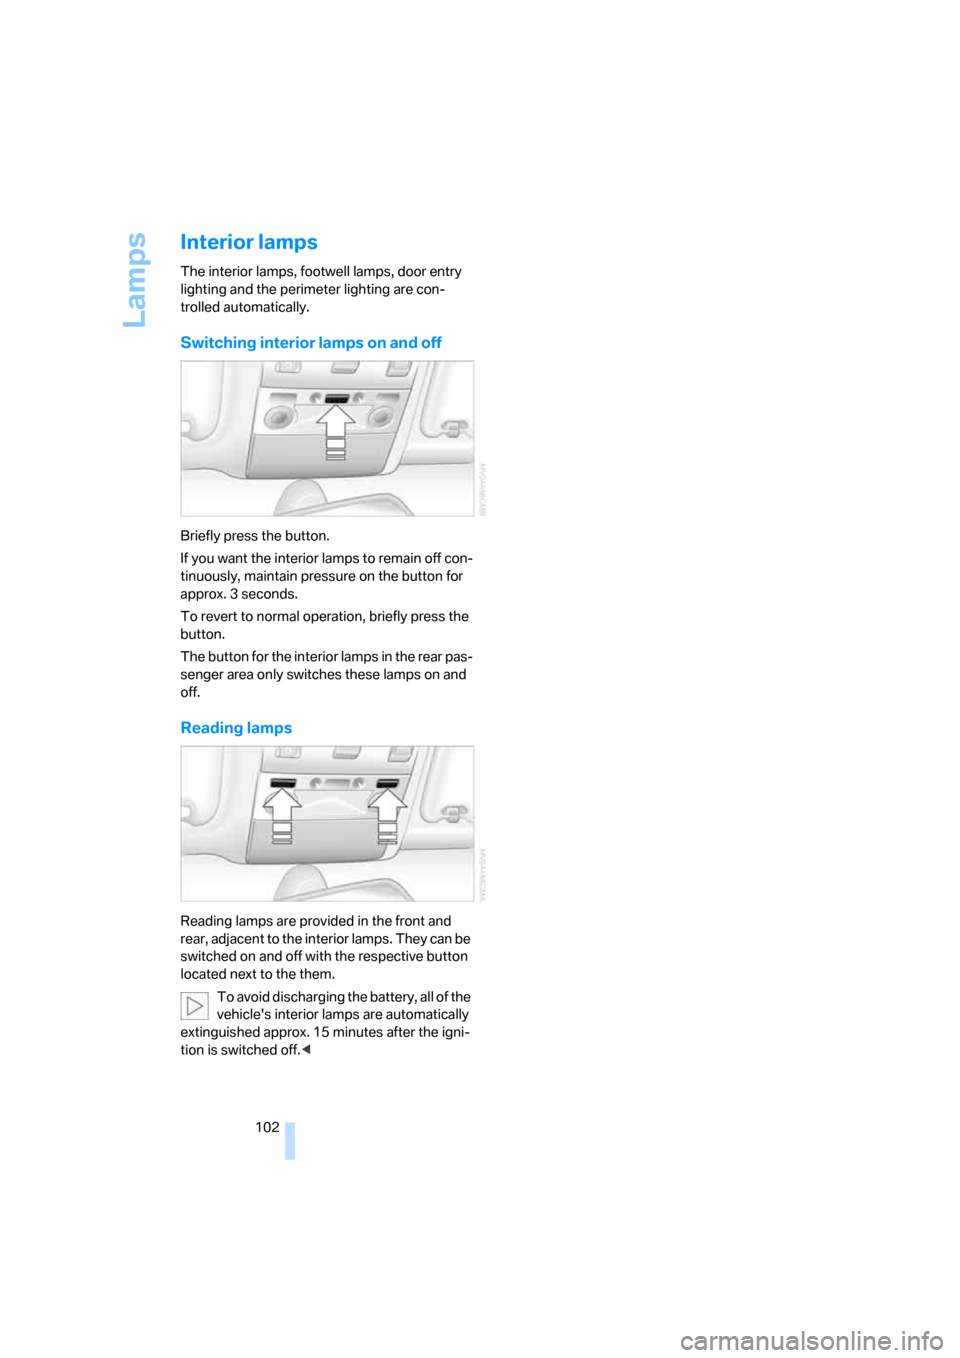
Switching interior lamps on and off
Briefly press the button.
If you want the interior lamps to remain off con-
tinuously, maintain pressure on the button for
approx. 3 seconds.
To revert to normal operation, briefly press the
button.
The button for the interior lamps in the rear pas-
senger area only switches these lamps on and
off.
Reading lamps
Reading lamps are provided in the front and
rear, adjacent to the interior lamps. They can be
switched on and off with the respective button
located next to the them.
To avoid discharging the battery, all of the
vehicle's interior lamps are automatically
extinguished approx. 15 minutes after the igni-
tion is switched off.<
Page 106 of 247

Climate
104
Automatic climate control
1AUTO program, left side of passenger
compartment, refer to section below
2Outside air/AUC Automatic recirculated-air
control/recirculated air105
3Switching off automatic climate
control105
4Temperature, left side of passenger
compartment105
5Maximum cooling106
6Air volume, left side of passenger
compartment106
7Defrosting windows and removing
condensation106
8Air volume, right side of passenger
compartment106
9Temperature, right side of passenger
compartment10510Residual heat mode106
11Rear window defroster107
12Switching cooling function on and off
manually107
13AUTO program, right side of passenger
compartment, refer to section below
14Air grille for interior temperature sensor –
please keep clear and unobstructed
15Parked car ventilation109
> lights up: activation time activated
> flashes: parked car ventilation
switched on
The current setting for air distribution is dis-
played on the Control Display, refer to
page106.
A congenial climate
For almost all conditions, the AUTO program1
offers the optimal air distribution and air vol-
ume. Select an interior temperature you find
pleasant.
The following section contains more detailed
information on the available setting options.
The settings are stored for the remote key cur-
rently in use.
AUTO program
The AUTO program handles the
adjustment of air distribution to the
windshield and side windows, in
the direction of the upper body, and in the foot-
well, as well as the adjustment of the air volume. It also adapts your instructions for the tempera-
ture to outside influences throughout the year.
The cooling is switched on automatically with
the AUTO program. At the same time, a con-
densation sensor controls the program so as to
prevent window condensation as much as pos-
sible.
Intensity of AUTO program
You can adjust the intensity of the AUTO pro-
gram by repeatedly pressing the AUTO button.
If you briefly press the button, the current set-
ting is displayed in the lower status line of the
Control Display.
Page 108 of 247

Climate
106 5.Turn the controller to adjust the tempera-
ture:
>Turn toward the left, toward blue: colder
>Turn toward the right, toward red:
warmer
6.Press the controller to save the setting.
Maximum cooling
Maximally cooled air is obtained as
quickly as possible from an outside
temperature above 327/06 and
with the engine running.
The automatic climate control
changes over to the lowest temperature and
switches into the recirculated-air mode. The
maximum air quantity only flows out of the vents
for the upper body, so open these vents for
maximum cooling.
Air volume
You can vary the air volume by
turning. You can reactivate the
automatic air supply mode by
pressing the AUTO button.
Manual air distribution
You can adapt the air distribution to your own
personal preferences:
1.Open the start menu.
2.Open "Climate".
3.Turn the controller to select driver's side or
passenger side.4.Select the desired field and press the con-
troller.
1Airflow directed toward the windshield and
side windows
2Air to the upper body
3Air to footwell
You can only use the condensation sensor in
the AUTO program. Press the AUTO button
when you notice condensation on windows and
want to use the advantages of the condensation
sensor.
Defrosting windows and removing
condensation
Quickly remove ice and condensa-
tion from the windshield and front
side windows.
Residual heat
The system uses the warmth
stored in the engine to heat the
interior when the ignition is off, e.g.
while the vehicle is stopped at a
railroad crossing.
The function can be switched on when the fol-
lowing conditions are met:
>up to 15 minutes after switching off the
engine
>with the engine at operating temperature
>with sufficient battery voltage
>at an outside temperature below 777/
256
The LED lights up when the function is
switched on.
Page 112 of 247
Climate
110
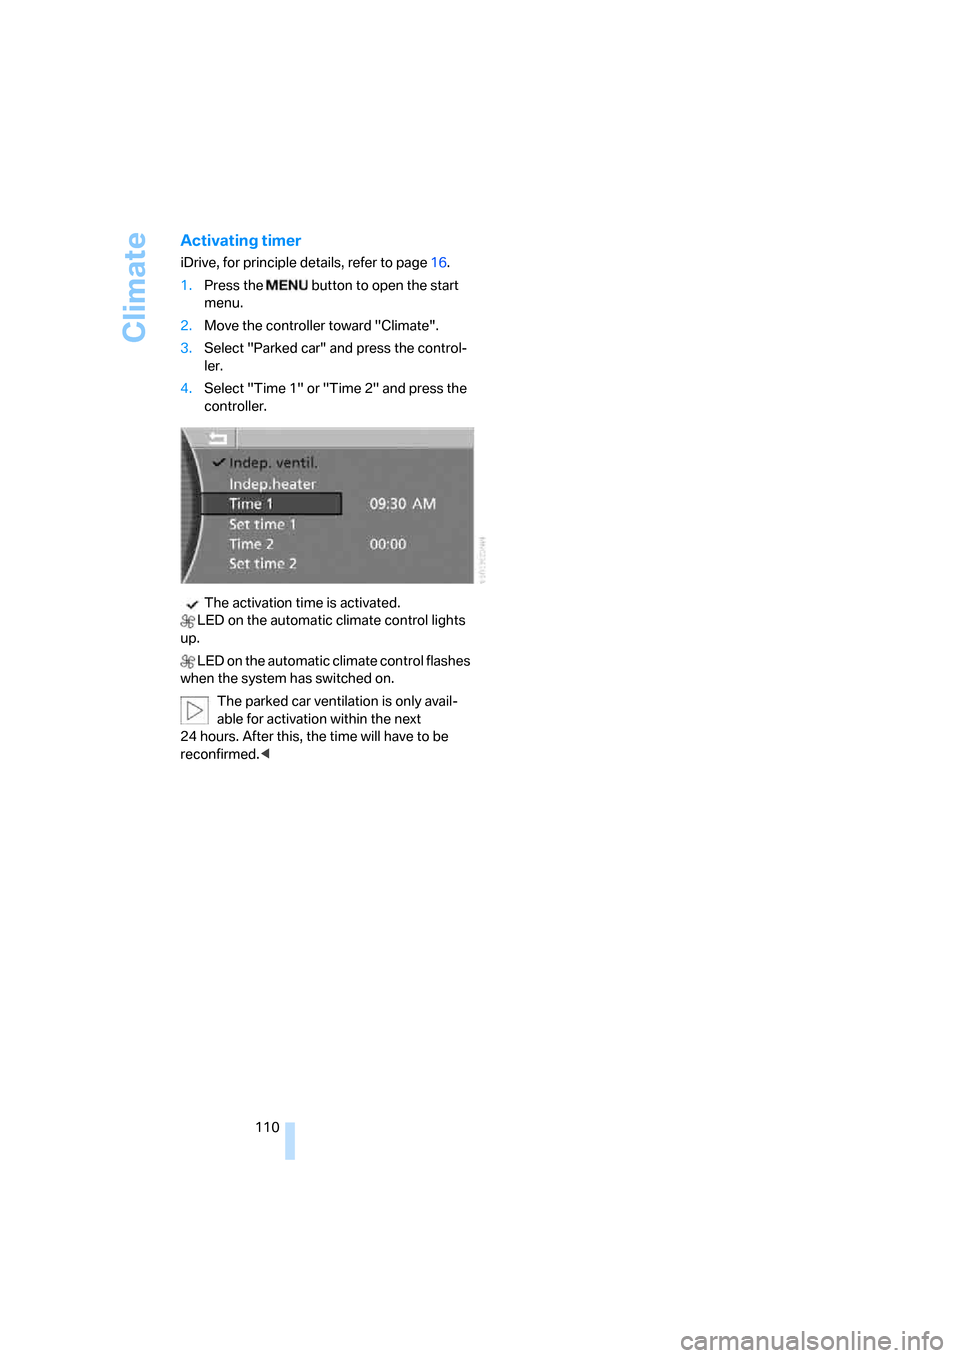
Activating timer
iDrive, for principle details, refer to page16.
1.Press the button to open the start
menu.
2.Move the controller toward "Climate".
3.Select "Parked car" and press the control-
ler.
4.Select "Time 1" or "Time 2" and press the
controller.
The activation time is activated.
LED on the automatic climate control lights
up.
LED on the automatic climate control flashes
when the system has switched on.
The parked car ventilation is only avail-
able for activation within the next
24 hours. After this, the time will have to be
reconfirmed.<
Page 114 of 247
Practical interior accessories
112 If the device cannot be operated after
repeated programming, check whether
the original hand-held transmitter uses an alter-
nating-code system. To do so, either read the
instructions of the original hand-held transmit-
ter or press and hold down the programmed
memory button1 of the integrated universal
remote control. If the LED2 on the integrated
universal remote control flashes rapidly for a
short time and then remains lit for approx.
2 seconds, then this indicates that the original
hand-held transmitter is equipped with an alter-
nating-code system. In the case of an alternat-
ing-code system, program the memory but-
tons1 as described in the Alternating-code
transmitters section below.<
Alternating-code transmitters
Consult the operating instructions of the unit
you wish to set when programming the univer-
sal remote control. You will find information
there on the possibilities for synchronization.
When programming hand-held transmitters
that employ an alternating code, please follow
the supplementary instructions below:
Programming will be easier with the aid of
a second person.<
1.Park your vehicle within the range of the
remote-controlled device.
2.Program the integrated universal remote
control as described above in the Fixed-
code hand-held transmitters section.
3.Locate the button on the receiver of the
device you want to set up, e.g. on the upper
section of its motor.
4.Press the button on the receiver of the
device you want to set up. After step 4, you
have approx. 30 seconds for step 5.
5.Press the programmable memory button1
on the integrated universal remote control
three times.
The corresponding memory button1 is now
programmed with the signal of the original
hand-held transmitter.
If you have any additional questions,
please contact your BMW center.<
Clearing memory buttons
Press both outer buttons1 for approx. 20 sec-
onds, maintaining pressure until the LED2
starts to flash:
All of the memory buttons have been cleared.
It is not possible to clear individual memory
buttons1.
Roller sun blinds*
Rear window blind
Briefly press the button on the driver's door with
the ignition in radio ready state or higher.
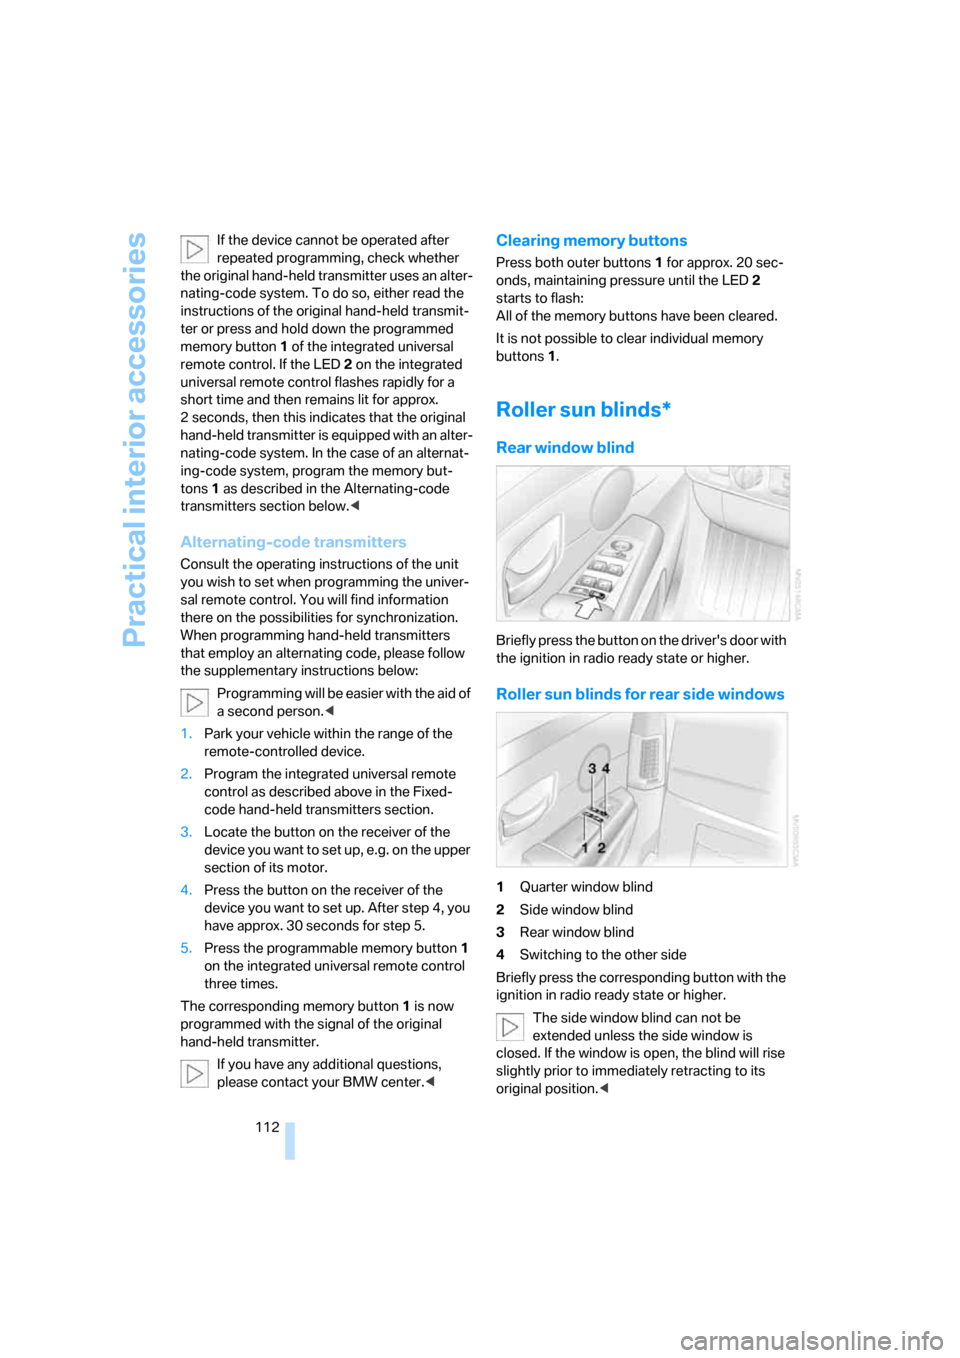
Roller sun blinds for rear side windows
1Quarter window blind
2Side window blind
3Rear window blind
4Switching to the other side
Briefly press the corresponding button with the
ignition in radio ready state or higher.
The side window blind can not be
extended unless the side window is
closed. If the window is open, the blind will rise
slightly prior to immediately retracting to its
original position.<
Page 115 of 247
Controls
113Reference
At a glance
Driving tips
Communications
Navigation
Entertainment
Mobility
To avoid injuries, make sure that the clos-
ing region of the roller blind is clear.
Press the safety switch on the driver's door,
refer to page40. The LED must light up. This
precaution prevents children from operating
the sun blinds using the rear switches, etc.
When leaving the vehicle parked, remove the
remote control from the ignition lock and close
the doors; this precaution prevents children
from operating the roller sun blinds and injuring
themselves.<
Automatically extending and retracting
sun blinds
You can run the sun blinds up and down
together when you press and hold the button3
longer.
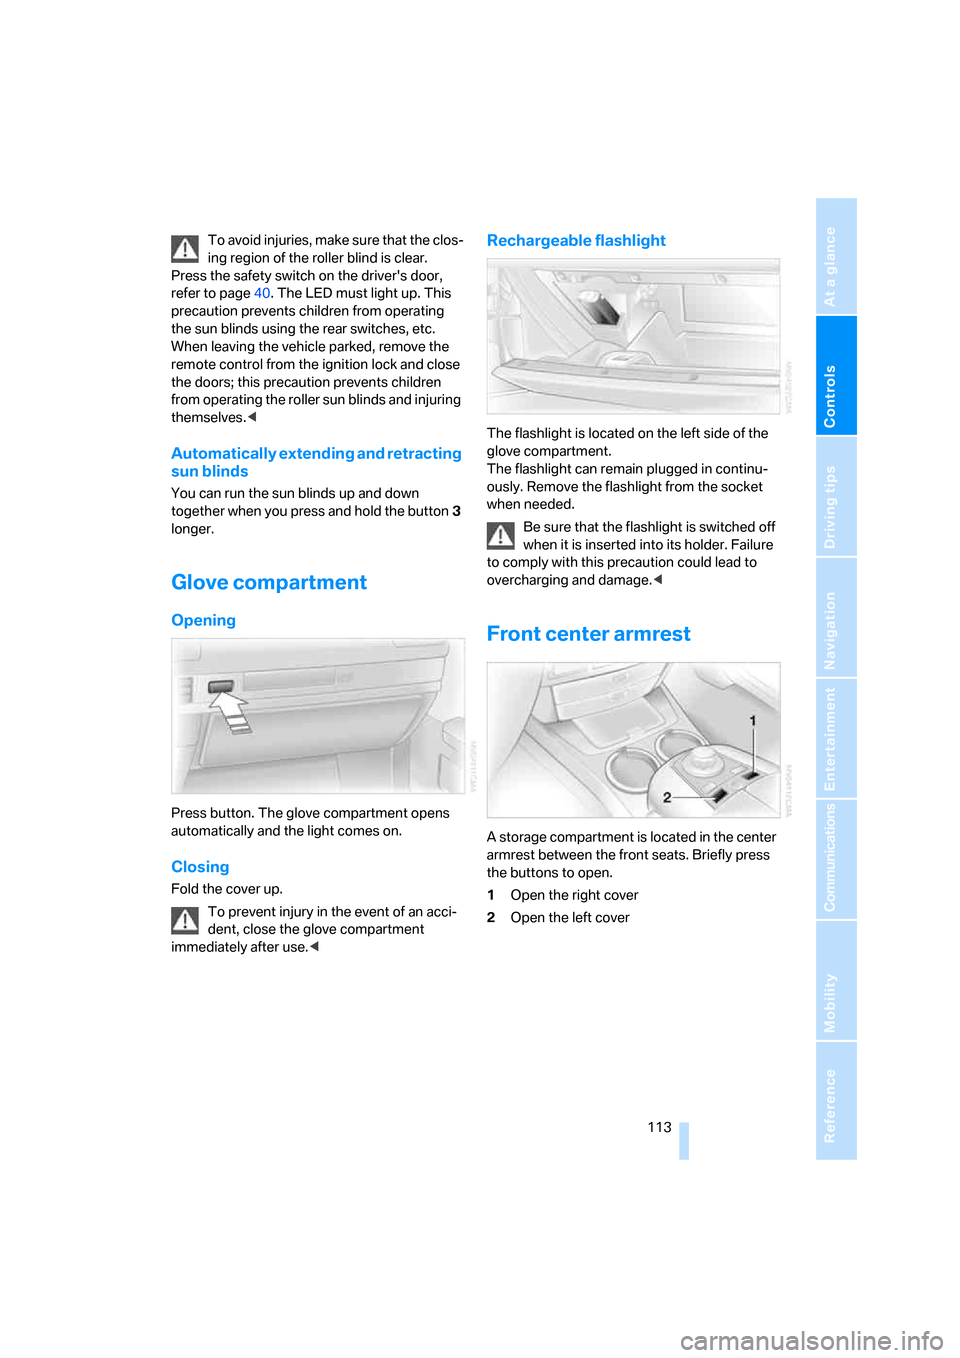
Glove compartment
Opening
Press button. The glove compartment opens
automatically and the light comes on.
Closing
Fold the cover up.
To prevent injury in the event of an acci-
dent, close the glove compartment
immediately after use.<
Rechargeable flashlight
The flashlight is located on the left side of the
glove compartment.
The flashlight can remain plugged in continu-
ously. Remove the flashlight from the socket
when needed.
Be sure that the flashlight is switched off
when it is inserted into its holder. Failure
to comply with this precaution could lead to
overcharging and damage.<
Front center armrest
A storage compartment is located in the center
armrest between the front seats. Briefly press
the buttons to open.
1Open the right cover
2Open the left cover
Page 118 of 247
Practical interior accessories
116 To extinguish a cigarette, tap off the ash and
gently press the tip into the funnel.
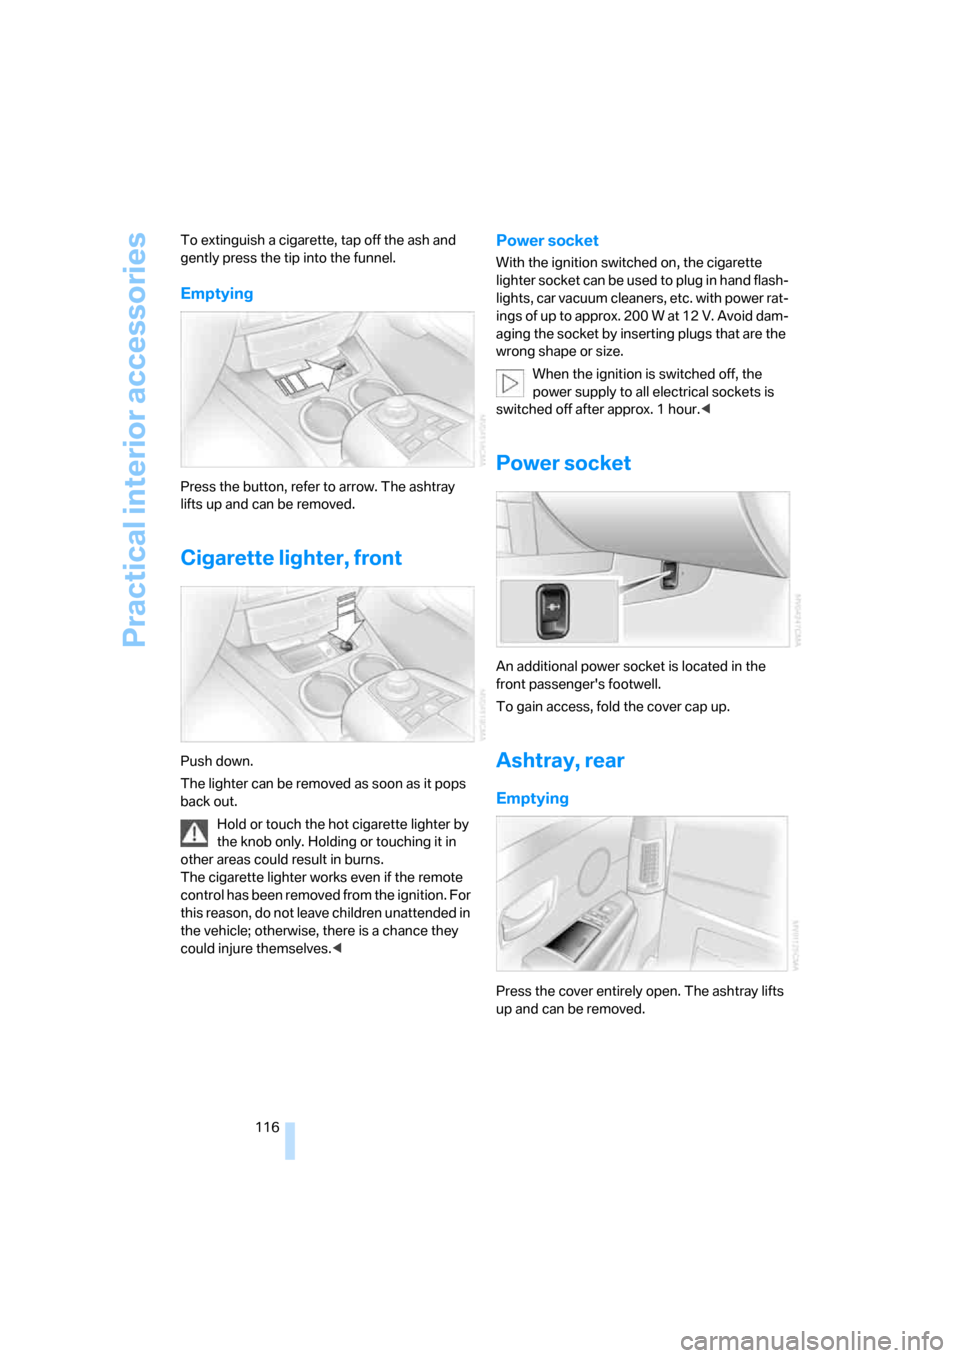
Emptying
Press the button, refer to arrow. The ashtray
lifts up and can be removed.
Cigarette lighter, front
Push down.
The lighter can be removed as soon as it pops
back out.
Hold or touch the hot cigarette lighter by
the knob only. Holding or touching it in
other areas could result in burns.
The cigarette lighter works even if the remote
control has been removed from the ignition. For
this reason, do not leave children unattended in
the vehicle; otherwise, there is a chance they
could injure themselves.<
Power socket
With the ignition switched on, the cigarette
lighter socket can be used to plug in hand flash-
lights, car vacuum cleaners, etc. with power rat-
ings of up to approx. 200 W at 12 V. Avoid dam-
aging the socket by inserting plugs that are the
wrong shape or size.
When the ignition is switched off, the
power supply to all electrical sockets is
switched off after approx. 1 hour.<
Power socket
An additional power socket is located in the
front passenger's footwell.
To gain access, fold the cover cap up.
Ashtray, rear
Emptying
Press the cover entirely open. The ashtray lifts
up and can be removed.