2006 BMW 745i navigation
[x] Cancel search: navigationPage 197 of 247

Mobility
195Reference
At a glance
Controls
Driving tips
Communications
Navigation
Entertainment
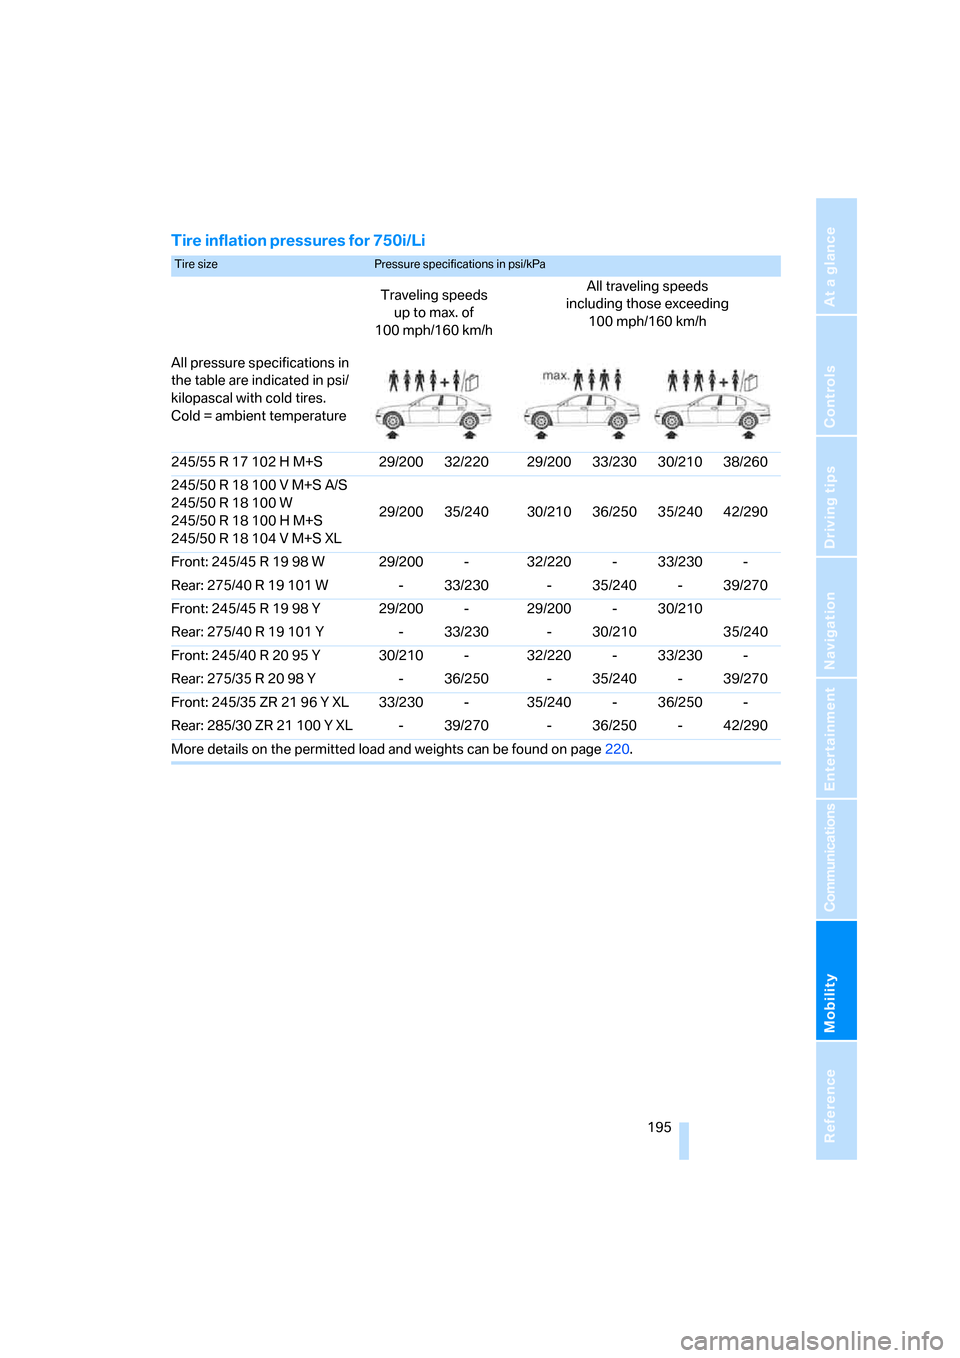
Tire inflation pressures for 750i/Li
Tire size Pressure specifications in psi/kPa
Traveling speeds
up to max. of
100 mph/160 km/hAll traveling speeds
including those exceeding
100 mph/160 km/h
All pressure specifications in
the table are indicated in psi/
kilopascal with cold tires.
Cold = ambient temperature
245/55 R 17 102 H M+S 29/200 32/220 29/200 33/230 30/210 38/260
245/50 R 18 100 V M+S A/S
245/50 R 18 100 W
245/50 R 18 100 H M+S
245/50 R 18 104 V M+S XL29/200 35/240 30/210 36/250 35/240 42/290
Front: 245/45 R 19 98 W 29/200 - 32/220 - 33/230 -
Rear: 275/40 R 19 101 W - 33/230 - 35/240 - 39/270
Front: 245/45 R 19 98 Y 29/200 - 29/200 - 30/210
Rear: 275/40 R 19 101 Y - 33/230 - 30/210 35/240
Front: 245/40 R 20 95 Y 30/210 - 32/220 - 33/230 -
Rear: 275/35 R 20 98 Y - 36/250 - 35/240 - 39/270
Front: 245/35 ZR 21 96 Y XL 33/230 - 35/240 - 36/250 -
Rear: 285/30 ZR 21 100 Y XL - 39/270 - 36/250 - 42/290
More details on the permitted load and weights can be found on page220.
Page 199 of 247

Mobility
197Reference
At a glance
Controls
Driving tips
Communications
Navigation
Entertainment
Tire coding
Knowledge of the labeling on the side of the tire
makes it easier to identify and choose the right
tires.
Tire size
Speed rating
Q = up to 105 mph/160 km/h
T = up to 118 mph/190 km/h
H = up to 131 mph/210 km/h
V = up to 150 mph/240 km/h
W = up to 167 mph/270 km/h
Y = up to 186 mph/300 km/h
Tire Identification Number
Tires with DOT codes meet the guidelines of
the U.S. Department of Transportation.
DOT code:
Tire age
The tire's date of manufacture is indicated on
the sidewall:
DOT...1006 means that the tire was manufac-
tured in the 10th week of 2006.
BMW recommends that you replace all tires –
including the spare – after a maximum of 6 years, even though the tires may have a theo-
retical service life of up to 10 years.
Uniform Tire Quality Grading
Quality grades can be found where applicable
on the tire sidewall between tread shoulder and
maximum section width. For example:
Tread wear 200 Traction AA
Temperature A
DOT Quality Grades
Tread wear
Traction AA A B C
Temperature A B C
All passenger car tires must conform to
Federal Safety Requirements in addition
to these grades.<
Tread wear
The tread wear grade is a comparative rating
based on the wear rate of the tire when tested
under controlled conditions on a specified gov-
ernment test course.
For example, a tire graded 150 would wear one
and one-half, 1γ, times as well on the govern-
ment course as a tire graded 100. The relative
performance of tires depends upon the actual
conditions of their use, however, and may devi-
ate significantly from the norm due to variations
in driving habits, service practices and differ-
ences in road characteristics and climate.
Traction
The traction grades, from highest to lowest, are
AA, A, B, and C.
Those grades represent the tire's ability to stop
on wet pavement as measured under controlled
conditions on specified government test sur-
faces of asphalt and concrete. A tire marked C
may have poor traction performance.
The traction grade assigned to this tire is
based on straight-ahead braking traction
tests, and does not include acceleration, cor-
nering, hydroplaning, or peak traction charac-
teristics.< e.g.
Nominal width in mm
Aspect ratio in Ξ
Radial tire code
Rim diameter in inches
Load rating,
not for ZR tires
Speed rating,
before R on ZR tires
245/50 R18100 V
e.g.
Manufacturer code
for tire makes
Tire size and tire design
Tire ageDOT xxxx xxx 1006
Page 201 of 247

Mobility
199Reference
At a glance
Controls
Driving tips
Communications
Navigation
Entertainment
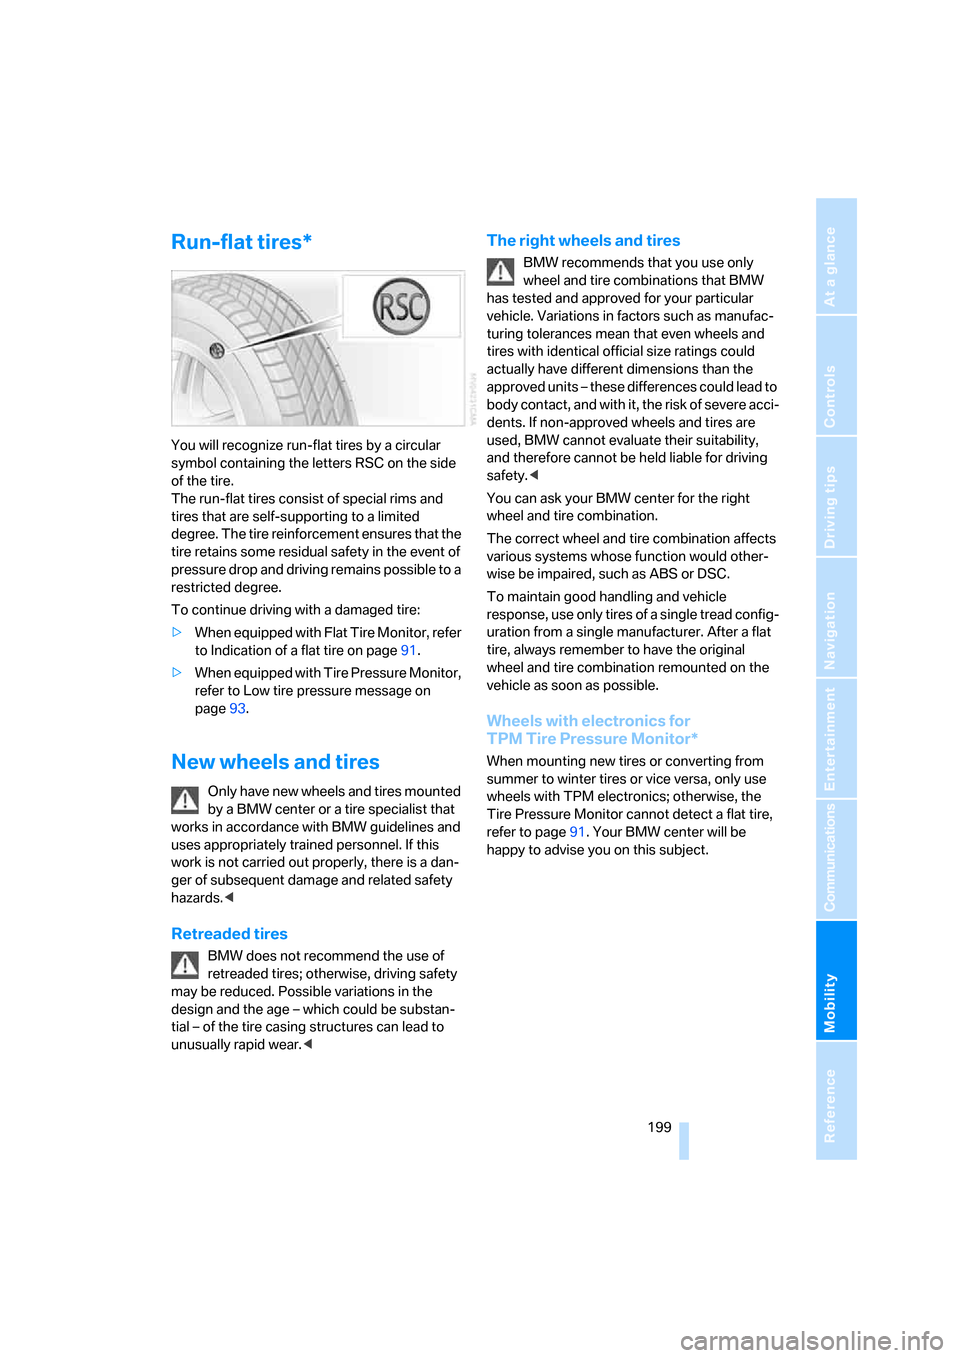
Run-flat tires*
You will recognize run-flat tires by a circular
symbol containing the letters RSC on the side
of the tire.
The run-flat tires consist of special rims and
tires that are self-supporting to a limited
degree. The tire reinforcement ensures that the
tire retains some residual safety in the event of
pressure drop and driving remains possible to a
restricted degree.
To continue driving with a damaged tire:
>When equipped with Flat Tire Monitor, refer
to Indication of a flat tire on page91.
>When equipped with Tire Pressure Monitor,
refer to Low tire pressure message on
page93.
New wheels and tires
Only have new wheels and tires mounted
by a BMW center or a tire specialist that
works in accordance with BMW guidelines and
uses appropriately trained personnel. If this
work is not carried out properly, there is a dan-
ger of subsequent damage and related safety
hazards.<
Retreaded tires
BMW does not recommend the use of
retreaded tires; otherwise, driving safety
may be reduced. Possible variations in the
design and the age – which could be substan-
tial – of the tire casing structures can lead to
unusually rapid wear.<
The right wheels and tires
BMW recommends that you use only
wheel and tire combinations that BMW
has tested and approved for your particular
vehicle. Variations in factors such as manufac-
turing tolerances mean that even wheels and
tires with identical official size ratings could
actually have different dimensions than the
approved units – these differences could lead to
body contact, and with it, the risk of severe acci-
dents. If non-approved wheels and tires are
used, BMW cannot evaluate their suitability,
and therefore cannot be held liable for driving
safety.<
You can ask your BMW center for the right
wheel and tire combination.
The correct wheel and tire combination affects
various systems whose function would other-
wise be impaired, such as ABS or DSC.
To maintain good handling and vehicle
response, use only tires of a single tread config-
uration from a single manufacturer. After a flat
tire, always remember to have the original
wheel and tire combination remounted on the
vehicle as soon as possible.
Wheels with electronics for
TPM Tire Pressure Monitor*
When mounting new tires or converting from
summer to winter tires or vice versa, only use
wheels with TPM electronics; otherwise, the
Tire Pressure Monitor cannot detect a flat tire,
refer to page91. Your BMW center will be
happy to advise you on this subject.
Page 203 of 247

Mobility
201Reference
At a glance
Controls
Driving tips
Communications
Navigation
Entertainment
Under the hood
Never attempt to perform any service or
repair operations on your vehicle without
the required, professional technical training.
If you are unfamiliar with the regulations to be
observed, only have work on your vehicle car-
ried out by a BMW center or a repair shop that
works in accordance with BMW guidelines and
uses appropriately trained personnel. If this
work is not carried out properly, there is a dan-
ger of subsequent damage and related safety
hazards.<
Hood
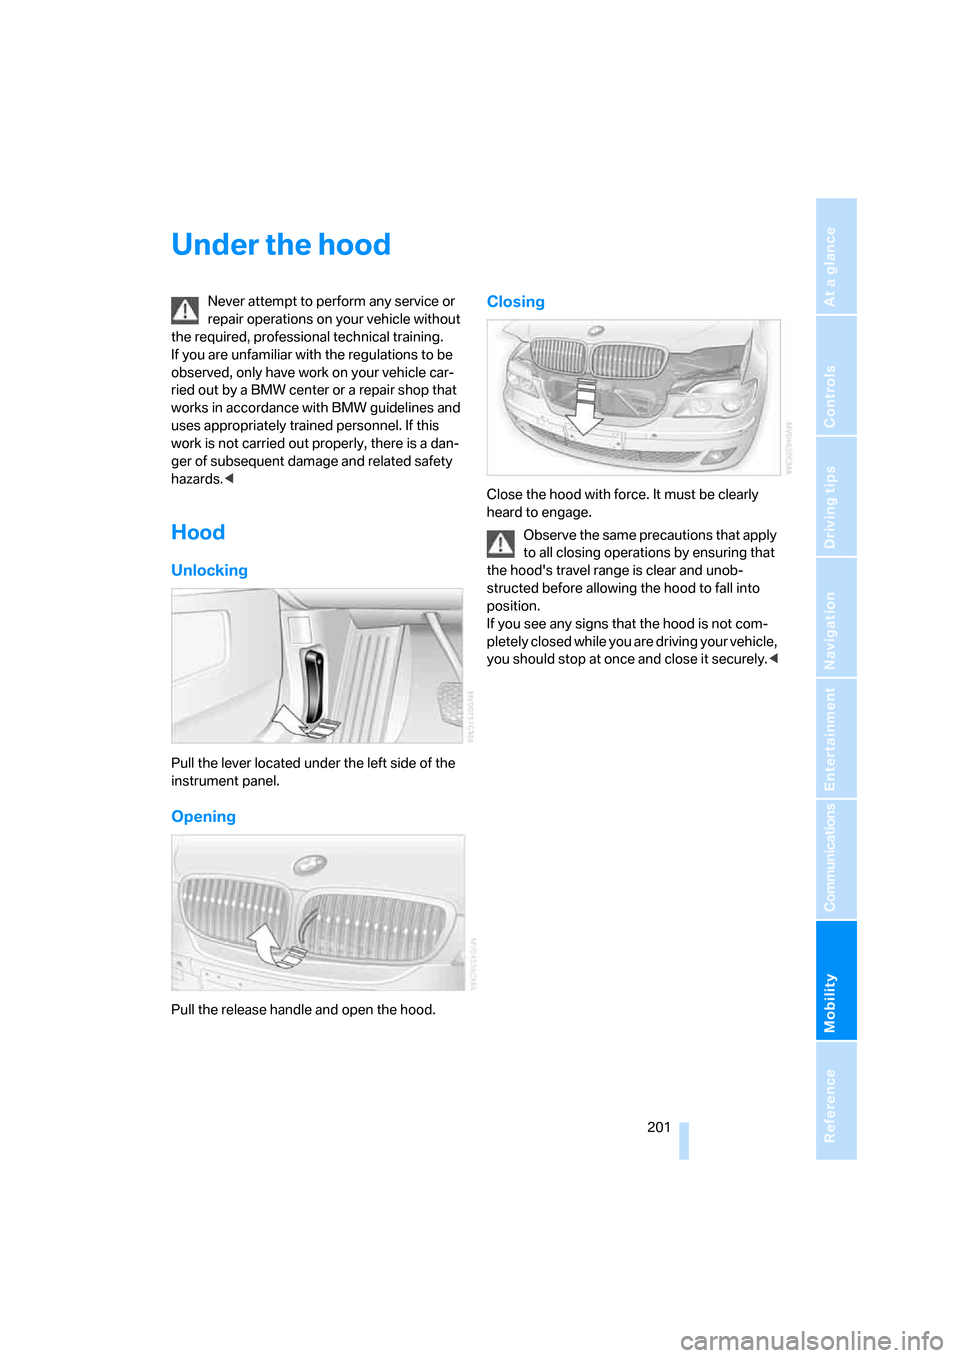
Unlocking
Pull the lever located under the left side of the
instrument panel.
Opening
Pull the release handle and open the hood.
Closing
Close the hood with force. It must be clearly
heard to engage.
Observe the same precautions that apply
to all closing operations by ensuring that
the hood's travel range is clear and unob-
structed before allowing the hood to fall into
position.
If you see any signs that the hood is not com-
pletely closed while you are driving your vehicle,
you should stop at once and close it securely.<
Page 205 of 247

Mobility
203Reference
At a glance
Controls
Driving tips
Communications
Navigation
Entertainment
Possible displays
>"Update of engine oil level in process".
>"Engine oil level O.K.".
>"Oil level at minimum! Add 1 quart engine
oil": Add a maximum of 1 quart/1 liter of
engine oil at the earliest opportunity, refer
to Adding engine oil.
>"Oil level under min.! Add 1 quart engine
oil": Add a maximum of 1 quart/1 liter of
engine oil at the earliest opportunity, refer
to Adding engine oil.
>"Engine oil level too high".
Have vehicle checked immediately;
otherwise, overfilled oil can lead to
engine damage.<
>"No measurement possible at this time".
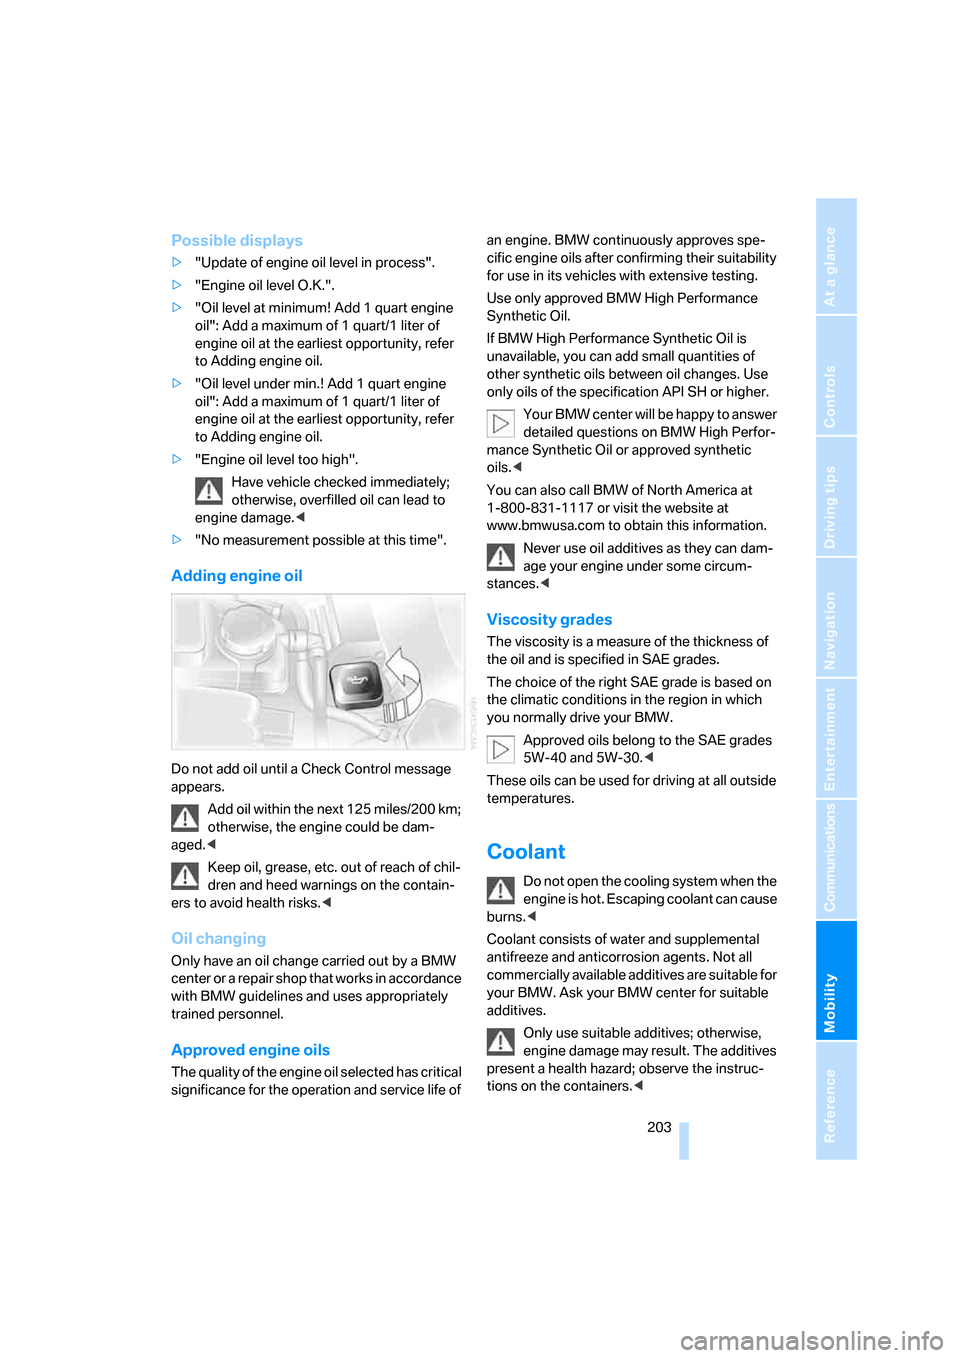
Adding engine oil
Do not add oil until a Check Control message
appears.
Add oil within the next 125 miles/200 km;
otherwise, the engine could be dam-
aged.<
Keep oil, grease, etc. out of reach of chil-
dren and heed warnings on the contain-
ers to avoid health risks.<
Oil changing
Only have an oil change carried out by a BMW
center or a repair shop that works in accordance
with BMW guidelines and uses appropriately
trained personnel.
Approved engine oils
The quality of the engine oil selected has critical
significance for the operation and service life of an engine. BMW continuously approves spe-
cific engine oils after confirming their suitability
for use in its vehicles with extensive testing.
Use only approved BMW High Performance
Synthetic Oil.
If BMW High Performance Synthetic Oil is
unavailable, you can add small quantities of
other synthetic oils between oil changes. Use
only oils of the specification API SH or higher.
Your BMW center will be happy to answer
detailed questions on BMW High Perfor-
mance Synthetic Oil or approved synthetic
oils.<
You can also call BMW of North America at
1-800-831-1117 or visit the website at
www.bmwusa.com to obtain this information.
Never use oil additives as they can dam-
age your engine under some circum-
stances.<
Viscosity grades
The viscosity is a measure of the thickness of
the oil and is specified in SAE grades.
The choice of the right SAE grade is based on
the climatic conditions in the region in which
you normally drive your BMW.
Approved oils belong to the SAE grades
5W-40 and 5W-30.<
These oils can be used for driving at all outside
temperatures.
Coolant
Do not open the cooling system when the
engine is hot. Escaping coolant can cause
burns.<
Coolant consists of water and supplemental
antifreeze and anticorrosion agents. Not all
commercially available additives are suitable for
your BMW. Ask your BMW center for suitable
additives.
Only use suitable additives; otherwise,
engine damage may result. The additives
present a health hazard; observe the instruc-
tions on the containers.<
Page 207 of 247

Mobility
205Reference
At a glance
Controls
Driving tips
Communications
Navigation
Entertainment
Maintenance
The BMW Maintenance
System
The BMW Maintenance System serves to
retain the operating and road safety of your
BMW. The service schedule also includes oper-
ations related to the vehicle's comfort and con-
venience features, such as replacement of the
filters for the inside air. The aim is to optimize
maintenance procedures with a view to reduc-
ing the cost of running the vehicle.
Should the day come when you decide to sell
your BMW, you will find that a complete dealer
service history is an asset of inestimable value.
CBS Condition Based Service
Sensors and special algorithms take the differ-
ent driving conditions of your BMW into
account. As a result, Condition Based Service
determines the current and future maintenance
requirements. By letting you define a service
and maintenance regimen that reflects your
own individual requirements, the system forms
the basis for trouble-free driving.
You can have the remaining times or distances
to selected maintenance requirements as well
as legally required deadlines displayed on the
Control Display, refer to page78:
>Engine oil
>Brakes, separate for front and rear
>Microfilter
>Brake fluid
>Spark plugs>Vehicle check
>Legally prescribed inspections depending
on national regulations
Your vehicle stores this information continu-
ously in the ignition key while the vehicle is
being driven. After accessing the data stored in
the vehicle key, your BMW Service Advisor can
suggest precisely the right array of service pro-
cedures for your own individual vehicle. This is
why it is important when you take your vehicle in
for service to give the BMW Service Advisor the
last remote control you used for driving.
Storage periods with the battery discon-
nected are not taken into account by the
CBS maintenance system. Have the time-
dependent service and maintenance opera-
tions, such as brake fluid and coolant, and if
necessary engine oil and the micro/activated
charcoal filter, updated by a BMW center.<
Service and Warranty Information
Booklet for US models and
Warranty and Service Guide Booklet
for Canadian models
Please consult your Service and Warranty Infor-
mation Booklet for US models and Warranty
and Service Guide Booklet for Canadian models
for additional information on service require-
ments.
BMW recommends that you have service
and repair operations performed at your
BMW center.
Take the time to ensure that these service pro-
cedures are confirmed by entries in your vehi-
cle's Service and Warranty Information Booklet
for US models and Warranty and Service Guide
Booklet for Canadian models. These entries
verify that your vehicle has received the speci-
fied regular maintenance.<
Page 209 of 247

Mobility
207Reference
At a glance
Controls
Driving tips
Communications
Navigation
Entertainment
Replacing components
Onboard tool kit
The onboard toolkit is located in the luggage
compartment lid.
Loosen the wingnut to open.
The adapter for the spare key can be stored
beneath the open-ended wrenches.
Windshield wiper blades
To replace the blades, start by folding the wip-
ers out and away from the windshield, refer to
page66.
Lamps and bulbs
Lamps and lights contribute significantly to
road safety. Therefore, comply fully with the fol-
lowing instructions during bulb replacement.
BMW recommends that you entrust corre-
sponding procedures to your BMW center if
you are unfamiliar with them or they are not
described here.
Never touch the glass of new bulbs with
your bare fingers, as even minute
amounts of contamination will burn into the
bulb's surface and reduce its service life. Use a
clean cloth, napkin, etc., or hold the bulb by its
metal socket.<
You can obtain a selection of replacement bulbs
at your BMW center.
When working on the lighting system, you
should always switch off the lights affected to prevent short circuits.
To avoid possible injury or equipment damage
when replacing bulbs, follow any instructions
provided by the bulb manufacturer.<
When maintaining the headlamps, please follow
the instructions in the separate Caring for your
vehicle brochure.
Light-emitting diodes LEDs
Light-emitting diodes installed behind translu-
cent lenses serve as the light source for many of
the controls and displays in your vehicle. These
light-emitting diodes, which operate using a
concept similar to that applied in conventional
lasers, are officially designated as Class 1 light-
emitting diodes.
Do not remove the covers, and never
stare into the unfiltered light for several
hours, as irritation of the retina could result.<
Xenon lamp*
The service life of these bulbs is very long and
the probability of a failure is very low, provided
that they are not switched on and off an unusual
number of times. In the unlikely event that one
of these lamps should fail, you can respond by
switching on your fog lamps and proceeding
carefully, where allowed by law.
Only have work on the xenon lighting sys-
tem including bulb changes carried out by
a BMW center or a repair shop that works in
accordance with BMW guidelines and uses
appropriately trained personnel. Due to the high
voltage involved, there is a danger to life and
limb when work is carried out improperly.<
For checking and adjusting headlamp
aim, please contact your BMW center.<
Turn signals, front
The illustration shows the left side of the engine
compartment.
Two bulbs, 21 Watt: P 21 W or PY 21 W
*
Page 211 of 247

Mobility
209Reference
At a glance
Controls
Driving tips
Communications
Navigation
Entertainment
Lamps in luggage compartment lid
1Backup lamps
The illustration shows the left luggage com-
partment lid cutout.
Remove the trim panel from the luggage com-
partment lid.
Backup lamp
Backup lamp:
Bulb 16 watts, W 16 W
1.Pull the bulb holder out.
2.Extract the bulb for replacement.
Changing wheels
Safety precautions to observe in the
event of a flat and during all tire changes:
Park the vehicle as far as possible from passing
traffic. Park on a firm, flat, surface. Switch on the
hazard warning flashers.
Engage the parking brake and shift the trans-
mission selector lever into P.
Have all vehicle occupants get out of the vehicle
and ensure that they remain outside the imme-
diate area in a safe place, such as behind a
guardrail.
If a warning triangle or portable hazard warning
lamp is required, set it up on the roadside at an
appropriate distance from the rear of the vehi-
cle. Comply with all safety guidelines and regu-
lations.
Change the wheel only on a level, firm surface
which is not slippery. The vehicle or the jack
could slip to the side if you attempt to raise the
vehicle on a soft or slippery surface such as
snow, ice, tile, etc.
Position the jack on a firm support surface. Do not use a wooden block or similar object as a
support base for the jack, as this would prevent
it from extending to its full support height and
reduce its load-carrying capacity.
To avoid serious or fatal injury, never lie under
the vehicle and never start the engine while it is
supported by the jack.<
What you will need
To avoid rattling noises, note the positions of
the tools before removing them, then return
them to their initial positions after completing
work.
>Lug wrench
Located beside the spare wheel.
>Wheel chock
Located next to the spare wheel, or behind
the trim panel on the left side of the luggage
compartment on vehicles equipped with a
trailer coupling.
Remove the floor mat and the cover above
the spare tire.
Unscrew the wingnut and remove the wheel
chock.