2006 BMW 745i navigation
[x] Cancel search: navigationPage 163 of 247

Navigation
Entertainment
Driving tips
161Reference
At a glance
Controls
Communications
Mobility
near trees, mountains or other sources of radio
interference.
Reception is usually possible again as soon as
the signal is available again.<
Storing a station
1.Select "SAT" and press the controller.
2.Select "Channels" and press the controller.
3.Select the desired station.
4.Select "STORE" and press the controller.
The list of stored stations appears in the
display.
5.Select the desired station.
6.Turn the controller until you reach the
desired memory position.
7.Maintain pressure on the controller for sev-
eral seconds.
High Definition Radio*
Many stations transmit both analog and digital
signals. You can receive these stations digitally
and in improved sound quality.
Activating and deactivating digital
radio reception
iDrive, for principle details, refer to page16.
1.Press the button to open the start
menu.
2.Move the controller toward "Entertain-
ment".
3.Select "FM" or "AM" and press the control-
ler.
4.Select "MANUAL" and press the controller.
5.Select "HD" and press the controller.
The reception of digital stations is activated.
"HD" is shown in the status line when a station
is received digitally.
With some stations the digital signals are not
transmitted simultaneously with the analog sig-
nals. If you are in an area in which the selected
station is not continuously received digitally,
playback switches between analog and digital
reception. This can result in repetitions or inter-
ruptions. In this case it may be advisable to
deactivate digital radio reception.
Displaying additional information
With the digital stations, additional information
on the current track is displayed, e.g. the name
of the album or the artist.
Select the channel currently being played and
press the controller.
"HD" must be shown in the status line
and a digital station received.<
Page 165 of 247
Navigation
Entertainment
Driving tips
163Reference
At a glance
Controls
Communications
Mobility
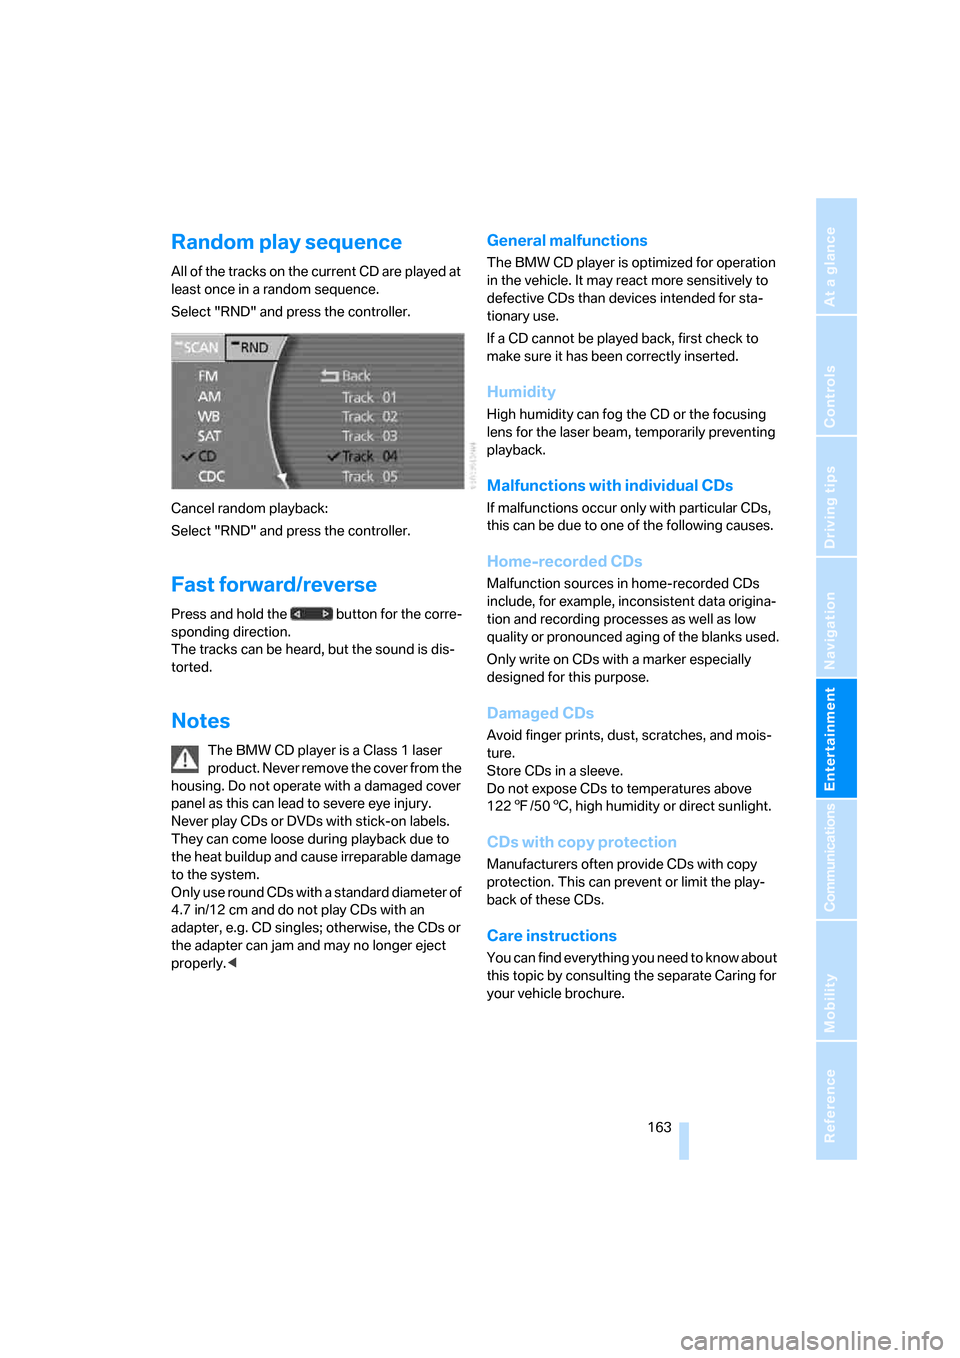
Random play sequence
All of the tracks on the current CD are played at
least once in a random sequence.
Select "RND" and press the controller.
Cancel random playback:
Select "RND" and press the controller.
Fast forward/reverse
Press and hold the button for the corre-
sponding direction.
The tracks can be heard, but the sound is dis-
torted.
Notes
The BMW CD player is a Class 1 laser
product. Never remove the cover from the
housing. Do not operate with a damaged cover
panel as this can lead to severe eye injury.
Never play CDs or DVDs with stick-on labels.
They can come loose during playback due to
the heat buildup and cause irreparable damage
to the system.
Only use round CDs with a standard diameter of
4.7 in/12 cm and do not play CDs with an
adapter, e.g. CD singles; otherwise, the CDs or
the adapter can jam and may no longer eject
properly.<
General malfunctions
The BMW CD player is optimized for operation
in the vehicle. It may react more sensitively to
defective CDs than devices intended for sta-
tionary use.
If a CD cannot be played back, first check to
make sure it has been correctly inserted.
Humidity
High humidity can fog the CD or the focusing
lens for the laser beam, temporarily preventing
playback.
Malfunctions with individual CDs
If malfunctions occur only with particular CDs,
this can be due to one of the following causes.
Home-recorded CDs
Malfunction sources in home-recorded CDs
include, for example, inconsistent data origina-
tion and recording processes as well as low
quality or pronounced aging of the blanks used.
Only write on CDs with a marker especially
designed for this purpose.
Damaged CDs
Avoid finger prints, dust, scratches, and mois-
ture.
Store CDs in a sleeve.
Do not expose CDs to temperatures above
1227/506, high humidity or direct sunlight.
CDs with copy protection
Manufacturers often provide CDs with copy
protection. This can prevent or limit the play-
back of these CDs.
Care instructions
You can find everything you need to know about
this topic by consulting the separate Caring for
your vehicle brochure.
Page 167 of 247
Navigation
Entertainment
Driving tips
165Reference
At a glance
Controls
Communications
Mobility
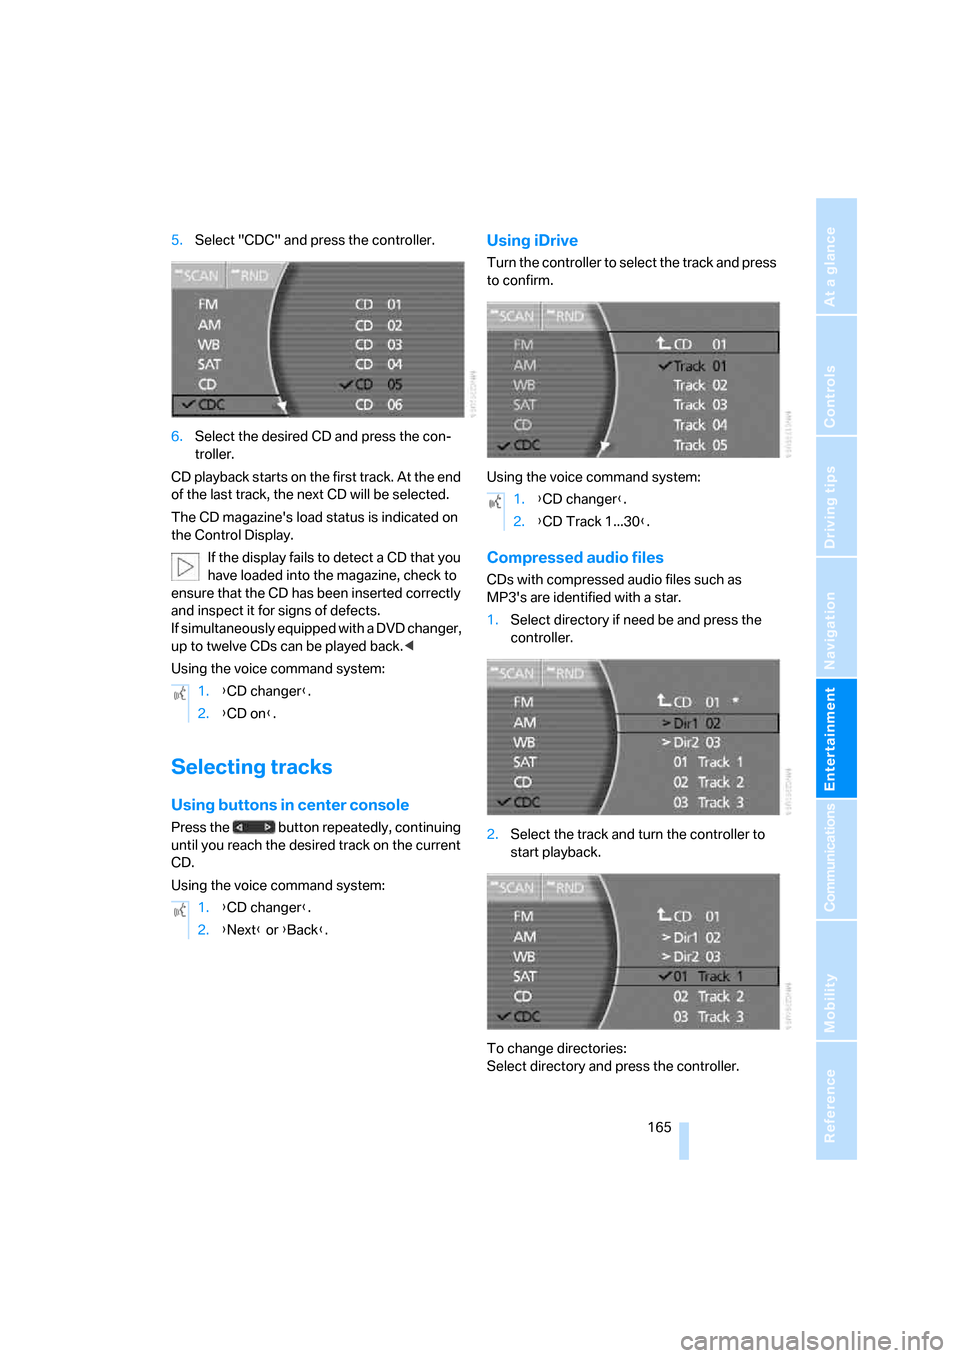
5.Select "CDC" and press the controller.
6.Select the desired CD and press the con-
troller.
CD playback starts on the first track. At the end
of the last track, the next CD will be selected.
The CD magazine's load status is indicated on
the Control Display.
If the display fails to detect a CD that you
have loaded into the magazine, check to
ensure that the CD has been inserted correctly
and inspect it for signs of defects.
If simultaneously equipped with a DVD changer,
up to twelve CDs can be played back.<
Using the voice command system:
Selecting tracks
Using buttons in center console
Press the button repeatedly, continuing
until you reach the desired track on the current
CD.
Using the voice command system:
Using iDrive
Turn the controller to select the track and press
to confirm.
Using the voice command system:
Compressed audio files
CDs with compressed audio files such as
MP3's are identified with a star.
1.Select directory if need be and press the
controller.
2.Select the track and turn the controller to
start playback.
To change directories:
Select directory and press the controller. 1.{CD changer}.
2.{CD on}.
1.{CD changer}.
2.{Next} or {Back}.
1.{CD changer}.
2.{CD Track 1...30}.
Page 169 of 247
Navigation
Entertainment
Driving tips
167Reference
At a glance
Controls
Communications
Mobility
General malfunctions
The BMW CD changer is optimized for opera-
tion in the vehicle. It may react more sensitively
to defective CDs than devices intended for sta-
tionary use.
If a CD cannot be played back, first check to
make sure it has been correctly inserted.
Humidity
High humidity can fog the CD or the focusing
lens for the laser beam, temporarily preventing
playback.
Malfunctions with individual CDs
If malfunctions occur only with particular CDs,
this can be due to one of the following causes.
Home-recorded CDs
Malfunction sources in home-recorded CDs
include, for example, inconsistent data origina-
tion and recording processes as well as low
quality or pronounced aging of the blanks used.
Only write on CDs with a marker especially
designed for this purpose.
Damaged CDs
Avoid finger prints, dust, scratches, and mois-
ture.
Store CDs in a sleeve.
Do not expose CDs to temperatures above
1227/506, high humidity or direct sunlight.
CDs with copy protection
Manufacturers often provide CDs with copy
protection. This can prevent or limit the play-
back of these CDs.
Care instructions
You can find everything you need to know about
this topic by consulting the separate Caring for
your vehicle brochure.
Page 171 of 247
Navigation
Entertainment
Driving tips
169Reference
At a glance
Controls
Communications
Mobility
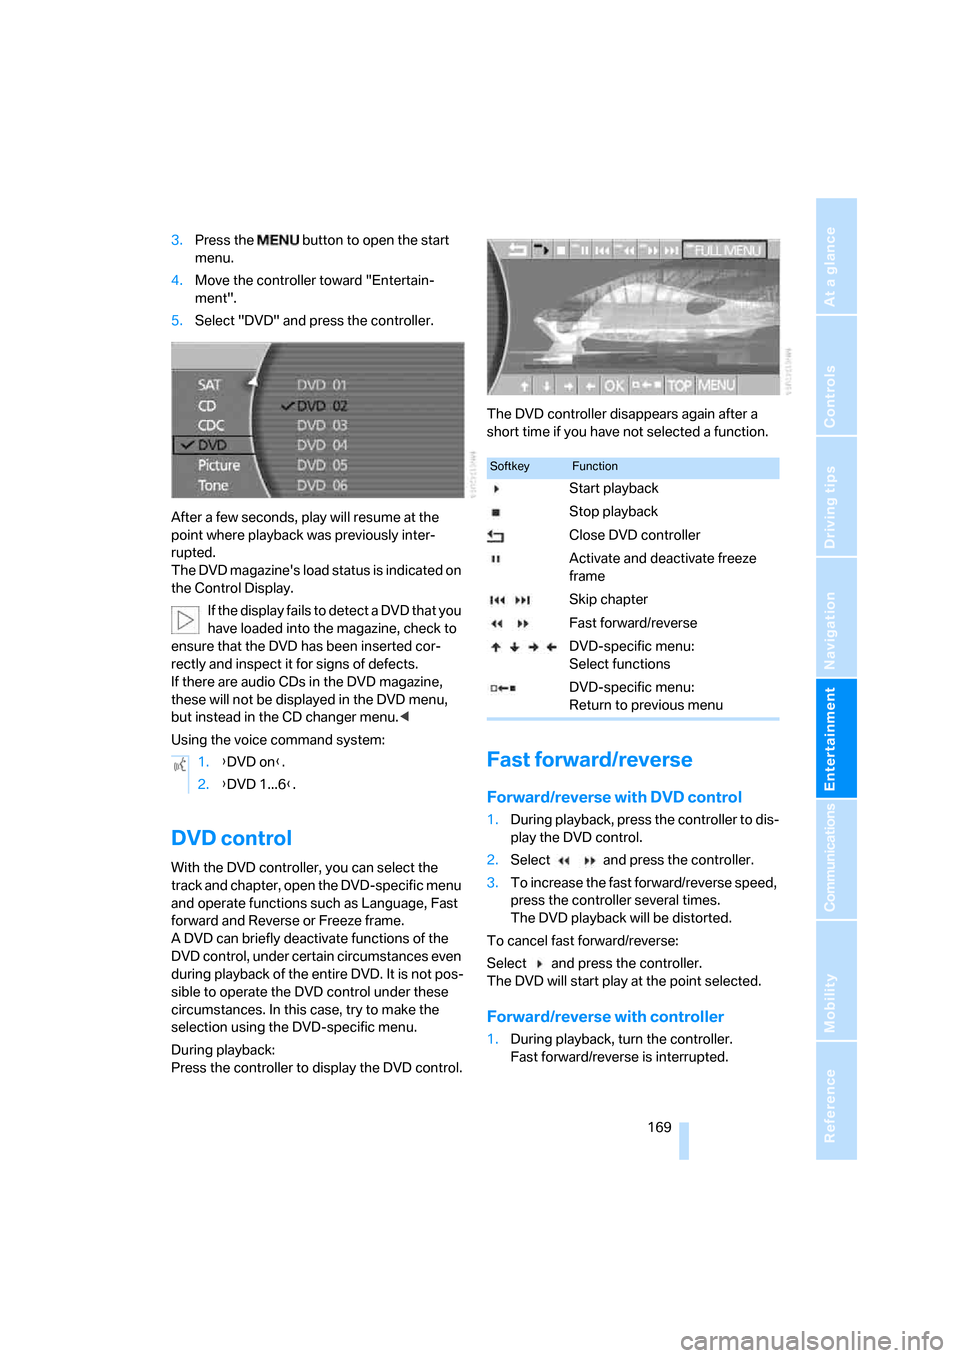
3.Press the button to open the start
menu.
4.Move the controller toward "Entertain-
ment".
5.Select "DVD" and press the controller.
After a few seconds, play will resume at the
point where playback was previously inter-
rupted.
The DVD magazine's load status is indicated on
the Control Display.
If the display fails to detect a DVD that you
have loaded into the magazine, check to
ensure that the DVD has been inserted cor-
rectly and inspect it for signs of defects.
If there are audio CDs in the DVD magazine,
these will not be displayed in the DVD menu,
but instead in the CD changer menu.<
Using the voice command system:
DVD control
With the DVD controller, you can select the
track and chapter, open the DVD-specific menu
and operate functions such as Language, Fast
forward and Reverse or Freeze frame.
A DVD can briefly deactivate functions of the
DVD control, under certain circumstances even
during playback of the entire DVD. It is not pos-
sible to operate the DVD control under these
circumstances. In this case, try to make the
selection using the DVD-specific menu.
During playback:
Press the controller to display the DVD control.The DVD controller disappears again after a
short time if you have not selected a function.
Fast forward/reverse
Forward/reverse with DVD control
1.During playback, press the controller to dis-
play the DVD control.
2.Select and press the controller.
3.To increase the fast forward/reverse speed,
press the controller several times.
The DVD playback will be distorted.
To cancel fast forward/reverse:
Select and press the controller.
The DVD will start play at the point selected.
Forward/reverse with controller
1.During playback, turn the controller.
Fast forward/reverse is interrupted. 1.{DVD on}.
2.{DVD 1...6}.
SoftkeyFunction
Start playback
Stop playback
Close DVD controller
Activate and deactivate freeze
frame
Skip chapter
Fast forward/reverse
DVD-specific menu:
Select functions
DVD-specific menu:
Return to previous menu
Page 173 of 247
Navigation
Entertainment
Driving tips
171Reference
At a glance
Controls
Communications
Mobility
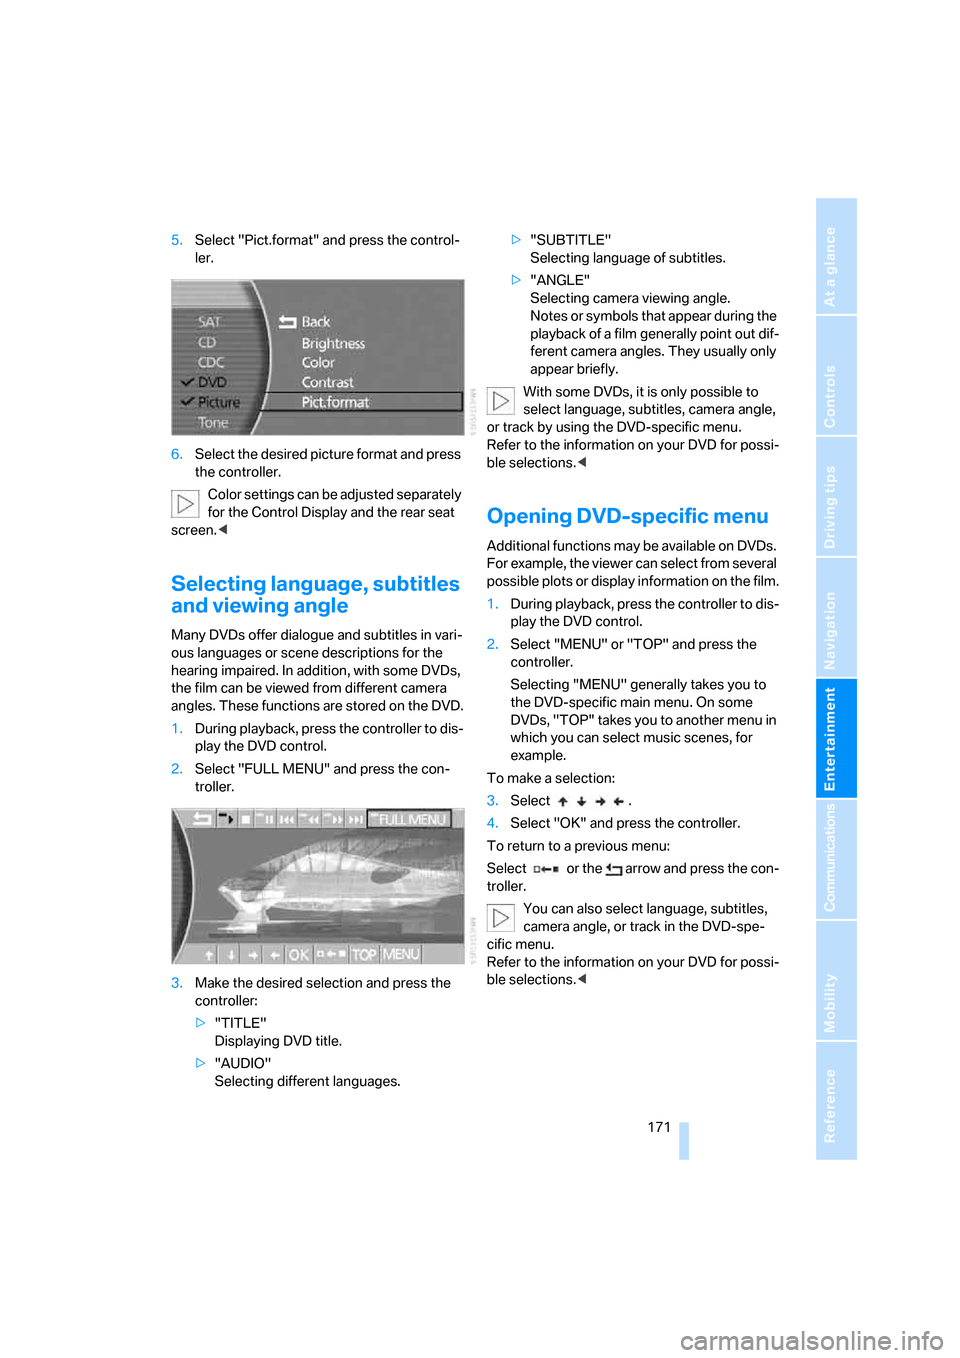
5.Select "Pict.format" and press the control-
ler.
6.Select the desired picture format and press
the controller.
Color settings can be adjusted separately
for the Control Display and the rear seat
screen.<
Selecting language, subtitles
and viewing angle
Many DVDs offer dialogue and subtitles in vari-
ous languages or scene descriptions for the
hearing impaired. In addition, with some DVDs,
the film can be viewed from different camera
angles. These functions are stored on the DVD.
1.During playback, press the controller to dis-
play the DVD control.
2.Select "FULL MENU" and press the con-
troller.
3.Make the desired selection and press the
controller:
>"TITLE"
Displaying DVD title.
>"AUDIO"
Selecting different languages.>"SUBTITLE"
Selecting language of subtitles.
>"ANGLE"
Selecting camera viewing angle.
Notes or symbols that appear during the
playback of a film generally point out dif-
ferent camera angles. They usually only
appear briefly.
With some DVDs, it is only possible to
select language, subtitles, camera angle,
or track by using the DVD-specific menu.
Refer to the information on your DVD for possi-
ble selections.<
Opening DVD-specific menu
Additional functions may be available on DVDs.
For example, the viewer can select from several
possible plots or display information on the film.
1.During playback, press the controller to dis-
play the DVD control.
2.Select "MENU" or "TOP" and press the
controller.
Selecting "MENU" generally takes you to
the DVD-specific main menu. On some
DVDs, "TOP" takes you to another menu in
which you can select music scenes, for
example.
To make a selection:
3.Select .
4.Select "OK" and press the controller.
To return to a previous menu:
Select or the arrow and press the con-
troller.
You can also select language, subtitles,
camera angle, or track in the DVD-spe-
cific menu.
Refer to the information on your DVD for possi-
ble selections.<
Page 175 of 247

Navigation
Entertainment
Driving tips
173Reference
At a glance
Controls
Communications
Mobility
Page 179 of 247
177
Entertainment
Reference
At a glance
Controls
Driving tips Communications
Navigation
Mobility
Hands-free system
The hands-free microphone is located on the
left-hand side on the headliner.
The hands-free system is activated whenever
you establish or receive a call using the follow-
ing:
>Buttons on the steering wheel, page11
>Voice command system
*, page23, except
for incoming calls
>Retracting telephone keypad
>iDrive, refer to Using the phone, page182
Volume adjustment
You can set the volume for the hands-free sys-
tem and the ring tone separately:
>Turn knob during a call.
>Turn knob during an incoming call.
This volume is maintained, even if the other
audio sources are set to minimum volume.
The setting is stored for the remote control cur-
rently in use.
Retracting telephone keypad
The telephone keypad allows you to use all of
the basic mobile phone functions without ever
picking up the handset.
Calls are automatically routed through the
hands-free system.
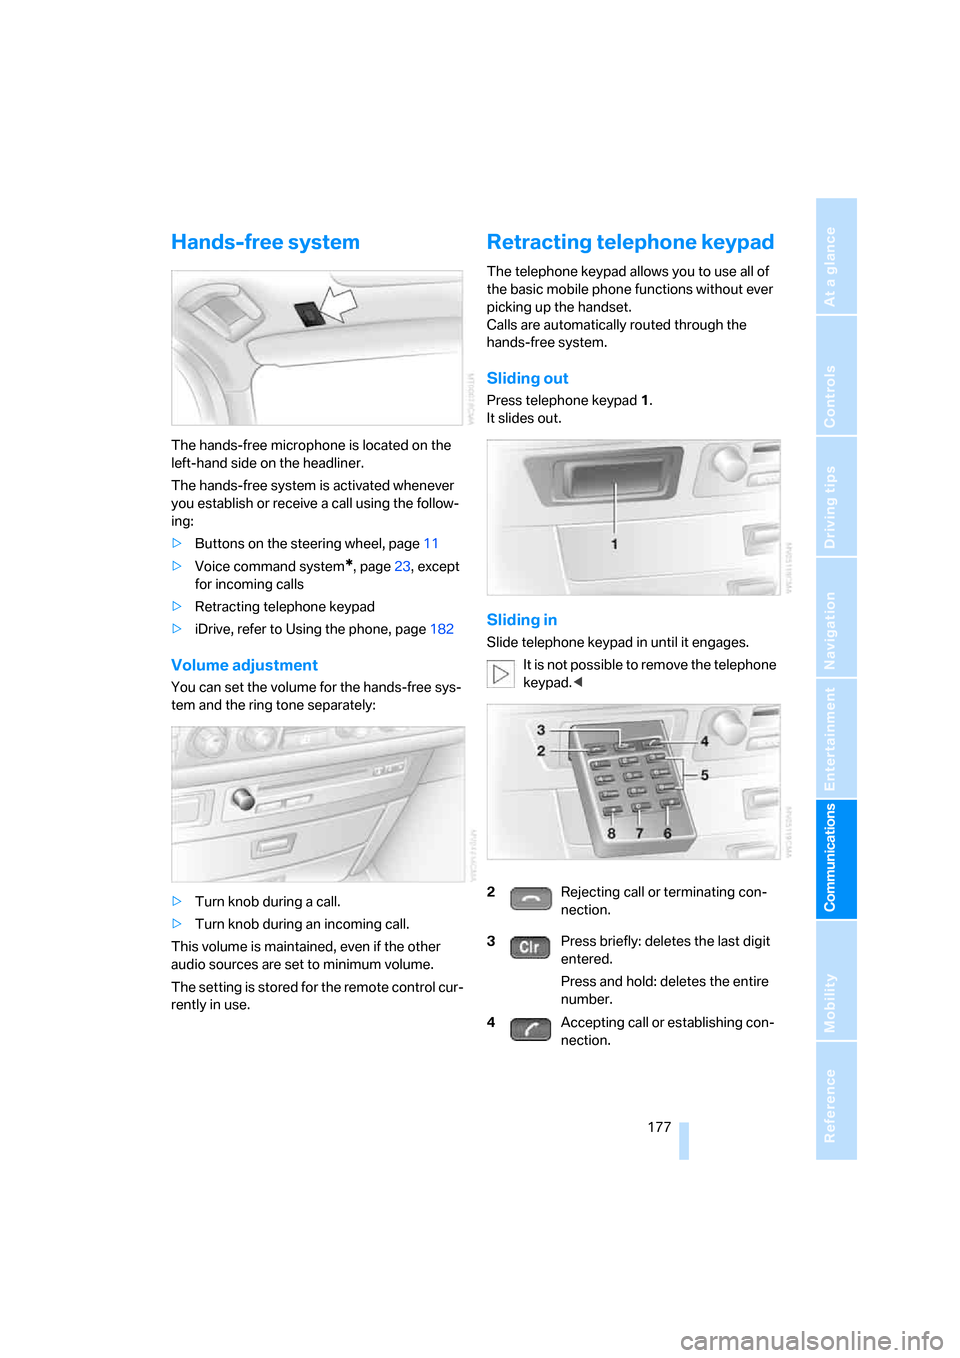
Sliding out
Press telephone keypad1.
It slides out.
Sliding in
Slide telephone keypad in until it engages.
It is not possible to remove the telephone
keypad.<
2Rejecting call or terminating con-
nection.
3Press briefly: deletes the last digit
entered.
Press and hold: deletes the entire
number.
4Accepting call or establishing con-
nection.