2006 BMW 650I COUPE navigation
[x] Cancel search: navigationPage 194 of 236
Mobility
193Reference
At a glance
Controls
Driving tips
Communications
Navigation
Entertainment
You can also call BMW of North America at
1-800-831-1117 or visit the website at
www.bmwusa.com to obtain this information.
Do not use oil additives; under some
circumstances, they can harm your
engine.<
Viscosity grades
The viscosity is a measure of the thickness of
the oil and is specified in SAE grades.
The choice of the right SAE grade is based on
the climatic conditions in the region in which
you normally drive your BMW.
Approved oils belong to the SAE grades
5W-40 and 5W-30.<
These oils can be used for driving at all outside
temperatures.
Coolant
Do not open the cooling system when the
engine is hot. Escaping coolant can cause
burns.<
Coolant consists of water and coolant additive.
Not all commercially available additives are suit-
able for your BMW. Ask your BMW center for
suitable additives.
Only use suitable additives; otherwise,
engine damage may result. The additives
present a health hazard.<
Always observe all applicable environ-
mental laws and regulations when dis-
posing of used coolant additives.<
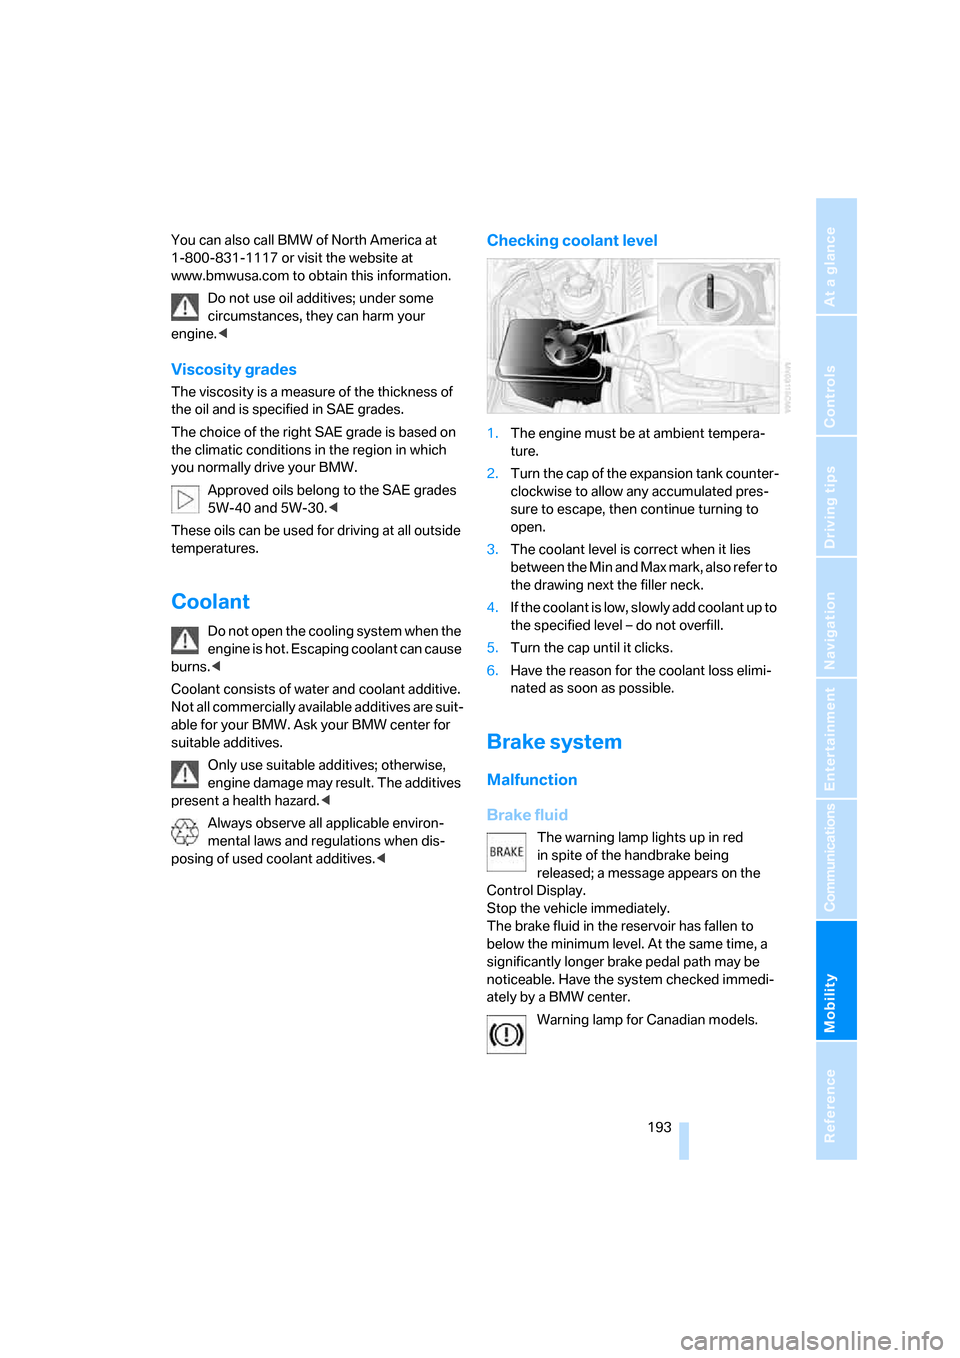
Checking coolant level
1.The engine must be at ambient tempera-
ture.
2.Turn the cap of the expansion tank counter-
clockwise to allow any accumulated pres-
sure to escape, then continue turning to
open.
3.The coolant level is correct when it lies
between the Min and Max mark, also refer to
the drawing next the filler neck.
4.If the coolant is low, slowly add coolant up to
the specified level – do not overfill.
5.Turn the cap until it clicks.
6.Have the reason for the coolant loss elimi-
nated as soon as possible.
Brake system
Malfunction
Brake fluid
The warning lamp lights up in red
in spite of the handbrake being
released; a message appears on the
Control Display.
Stop the vehicle immediately.
The brake fluid in the reservoir has fallen to
below the minimum level. At the same time, a
significantly longer brake pedal path may be
noticeable. Have the system checked immedi-
ately by a BMW center.
Warning lamp for Canadian models.
Page 196 of 236

Mobility
195Reference
At a glance
Controls
Driving tips
Communications
Navigation
Entertainment
Maintenance
The BMW Maintenance
System
The BMW Maintenance System supports the
preservation of the traffic and operating safety
of your BMW. The service schedule also
includes operations related to the vehicle's
comfort and convenience features, such as
replacement of the filters for the inside air.
The ultimate objective is to ensure economical
maintenance by providing the ideal service for
your vehicle.
Should the day come when you decide to sell
your BMW, you will find that a complete dealer
service history is an asset of inestimable value.
CBS Condition Based Service
Sensors and special algorithms take the differ-
ent driving conditions of your BMW into
account. Condition Based Service uses this to
determine the current and future service
requirements. By letting you define a service
and maintenance regimen that reflects your
own individual requirements, the system builds
the basis for trouble-free driving.
You can set the Control Display to show
remaining distances and times of selected
maintenance intervals and legally mandated
deadlines, refer to page77:
>Engine oil
>Brakes, front and rear separately
>Microfilter/activated-charcoal filter
>Brake fluid>Spark plugs
>Vehicle check
>Legally required tests depending on local
regulations
Service data in remote control
Your vehicle stores this information continu-
ously in the remote control while the vehicle is
being driven. After accessing the data stored in
the remote control, your BMW Service Advisor
can suggest precisely the right array of service
procedures for your own individual vehicle.
For this reason, when you take your vehicle in
for service, you should give the BMW Service
Advisor the remote control last used to drive it.
Make sure the date in the iDrive is always
set correctly, refer to page83; otherwise,
the effectiveness of CBS Condition Based Ser-
vice is not ensured.<
Service and Warranty Information
Booklet for US models and
Warranty and Service Guide Booklet
for Canadian models
Please consult your Service and Warranty Infor-
mation Booklet for US models and Warranty
and Service Guide Booklet for Canadian models
for additional information on service require-
ments.
Have service and repair operations per-
formed at your BMW center.
Take the time to ensure that these service pro-
cedures are confirmed by entries in your vehi-
cle's Service and Warranty Information Booklet
for US models and Warranty and Service Guide
Booklet for Canadian models. These entries
verify that your vehicle has received the speci-
fied regular maintenance, and may also be
required when submitting warranty claims.<
Page 198 of 236
Mobility
197Reference
At a glance
Controls
Driving tips
Communications
Navigation
Entertainment
Replacing components
Onboard tool kit
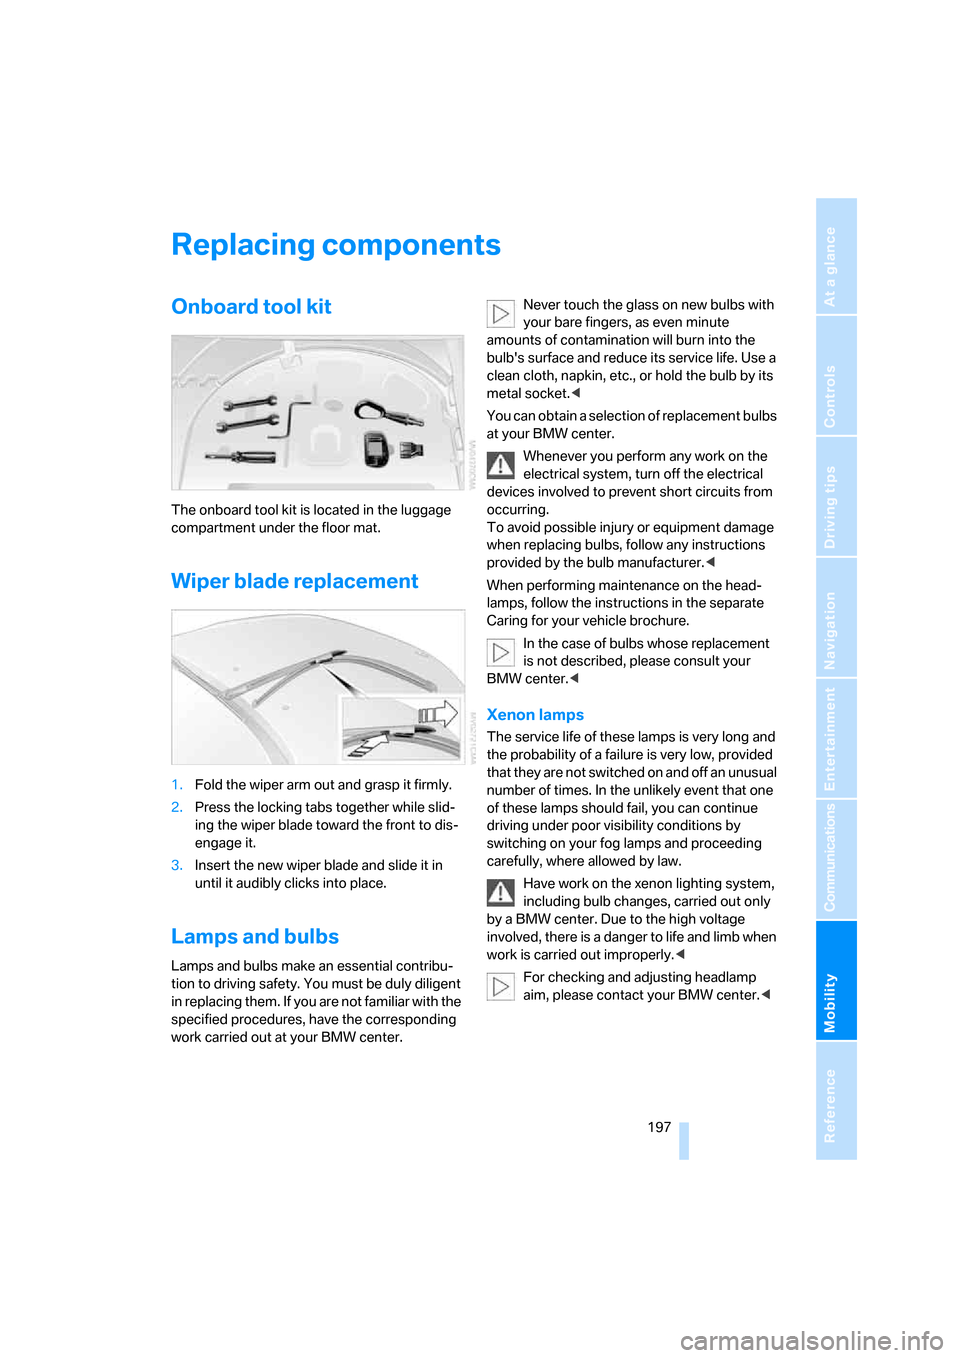
The onboard tool kit is located in the luggage
compartment under the floor mat.
Wiper blade replacement
1.Fold the wiper arm out and grasp it firmly.
2.Press the locking tabs together while slid-
ing the wiper blade toward the front to dis-
engage it.
3.Insert the new wiper blade and slide it in
until it audibly clicks into place.
Lamps and bulbs
Lamps and bulbs make an essential contribu-
tion to driving safety. You must be duly diligent
in replacing them. If you are not familiar with the
specified procedures, have the corresponding
work carried out at your BMW center.Never touch the glass on new bulbs with
your bare fingers, as even minute
amounts of contamination will burn into the
bulb's surface and reduce its service life. Use a
clean cloth, napkin, etc., or hold the bulb by its
metal socket.<
You can obtain a selection of replacement bulbs
at your BMW center.
Whenever you perform any work on the
electrical system, turn off the electrical
devices involved to prevent short circuits from
occurring.
To avoid possible injury or equipment damage
when replacing bulbs, follow any instructions
provided by the bulb manufacturer.<
When performing maintenance on the head-
lamps, follow the instructions in the separate
Caring for your vehicle brochure.
In the case of bulbs whose replacement
is not described, please consult your
BMW center.<
Xenon lamps
The service life of these lamps is very long and
the probability of a failure is very low, provided
that they are not switched on and off an unusual
number of times. In the unlikely event that one
of these lamps should fail, you can continue
driving under poor visibility conditions by
switching on your fog lamps and proceeding
carefully, where allowed by law.
Have work on the xenon lighting system,
including bulb changes, carried out only
by a BMW center. Due to the high voltage
involved, there is a danger to life and limb when
work is carried out improperly.<
For checking and adjusting headlamp
aim, please contact your BMW center.<
Page 200 of 236
Mobility
199Reference
At a glance
Controls
Driving tips
Communications
Navigation
Entertainment
4.Turn the bulb holder to the left and remove,
refer to arrow.
5.Remove and replace the bulb.
Sidemarker
Bulb 5 watts, WY5W ST
The bulb can be replaced via a cover at the front
of the wheel well, refer to the description for
turn signal lamp 2.
1.The bulb holder of the sidemarker lamp is
located toward the outside of the vehicle
next to the bulb holder of turn signal lamp 2.
2.Turn the bulb holder to the left and remove.
3.Remove and replace the bulb.
Side turn signals
Bulb 5 watts, WY 5 W
1.Press against the front edge of the lamp
with the tip of your finger, then push it to the
rear, release the snap connection at the
front and take it off the trim strip.
2.Turn the bulb holder to the left by 905 and
remove.
3.Remove and replace the bulb.
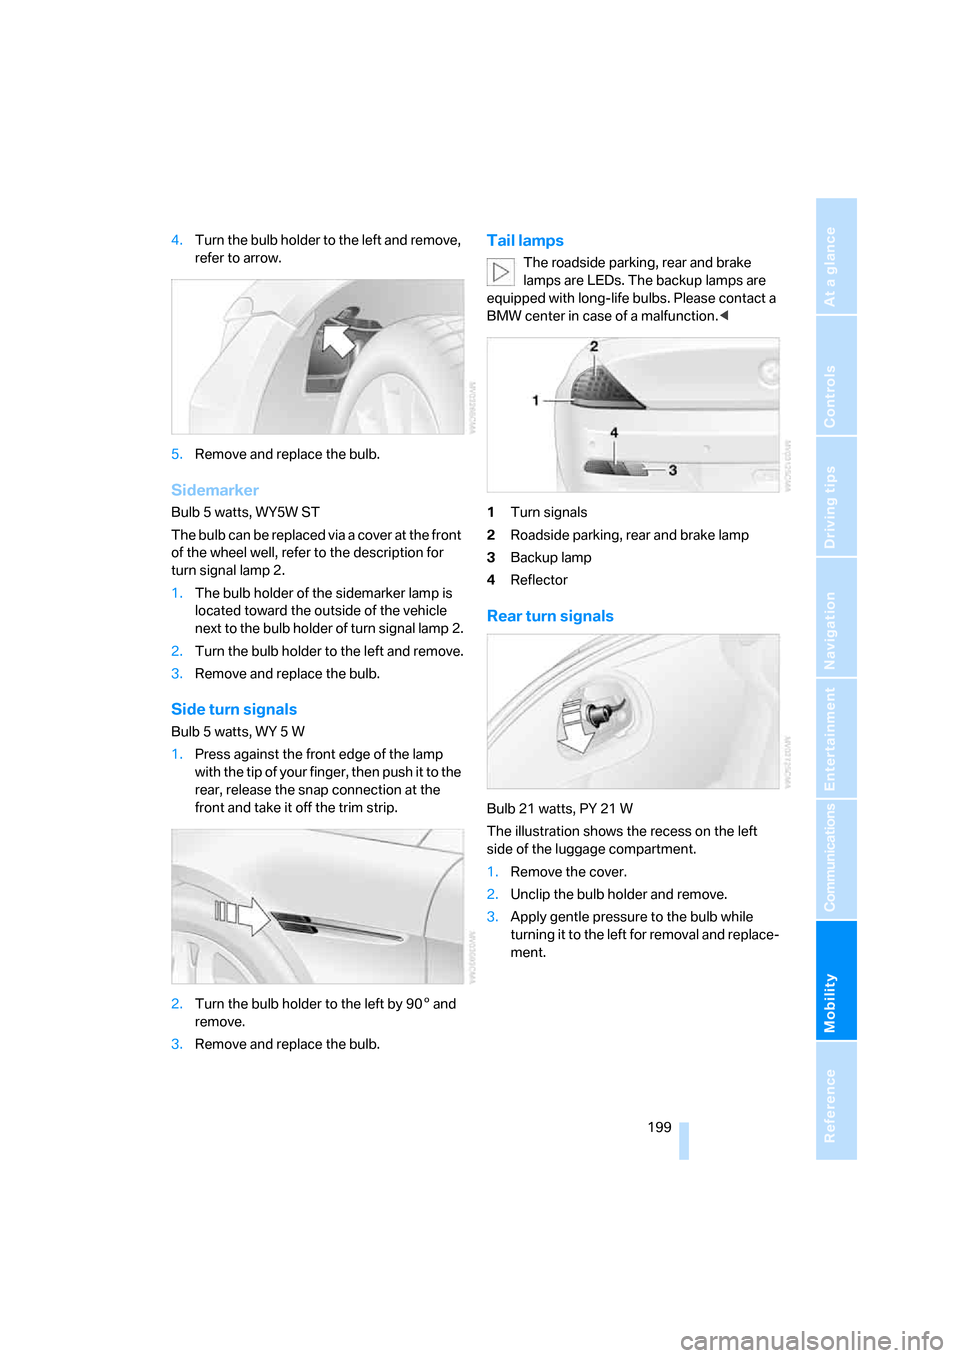
Tail lamps
The roadside parking, rear and brake
lamps are LEDs. The backup lamps are
equipped with long-life bulbs. Please contact a
BMW center in case of a malfunction.<
1Turn signals
2Roadside parking, rear and brake lamp
3Backup lamp
4Reflector
Rear turn signals
Bulb 21 watts, PY 21 W
The illustration shows the recess on the left
side of the luggage compartment.
1.Remove the cover.
2.Unclip the bulb holder and remove.
3.Apply gentle pressure to the bulb while
turning it to the left for removal and replace-
ment.
Page 202 of 236
Mobility
201Reference
At a glance
Controls
Driving tips
Communications
Navigation
Entertainment
Power failure
Following a temporary interruption of the power
supply, the operation of some equipment is lim-
ited and must be reinitialized. Individual settings
are also lost and must be updated:
>Seat, mirror and steering wheel memory
The position must be stored again, refer to
page49.
>Time and Date
The values must be updated, refer to
page82.
>Radio
Stations must be stored again if necessary,
refer to page146.
>Navigation system
Wait until the system starts, refer to
page137.
Fuses
Never attempt to repair a blown fuse, and
do not replace a defective fuse with a sub-
stitute of another color or amperage rating, as
this could lead to overloading of the wiring, ulti-
mately resulting in a fire in the vehicle.<
Spare fuses and a pair of plastic tweezers are
located in the compartment for the onboard tool
kit, refer to page197.
Information on fuse allocation is located below
the bracket for the onboard tool kit, see below.
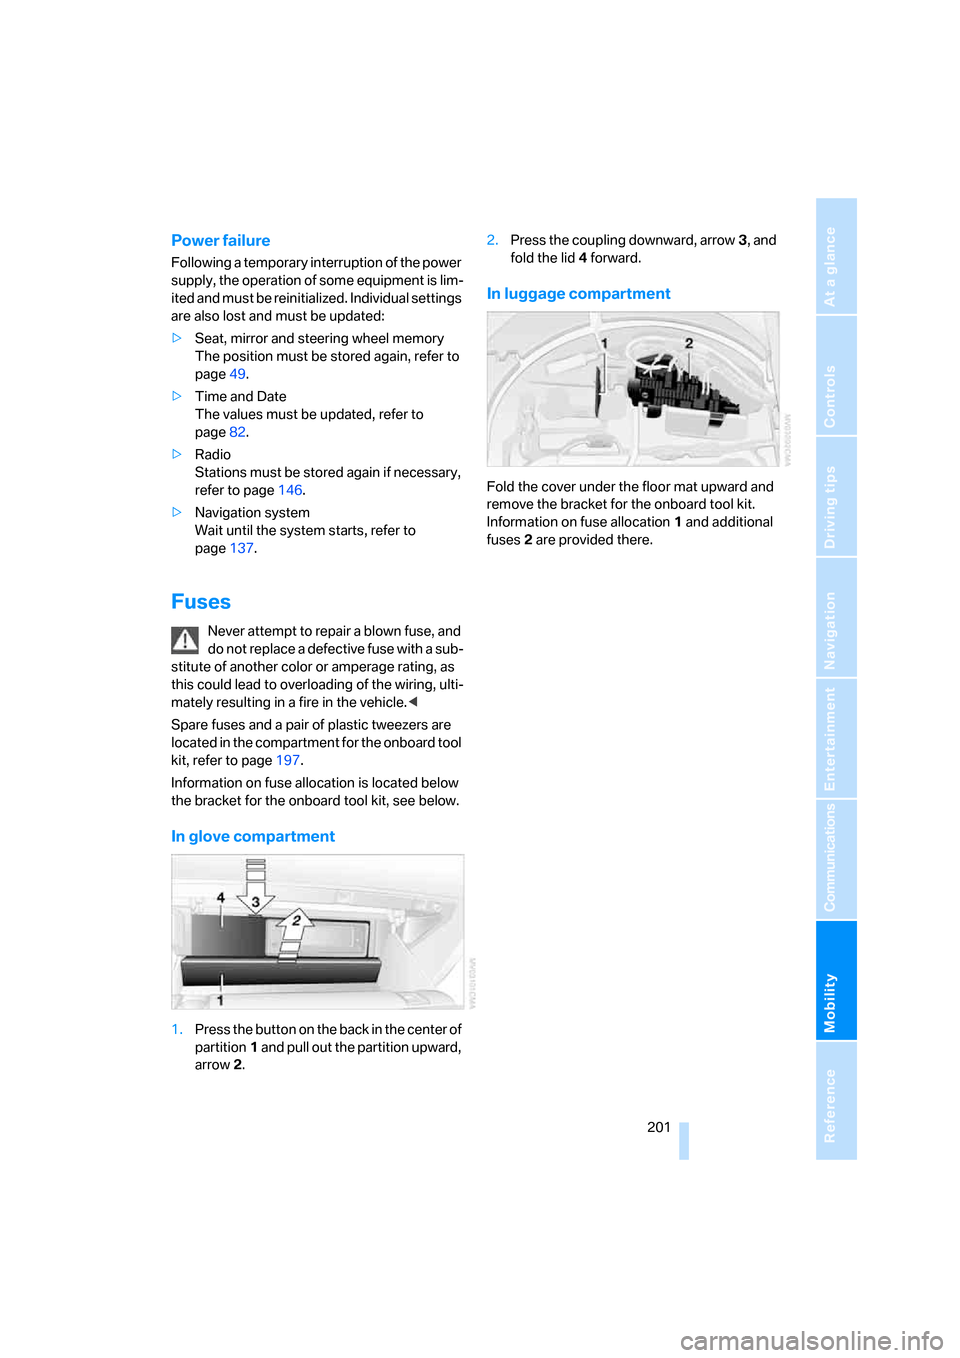
In glove compartment
1.Press the button on the back in the center of
partition1 and pull out the partition upward,
arrow2.2.Press the coupling downward, arrow3, and
fold the lid 4 forward.
In luggage compartment
Fold the cover under the floor mat upward and
remove the bracket for the onboard tool kit.
Information on fuse allocation1 and additional
fuses2 are provided there.
Page 204 of 236
Mobility
203Reference
At a glance
Controls
Driving tips
Communications
Navigation
Entertainment
First-aid kit*
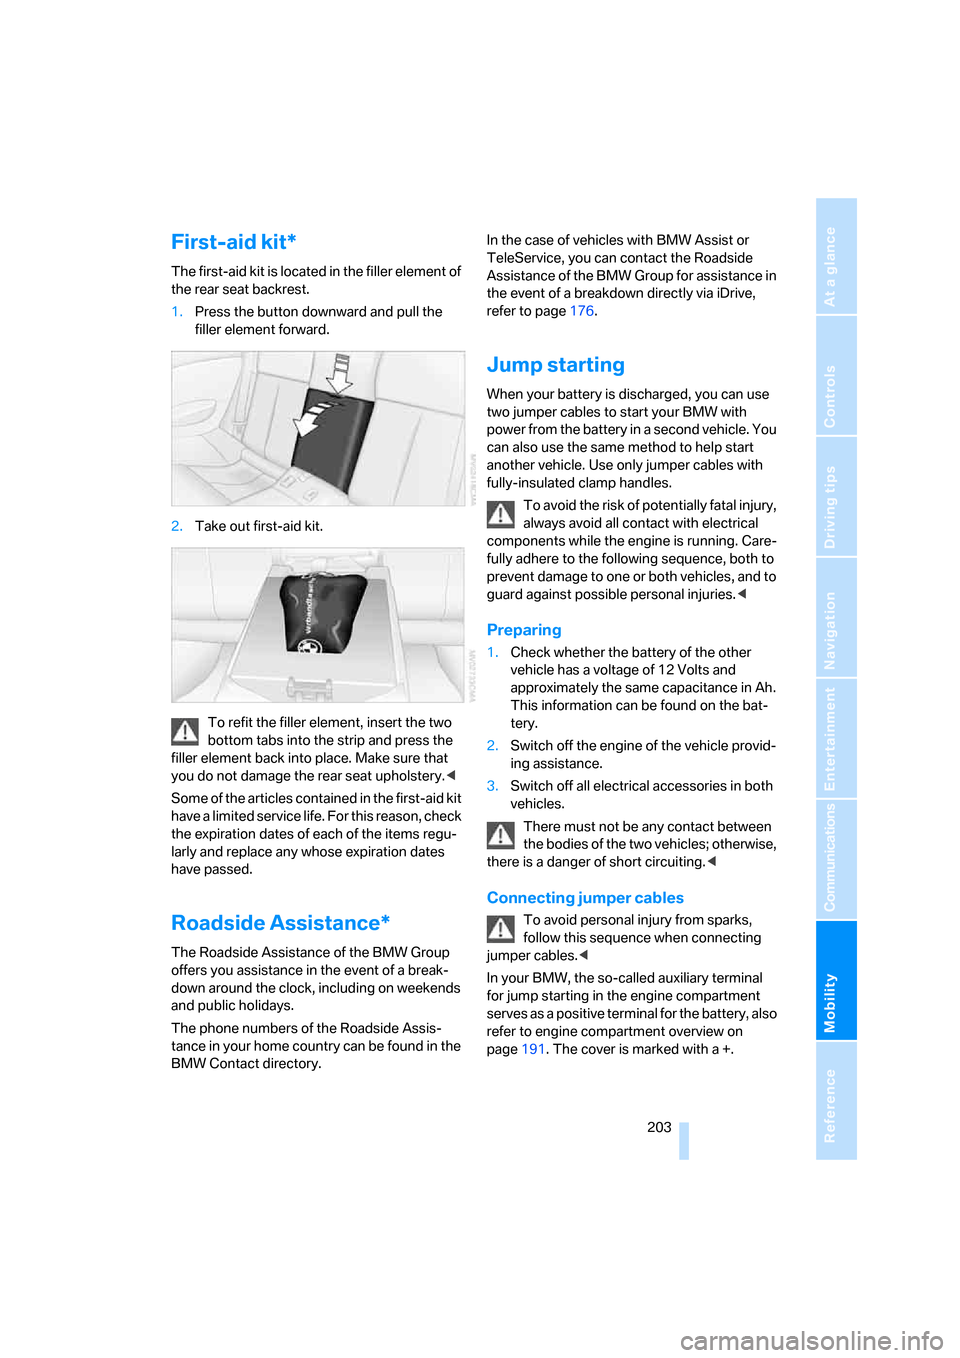
The first-aid kit is located in the filler element of
the rear seat backrest.
1.Press the button downward and pull the
filler element forward.
2.Take out first-aid kit.
To refit the filler element, insert the two
bottom tabs into the strip and press the
filler element back into place. Make sure that
you do not damage the rear seat upholstery.<
Some of the articles contained in the first-aid kit
have a limited service life. For this reason, check
the expiration dates of each of the items regu-
larly and replace any whose expiration dates
have passed.
Roadside Assistance*
The Roadside Assistance of the BMW Group
offers you assistance in the event of a break-
down around the clock, including on weekends
and public holidays.
The phone numbers of the Roadside Assis-
tance in your home country can be found in the
BMW Contact directory.In the case of vehicles with BMW Assist or
TeleService, you can contact the Roadside
Assistance of the BMW Group for assistance in
the event of a breakdown directly via iDrive,
refer to page176.
Jump starting
When your battery is discharged, you can use
two jumper cables to start your BMW with
power from the battery in a second vehicle. You
can also use the same method to help start
another vehicle. Use only jumper cables with
fully-insulated clamp handles.
To avoid the risk of potentially fatal injury,
always avoid all contact with electrical
components while the engine is running. Care-
fully adhere to the following sequence, both to
prevent damage to one or both vehicles, and to
guard against possible personal injuries.<
Preparing
1.Check whether the battery of the other
vehicle has a voltage of 12 Volts and
approximately the same capacitance in Ah.
This information can be found on the bat-
tery.
2.Switch off the engine of the vehicle provid-
ing assistance.
3.Switch off all electrical accessories in both
vehicles.
There must not be any contact between
the bodies of the two vehicles; otherwise,
there is a danger of short circuiting.<
Connecting jumper cables
To avoid personal injury from sparks,
follow this sequence when connecting
jumper cables.<
In your BMW, the so-called auxiliary terminal
for jump starting in the engine compartment
serves as a positive terminal for the battery, also
refer to engine compartment overview on
page191. The cover is marked with a +.
Page 206 of 236
Mobility
205Reference
At a glance
Controls
Driving tips
Communications
Navigation
Entertainment
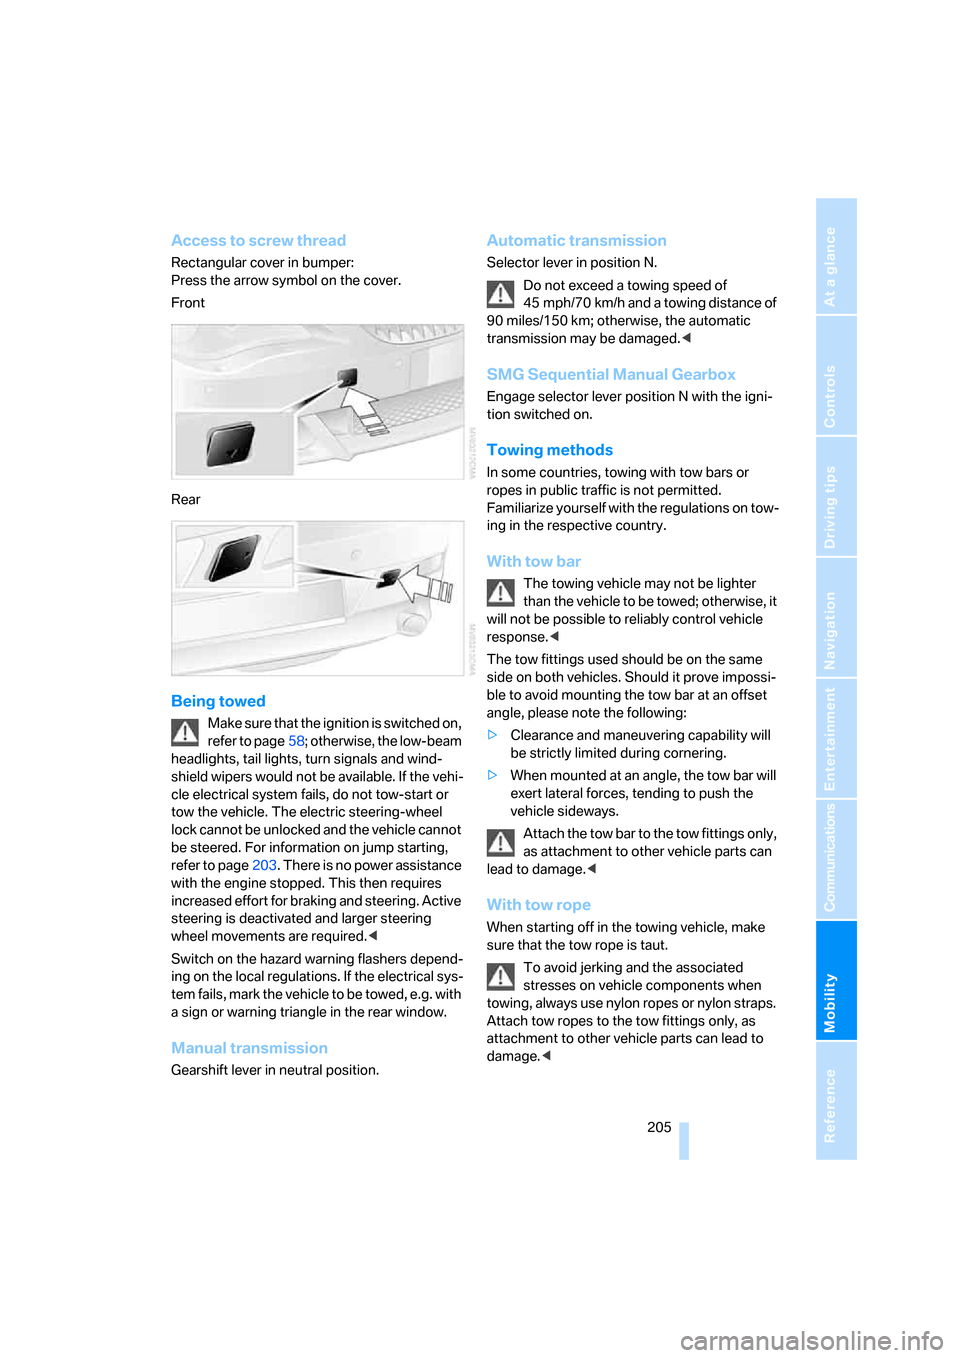
Access to screw thread
Rectangular cover in bumper:
Press the arrow symbol on the cover.
Front
Rear
Being towed
Make sure that the ignition is switched on,
refer to page58; otherwise, the low-beam
headlights, tail lights, turn signals and wind-
shield wipers would not be available. If the vehi-
cle electrical system fails, do not tow-start or
tow the vehicle. The electric steering-wheel
lock cannot be unlocked and the vehicle cannot
be steered. For information on jump starting,
refer to page203. There is no power assistance
with the engine stopped. This then requires
increased effort for braking and steering. Active
steering is deactivated and larger steering
wheel movements are required.<
Switch on the hazard warning flashers depend-
ing on the local regulations. If the electrical sys-
tem fails, mark the vehicle to be towed, e.g. with
a sign or warning triangle in the rear window.
Manual transmission
Gearshift lever in neutral position.
Automatic transmission
Selector lever in position N.
Do not exceed a towing speed of
45 mph/70 km/h and a towing distance of
90 miles/150 km; otherwise, the automatic
transmission may be damaged.<
SMG Sequential Manual Gearbox
Engage selector lever position N with the igni-
tion switched on.
Towing methods
In some countries, towing with tow bars or
ropes in public traffic is not permitted.
Familiarize yourself with the regulations on tow-
ing in the respective country.
With tow bar
The towing vehicle may not be lighter
than the vehicle to be towed; otherwise, it
will not be possible to reliably control vehicle
response.<
The tow fittings used should be on the same
side on both vehicles. Should it prove impossi-
ble to avoid mounting the tow bar at an offset
angle, please note the following:
>Clearance and maneuvering capability will
be strictly limited during cornering.
>When mounted at an angle, the tow bar will
exert lateral forces, tending to push the
vehicle sideways.
Attach the tow bar to the tow fittings only,
as attachment to other vehicle parts can
lead to damage.<
With tow rope
When starting off in the towing vehicle, make
sure that the tow rope is taut.
To avoid jerking and the associated
stresses on vehicle components when
towing, always use nylon ropes or nylon straps.
Attach tow ropes to the tow fittings only, as
attachment to other vehicle parts can lead to
damage.<
Page 208 of 236

Mobility
207Reference
At a glance
Controls
Driving tips
Communications
Navigation
Entertainment