2006 BMW 650I COUPE&CONVERTIBLE remote start
[x] Cancel search: remote startPage 50 of 242
Controls
49Reference
At a glance
Driving tips
Communications
Navigation
Entertainment
Mobility
Seat, mirror and steering
wheel memory
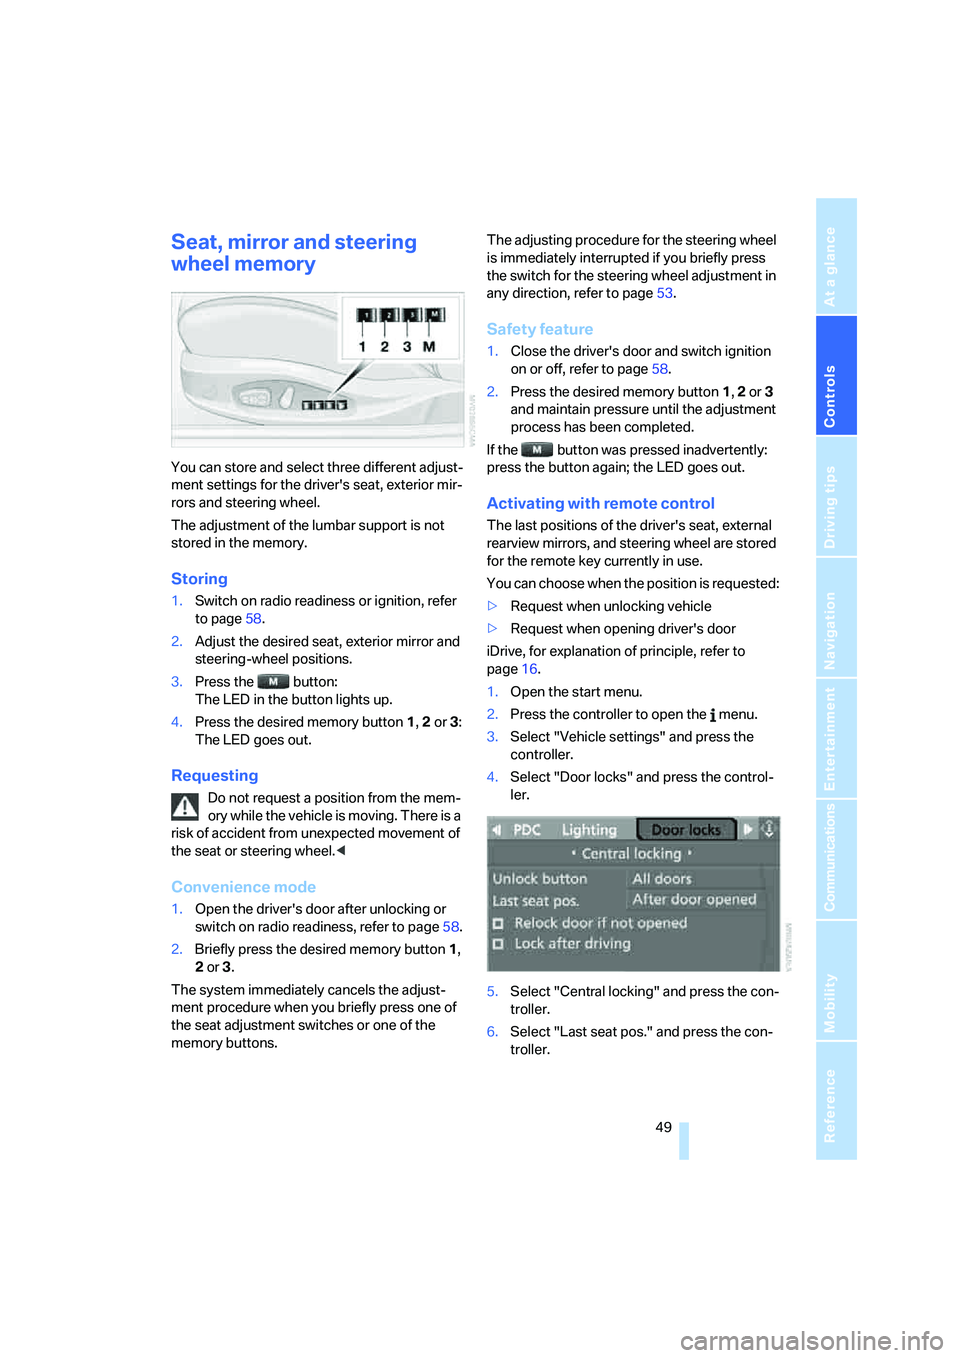
You can store and select three different adjust-
ment settings for the driver's seat, exterior mir-
rors and steering wheel.
The adjustment of the lumbar support is not
stored in the memory.
Storing
1.Switch on radio readiness or ignition, refer
to page58.
2.Adjust the desired seat, exterior mirror and
steering-wheel positions.
3.Press the button:
The LED in the button lights up.
4.Press the desired memory button 1, 2 or3:
The LED goes out.
Requesting
Do not request a position from the mem-
ory while the vehicle is moving. There is a
risk of accident from unexpected movement of
the seat or steering wheel.<
Convenience mode
1.Open the driver's door after unlocking or
switch on radio readiness, refer to page58.
2.Briefly press the desired memory button1,
2 or3.
The system immediately cancels the adjust-
ment procedure when you briefly press one of
the seat adjustment switches or one of the
memory buttons.The adjusting procedure for the steering wheel
is immediately interrupted if you briefly press
the switch for the steering wheel adjustment in
any direction, refer to page53.
Safety feature
1.Close the driver's door and switch ignition
on or off, refer to page58.
2.Press the desired memory button 1, 2 or3
and maintain pressure until the adjustment
process has been completed.
If the button was pressed inadvertently:
press the button again; the LED goes out.
Activating with remote control
The last positions of the driver's seat, external
rearview mirrors, and steering wheel are stored
for the remote key currently in use.
You can choose when the position is requested:
>Request when unlocking vehicle
>Request when opening driver's door
iDrive, for explanation of principle, refer to
page16.
1.Open the start menu.
2.Press the controller to open the menu.
3.Select "Vehicle settings" and press the
controller.
4.Select "Door locks" and press the control-
ler.
5.Select "Central locking" and press the con-
troller.
6.Select "Last seat pos." and press the con-
troller.
Page 55 of 242
Adjustments
54
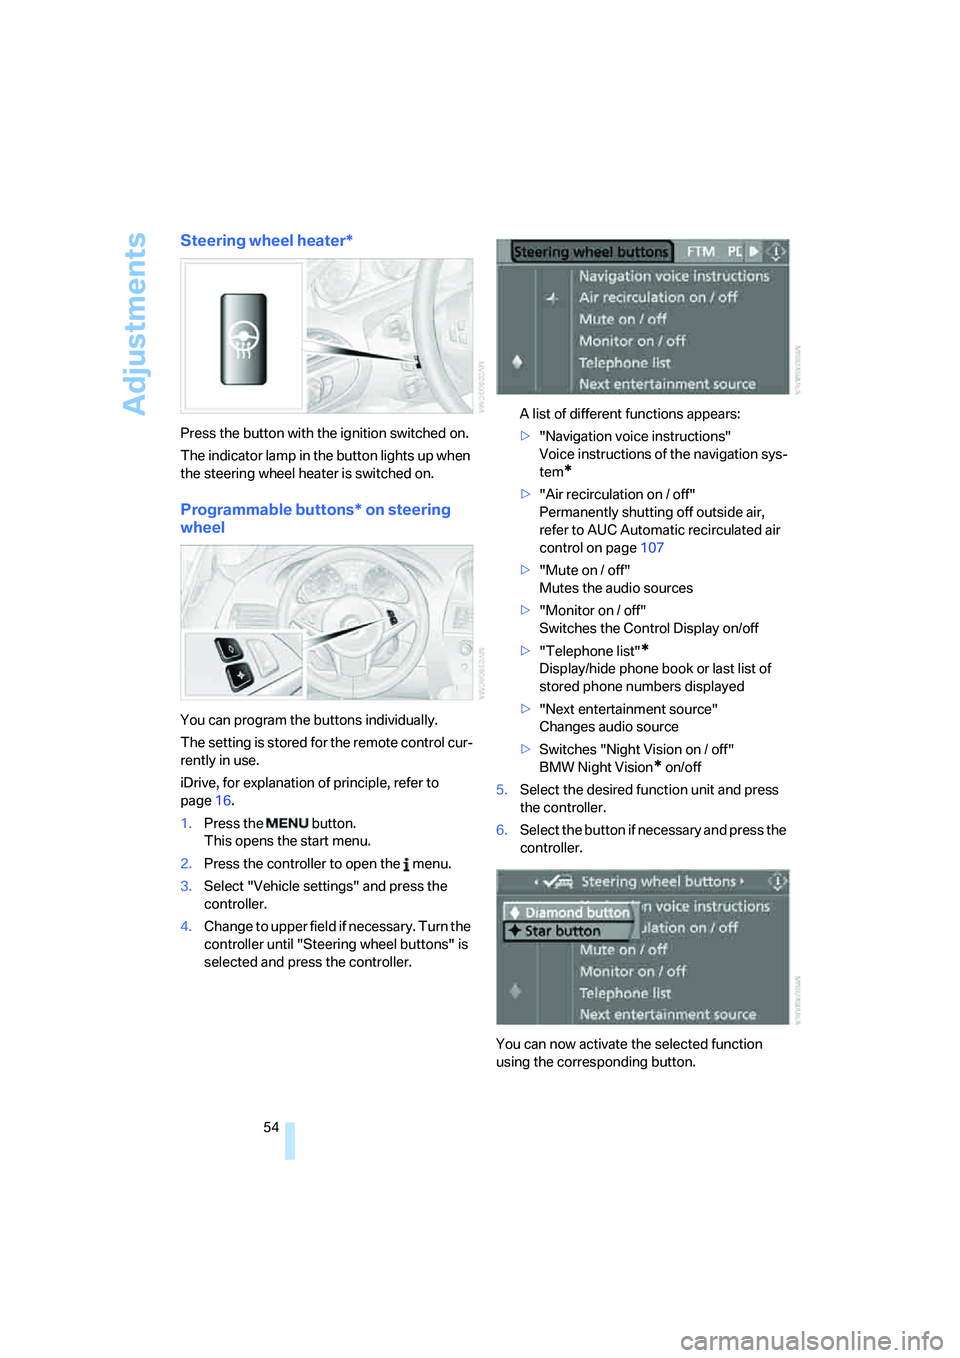
Steering wheel heater*
Press the button with the ignition switched on.
The indicator lamp in the button lights up when
the steering wheel heater is switched on.
Programmable buttons* on steering
wheel
You can program the buttons individually.
The setting is stored for the remote control cur-
rently in use.
iDrive, for explanation of principle, refer to
page16.
1.Press the button.
This opens the start menu.
2.Press the controller to open the menu.
3.Select "Vehicle settings" and press the
controller.
4.Change to upper field if necessary. Turn the
controller until "Steering wheel buttons" is
selected and press the controller.A list of different functions appears:
>"Navigation voice instructions"
Voice instructions of the navigation sys-
tem
*
>"Air recirculation on / off"
Permanently shutting off outside air,
refer to AUC Automatic recirculated air
control on page107
>"Mute on / off"
Mutes the audio sources
>"Monitor on / off"
Switches the Control Display on/off
>"Telephone list"
*
Display/hide phone book or last list of
stored phone numbers displayed
>"Next entertainment source"
Changes audio source
>Switches "Night Vision on / off"
BMW Night Vision
* on/off
5.Select the desired function unit and press
the controller.
6.Select the button if necessary and press the
controller.
You can now activate the selected function
using the corresponding button.
Page 59 of 242
Driving
58
Driving
Ignition lock
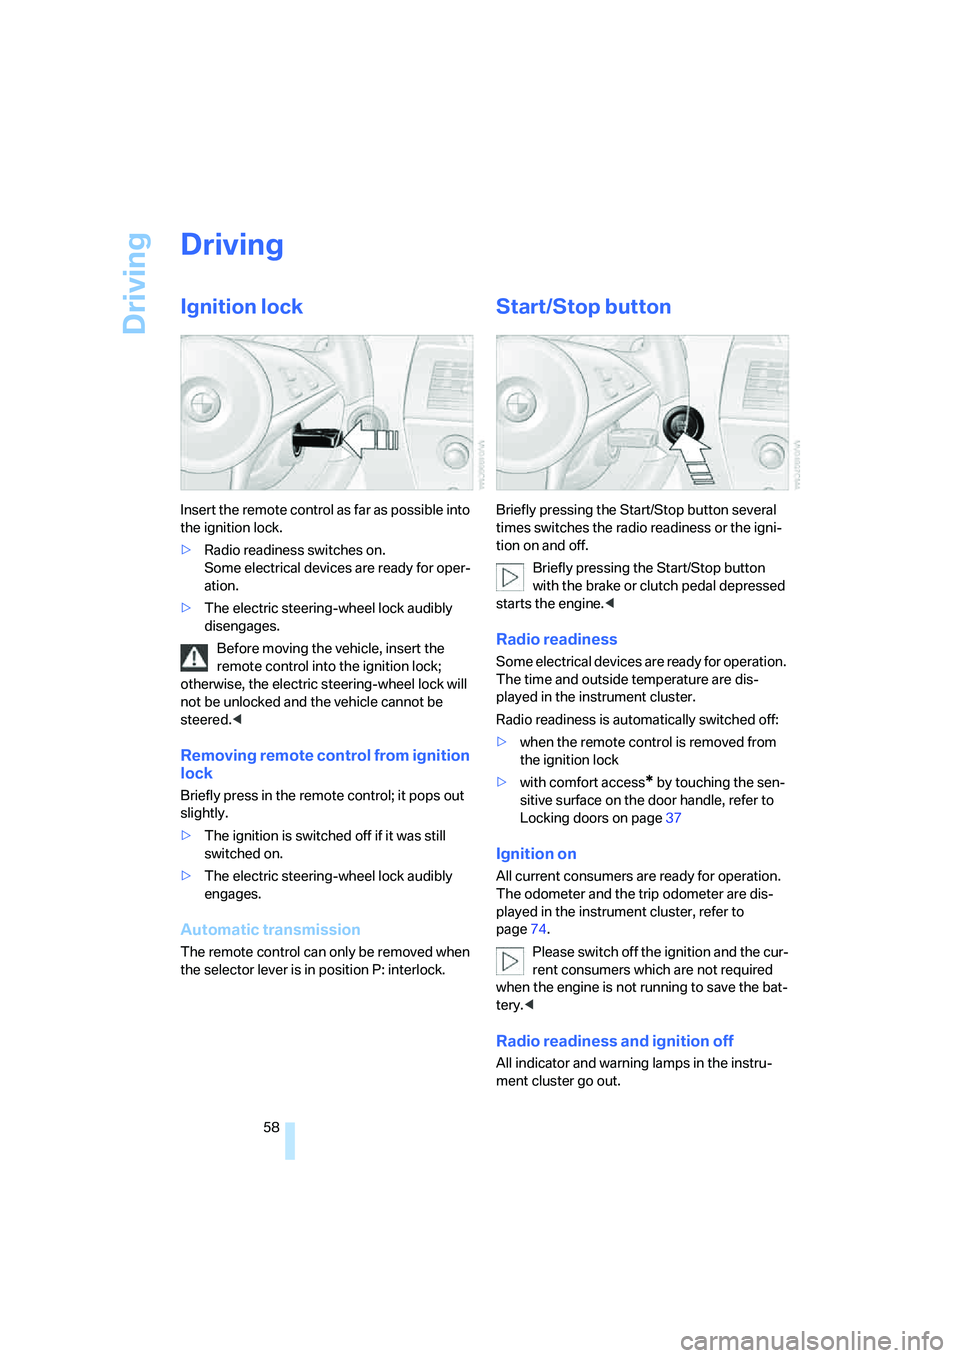
Insert the remote control as far as possible into
the ignition lock.
>Radio readiness switches on.
Some electrical devices are ready for oper-
ation.
>The electric steering-wheel lock audibly
disengages.
Before moving the vehicle, insert the
remote control into the ignition lock;
otherwise, the electric steering-wheel lock will
not be unlocked and the vehicle cannot be
steered.<
Removing remote control from ignition
lock
Briefly press in the remote control; it pops out
slightly.
>The ignition is switched off if it was still
switched on.
>The electric steering-wheel lock audibly
engages.
Automatic transmission
The remote control can only be removed when
the selector lever is in position P: interlock.
Start/Stop button
Briefly pressing the Start/Stop button several
times switches the radio readiness or the igni-
tion on and off.
Briefly pressing the Start/Stop button
with the brake or clutch pedal depressed
starts the engine.<
Radio readiness
Some electrical devices are ready for operation.
The time and outside temperature are dis-
played in the instrument cluster.
Radio readiness is automatically switched off:
>when the remote control is removed from
the ignition lock
>with comfort access
* by touching the sen-
sitive surface on the door handle, refer to
Locking doors on page37
Ignition on
All current consumers are ready for operation.
The odometer and the trip odometer are dis-
played in the instrument cluster, refer to
page74.
Please switch off the ignition and the cur-
rent consumers which are not required
when the engine is not running to save the bat-
tery.<
Radio readiness and ignition off
All indicator and warning lamps in the instru-
ment cluster go out.
Page 61 of 242
Driving
60
Switching engine off
Do not remove the remote control from
the ignition lock while the vehicle is roll-
ing, otherwise the steering wheel lock would
engage while steering.
When leaving the vehicle, always take the
remote control with you.
When parking on a downhill incline, apply the
handbrake, as otherwise the vehicle could roll
away.<
Manual transmission
1.Briefly press Start/Stop button with vehicle
stopped.
2.Shift into first gear or reverse.
3.Apply handbrake.
SMG Sequential Manual
Transmission*
1.Apply handbrake.
2.Move selector lever into a drive position.
3.Briefly press Start/Stop button.
If the position N is engaged when the
engine is switched off, this is pointed out
visually and acoustically.
Automatic transmission*
1.Move selector lever into position P with
vehicle stopped.
2.Briefly press Start/Stop button.
Handbrake
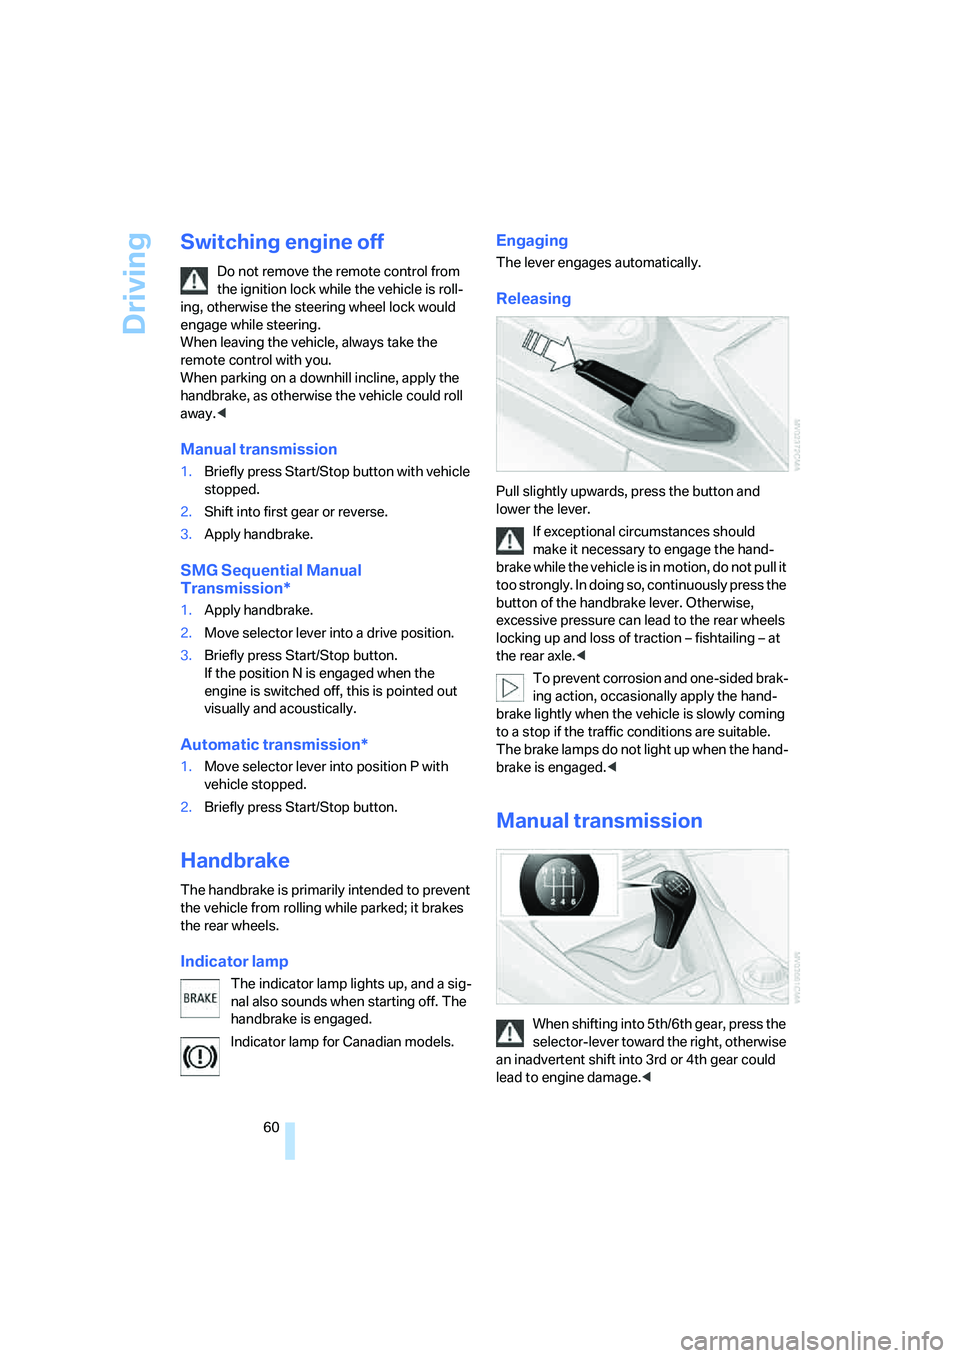
The handbrake is primarily intended to prevent
the vehicle from rolling while parked; it brakes
the rear wheels.
Indicator lamp
The indicator lamp lights up, and a sig-
nal also sounds when starting off. The
handbrake is engaged.
Indicator lamp for Canadian models.
Engaging
The lever engages automatically.
Releasing
Pull slightly upwards, press the button and
lower the lever.
If exceptional circumstances should
make it necessary to engage the hand-
brake while the vehicle is in motion, do not pull it
too strongly. In doing so, continuously press the
button of the handbrake lever. Otherwise,
excessive pressure can lead to the rear wheels
locking up and loss of traction – fishtailing – at
the rear axle.<
To prevent corrosion and one-sided brak-
ing action, occasionally apply the hand-
brake lightly when the vehicle is slowly coming
to a stop if the traffic conditions are suitable.
The brake lamps do not light up when the hand-
brake is engaged.<
Manual transmission
When shifting into 5th/6th gear, press the
selector-lever toward the right, otherwise
an inadvertent shift into 3rd or 4th gear could
lead to engine damage.<
Page 78 of 242
Controls
77Reference
At a glance
Driving tips
Communications
Navigation
Entertainment
Mobility
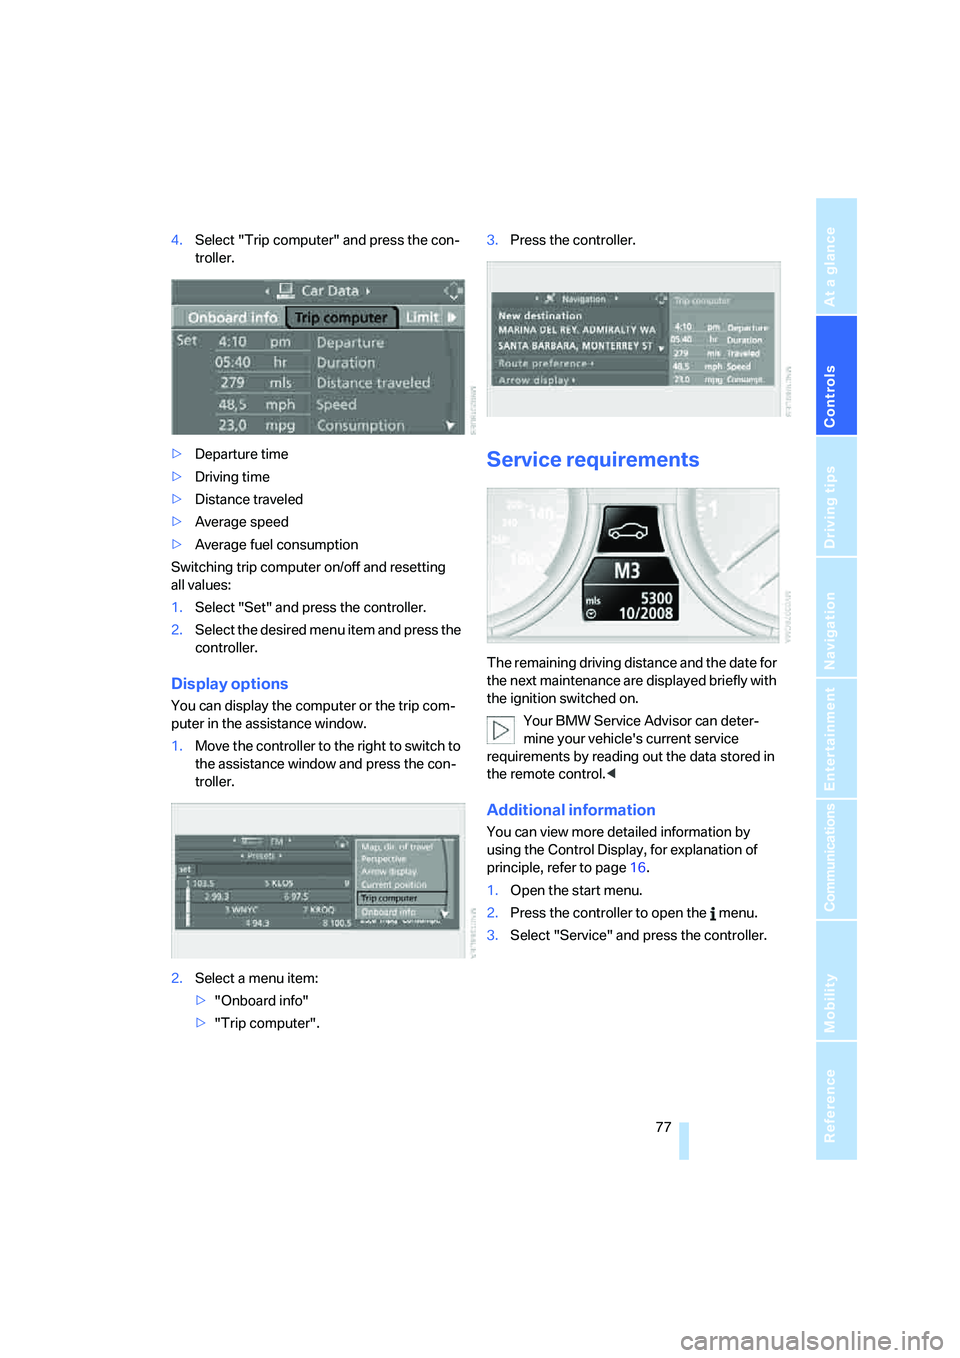
4.Select "Trip computer" and press the con-
troller.
>Departure time
>Driving time
>Distance traveled
>Average speed
>Average fuel consumption
Switching trip computer on/off and resetting
all values:
1.Select "Set" and press the controller.
2.Select the desired menu item and press the
controller.
Display options
You can display the computer or the trip com-
puter in the assistance window.
1.Move the controller to the right to switch to
the assistance window and press the con-
troller.
2.Select a menu item:
>"Onboard info"
>"Trip computer".3.Press the controller.
Service requirements
The remaining driving distance and the date for
the next maintenance are displayed briefly with
the ignition switched on.
Your BMW Service Advisor can deter-
mine your vehicle's current service
requirements by reading out the data stored in
the remote control.<
Additional information
You can view more detailed information by
using the Control Display, for explanation of
principle, refer to page16.
1.Open the start menu.
2.Press the controller to open the menu.
3.Select "Service" and press the controller.
Page 87 of 242
Technology for comfort, convenience and safety
86 sounds. The setting is stored for the remote
control currently in use.
iDrive, for explanation of principle, refer to
page16.
1.Open the start menu.
2.Press the controller to open the menu.
3.Select "Vehicle settings" and press the
controller.
4.Change to upper field if necessary. Turn the
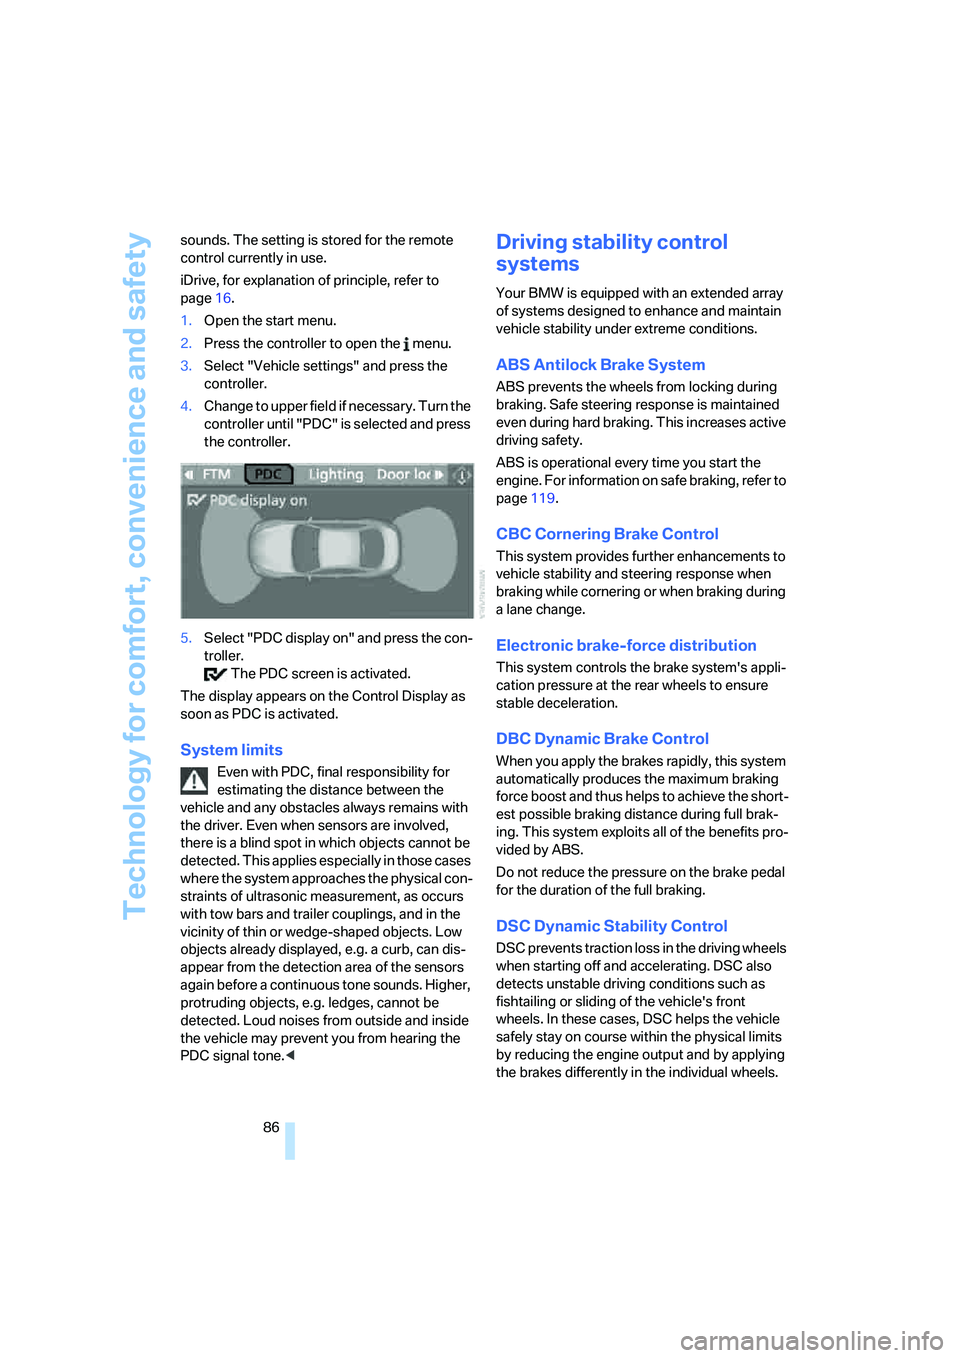
controller until "PDC" is selected and press
the controller.
5.Select "PDC display on" and press the con-
troller.
The PDC screen is activated.
The display appears on the Control Display as
soon as PDC is activated.
System limits
Even with PDC, final responsibility for
estimating the distance between the
vehicle and any obstacles always remains with
the driver. Even when sensors are involved,
there is a blind spot in which objects cannot be
detected. This applies especially in those cases
where the system approaches the physical con-
straints of ultrasonic measurement, as occurs
with tow bars and trailer couplings, and in the
vicinity of thin or wedge-shaped objects. Low
objects already displayed, e.g. a curb, can dis-
appear from the detection area of the sensors
again before a continuous tone sounds. Higher,
protruding objects, e.g. ledges, cannot be
detected. Loud noises from outside and inside
the vehicle may prevent you from hearing the
PDC signal tone.<
Driving stability control
systems
Your BMW is equipped with an extended array
of systems designed to enhance and maintain
vehicle stability under extreme conditions.
ABS Antilock Brake System
ABS prevents the wheels from locking during
braking. Safe steering response is maintained
even during hard braking. This increases active
driving safety.
ABS is operational every time you start the
engine. For information on safe braking, refer to
page119.
CBC Cornering Brake Control
This system provides further enhancements to
vehicle stability and steering response when
braking while cornering or when braking during
a lane change.
Electronic brake-force distribution
This system controls the brake system's appli-
cation pressure at the rear wheels to ensure
stable deceleration.
DBC Dynamic Brake Control
When you apply the brakes rapidly, this system
automatically produces the maximum braking
force boost and thus helps to achieve the short-
est possible braking distance during full brak-
ing. This system exploits all of the benefits pro-
vided by ABS.
Do not reduce the pressure on the brake pedal
for the duration of the full braking.
DSC Dynamic Stability Control
DSC prevents traction loss in the driving wheels
when starting off and accelerating. DSC also
detects unstable driving conditions such as
fishtailing or sliding of the vehicle's front
wheels. In these cases, DSC helps the vehicle
safely stay on course within the physical limits
by reducing the engine output and by applying
the brakes differently in the individual wheels.
Page 97 of 242
Technology for comfort, convenience and safety
96
Selecting displays
iDrive, for explanation of principle, refer to
page16.
1.Press the button.
This opens the start menu.
2.Press the controller to open the menu.
3.Select "Display settings" and press the
controller.
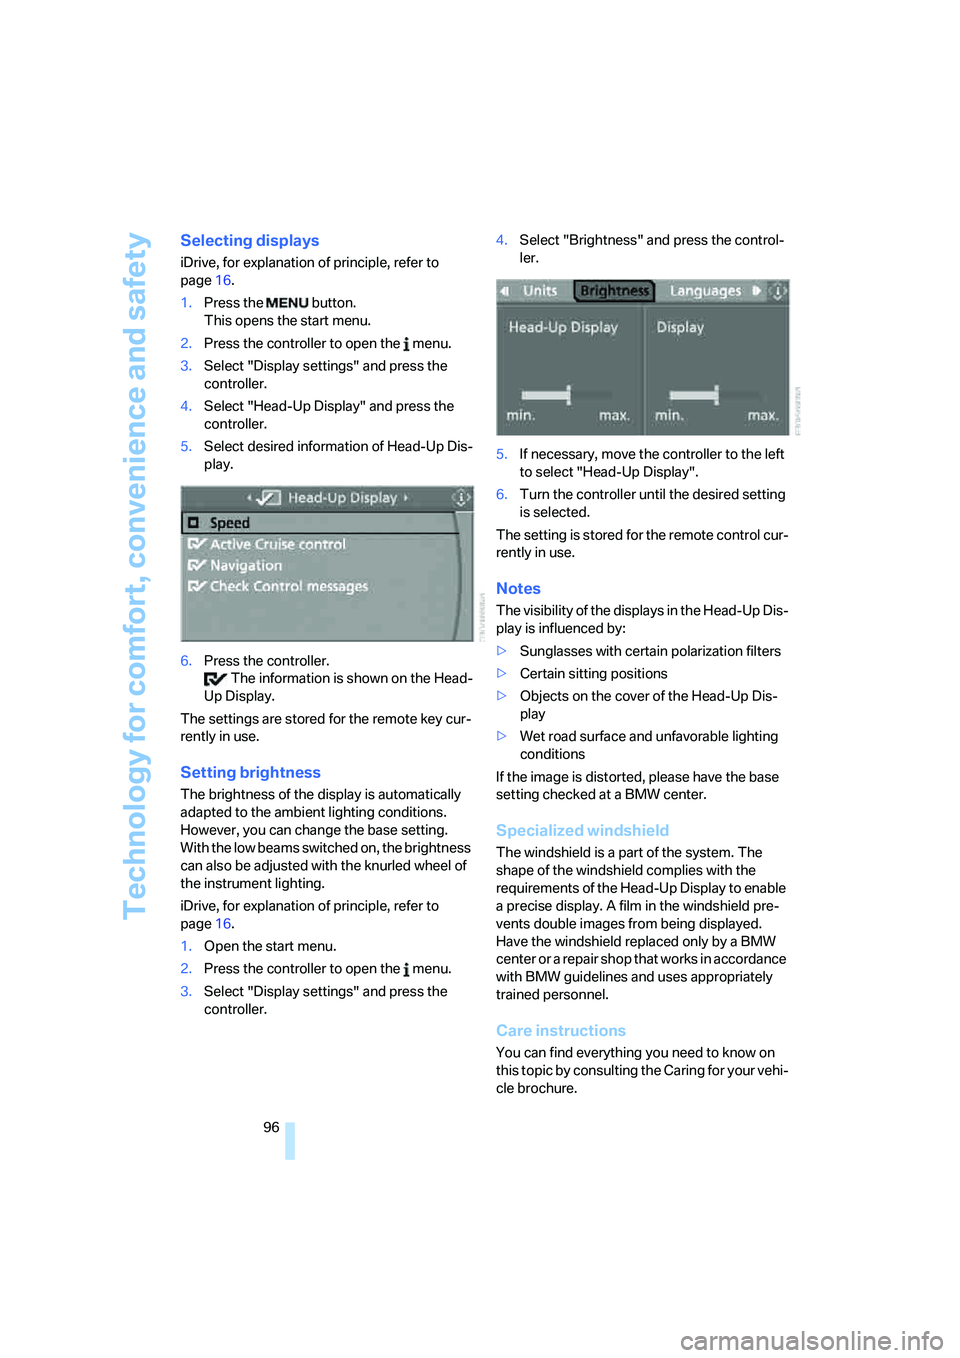
4.Select "Head-Up Display" and press the
controller.
5.Select desired information of Head-Up Dis-
play.
6.Press the controller.
The information is shown on the Head-
Up Display.
The settings are stored for the remote key cur-
rently in use.
Setting brightness
The brightness of the display is automatically
adapted to the ambient lighting conditions.
However, you can change the base setting.
With the low beams switched on, the brightness
can also be adjusted with the knurled wheel of
the instrument lighting.
iDrive, for explanation of principle, refer to
page16.
1.Open the start menu.
2.Press the controller to open the menu.
3.Select "Display settings" and press the
controller.4.Select "Brightness" and press the control-
ler.
5.If necessary, move the controller to the left
to select "Head-Up Display".
6.Turn the controller until the desired setting
is selected.
The setting is stored for the remote control cur-
rently in use.
Notes
The visibility of the displays in the Head-Up Dis-
play is influenced by:
>Sunglasses with certain polarization filters
>Certain sitting positions
>Objects on the cover of the Head-Up Dis-
play
>Wet road surface and unfavorable lighting
conditions
If the image is distorted, please have the base
setting checked at a BMW center.
Specialized windshield
The windshield is a part of the system. The
shape of the windshield complies with the
requirements of the Head-Up Display to enable
a precise display. A film in the windshield pre-
vents double images from being displayed.
Have the windshield replaced only by a BMW
center or a repair shop that works in accordance
with BMW guidelines and uses appropriately
trained personnel.
Care instructions
You can find everything you need to know on
this topic by consulting the Caring for your vehi-
cle brochure.
Page 106 of 242
Controls
105Reference
At a glance
Driving tips
Communications
Navigation
Entertainment
Mobility
The current setting for air distribution is dis-
played on the Control Display.
A congenial climate
The AUTO program offers the optimum air dis-
tribution and air volume for virtually all condi-
tions, refer to AUTO program below. Now you
only need to select an interior temperature that
you find pleasant.
The following sections contain more detailed
information on the available setting options.
Most settings are stored for the remote control
currently in use, also refer to Personal Profile
settings on page29.
AUTO program
The AUTO program handles the
adjustment of air distribution to the
windshield and side windows, in
the direction of the upper body, and in the foot-
well, as well as the adjustment of the air volume.
It also adapts your instructions for the tempera-
ture to outside influences throughout the year.
The cooling is switched on automatically with
the AUTO program. At the same time, a con-
densation sensor controls the program in such
a way that window condensation is prevented
as much as possible.
Intensity of AUTO program
To meet your individual needs, you can
increase or decrease the intensity of the auto-
matic climate control.
iDrive, for explanation of principle, refer to
page16.
1.Press the button.
This opens the start menu.
2.Move the controller to the left to open "Cli-
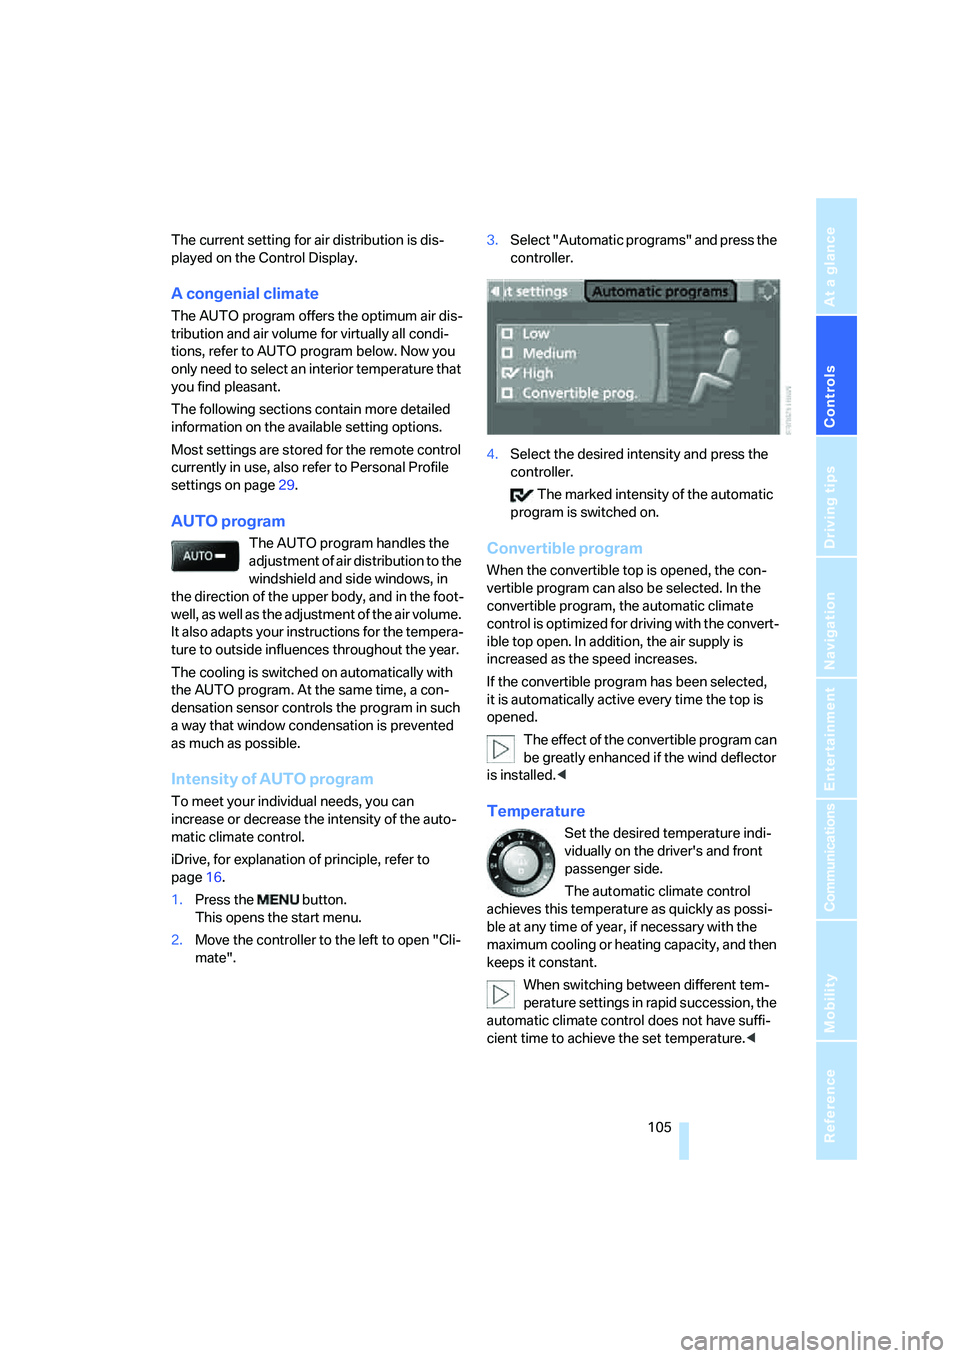
mate".3.Select "Automatic programs" and press the
controller.
4.Select the desired intensity and press the
controller.
The marked intensity of the automatic
program is switched on.
Convertible program
When the convertible top is opened, the con-
vertible program can also be selected. In the
convertible program, the automatic climate
control is optimized for driving with the convert-
ible top open. In addition, the air supply is
increased as the speed increases.
If the convertible program has been selected,
it is automatically active every time the top is
opened.
The effect of the convertible program can
be greatly enhanced if the wind deflector
is installed.<
Temperature
Set the desired temperature indi-
vidually on the driver's and front
passenger side.
The automatic climate control
achieves this temperature as quickly as possi-
ble at any time of year, if necessary with the
maximum cooling or heating capacity, and then
keeps it constant.
When switching between different tem-
perature settings in rapid succession, the
automatic climate control does not have suffi-
cient time to achieve the set temperature.<