2006 BMW 530I ECU
[x] Cancel search: ECUPage 2 of 248

525i
530i
550i
525xi
530xiOwner's Manual for Vehicle
Congratulations, and thank you for choosing a BMW.
Thorough familiarity with your vehicle will provide you with
enhanced control and security when you drive it. We therefore
have this request:
Please take the time to read this Owner's Manual and familiarize
yourself with the information that we have compiled for you
before starting off in your new vehicle. It contains important data
and instructions intended to assist you in gaining maximum use
and satisfaction from your BMW's unique range of technical fea-
tures. The manual also contains information on maintenance
designed to enhance operating safety and contribute to main-
taining the value of your BMW throughout an extended service
life.
This manual is supplemented by a Service and Warranty Infor-
mation Booklet for US models or a Warranty and Service Guide
Booklet for Canadian models.
We wish you an enjoyable driving experience.
BMW AG
Page 43 of 248
Opening and closing
42 For information on using the convenience oper-
ation at the door lock or with the remote control,
refer to page30 or32.
For information on comfort closing with comfort
access, refer to Locking on page38.
Ventilation setting
Press the switch:
The sunroof is raised and the sliding visor is
opened slightly.
Automatic opening and closing
Press the switch past the resistance point.
Pressing the switch again stops the motion.
Opening and closing sunroof and
sliding visor together
Press the switch beyond the resistance point
twice consecutively.
Pressing the switch again stops the motion.
Comfort position
Each time the panorama glass sunroof is com-
pletely opened and then closed, it stops in the
comfort position. If desired, continue the
motion following this with the switch.
In the comfort position the wind noises in the
interior are reduced.
Anti-trapping mechanism
If the panorama glass sunroof or sliding visor
encounter resistance when closing from
roughly one third of the sunroof opening or
when closing from the raised position, the clos-
ing action is interrupted and the panorama
glass sunroof and sliding visor reopen a little.
Despite the anti-trapping mechanism
inspect the sunroof's travel path prior to
closing it, as the safety system might fail to
detect certain kinds of obstructions, such as
very thin objects, and the sunroof would con-
tinue closing.
Pressing the switch beyond the resistance
point and holding it there deactivates the anti-
trapping mechanism.<
Following interruptions in electrical
power supply
After a power loss, the sunroof may only
respond to the lift command. The system must
be initialized. BMW recommends having this
work done by your BMW center.
Moving manually
In the event of an electrical malfunction, you can
move the roof manually:
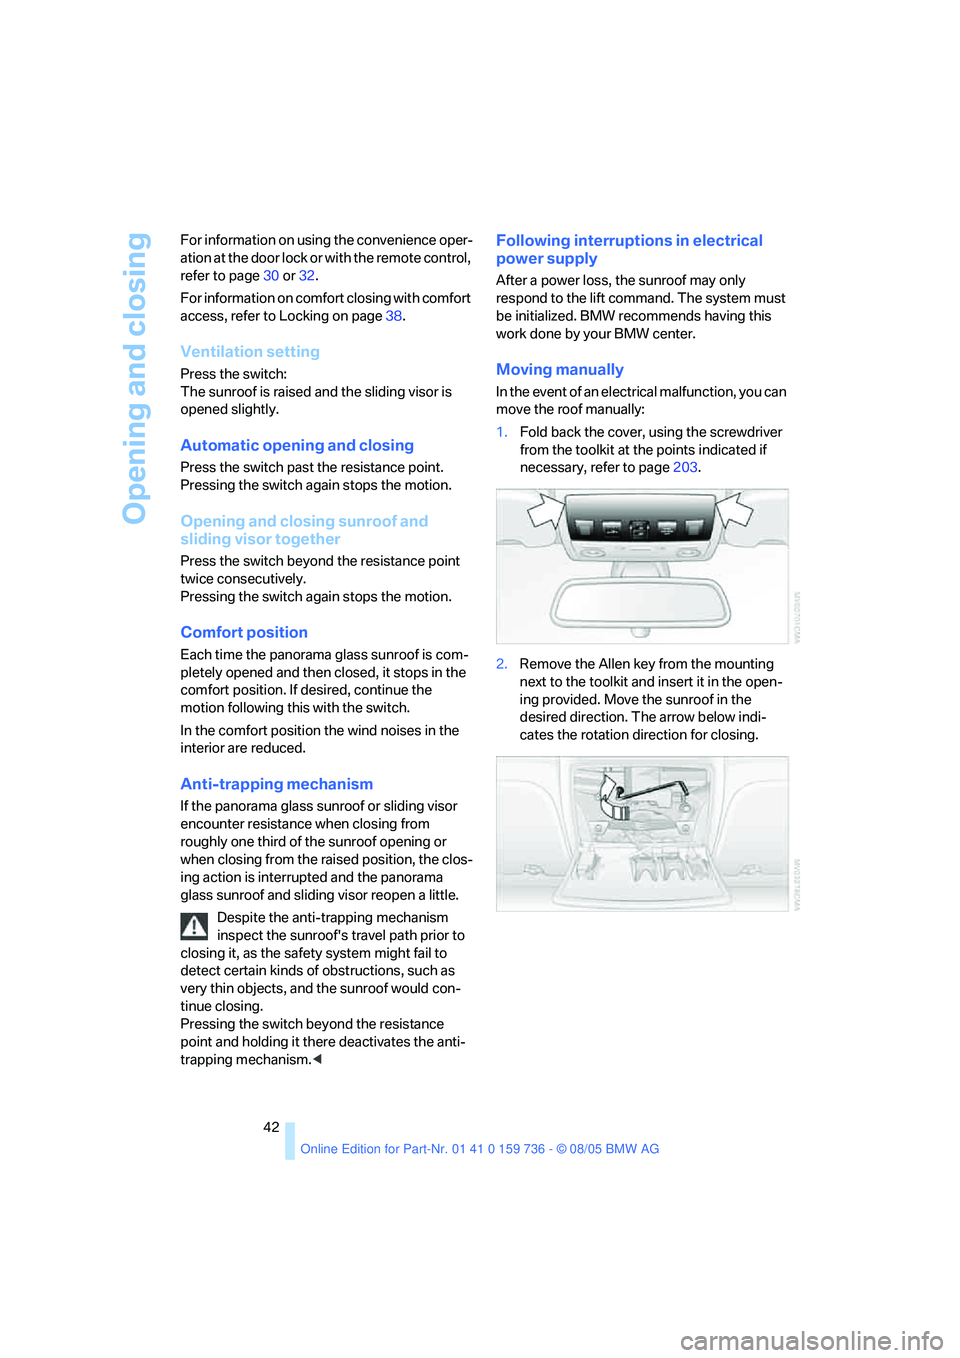
1.Fold back the cover, using the screwdriver
from the toolkit at the points indicated if
necessary, refer to page203.
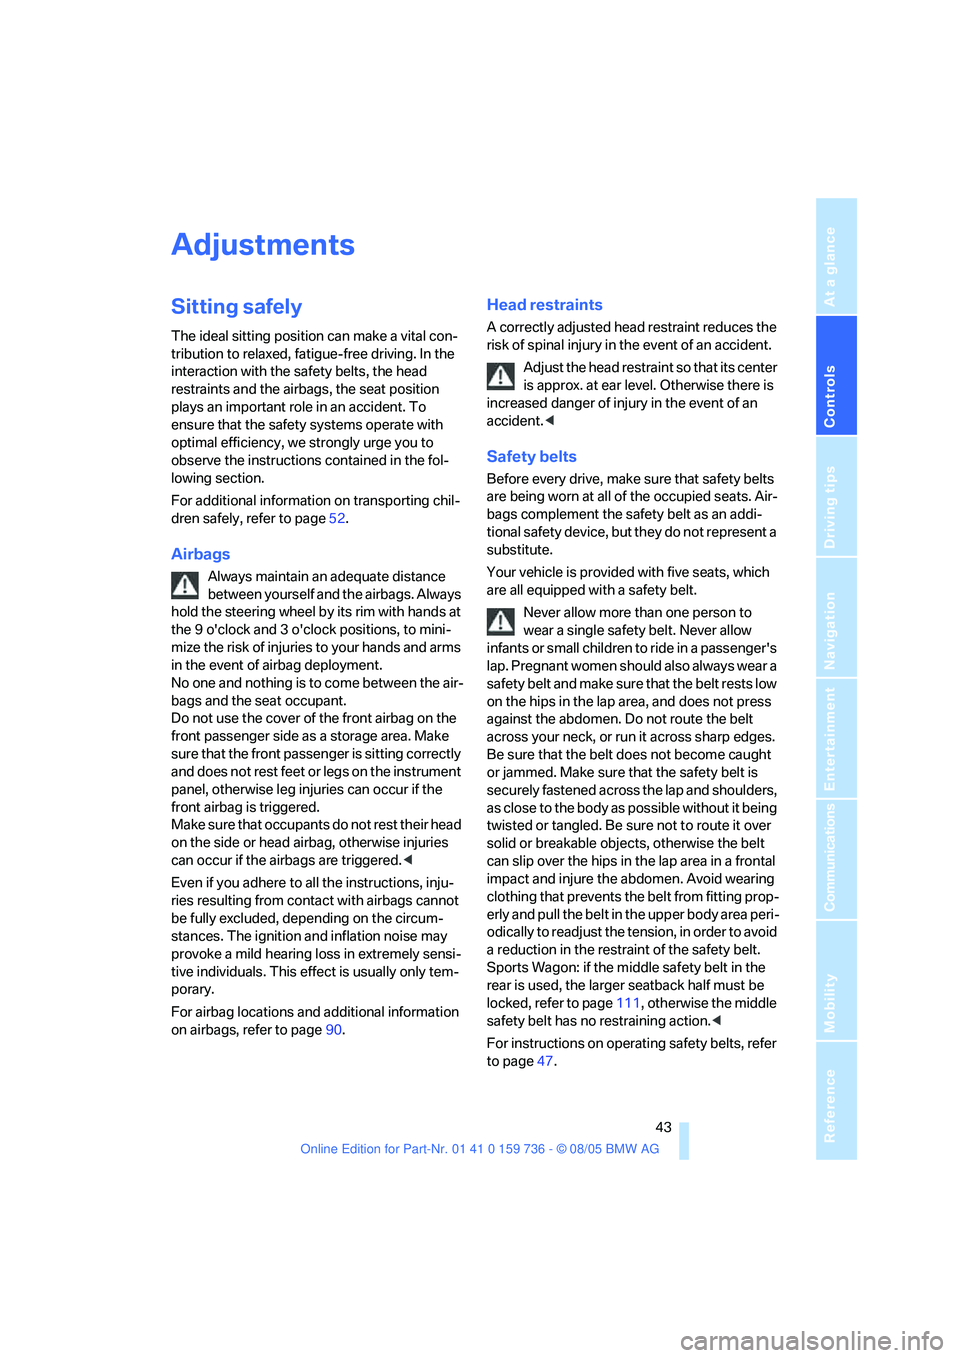
2.Remove the Allen key from the mounting
next to the toolkit and insert it in the open-
ing provided. Move the sunroof in the
desired direction. The arrow below indi-
cates the rotation direction for closing.
Page 44 of 248
Controls
43Reference
At a glance
Driving tips
Communications
Navigation
Entertainment
Mobility
Adjustments
Sitting safely
The ideal sitting position can make a vital con-
tribution to relaxed, fatigue-free driving. In the
interaction with the safety belts, the head
restraints and the airbags, the seat position
plays an important role in an accident. To
ensure that the safety systems operate with
optimal efficiency, we strongly urge you to
observe the instructions contained in the fol-
lowing section.
For additional information on transporting chil-
dren safely, refer to page52.
Airbags
Always maintain an adequate distance
between yourself and the airbags. Always
hold the steering wheel by its rim with hands at
the 9 o'clock and 3 o'clock positions, to mini-
mize the risk of injuries to your hands and arms
in the event of airbag deployment.
No one and nothing is to come between the air-
bags and the seat occupant.
Do not use the cover of the front airbag on the
front passenger side as a storage area. Make
sure that the front passenger is sitting correctly
and does not rest feet or legs on the instrument
panel, otherwise leg injuries can occur if the
front airbag is triggered.
Make sure that occupants do not rest their head
on the side or head airbag, otherwise injuries
can occur if the airbags are triggered.<
Even if you adhere to all the instructions, inju-
ries resulting from contact with airbags cannot
be fully excluded, depending on the circum-
stances. The ignition and inflation noise may
provoke a mild hearing loss in extremely sensi-
tive individuals. This effect is usually only tem-
porary.
For airbag locations and additional information
on airbags, refer to page90.
Head restraints
A correctly adjusted head restraint reduces the
risk of spinal injury in the event of an accident.
Adjust the head restraint so that its center
is approx. at ear level. Otherwise there is
increased danger of injury in the event of an
accident.<
Safety belts
Before every drive, make sure that safety belts
are being worn at all of the occupied seats. Air-
bags complement the safety belt as an addi-
tional safety device, but they do not represent a
substitute.
Your vehicle is provided with five seats, which
are all equipped with a safety belt.
Never allow more than one person to
wear a single safety belt. Never allow
infants or small children to ride in a passenger's
lap. Pregnant women should also always wear a
safety belt and make sure that the belt rests low
on the hips in the lap area, and does not press
against the abdomen. Do not route the belt
across your neck, or run it across sharp edges.
Be sure that the belt does not become caught
or jammed. Make sure that the safety belt is
securely fastened across the lap and shoulders,
as close to the body as possible without it being
twisted or tangled. Be sure not to route it over
solid or breakable objects, otherwise the belt
can slip over the hips in the lap area in a frontal
impact and injure the abdomen. Avoid wearing
clothing that prevents the belt from fitting prop-
erly and pull the belt in the upper body area peri-
odically to readjust the tension, in order to avoid
a reduction in the restraint of the safety belt.
Sports Wagon: if the middle safety belt in the
rear is used, the larger seatback half must be
locked, refer to page111, otherwise the middle
safety belt has no restraining action.<
For instructions on operating safety belts, refer
to page47.
Page 53 of 248
Transporting children safely
52
Transporting children safely
The right place for children
Do not leave children unattended in the
vehicle, otherwise they could endanger
themselves and other persons, e.g. by opening
the doors.<
In principle, all seats in your BMW are suitable,
with the exception of the driver's seat, for
mounting universal child restraint systems for
all age classes approved for the respective age
group.
Children always in the rear
Accident research shows that the safest place
for children is on the back seat.
Children younger than 13 years of age or
with a height under 5 ft/150 cm may only
be transported in the rear in child restraint sys-
tems which correspond to the age, weight and
height of the child. Otherwise there is an
increased danger of injury in an accident.<
Children 13 years of age or older must wear a
safety belt as soon as a suitable child restraint
system can no longer be used due to their age,
size and weight.
All rear seat positions in your vehicle comply
with the recommendations of the standard
SAE J1819 for the safe securing of child
restraint systems in motor vehicles.
If your BMW is equipped with side airbags
in the rea r, make s ure tha t children do not
lean against the door trim, otherwise serious
injuries can result when the side airbags are
triggered.<
Deactivating rear seat side airbags
Stickers on the rear door frame indicate the sta-
tus of the rear side airbags. If the status cannot
be clearly recognized, or if you want to have the
airbags activated/deactivated, please contact
your BMW center.
Exception for front passenger seat
Should it be necessary to use a child-
restraint system on the front passenger
seat, the front and side airbag must be deacti-
vated. Otherwise, there is an increased risk of
injury for the child if the airbags are triggered,
even with a child-restraint system. Your BMW
center will be glad to advise you.<
More information on automatic deactivation of
the front passenger airbags, refer to page90.
Installing child-restraint
systems
Observe the child-restraint system man-
ufacturer's instructions for selection,
installation and use of the child restraint sys-
tems. Otherwise the degree of protection may
be reduced.<
Commercially available child restraint systems
are designed for securing with a lap belt or with
the lap belt section of a three-point belt. Incor-
rectly or improperly installed child restraint sys-
tems can increase the risk of injury for children.
Always follow the instructions for installing the
system exactly.
On front passenger seat
Before mounting a child restraint system
on the front passenger seat, make sure
that the front and side airbag on the front pas-
senger side are deactivated, otherwise there is
an increased risk of injury if the airbags are trig-
gered.<
Seat height
Before mounting a universal child-restraint sys-
tem, move the front passenger seat into the
highest position to achieve the best possible
belt routing. Do not change this seat height.
Page 54 of 248
Controls
53Reference
At a glance
Driving tips
Communications
Navigation
Entertainment
Mobility
Backrest width*
The backrest width adjustment of the
passenger seat must be opened com-
pletely. After mounting the child's seat, no
memory position may be called up and the
active backrest width adjustment must be
deactivated, otherwise the stability of the
child's seat on the front passenger seat is lim-
ited.<
1.After unlocking the vehicle, place on the
front passenger seat and close the door to
call up the memory position.
2.Completely open the backrest width adjust-
ment, refer to page44.
3.Deactivate active backrest width adjust-
ment, refer to page45.
4.Install child's seat.
Child seat security
All rear safety belts and the safety belt for the
front passenger can be locked against pulling
out to secure child restraint systems.
Locking safety belt
1.Secure the child restraint system with the
belt.
2.Pull out the belt webbing completely.
3.Allow the belt webbing to be pulled in and
pull taut against the child restraint system.
The safety belt is locked.
Unlocking safety belt
1.Open the belt buckle.
2.Remove the child restraint system.
3.Allow the belt webbing to be pulled in com-
pletely.
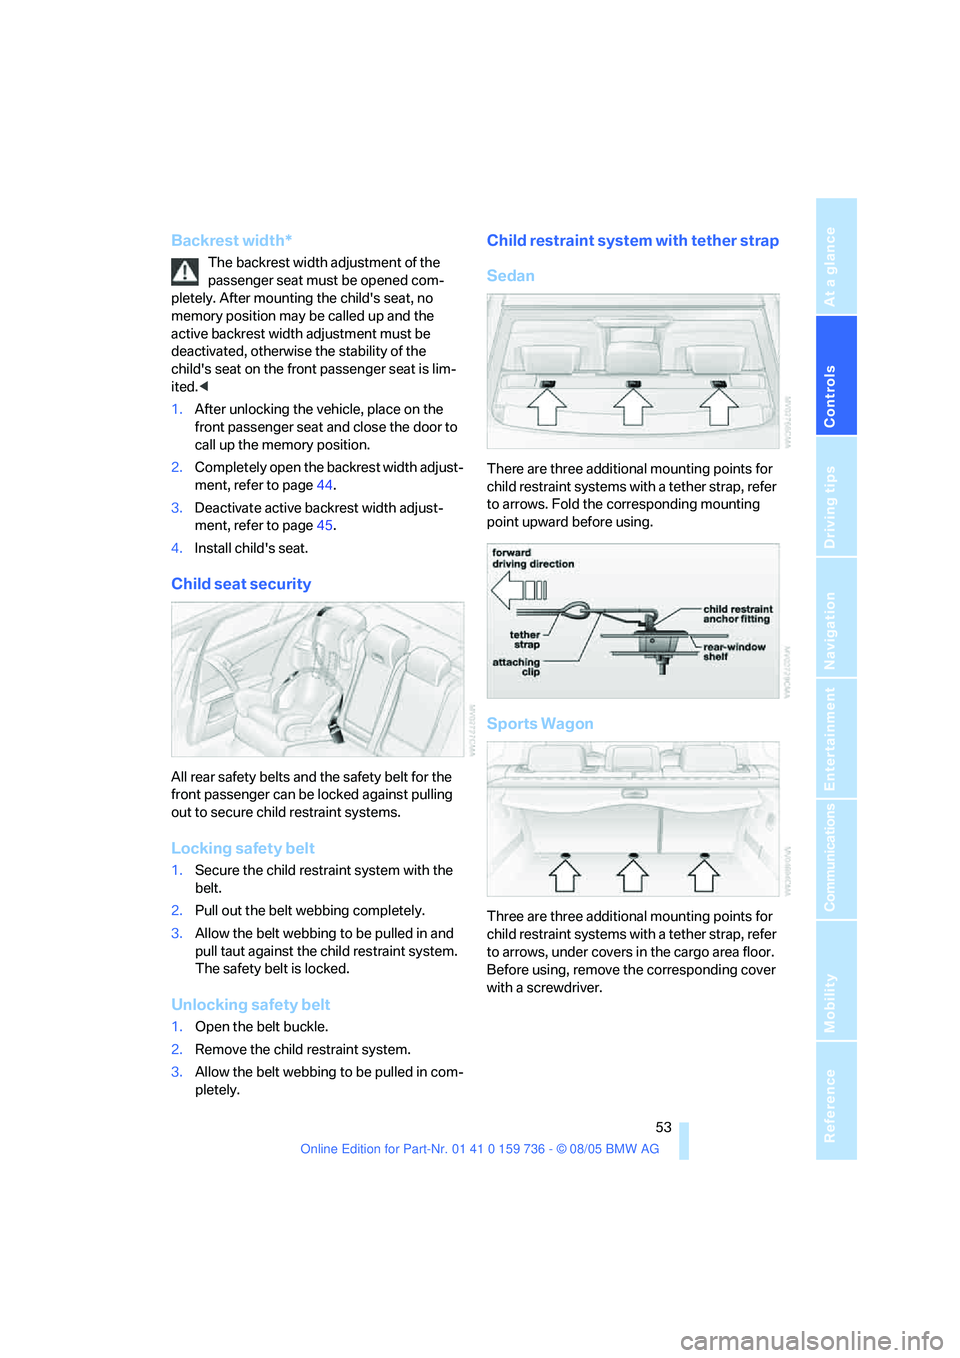
Child restraint system with tether strap
Sedan
There are three additional mounting points for
child restraint systems with a tether strap, refer
to arrows. Fold the corresponding mounting
point upward before using.
Sports Wagon
Three are three additional mounting points for
child restraint systems with a tether strap, refer
to arrows, under covers in the cargo area floor.
Before using, remove the corresponding cover
with a screwdriver.
Page 60 of 248
Controls
59Reference
At a glance
Driving tips
Communications
Navigation
Entertainment
Mobility
Reverse gear
Select only when the vehicle is stationary.
When pressing the gearshift lever to the left,
overcome some resistance.
The backup lamps switch on automatically with
the ignition switched on.
SMG Sequential Manual
Gearbox*
The concept
The SMG Sequential Manual Gearbox is an
automated manual transmission in which an
electrohydraulic system handles the clutching
and gear changes.
You operate SMG with the selector lever in the
center console and two shift paddles on the
steering wheel.
It offers you the following functions:
>Optional manual or automatic operation:
Sequential mode or Drive mode
>You have a choice of two driving programs:
Normal or Sport, refer to Dynamic Driving
Control page60
>Automatic downshifting and prevention of
incorrect shifting even in sequential opera-
tion
>Acceleration assistant, refer to page61.
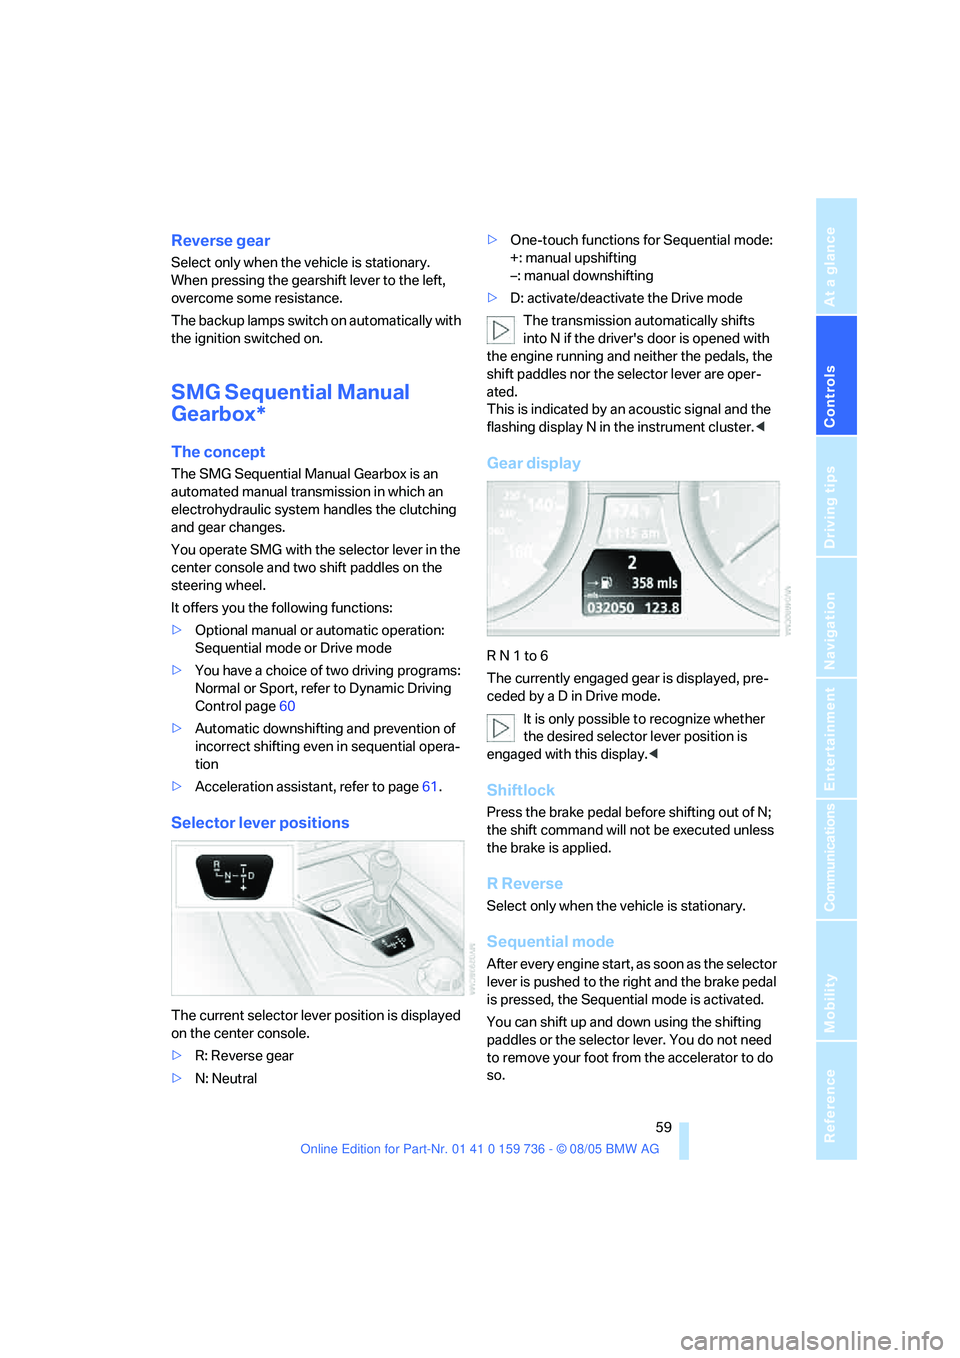
Selector lever positions
The current selector lever position is displayed
on the center console.
>R: Reverse gear
>N: Neutral>One-touch functions for Sequential mode:
+: manual upshifting
–: manual downshifting
>D: activate/deactivate the Drive mode
The transmission automatically shifts
into N if the driver's door is opened with
the engine running and neither the pedals, the
shift paddles nor the selector lever are oper-
ated.
This is indicated by an acoustic signal and the
flashing display N in the instrument cluster.<
Gear display
R N 1 to 6
The currently engaged gear is displayed, pre-
ceded by a D in Drive mode.
It is only possible to recognize whether
the desired selector lever position is
engaged with this display.<
Shiftlock
Press the brake pedal before shifting out of N;
the shift command will not be executed unless
the brake is applied.
R Reverse
Select only when the vehicle is stationary.
Sequential mode
After every engine start, as soon as the selector
lever is pushed to the right and the brake pedal
is pressed, the Sequential mode is activated.
You can shift up and down using the shifting
paddles or the selector lever. You do not need
to remove your foot from the accelerator to do
so.
Page 61 of 248
Driving
60 It is also possible to start off in second gear, e. g.
in slippery conditions.
In the following situations, SMG thinks for you:
>Upshifts and downshifts are executed only
when they will result in a plausible combina-
tion of engine and vehicle speed; thus, for
example, a downshift that would cause the
engine to overrev will not be executed by
the system.
>When the vehicle is stationary, the trans-
mission automatically downshifts into first
gear.
>Shortly before dropping below a gear-
dependent minimum speed, the transmis-
sion downshifts automatically even without
your intervention.
D Drive mode
In the Drive mode, all forward gears are shifted
automatically.
Shifting from Sequential mode to Drive mode:
press selector lever to the right toward D.
Kick-down: for rapid acceleration, e. g. when
passing, press the accelerator pedal as far
down as it will go. You achieve maximum accel-
eration.
To switch back into the Sequential mode: press
selector lever to the right again toward D or shift
using the shifting paddles or the selector lever.
Start off quickly on slopes. Do not hold
the vehicle on a hill by pressing the accel-
erator, but apply the handbrake instead. Other-
wise overheating can occur in the transmission
region.<
Gear changes
Using selector lever
>To upshift, pull the selector lever back.
>To downshift, push the selector lever for-
ward.
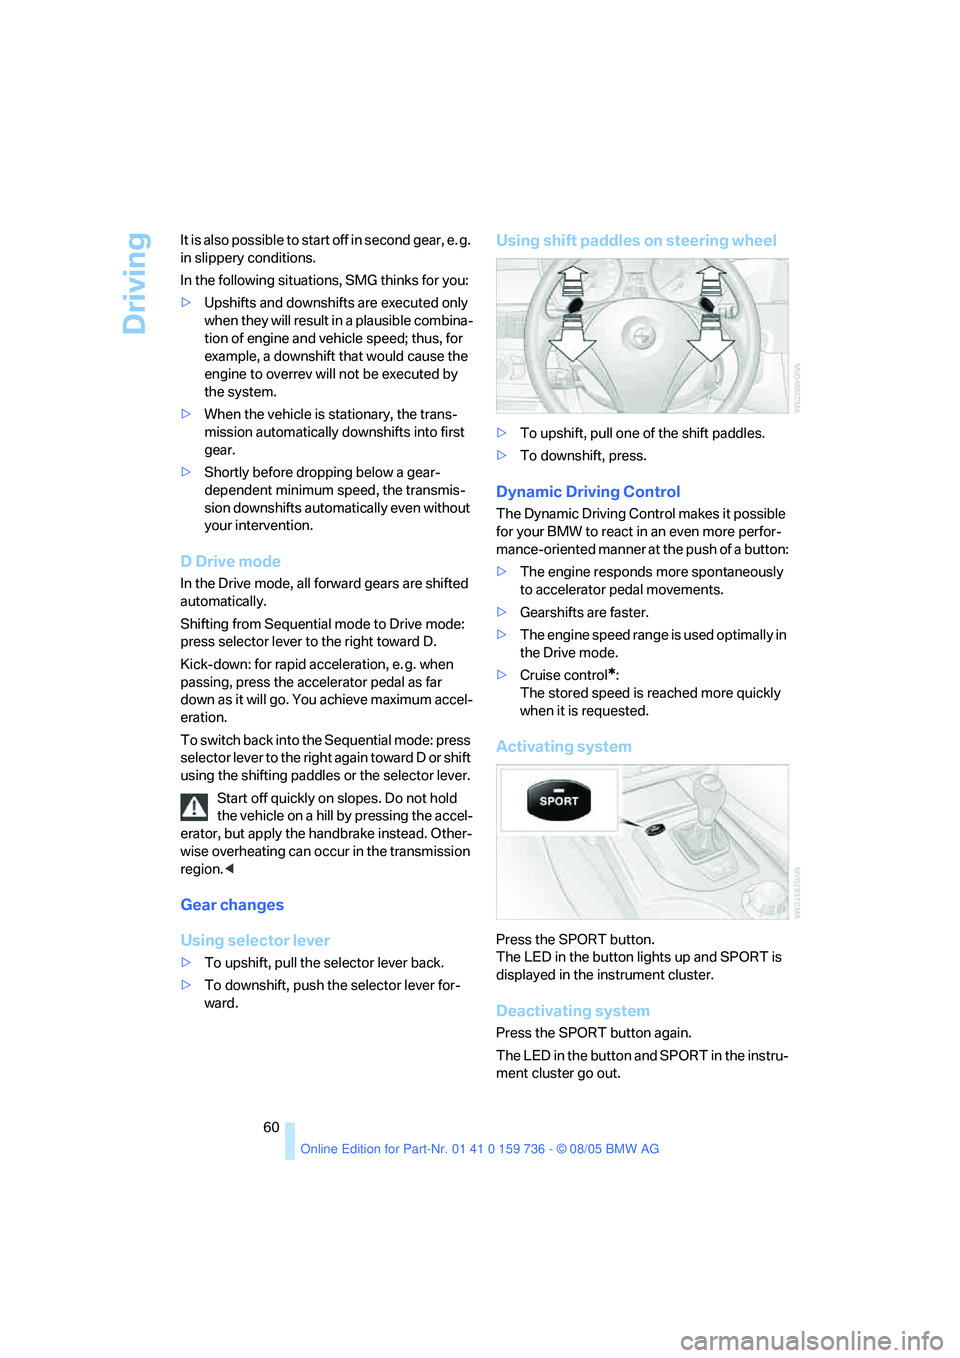
Using shift paddles on steering wheel
>To upshift, pull one of the shift paddles.
>To downshift, press.
Dynamic Driving Control
The Dynamic Driving Control makes it possible
for your BMW to react in an even more perfor-
mance-oriented manner at the push of a button:
>The engine responds more spontaneously
to accelerator pedal movements.
>Gearshifts are faster.
>The engine speed range is used optimally in
the Drive mode.
>Cruise control
*:
The stored speed is reached more quickly
when it is requested.
Activating system
Press the SPORT button.
The LED in the button lights up and SPORT is
displayed in the instrument cluster.
Deactivating system
Press the SPORT button again.
The LED in the button and SPORT in the instru-
ment cluster go out.
Page 63 of 248
Driving
62
Sport program and
manual operation M/S
Move selector lever from position D toward the
left into the M/S shifting slot:
The sport program is activated and DS appears
in the instrument cluster. This position is rec-
ommended for a performance-oriented driving
style.
When the selector lever is pressed forward or
back, the manual mode is activated and the
Steptronic shifts the gear. The instrument clus-
ter shows M1 through M6.
Upshifts and downshifts are executed only
when they will result in a plausible combination
of engine and vehicle speed; thus, for example,
a downshift that would cause the engine to
overrev will not be executed by the system. The
selected gear appears briefly in the instrument
cluster, followed by the current gear.
To use the automatic function again, move the
selector lever to the right into position D.
Deactivating selector lever interlock
If the selector lever is blocked in the position P
even though the button on the selector lever is
pressed, the selector lever interlock can be
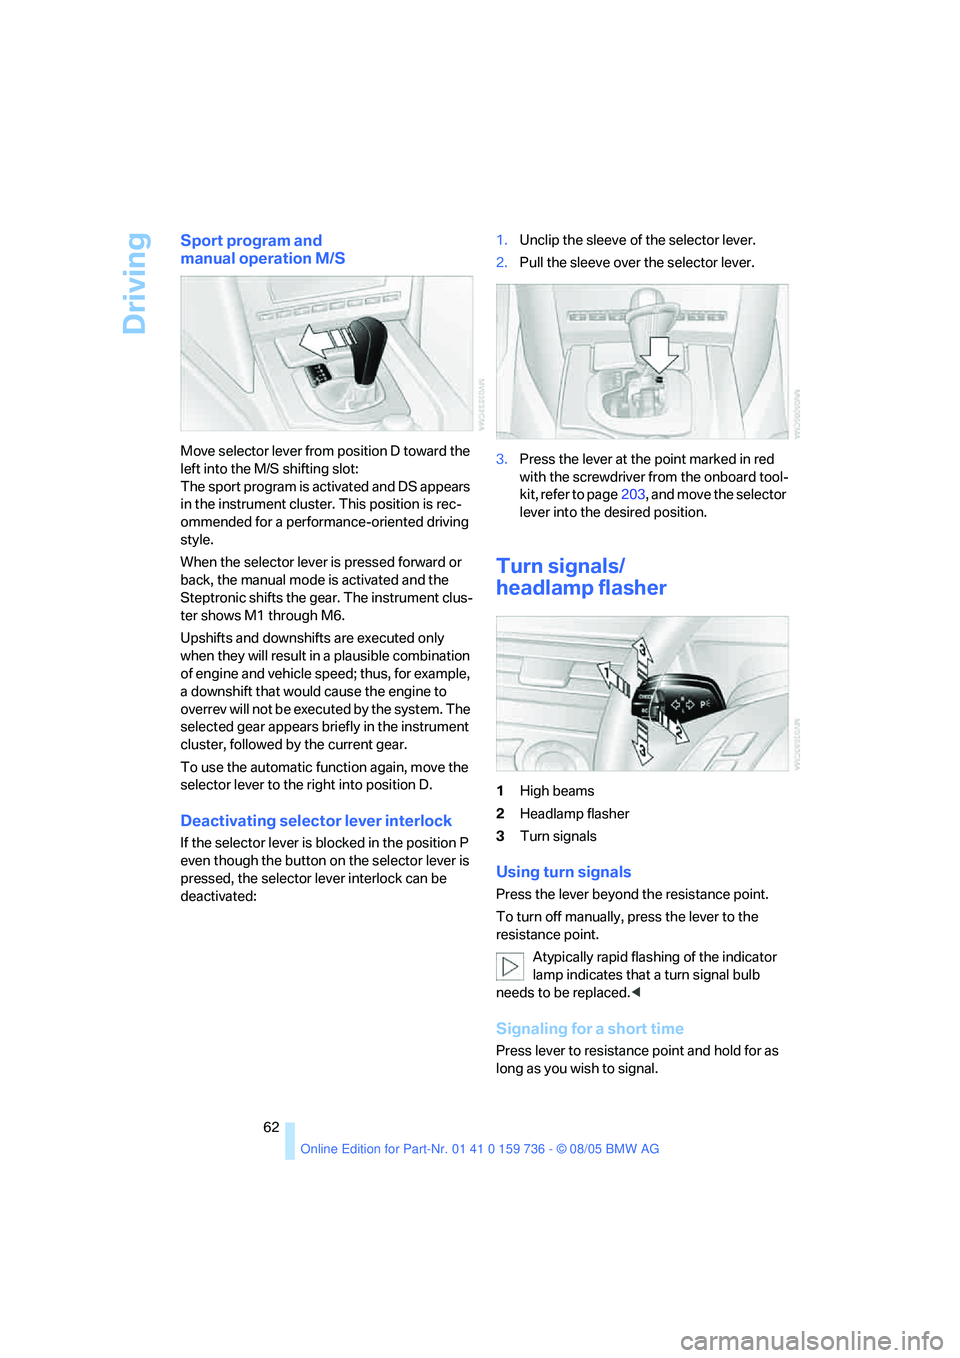
deactivated:1.Unclip the sleeve of the selector lever.
2.Pull the sleeve over the selector lever.
3.Press the lever at the point marked in red
with the screwdriver from the onboard tool-
kit, refer to page203, and move the selector
lever into the desired position.
Turn signals/
headlamp flasher
1High beams
2Headlamp flasher
3Turn signals
Using turn signals
Press the lever beyond the resistance point.
To turn off manually, press the lever to the
resistance point.
Atypically rapid flashing of the indicator
lamp indicates that a turn signal bulb
needs to be replaced.<
Signaling for a short time
Press lever to resistance point and hold for as
long as you wish to signal.