2006 BMW 525I SEDAN page 77
[x] Cancel search: page 77Page 146 of 259
Destination guidance
144
Destination guidance
Starting destination
guidance
iDrive, for explanation of principle, refer to
page16.
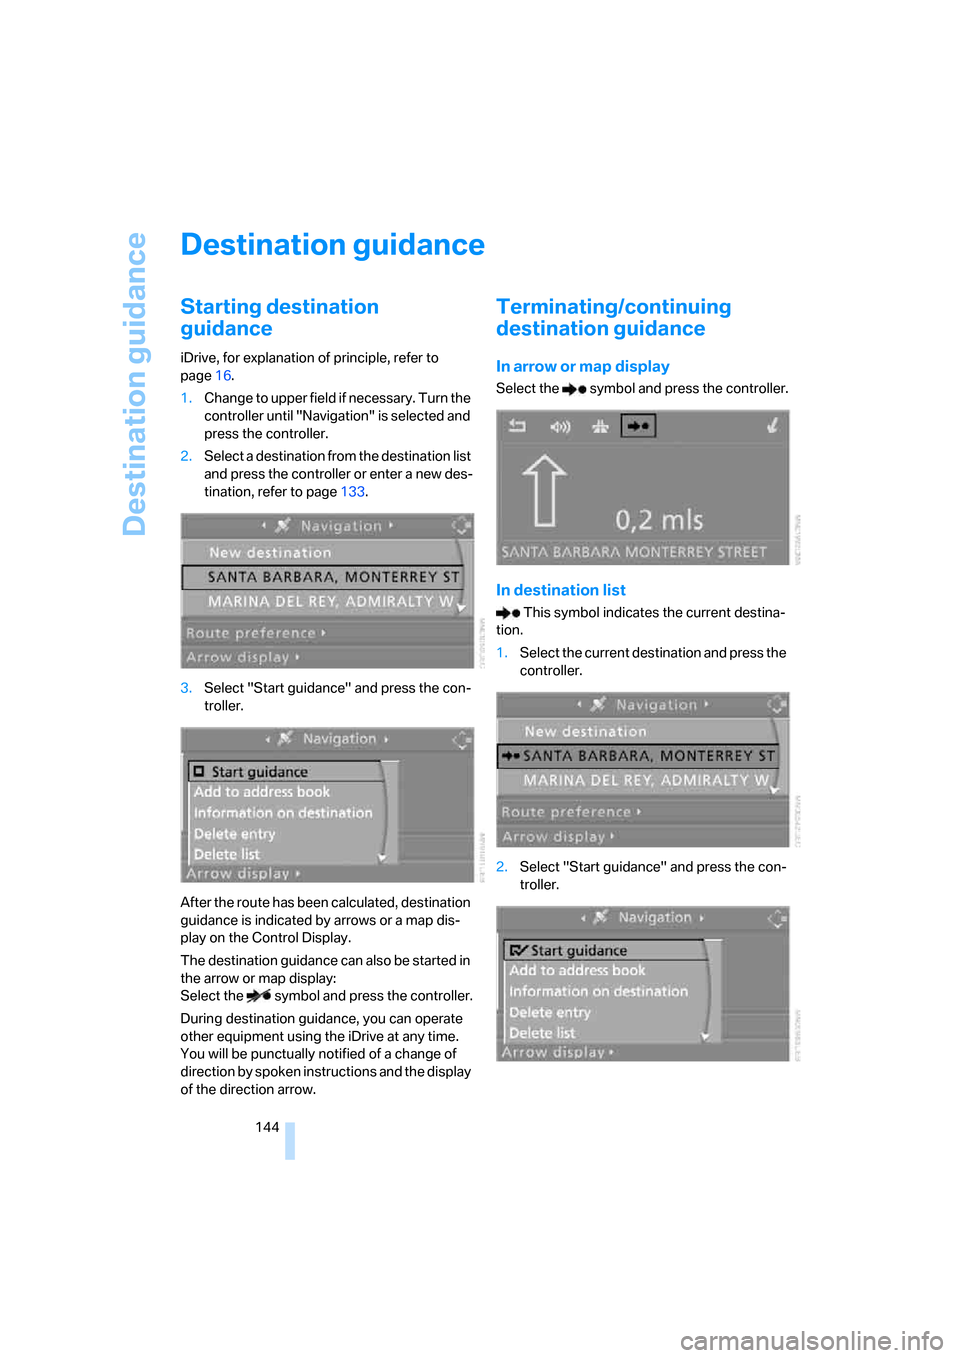
1.Change to upper field if necessary. Turn the
controller until "Navigation" is selected and
press the controller.
2.Select a destination from the destination list
and press the controller or enter a new des-
tination, refer to page133.
3.Select "Start guidance" and press the con-
troller.
After the route has been calculated, destination
guidance is indicated by arrows or a map dis-
play on the Control Display.
The destination guidance can also be started in
the arrow or map display:
Select the symbol and press the controller.
During destination guidance, you can operate
other equipment using the iDrive at any time.
You will be punctually notified of a change of
direction by spoken instructions and the display
of the direction arrow.
Terminating/continuing
destination guidance
In arrow or map display
Select the symbol and press the controller.
In destination list
This symbol indicates the current destina-
tion.
1.Select the current destination and press the
controller.
2.Select "Start guidance" and press the con-
troller.
Page 147 of 259
Navigation
Driving tips
145Reference
At a glance
Controls
Communications
Entertainment
Mobility
When you park the vehicle before reaching the
entered destination, the following the question
is displayed before beginning the next trip:
"Continue guidance to destination?".
The destination guidance starts automatically
after a short time.
To start the destination guidance:
Select "Yes" and press the controller.
Route display
You have the option of displaying various views
of the route during destination guidance.
From another menu, you can switch
directly to the screen last displayed,
refer to Comfort opening of menu items on
page18.<
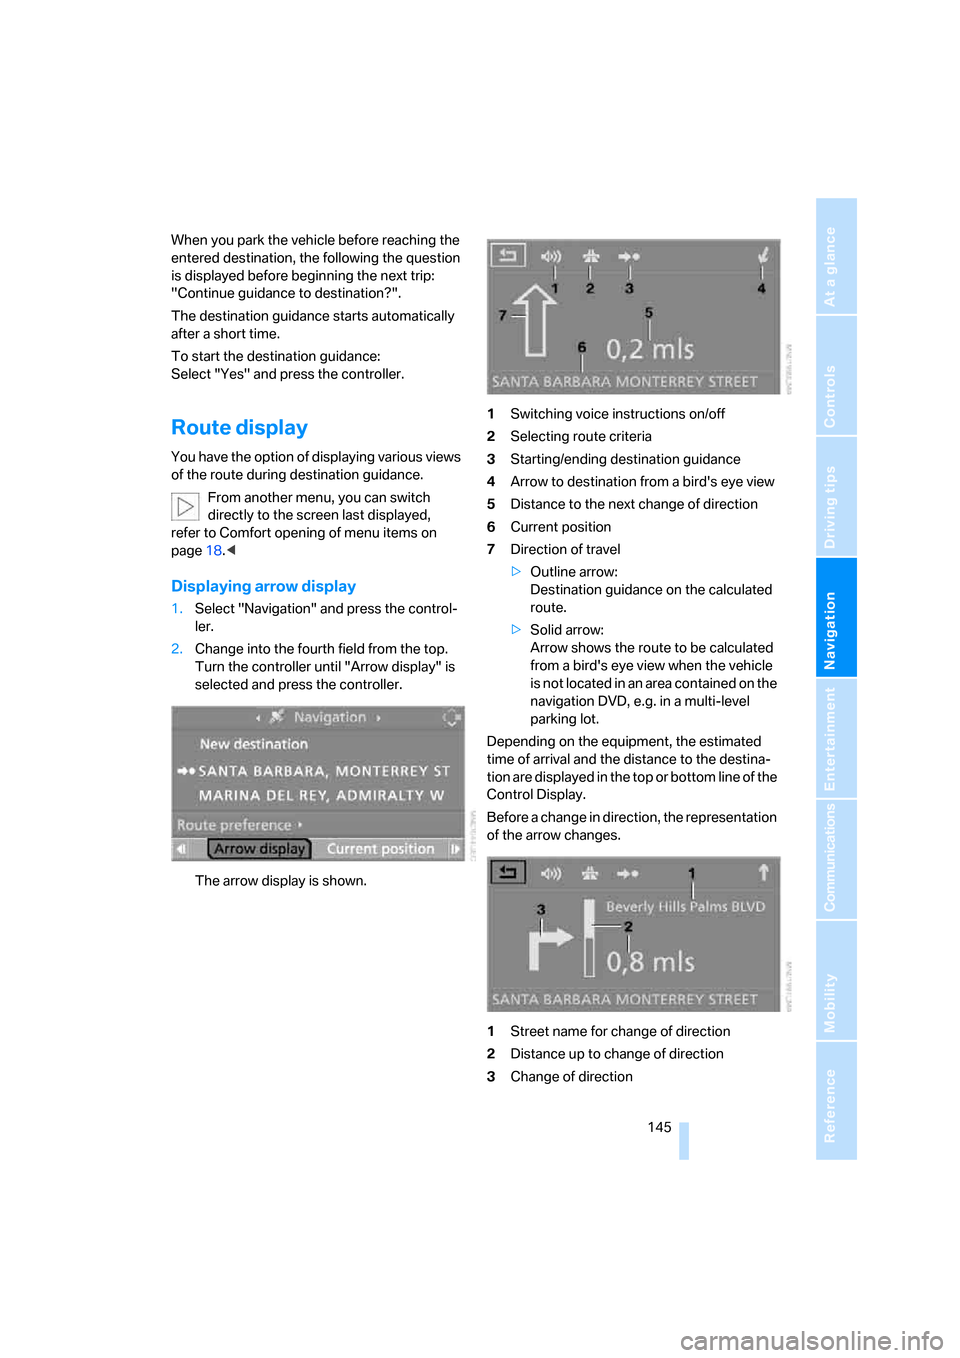
Displaying arrow display
1.Select "Navigation" and press the control-
ler.
2.Change into the fourth field from the top.
Turn the controller until "Arrow display" is
selected and press the controller.
The arrow display is shown.1Switching voice instructions on/off
2Selecting route criteria
3Starting/ending destination guidance
4Arrow to destination from a bird's eye view
5Distance to the next change of direction
6Current position
7Direction of travel
>Outline arrow:
Destination guidance on the calculated
route.
>Solid arrow:
Arrow shows the route to be calculated
from a bird's eye view when the vehicle
is not located in an area contained on the
navigation DVD, e.g. in a multi-level
parking lot.
Depending on the equipment, the estimated
time of arrival and the distance to the destina-
tion are displayed in the top or bottom line of the
Control Display.
Before a change in direction, the representation
of the arrow changes.
1Street name for change of direction
2Distance up to change of direction
3Change of direction
Page 148 of 259
Destination guidance
146 To exit the menu:
Select the arrow and press the controller.
Displaying map display
You can have your current position displayed on
a map. After starting the destination guidance,
the planned route is shown on the map.
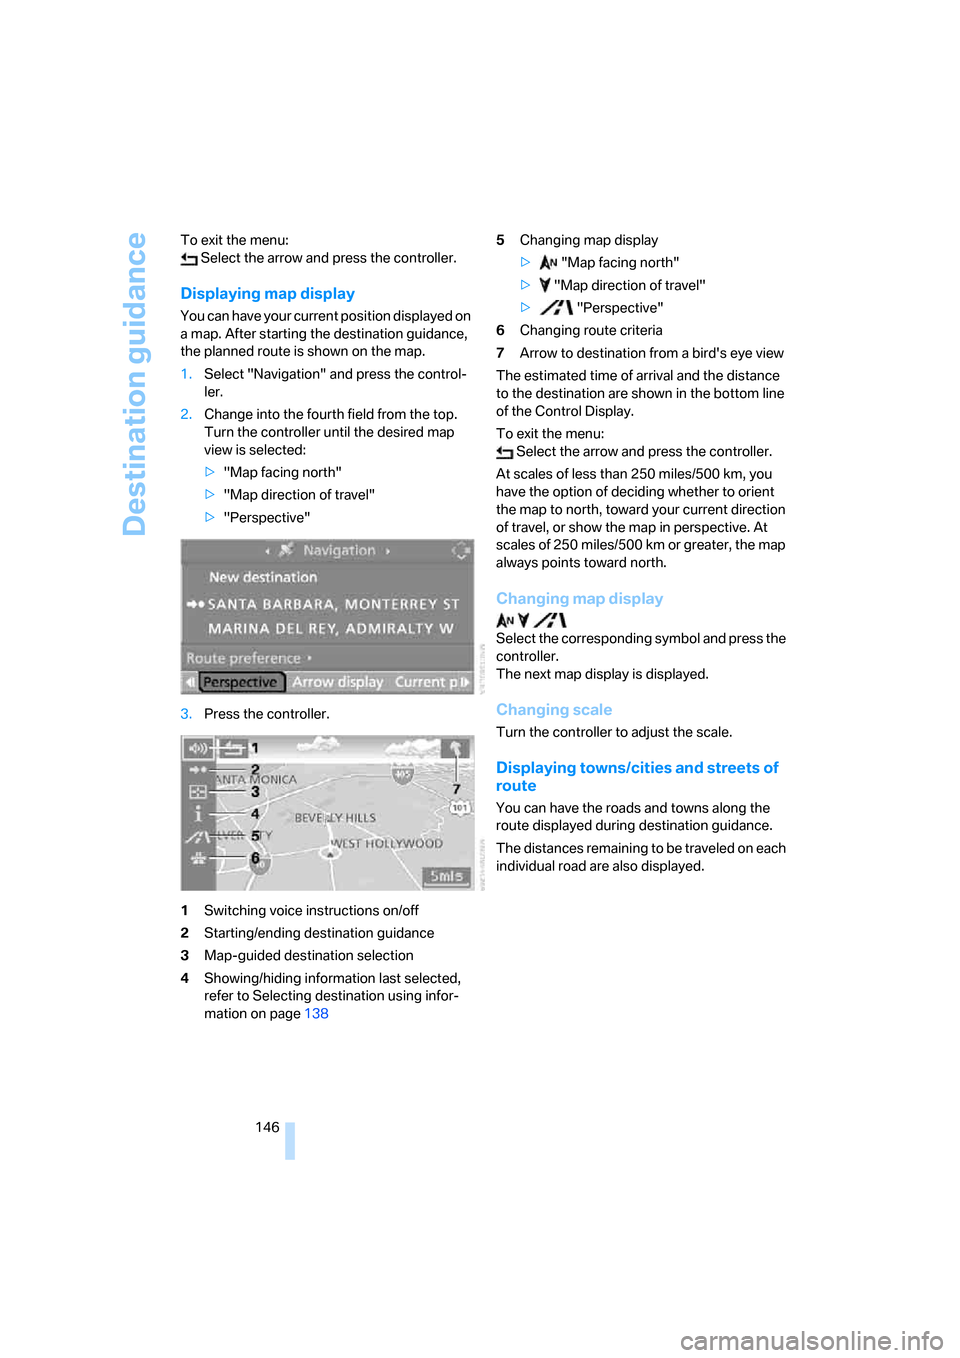
1.Select "Navigation" and press the control-
ler.
2.Change into the fourth field from the top.
Turn the controller until the desired map
view is selected:
>"Map facing north"
>"Map direction of travel"
>"Perspective"
3.Press the controller.
1Switching voice instructions on/off
2Starting/ending destination guidance
3Map-guided destination selection
4Showing/hiding information last selected,
refer to Selecting destination using infor-
mation on page1385Changing map display
> "Map facing north"
> "Map direction of travel"
> "Perspective"
6Changing route criteria
7Arrow to destination from a bird's eye view
The estimated time of arrival and the distance
to the destination are shown in the bottom line
of the Control Display.
To exit the menu:
Select the arrow and press the controller.
At scales of less than 250 miles/500 km, you
have the option of deciding whether to orient
the map to north, toward your current direction
of travel, or show the map in perspective. At
scales of 250 miles/500 km or greater, the map
always points toward north.
Changing map display
Select the corresponding symbol and press the
controller.
The next map display is displayed.
Changing scale
Turn the controller to adjust the scale.
Displaying towns/cities and streets of
route
You can have the roads and towns along the
route displayed during destination guidance.
The distances remaining to be traveled on each
individual road are also displayed.
Page 149 of 259
Navigation
Driving tips
147Reference
At a glance
Controls
Communications
Entertainment
Mobility
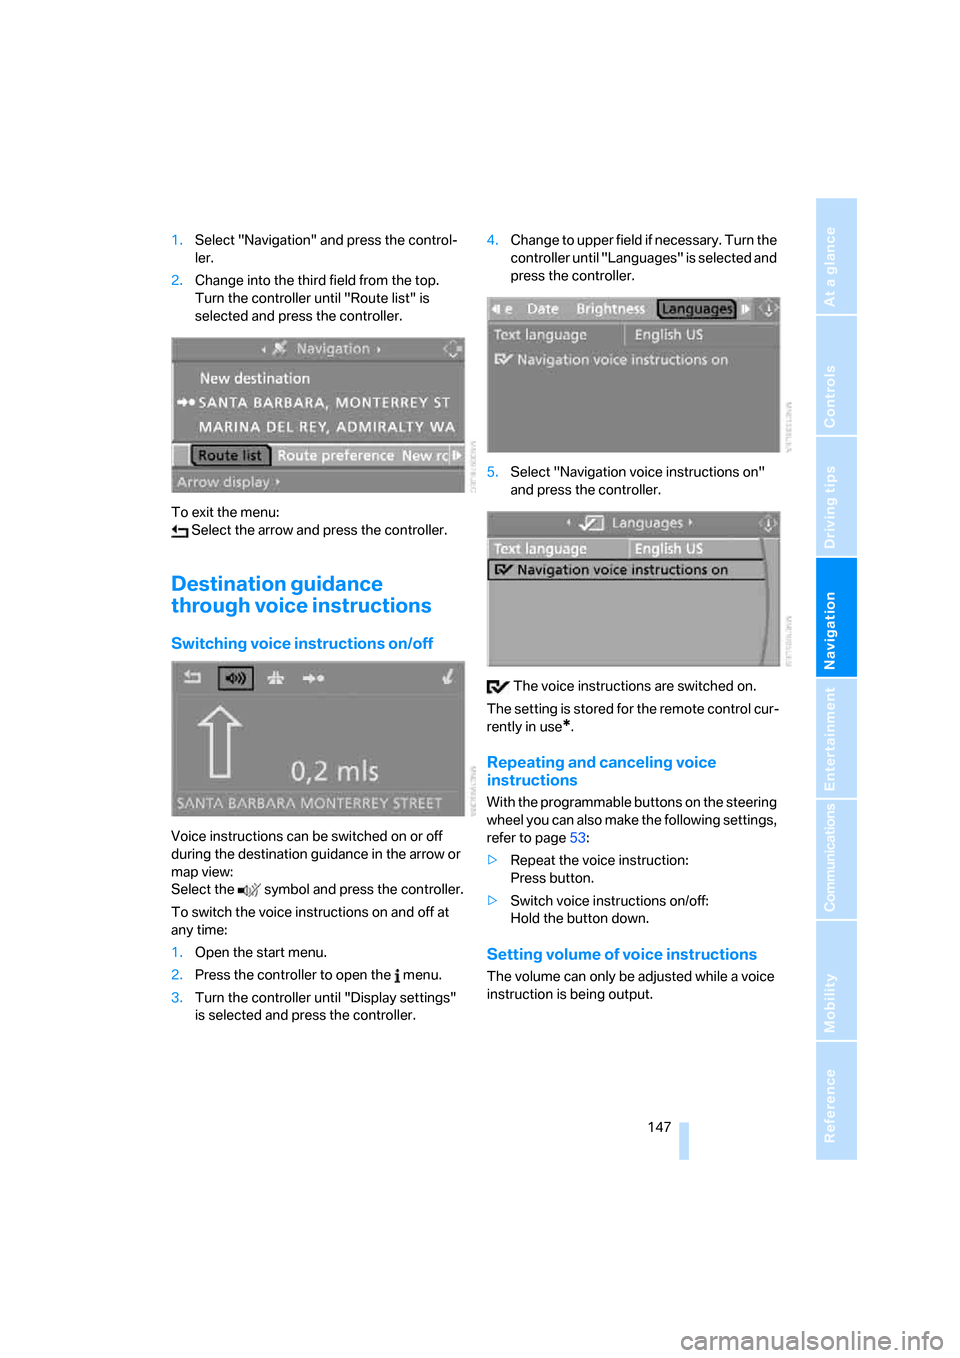
1.Select "Navigation" and press the control-
ler.
2.Change into the third field from the top.
Turn the controller until "Route list" is
selected and press the controller.
To exit the menu:
Select the arrow and press the controller.
Destination guidance
through voice instructions
Switching voice instructions on/off
Voice instructions can be switched on or off
during the destination guidance in the arrow or
map view:
Select the symbol and press the controller.
To switch the voice instructions on and off at
any time:
1.Open the start menu.
2.Press the controller to open the menu.
3.Turn the controller until "Display settings"
is selected and press the controller.4.Change to upper field if necessary. Turn the
controller until "Languages" is selected and
press the controller.
5.Select "Navigation voice instructions on"
and press the controller.
The voice instructions are switched on.
The setting is stored for the remote control cur-
rently in use
*.
Repeating and canceling voice
instructions
With the programmable buttons on the steering
wheel you can also make the following settings,
refer to page53:
>Repeat the voice instruction:
Press button.
>Switch voice instructions on/off:
Hold the button down.
Setting volume of voice instructions
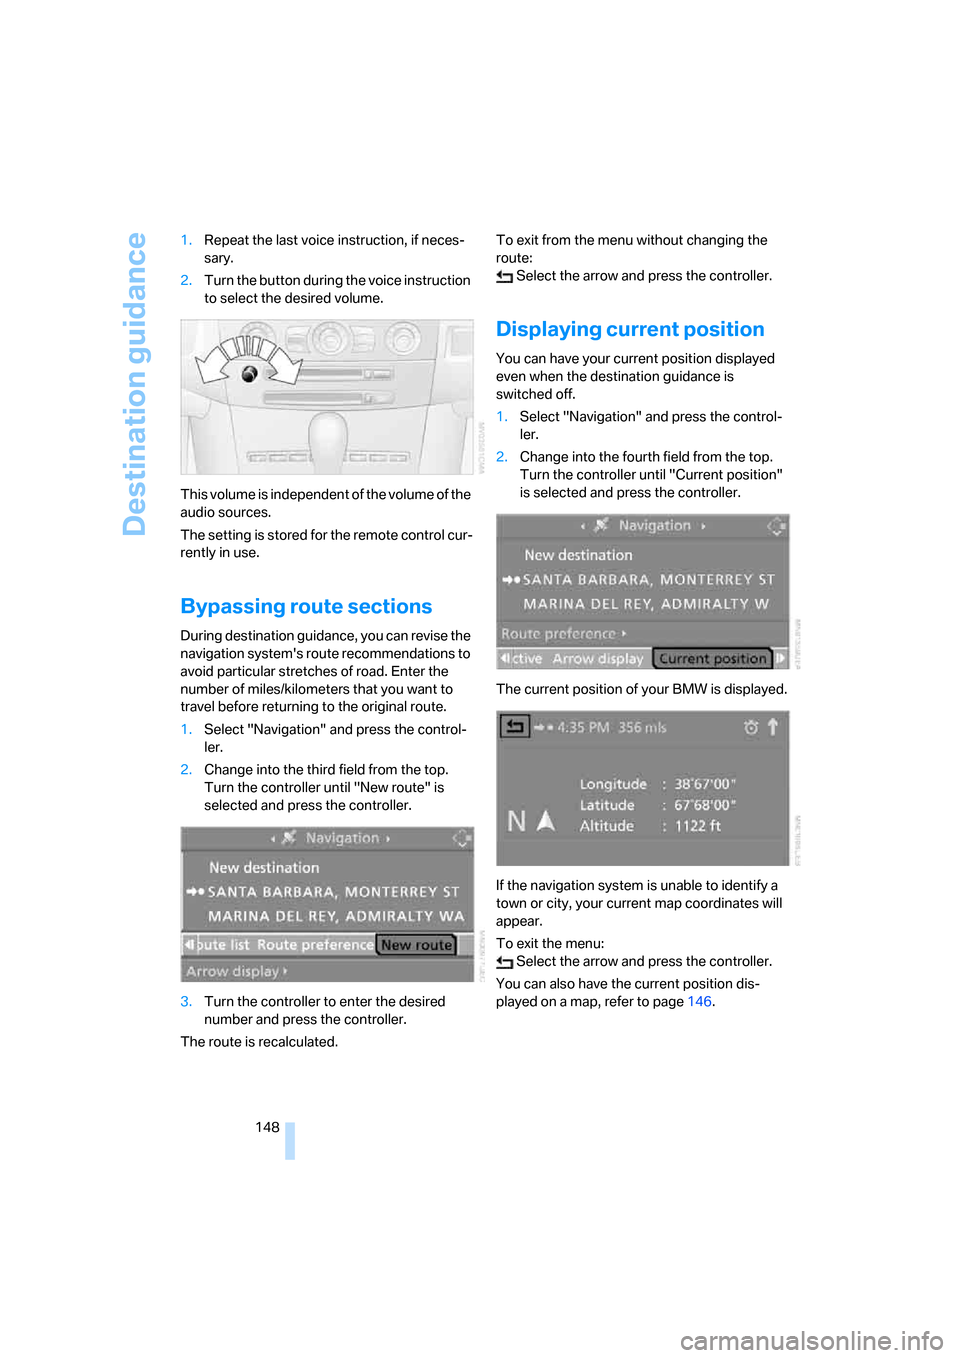
The volume can only be adjusted while a voice
instruction is being output.
Page 150 of 259
Destination guidance
148 1.Repeat the last voice instruction, if neces-
sary.
2.Turn the button during the voice instruction
to select the desired volume.
This volume is independent of the volume of the
audio sources.
The setting is stored for the remote control cur-
rently in use.
Bypassing route sections
During destination guidance, you can revise the
navigation system's route recommendations to
avoid particular stretches of road. Enter the
number of miles/kilometers that you want to
travel before returning to the original route.
1.Select "Navigation" and press the control-
ler.
2.Change into the third field from the top.
Turn the controller until "New route" is
selected and press the controller.
3.Turn the controller to enter the desired
number and press the controller.
The route is recalculated.To exit from the menu without changing the
route:
Select the arrow and press the controller.
Displaying current position
You can have your current position displayed
even when the destination guidance is
switched off.
1.Select "Navigation" and press the control-
ler.
2.Change into the fourth field from the top.
Turn the controller until "Current position"
is selected and press the controller.
The current position of your BMW is displayed.
If the navigation system is unable to identify a
town or city, your current map coordinates will
appear.
To exit the menu:
Select the arrow and press the controller.
You can also have the current position dis-
played on a map, refer to page146.
Page 154 of 259

On/off and tone
152
On/off and tone
The following audio sources have shared con-
trols and setting options:
>Professional radio
* or
Business radio
>CD player
>CD changer
*
Controls
The audio sources can be operated using:
>Buttons in the area of the CD player
>iDrive
>Buttons on steering wheel, refer to page11
Buttons in area of CD player
The layout of the buttons can vary depending
on your vehicle's equipment.
Single drive:
Two drives:1Entertainment sound output on/off, volume
>Press: switch on/off.
When you switch on, the last set radio
station or CD track is played.
>Turn: adjust volume.
2Drive for audio CDs
3 Eject CD
4 Station scan/track search
>Change radio station.
>Select track for CD player and
CD changer.
5Drive for navigation DVDs
Operation via iDrive
iDrive, for explanation of principle, refer to
page16.
1.Press the button.
This opens the start menu.
2.Move the controller backwards to open
"Entertainment".
You have the following choices:
>"FM" and "AM": radio reception
>"WB": Weather Band station
>"SAT": satellite radio
>"CD": CD player or CD changer
>"Audio Aux": external audio device
>"Set": depending on the audio source,
other adjustments can be made, e.g. with
the radio: update station with strongest
reception, save station, tone control, sam-
ple stations.
Page 155 of 259
Navigation
Entertainment
Driving tips
153Reference
At a glance
Controls
Communications
Mobility
From another menu, you can switch
directly to the screen last displayed,
refer to Comfort opening of menu items on
page18.<
The selected audio source is stored for the
remote control currently in use.
Switching on/off
In order to switch the Entertainment sound out-
put on and off:
Press knob1 next to the CD player.
This symbol on the Control Display indi-
cates that sound output is switched off.
For a single drive, the sound output is available
for approx. 20 minutes with the ignition
switched off.
Switch on the sound output again for this pur-
pose.
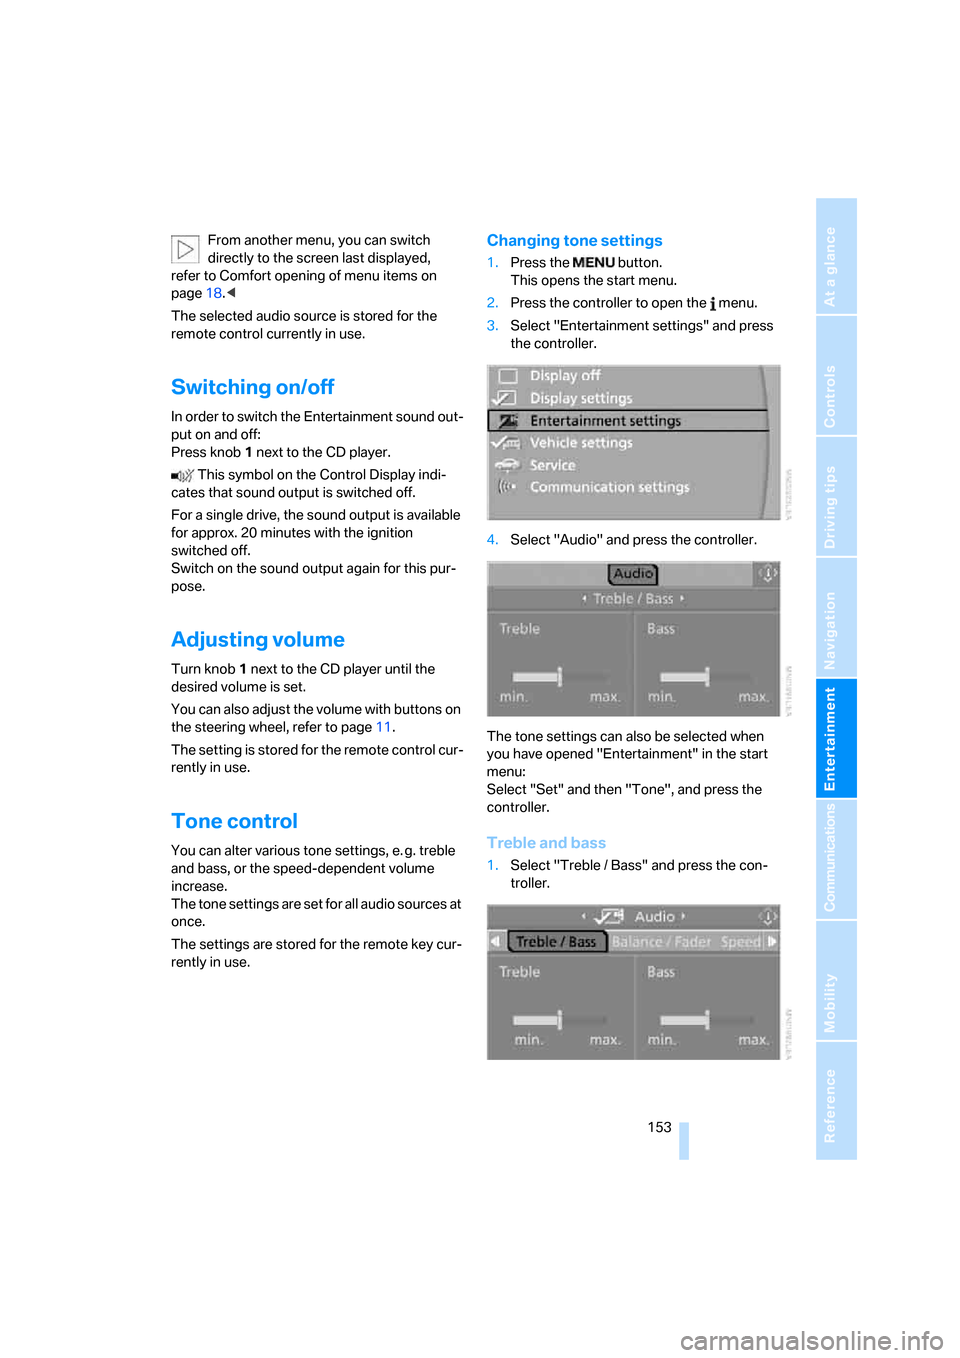
Adjusting volume
Turn knob1 next to the CD player until the
desired volume is set.
You can also adjust the volume with buttons on
the steering wheel, refer to page11.
The setting is stored for the remote control cur-
rently in use.
Tone control
You can alter various tone settings, e. g. treble
and bass, or the speed-dependent volume
increase.
The tone settings are set for all audio sources at
once.
The settings are stored for the remote key cur-
rently in use.
Changing tone settings
1.Press the button.
This opens the start menu.
2.Press the controller to open the menu.
3.Select "Entertainment settings" and press
the controller.
4.Select "Audio" and press the controller.
The tone settings can also be selected when
you have opened "Entertainment" in the start
menu:
Select "Set" and then "Tone", and press the
controller.
Treble and bass
1.Select "Treble / Bass" and press the con-
troller.
Page 158 of 259
Radio
156
Radio
Your radio provides reception the FM and AM
wavebands.
Listening to radio
Press the button if the sound output is switched
off.
iDrive, for explanation of principle, refer to
page16.
1.Press the button.
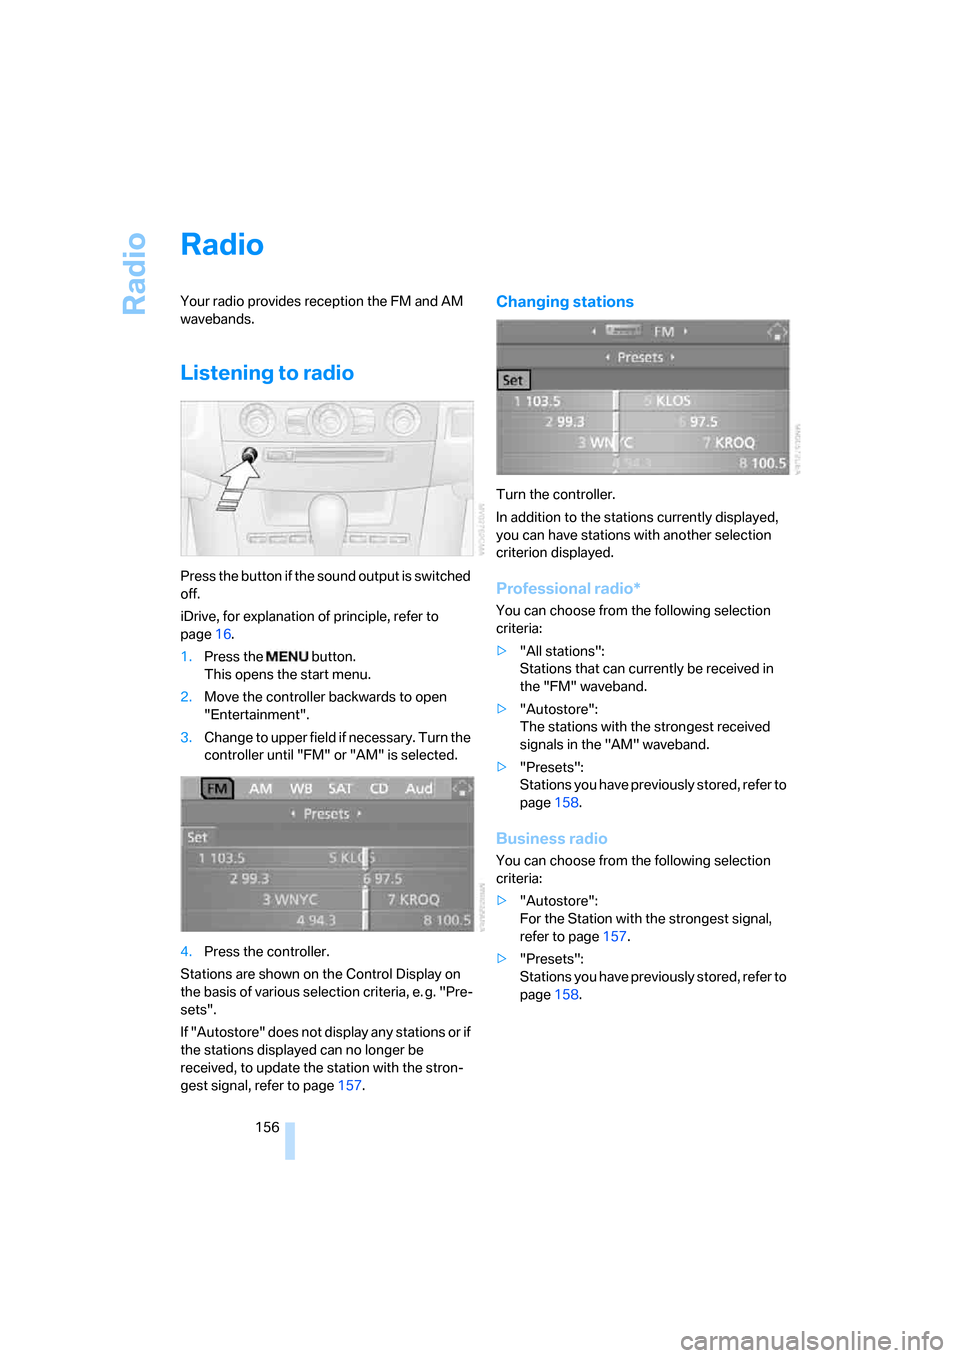
This opens the start menu.
2.Move the controller backwards to open
"Entertainment".
3.Change to upper field if necessary. Turn the
controller until "FM" or "AM" is selected.
4.Press the controller.
Stations are shown on the Control Display on
the basis of various selection criteria, e. g. "Pre-
sets".
If "Autostore" does not display any stations or if
the stations displayed can no longer be
received, to update the station with the stron-
gest signal, refer to page157.
Changing stations
Turn the controller.
In addition to the stations currently displayed,
you can have stations with another selection
criterion displayed.
Professional radio*
You can choose from the following selection
criteria:
>"All stations":
Stations that can currently be received in
the "FM" waveband.
>"Autostore":
The stations with the strongest received
signals in the "AM" waveband.
>"Presets":
Stations you have previously stored, refer to
page158.
Business radio
You can choose from the following selection
criteria:
>"Autostore":
For the Station with the strongest signal,
refer to page157.
>"Presets":
Stations you have previously stored, refer to
page158.