2006 BMW 335I COUPE rear entertainment
[x] Cancel search: rear entertainmentPage 83 of 239

Controls
81Reference
At a glance
Driving tips
Communications
Navigation
Entertainment
Mobility
5.Select "PDC display on" and press the con-
troller.
The PDC screen is activated.
The display is shown on the Control Display as
soon as PDC is activated.
System limitations
Even with PDC, final responsibility for
estimating the distance between the
vehicle and any obstructions always remains
with the driver. Even when sensors are pro-
vided, there is a blind spot in which objects can
no longer be detected. The system is also sub-
ject to the physical limits that apply to all forms
of ultrasonic measurement, such as those
encountered with trailer towbars and couplings,
thin and wedge-shaped objects, etc. Low
objects already indicated, such as a curb, may
enter the sensors' dead areas before a continu-
ous audible signal is given. Higher, protruding
objects, such as wall ledges, may not be detect-
able. Loud sound sources outside or inside the
car can drown out the PDC signal.<
Driving stability control
systems
Your BMW has a number of systems that help
to maintain the vehicle's stability even in
adverse driving conditions.
ABS Antilock Brake System
ABS prevents locking of the wheels during
braking. Safe steering response is maintained
even during full braking. Active safety is thus
increased.
The ABS is operational every time you start the
engine. Braking safely, refer to page113.
Electronic brake-force distribution
The system controls the brake pressure in the
rear wheels to ensure stable braking behavior.
DBC Dynamic Brake Control
When you apply the brakes rapidly, this system
automatically produces the maximum braking force boost and thus helps to achieve the short-
est possible braking distance during full brak-
ing. This system exploits all of the benefits pro-
vided by ABS.
Do not reduce the pressure on the brake for the
duration of the brake application. If the brake is
released, DBC will be switched off.
DSC Dynamic Stability Control
DSC prevents the driving wheels from losing
traction when you pull away from rest or accel-
erate. DSC also recognizes unstable driving
conditions, for example if the rear of the car is
about to swerve or if momentum is acting at an
angle past the front wheels. In these cases,
DSC helps the vehicle maintain a safe course
within physical limits by reducing engine output
and through braking actions at the individual
wheels.
The laws of physics cannot be repealed,
even with DSC. An appropriate driving
style always remains the responsibility of the
driver. Therefore, do not reduce the additional
safety margin again by taking risks.<
Deactivating DSC
Press the button for at least 3 seconds; the indi-
cator lamps for DSC in the instrument cluster
light up. Dynamic Traction Control DTC and
DSC have been simultaneously deactivated.
Stabilizing and drive-output promoting actions
are no longer executed.
To increase vehicle stability, activate DSC again
as soon as possible.
ba8_E9293_US.book Seite 81 Freitag, 5. Mai 2006 1:02 13
Page 89 of 239

Controls
87Reference
At a glance
Driving tips
Communications
Navigation
Entertainment
Mobility
Active steering*
The concept
Active steering varies the turning angle of the
front wheels in relation to steering wheel move-
ments. It also varies the steering force required
to turn the wheels depending on the speed at
which you are driving.
When you are driving in the low road-speed
range, e.g. in a town or when parking, the steer-
ing angle increases, i.e. the steering becomes
very direct, and less effort is required to turn the
wheels. In the higher speed range, on the other
hand, the steering angle is reduced more and
more. This improves the handling capability of
your BMW over the entire speed range.
In critical situations, the system can make tar-
geted corrections to the steering angle pro-
vided by the driver and thus stabilize the vehicle
before the driver intervenes. This stabilizing
intervention is simultaneously deactivated
when DSC is switched off, refer to page81.
Malfunction
The warning lamps come on. Active
steering is no longer operational. At
low speeds, greater steering wheel movements are required, whereas at higher
speeds the vehicle reacts more sensitively to
steering wheel movements. The stability-
enhancing feature may also be deactivated.
Drive cautiously and think well ahead. Have the
system checked.
If the warning lamp lights up during the first
engine starting following a power supply inter-
ruption, the system must be activated by being
initialized.
Brake Force Display
On the left: normal braking
On the right: sharp braking
Airbags
The following airbags are located under the
marked covers:
1Front airbags for driver and front passenger
2Head airbags, front and rear3Side airbags in the seat backrests
ba8_E9293_US.book Seite 87 Freitag, 5. Mai 2006 1:02 13
Page 95 of 239
Controls
93Reference
At a glance
Driving tips
Communications
Navigation
Entertainment
Mobility
Fog lamps
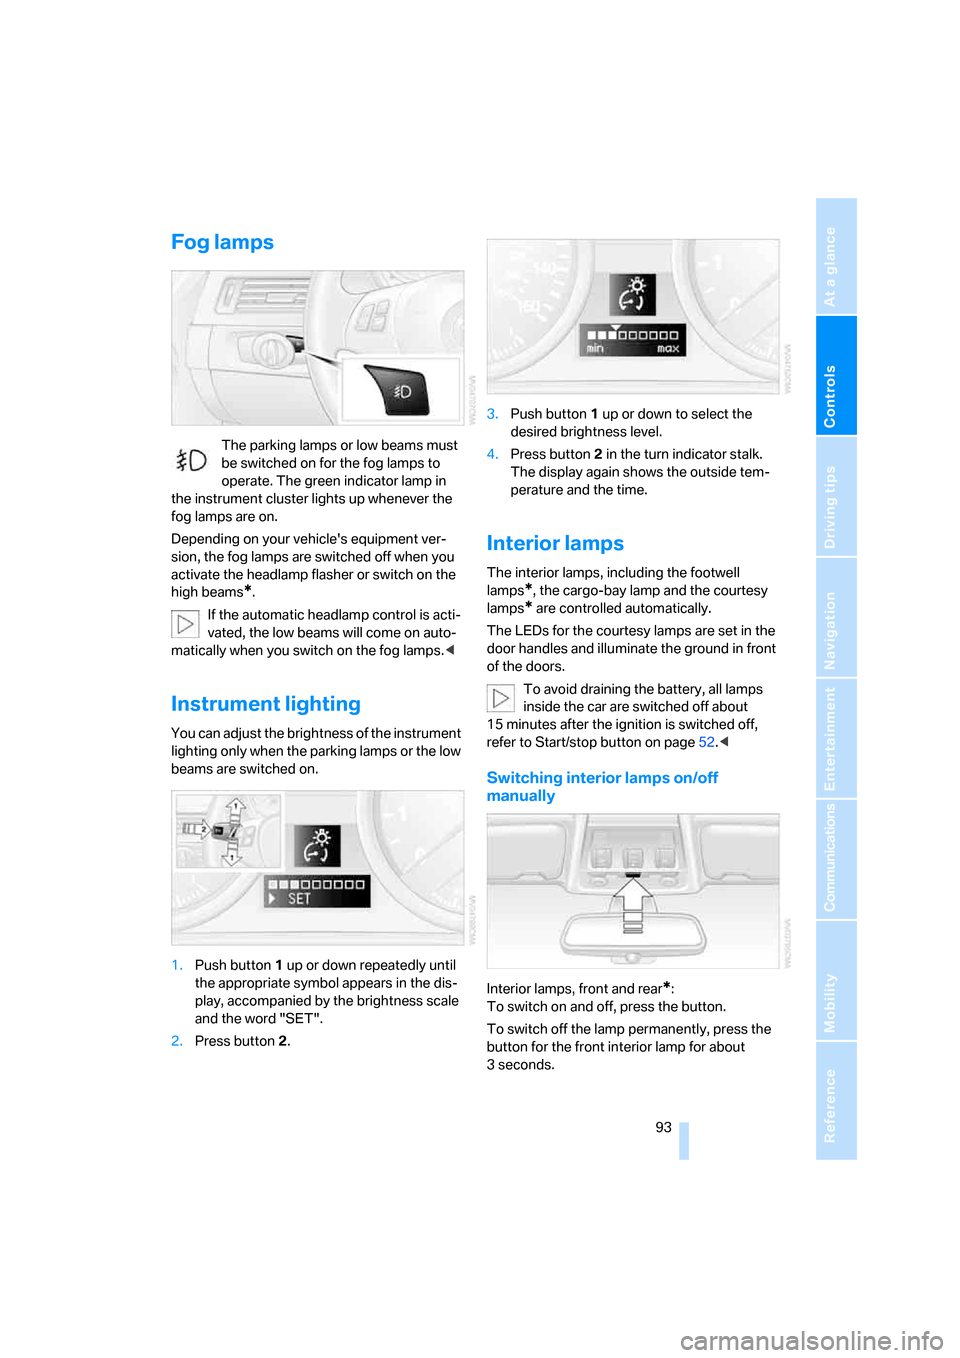
The parking lamps or low beams must
be switched on for the fog lamps to
operate. The green indicator lamp in
the instrument cluster lights up whenever the
fog lamps are on.
Depending on your vehicle's equipment ver-
sion, the fog lamps are switched off when you
activate the headlamp flasher or switch on the
high beams
*.
If the automatic headlamp control is acti-
vated, the low beams will come on auto-
matically when you switch on the fog lamps.<
Instrument lighting
You can adjust the brightness of the instrument
lighting only when the parking lamps or the low
beams are switched on.
1.Push button 1 up or down repeatedly until
the appropriate symbol appears in the dis-
play, accompanied by the brightness scale
and the word "SET".
2.Press button 2.3.Push button 1 up or down to select the
desired brightness level.
4.Press button 2 in the turn indicator stalk.
The display again shows the outside tem-
perature and the time.
Interior lamps
The interior lamps, including the footwell
lamps
*, the cargo-bay lamp and the courtesy
lamps
* are controlled automatically.
The LEDs for the courtesy lamps
are set in the
door handles and illuminate the ground in front
of the doors.
To avoid draining the battery, all lamps
inside the car are switched off about
15 minutes after the ignition is switched off,
refer to Start/stop button on page52.<
Switching interior lamps on/off
manually
Interior lamps, front and rear*:
To switch on and off, press the button.
To switch off the lamp permanently, press the
button for the front interior lamp for about
3seconds.
ba8_E9293_US.book Seite 93 Freitag, 5. Mai 2006 1:02 13
Page 97 of 239

Controls
95Reference
At a glance
Driving tips
Communications
Navigation
Entertainment
Mobility
Climate
1Airflow directed toward the windshield and
side windows
2Air to the upper body area
Draft-free ventilation98
3Air to the footwell
4Air distribution, manual
5Temperature adjustment, left-hand side of
passenger compartment
6Maximum cooling
7AUTO program
8Air flow rate, manual
9AUC Automatic recirculated-air control/
Recirculated-air mode10Temperature adjustment, right-hand side
of passenger compartment
11Residual heat
12Defrosting windows and removing conden-
sation
13Switching cooling function on/off manually
14Rear window defroster
15Air grill for interior temperature sensor –
please keep clear and unobstructed
The current setting for the air distribution is dis-
played on the Control Display, refer to page96.
ba8_E9293_US.book Seite 95 Freitag, 5. Mai 2006 1:02 13
Page 105 of 239
Controls
103Reference
At a glance
Driving tips
Communications
Navigation
Entertainment
Mobility
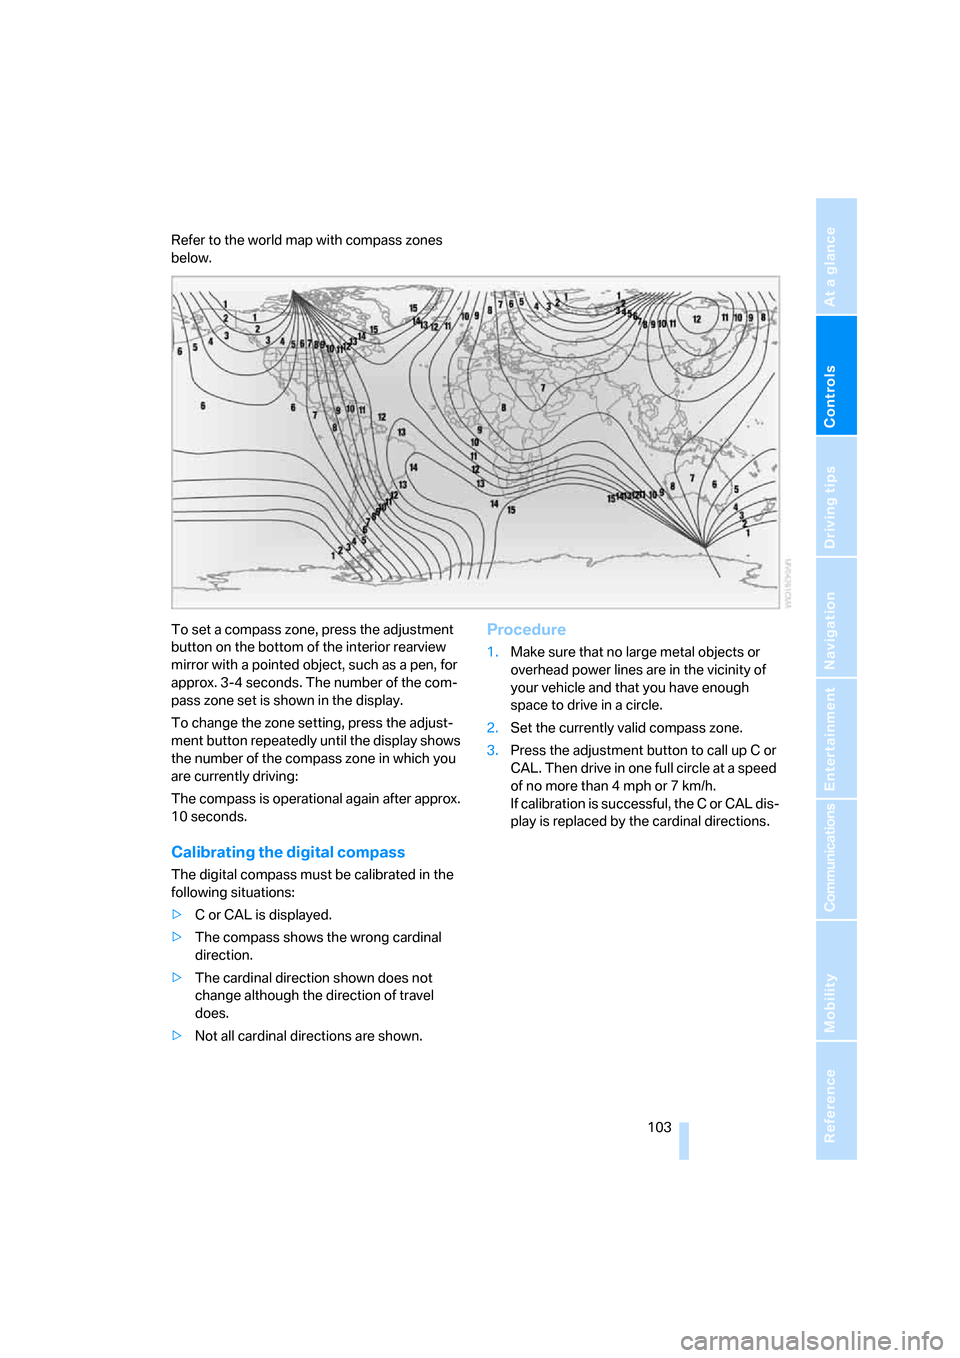
Refer to the world map with compass zones
below.
To set a compass zone, press the adjustment
button on the bottom of the interior rearview
mirror with a pointed object, such as a pen, for
approx. 3-4 seconds. The number of the com-
pass zone set is shown in the display.
To change the zone setting, press the adjust-
ment button repeatedly until the display shows
the number of the compass zone in which you
are currently driving:
The compass is operational again after approx.
10 seconds.
Calibrating the digital compass
The digital compass must be calibrated in the
following situations:
>C or CAL is displayed.
>The compass shows the wrong cardinal
direction.
>The cardinal direction shown does not
change although the direction of travel
does.
>Not all cardinal directions are shown.
Procedure
1.Make sure that no large metal objects or
overhead power lines are in the vicinity of
your vehicle and that you have enough
space to drive in a circle.
2.Set the currently valid compass zone.
3.Press the adjustment button to call up C or
CAL. Then drive in one full circle at a speed
of no more than 4 mph or 7 km/h.
If calibration is successful, the C or CAL dis-
play is replaced by the cardinal directions.
ba8_E9293_US.book Seite 103 Freitag, 5. Mai 2006 1:02 13
Page 107 of 239
Controls
105Reference
At a glance
Driving tips
Communications
Navigation
Entertainment
Mobility
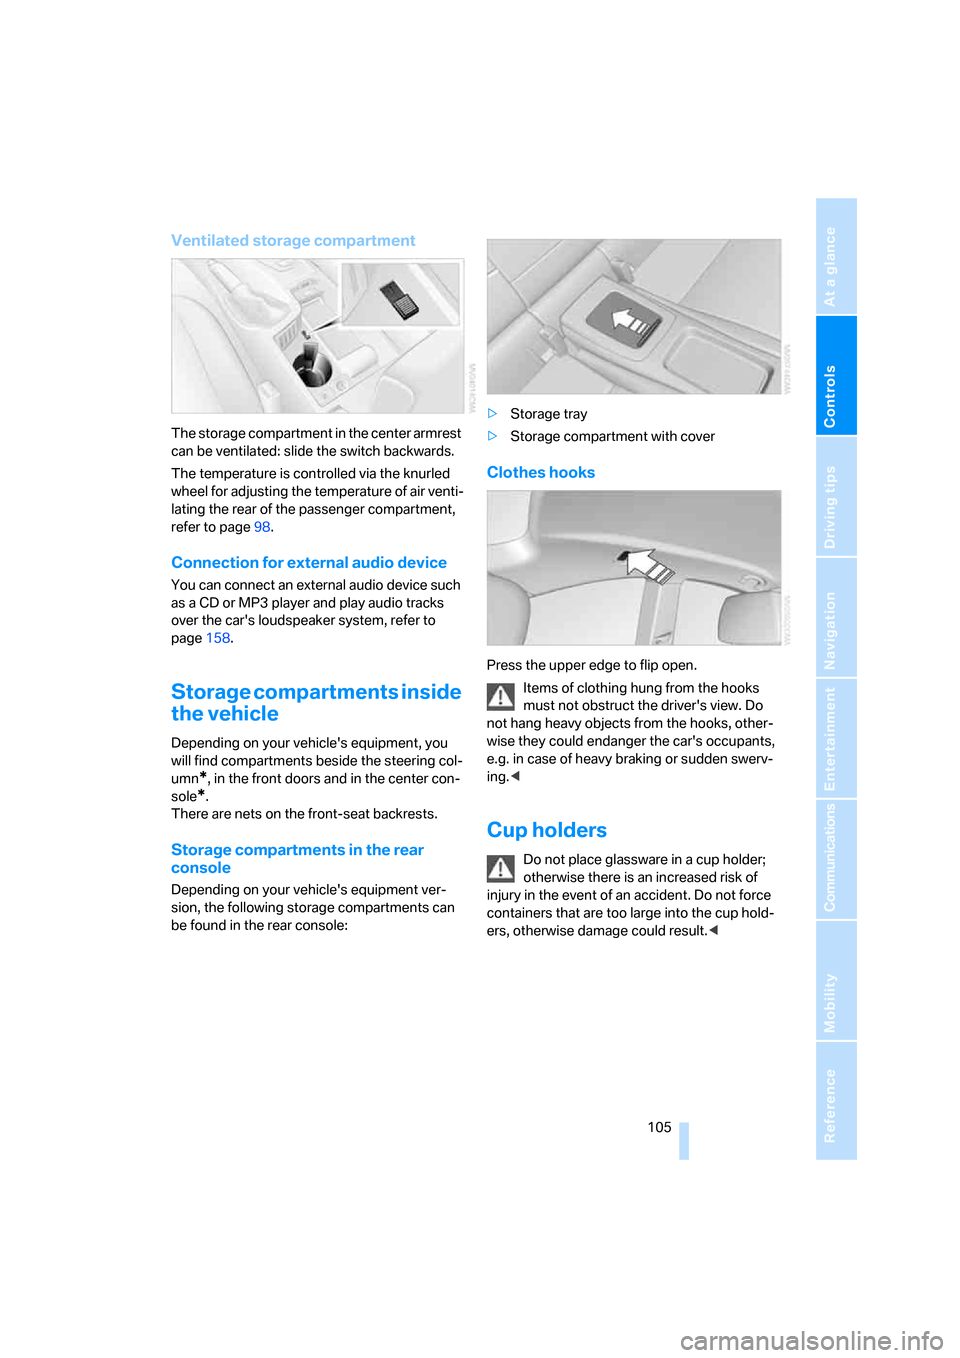
Ventilated storage compartment
The storage compartment in the center armrest
can be ventilated: slide the switch backwards.
The temperature is controlled via the knurled
wheel for adjusting the temperature of air venti-
lating the rear of the passenger compartment,
refer to page98.
Connection for external audio device
You can connect an external audio device such
as a CD or MP3 player and play audio tracks
over the car's loudspeaker system, refer to
page158.
Storage compartments inside
the vehicle
Depending on your vehicle's equipment, you
will find compartments beside the steering col-
umn
*, in the front doors and in the center con-
sole
*.
There are nets
on the front-seat backrests.
Storage compartments in the rear
console
Depending on your vehicle's equipment ver-
sion, the following storage compartments can
be found in the rear console:>Storage tray
>Storage compartment with cover
Clothes hooks
Press the upper edge to flip open.
Items of clothing hung from the hooks
must not obstruct the driver's view. Do
not hang heavy objects from the hooks, other-
wise they could endanger the car's occupants,
e.g. in case of heavy braking or sudden swerv-
ing.<
Cup holders
Do not place glassware in a cup holder;
otherwise there is an increased risk of
injury in the event of an accident. Do not force
containers that are too large into the cup hold-
ers, otherwise damage could result.<
ba8_E9293_US.book Seite 105 Freitag, 5. Mai 2006 1:02 13
Page 109 of 239
Controls
107Reference
At a glance
Driving tips
Communications
Navigation
Entertainment
Mobility
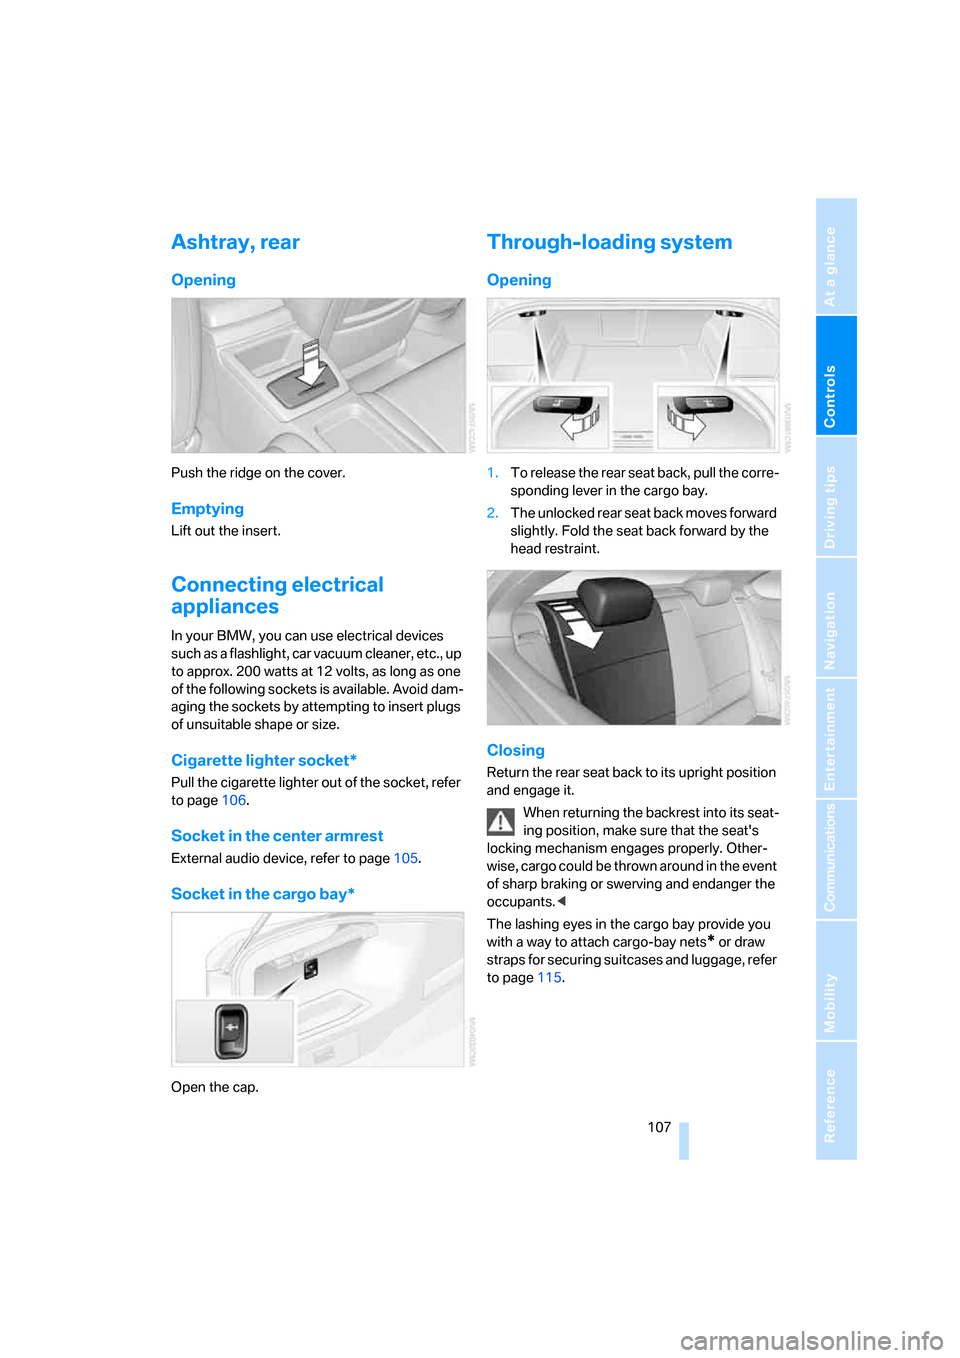
Ashtray, rear
Opening
Push the ridge on the cover.
Emptying
Lift out the insert.
Connecting electrical
appliances
In your BMW, you can use electrical devices
such as a flashlight, car vacuum cleaner, etc., up
to approx. 200 watts at 12 volts, as long as one
of the following sockets is available. Avoid dam-
aging the sockets by attempting to insert plugs
of unsuitable shape or size.
Cigarette lighter socket*
Pull the cigarette lighter out of the socket, refer
to page106.
Socket in the center armrest
External audio device, refer to page105.
Socket in the cargo bay*
Open the cap.
Through-loading system
Opening
1.To release the rear seat back, pull the corre-
sponding lever in the cargo bay.
2.The unlocked rear seat back moves forward
slightly. Fold the seat back forward by the
head restraint.
Closing
Return the rear seat back to its upright position
and engage it.
When returning the backrest into its seat-
ing position, make sure that the seat's
locking mechanism engages properly. Other-
wise, cargo could be thrown around in the event
of sharp braking or swerving and endanger the
occupants.<
The lashing eyes in the cargo bay provide you
with a way to attach cargo-bay nets
* or draw
straps for securing suitcases and luggage, refer
to page115.
ba8_E9293_US.book Seite 107 Freitag, 5. Mai 2006 1:02 13
Page 111 of 239
Controls
109Reference
At a glance
Driving tips
Communications
Navigation
Entertainment
Mobility
Secure the ski bag in the manner
described, otherwise it could endanger
the car's occupants, e.g. in case of heavy brak-
ing or sudden swerving.<
To store the ski bag, perform the steps
described for loading in reverse order.
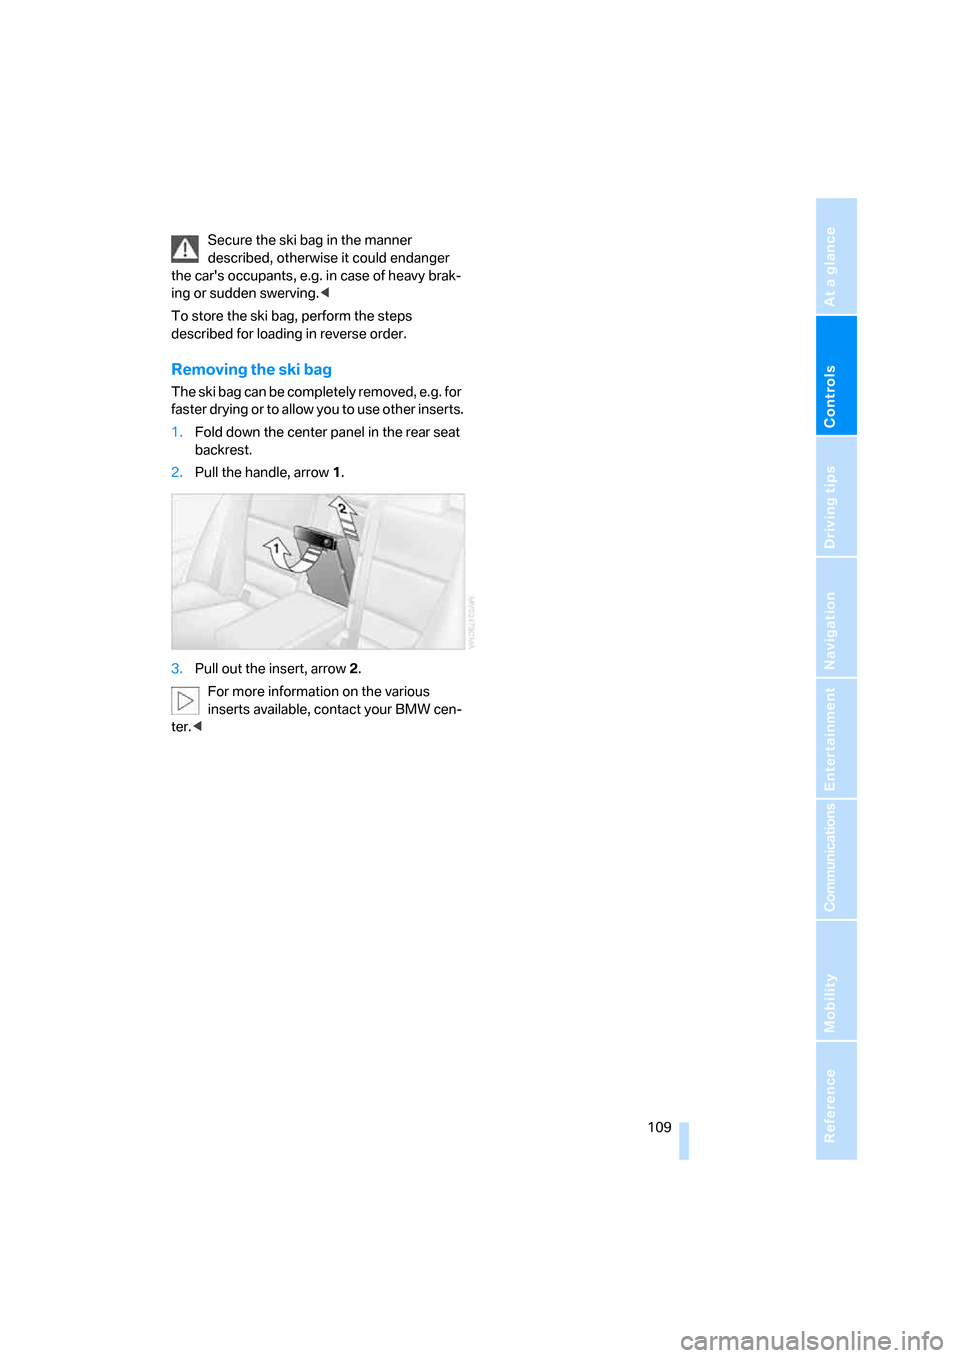
Removing the ski bag
The ski bag can be completely removed, e.g. for
faster drying or to allow you to use other inserts.
1.Fold down the center panel in the rear seat
backrest.
2.Pull the handle, arrow1.
3.Pull out the insert, arrow 2.
For more information on the various
inserts available, contact your BMW cen-
ter.<
ba8_E9293_US.book Seite 109 Freitag, 5. Mai 2006 1:02 13