2006 BMW 330I brake
[x] Cancel search: brakePage 7 of 246
5Reference
At a glance
Controls
Driving tips
Communications
Navigation
Entertainment
Mobility
The individual vehicle
When you ordered your BMW, you chose vari-
ous items of equipment. This Owner's Manual
describes the entire array of options and equip-
ment available with a specific BMW model.
Please bear in mind that the manual may con-
tain information on accessories and equipment
that you have not specified for your own vehicle.
Sections describing options and special equip-
ment are marked by asterisks
* to assist you in
identifying possible differences between the
descriptions in this manual and your own vehi-
cle's equipment.
If equipment in your BMW is not described in
this Owner's Manual, please refer to the accom-
panying Supplementary Owner's Manuals.
Editorial notice
BMW pursues a policy of continuous, ongoing
development that is conceived to ensure that
our vehicles continue to embody the highest
quality and safety standards combined with
advanced, state-of-the-art technology. For this
reason, it is possible in exceptional cases that
features described in this Owner's Manual
could differ from those on your vehicle.
For your own safety
Maintenance and repair
Advanced technology, e.g. the use of
modern materials and powerful electron-
ics, requires specially adapted maintenance
and repair methods. You should therefore have
the corresponding work on your vehicle per-
formed only by your BMW Center or at a work-
shop that works according to BMW repair pro-
cedures with correspondingly trained
personnel. If this work is not carried out prop-
erly, there is a danger of subsequent damage
and related safety hazards.<
Parts and accessories
For your own safety, use genuine parts
and accessories approved by BMW.
When you purchase accessories tested and
approved by BMW and Original BMW Parts, you
simultaneously acquire the assurance that they
have been thoroughly tested by BMW to ensure
optimum performance when installed on your
vehicle.
BMW warrants these parts to be free from
defects in material and workmanship.
BMW will not accept any liability for damage
resulting from installation of parts and accesso-
ries not approved by BMW.
BMW cannot test every product made by other
manufacturers to verify if it can be used on a
BMW safely and without risk to either the vehi-
cle, its operation, or its occupants.
Original BMW Parts, BMW Accessories and
other products approved by BMW, together
with professional advice on using these items,
are available from all BMW Centers.
Installation and operation of non-BMW
approved accessories such as alarms, radios,
amplifiers, radar detectors, wheels, suspension
components, brake dust shields, telephones,
including operation of any mobile phone from
within the vehicle without using an externally
mounted antenna, or transceiver equipment, for
instance, CBs, walkie-talkies, ham radio or sim-
ilar accessories, may cause extensive damage
Page 15 of 246
At a glance
13Reference
Controls
Driving tips
Communications
Navigation
Entertainment
Mobility
Indicator and warning lamps
The concept
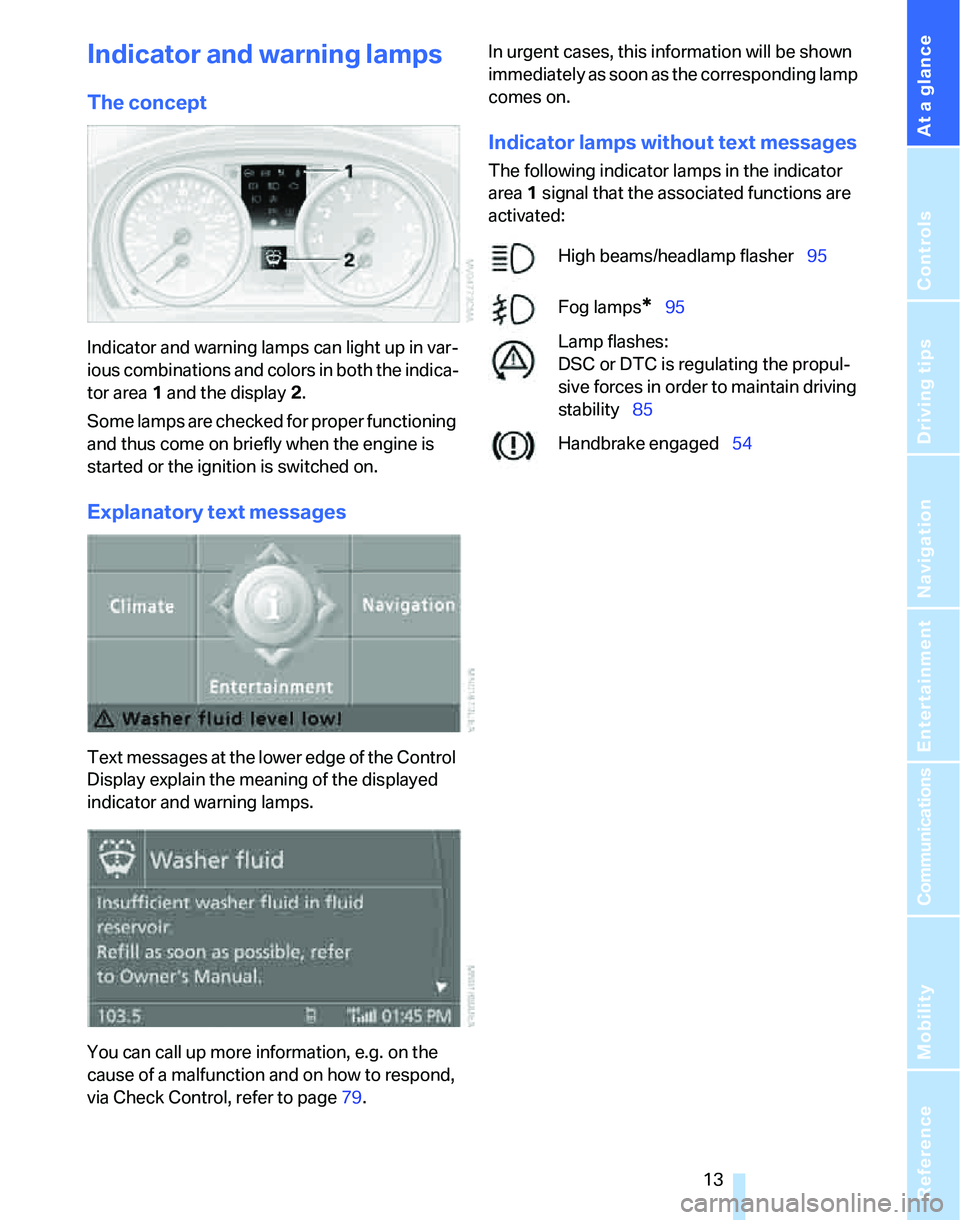
Indicator and warning lamps can light up in var-
ious combinations and colors in both the indica-
tor area 1 and the display 2.
Some lamps are checked for proper functioning
and thus come on briefly when the engine is
started or the ignition is switched on.
Explanatory text messages
Text messages at the lower edge of the Control
Display explain the meaning of the displayed
indicator and warning lamps.
You can call up more information, e.g. on the
cause of a malfunction and on how to respond,
via Check Control, refer to page79.In urgent cases, this information will be shown
immediately as soon as the corresponding lamp
comes on.
Indicator lamps without text messages
The following indicator lamps in the indicator
area1 signal that the associated functions are
activated:
High beams/headlamp flasher95
Fog lamps
*95
Lamp flashes:
DSC or DTC is regulating the propul-
sive forces in order to maintain driving
stability85
Handbrake engaged54
Page 38 of 246
Opening and closing
36
Unlocking
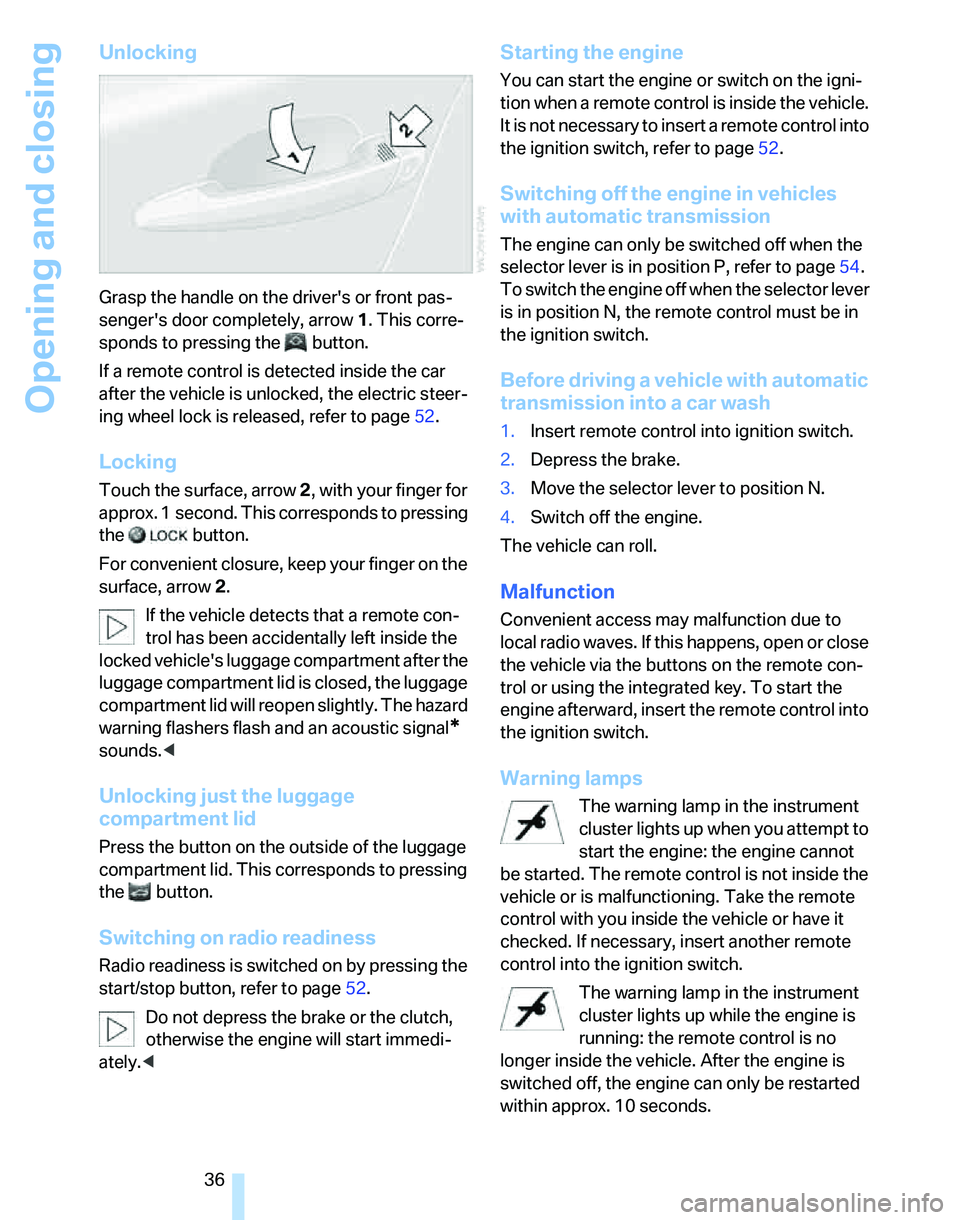
Grasp the handle on the driver's or front pas-
senger's door completely, arrow 1. This corre-
sponds to pressing the button.
If a remote control is detected inside the car
after the vehicle is unlocked, the electric steer-
ing wheel lock is released, refer to page52.
Locking
Touch the surface, arrow 2, with your finger for
approx. 1 second. This corresponds to pressing
the button.
For convenient closure, keep your finger on the
surface, arrow 2.
If the vehicle detects that a remote con-
trol has been accidentally left inside the
locked vehicle's luggage compartment after the
luggage compartment lid is closed, the luggage
compartment lid will reopen slightly. The hazard
warning flashers flash and an acoustic signal
*
sounds.<
Unlocking just the luggage
compartment lid
Press the button on the outside of the luggage
compartment lid. This corresponds to pressing
the button.
Switching on radio readiness
Radio readiness is switched on by pressing the
start/stop button, refer to page52.
Do not depress the brake or the clutch,
otherwise the engine will start immedi-
ately.<
Starting the engine
You can start the engine or switch on the igni-
tion when a remote control is inside the vehicle.
It is not necessary to insert a remote control into
the ignition switch, refer to page52.
Switching off the engine in vehicles
with automatic transmission
The engine can only be switched off when the
selector lever is in position P, refer to page54.
To switch the engine off when the selector lever
is in position N, the remote control must be in
the ignition switch.
Before driving a vehicle with automatic
transmission into a car wash
1.Insert remote control into ignition switch.
2.Depress the brake.
3.Move the selector lever to position N.
4.Switch off the engine.
The vehicle can roll.
Malfunction
Convenient access may malfunction due to
local radio waves. If this happens, open or close
the vehicle via the buttons on the remote con-
trol or using the integrated key. To start the
engine afterward, insert the remote control into
the ignition switch.
Warning lamps
The warning lamp in the instrument
cluster lights up when you attempt to
start the engine: the engine cannot
be started. The remote control is not inside the
vehicle or is malfunctioning. Take the remote
control with you inside the vehicle or have it
checked. If necessary, insert another remote
control into the ignition switch.
The warning lamp in the instrument
cluster lights up while the engine is
running: the remote control is no
longer inside the vehicle. After the engine is
switched off, the engine can only be restarted
within approx. 10 seconds.
Page 54 of 246
Driving
52
Driving
Ignition lock
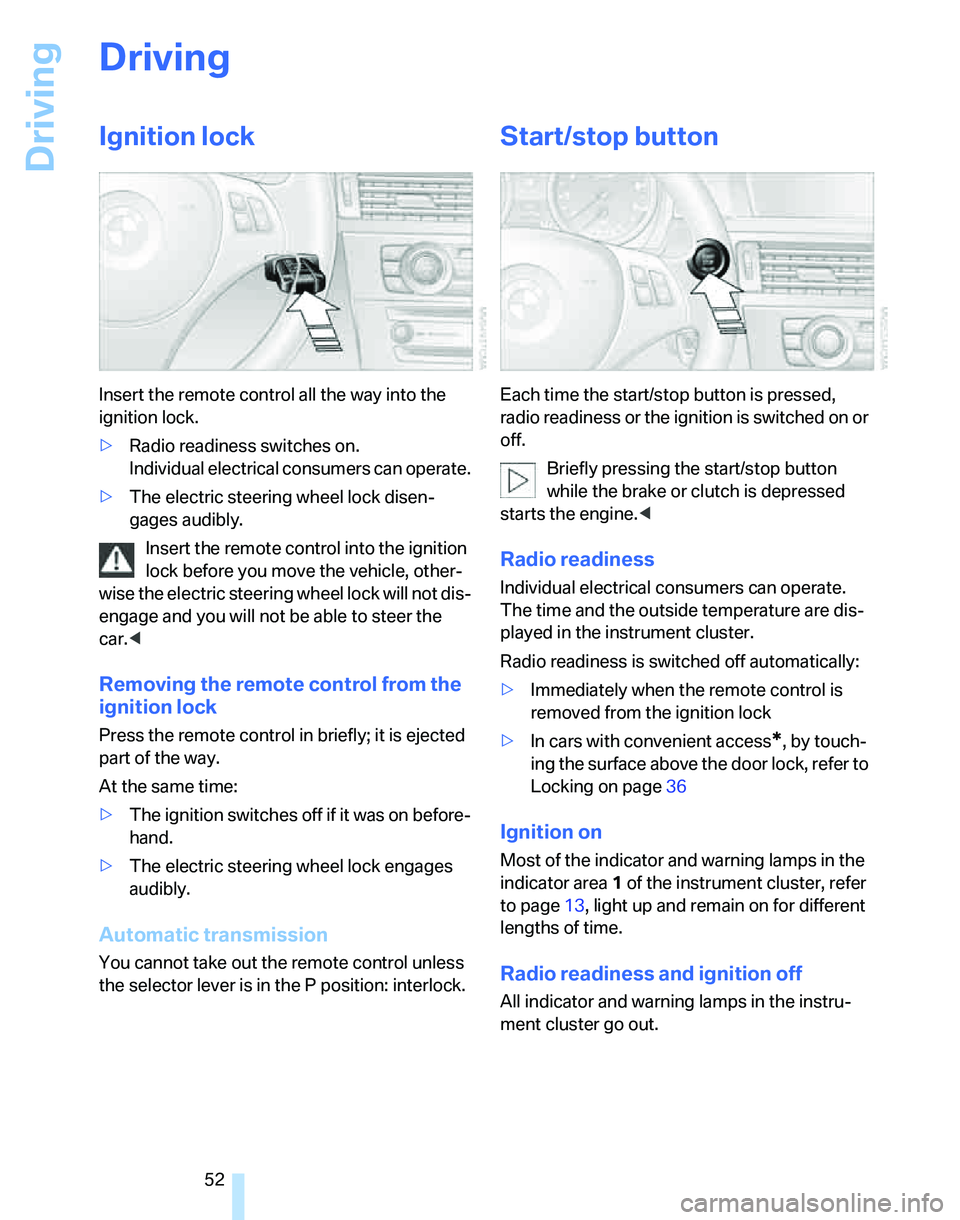
Insert the remote control all the way into the
ignition lock.
>Radio readiness switches on.
Individual electrical consumers can operate.
>The electric steering wheel lock disen-
gages audibly.
Insert the remote control into the ignition
lock before you move the vehicle, other-
wise the electric steering wheel lock will not dis-
engage and you will not be able to steer the
car.<
Removing the remote control from the
ignition lock
Press the remote control in briefly; it is ejected
part of the way.
At the same time:
>The ignition switches off if it was on before-
hand.
>The electric steering wheel lock engages
audibly.
Automatic transmission
You cannot take out the remote control unless
the selector lever is in the P position: interlock.
Start/stop button
Each time the start/stop button is pressed,
radio readiness or the ignition is switched on or
off.
Briefly pressing the start/stop button
while the brake or clutch is depressed
starts the engine.<
Radio readiness
Individual electrical consumers can operate.
The time and the outside temperature are dis-
played in the instrument cluster.
Radio readiness is switched off automatically:
>Immediately when the remote control is
removed from the ignition lock
>In cars with convenient access
*, by touch-
ing the surface above the door lock, refer to
Locking on page36
Ignition on
Most of the indicator and warning lamps in the
indicator area1 of the instrument cluster, refer
to page13, light up and remain on for different
lengths of time.
Radio readiness and ignition off
All indicator and warning lamps in the instru-
ment cluster go out.
Page 55 of 246
Controls
53Reference
At a glance
Driving tips
Communications
Navigation
Entertainment
Mobility
Starting the engine
Do not run the engine in closed rooms,
otherwise the inhaling of toxic exhaust
gases can cause unconsciousness and death.
The exhaust gases contain carbon monoxide,
an odorless and colorless, but highly toxic gas.
Never leave an unattended vehicle with the
engine running, otherwise such a vehicle repre-
sents a potential safety hazard.
Before leaving the car with the engine running,
place the transmission in idle or move the
selector lever to position P and apply the hand-
brake to prevent the car from moving.<
When starting the engine, do not press the
accelerator pedal.
Do not allow the engine to warm up by leaving it
running while the vehicle remains stationary.
Instead, begin to drive immediately at a moder-
ate engine speed.
Do not depress either the brake or the
clutch until you are ready to start the
engine. The engine is started immediately
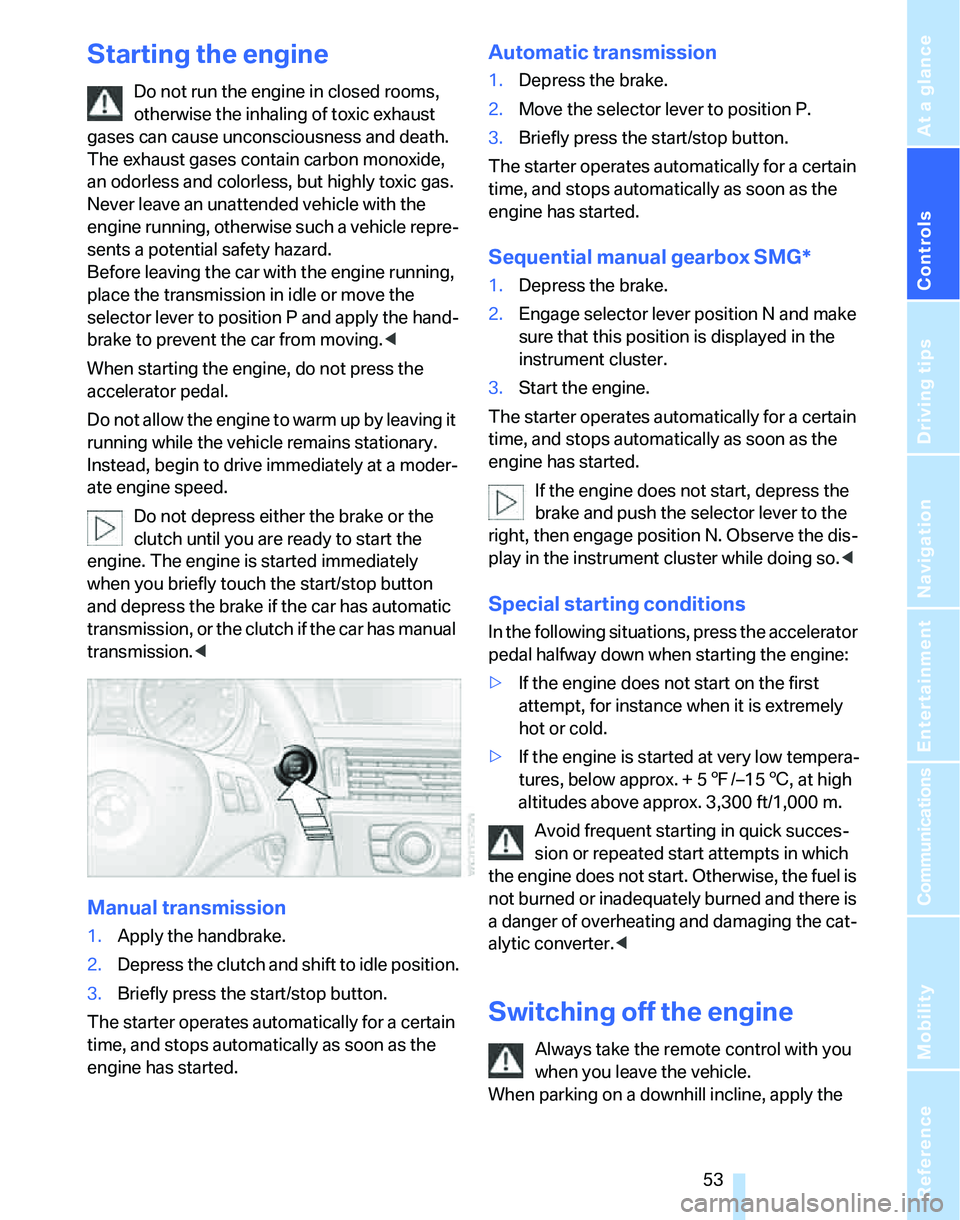
when you briefly touch the start/stop button
and depress the brake if the car has automatic
transmission, or the clutch if the car has manual
transmission.<
Manual transmission
1.Apply the handbrake.
2.Depress the clutch and shift to idle position.
3.Briefly press the start/stop button.
The starter operates automatically for a certain
time, and stops automatically as soon as the
engine has started.
Automatic transmission
1.Depress the brake.
2.Move the selector lever to position P.
3.Briefly press the start/stop button.
The starter operates automatically for a certain
time, and stops automatically as soon as the
engine has started.
Sequential manual gearbox SMG*
1.Depress the brake.
2.Engage selector lever position N and make
sure that this position is displayed in the
instrument cluster.
3.Start the engine.
The starter operates automatically for a certain
time, and stops automatically as soon as the
engine has started.
If the engine does not start, depress the
brake and push the selector lever to the
right, then engage position N. Observe the dis-
play in the instrument cluster while doing so.<
Special starting conditions
In the following situations, press the accelerator
pedal halfway down when starting the engine:
>If the engine does not start on the first
attempt, for instance when it is extremely
hot or cold.
>If the engine is started at very low tempera-
tures, below approx. + 57/–156, at high
altitudes above approx. 3,300 ft/1,000 m.
Avoid frequent starting in quick succes-
sion or repeated start attempts in which
the engine does not start. Otherwise, the fuel is
not burned or inadequately burned and there is
a danger of overheating and damaging the cat-
alytic converter.<
Switching off the engine
Always take the remote control with you
when you leave the vehicle.
When parking on a downhill incline, apply the
Page 56 of 246
Driving
54 handbrake, otherwise the vehicle could roll
away.<
Manual transmission
1.Apply the handbrake.
2.With the car at a standstill, briefly press the
start/stop button.
3.Shift into first gear or reverse.
Automatic transmission
1.With the car at a standstill, move the selec-
tor lever to position P.
2.Briefly press the start/stop button.
3.Apply the handbrake.
Sequential manual gearbox SMG
1.Apply the handbrake.
2.Engage a drive position.
3.Briefly press the start/stop button.
If the engine is switched off while N is engaged,
this will be signaled visually and acoustically.
Handbrake
The handbrake is primarily intended to prevent
the vehicle from rolling while parked; it brakes
the rear wheels.
Indicator lamp
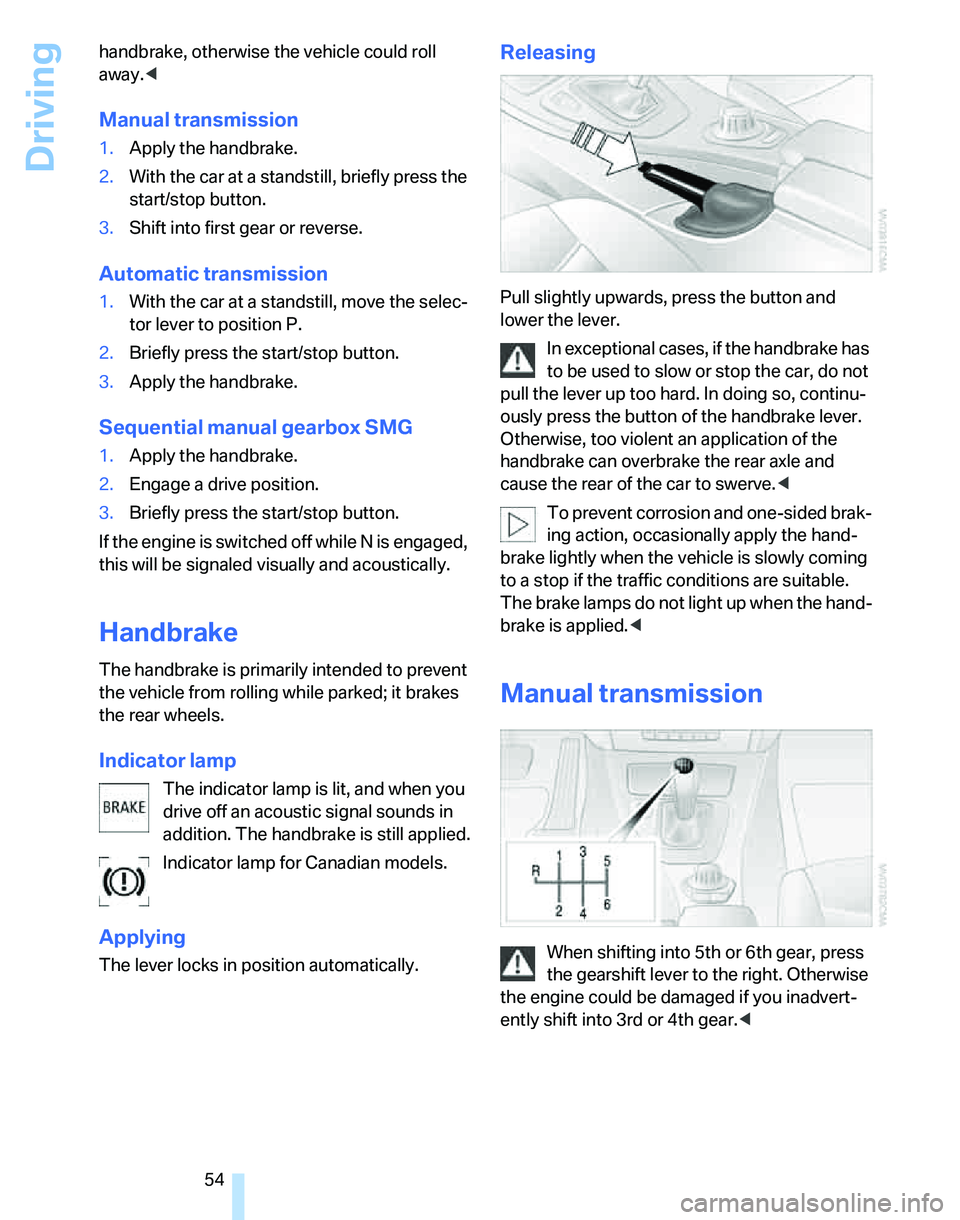
The indicator lamp is lit, and when you
drive off an acoustic signal sounds in
addition. The handbrake is still applied.
Indicator lamp for Canadian models.
Applying
The lever locks in position automatically.
Releasing
Pull slightly upwards, press the button and
lower the lever.
In exceptional cases, if the handbrake has
to be used to slow or stop the car, do not
pull the lever up too hard. In doing so, continu-
ously press the button of the handbrake lever.
Otherwise, too violent an application of the
handbrake can overbrake the rear axle and
cause the rear of the car to swerve.<
To prevent corrosion and one-sided brak-
ing action, occasionally apply the hand-
brake lightly when the vehicle is slowly coming
to a stop if the traffic conditions are suitable.
The brake lamps do not light up when the hand-
brake is applied.<
Manual transmission
When shifting into 5th or 6th gear, press
the gearshift lever to the right. Otherwise
the engine could be damaged if you inadvert-
ently shift into 3rd or 4th gear.<
Page 57 of 246
Controls
55Reference
At a glance
Driving tips
Communications
Navigation
Entertainment
Mobility
Reverse gear
Select only when the vehicle is stationary.
When the gearshift lever is pressed to the left, a
slight resistance has to be overcome.
Sequential manual gearbox
SMG*
The concept
The sequential manual gearbox SMG is an
automated transmission in which operation of
the clutch and gearshifts are performed by an
electro-hydraulic system.
SMG is operated via the selector lever in the
center console and two shift paddles on the
steering wheel.
It offers you the following functions:
>Choice of manual or automatic operation:
sequential mode or Drive mode
>Choice of two driving programs: Normal or
Sport, refer to Dynamic Driving Control,
page56
>Automatic downshifting and prevention of
misshifting in sequential mode as well
>Acceleration assistant, refer to page57
Selector lever positions
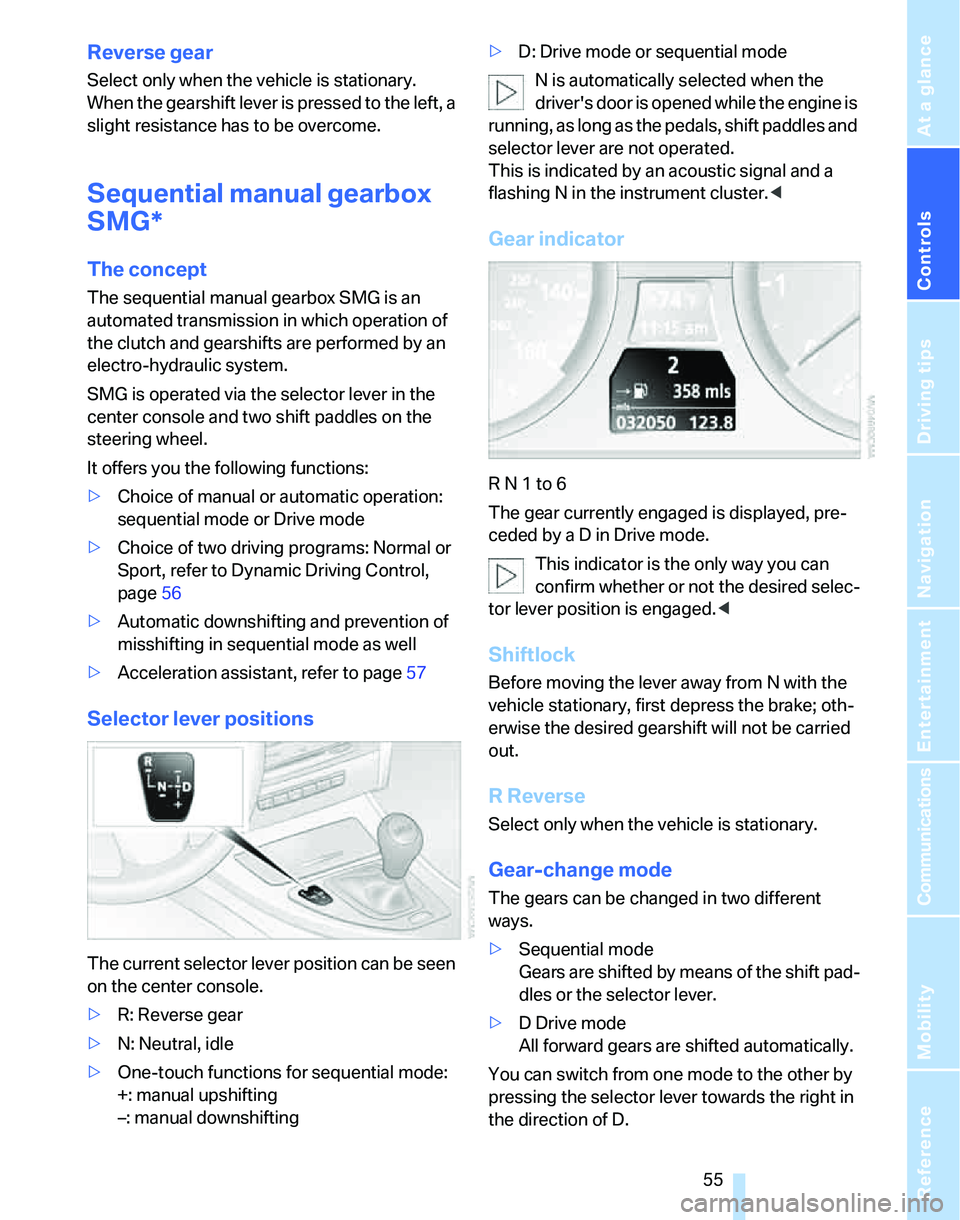
The current selector lever position can be seen
on the center console.
>R: Reverse gear
>N: Neutral, idle
>One-touch functions for sequential mode:
+: manual upshifting
–: manual downshifting>D: Drive mode or sequential mode
N is automatically selected when the
driver's door is opened while the engine is
running, as long as the pedals, shift paddles and
selector lever are not operated.
This is indicated by an acoustic signal and a
flashing N in the instrument cluster.<
Gear indicator
R N 1 to 6
The gear currently engaged is displayed, pre-
ceded by a D in Drive mode.
This indicator is the only way you can
confirm whether or not the desired selec-
tor lever position is engaged.<
Shiftlock
Before moving the lever away from N with the
vehicle stationary, first depress the brake; oth-
erwise the desired gearshift will not be carried
out.
R Reverse
Select only when the vehicle is stationary.
Gear-change mode
The gears can be changed in two different
ways.
>Sequential mode
Gears are shifted by means of the shift pad-
dles or the selector lever.
>D Drive mode
All forward gears are shifted automatically.
You can switch from one mode to the other by
pressing the selector lever towards the right in
the direction of D.
Page 58 of 246
Driving
56
Sequential mode
After every engine start, sequential mode is
activated when you press the selector lever
towards the right while the brake is depressed.
You can shift up or down using the shift paddles
or the selector lever. You do not need to lift your
foot from the accelerator pedal while doing so.
It is also possible to start off in second gear, e.g.
on slippery surfaces.
SMG assists you in the following situations:
>Upshifts and downshifts are executed only
when they will result in a plausible combina-
tion of engine and vehicle speed; for exam-
ple, a downshift that would cause the
engine to overrev cannot be executed by
the system.
>The system shifts down into first gear auto-
matically when the vehicle comes to a stop.
>The system shifts down automatically just
before the engine speed falls below the
minimum speed required for a certain gear;
the driver does not need to intervene.
Shifting gears via selector lever
>Pull the selector lever backwards to shift up.
>Push it forward to shift down.
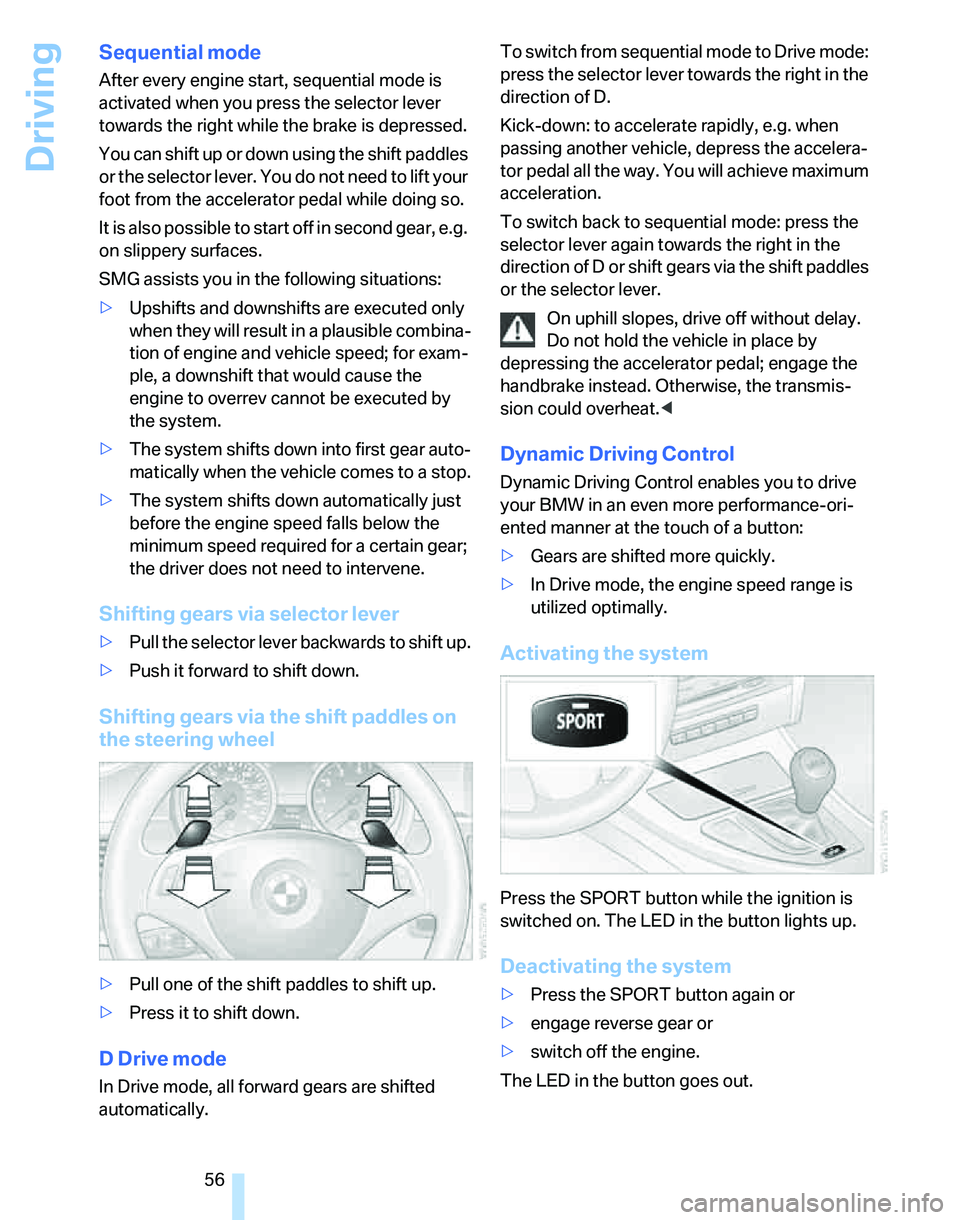
Shifting gears via the shift paddles on
the steering wheel
>Pull one of the shift paddles to shift up.
>Press it to shift down.
D Drive mode
In Drive mode, all forward gears are shifted
automatically.To switch from sequential mode to Drive mode:
press the selector lever towards the right in the
direction of D.
Kick-down: to accelerate rapidly, e.g. when
passing another vehicle, depress the accelera-
tor pedal all the way. You will achieve maximum
acceleration.
To switch back to sequential mode: press the
selector lever again towards the right in the
direction of D or shift gears via the shift paddles
or the selector lever.
On uphill slopes, drive off without delay.
Do not hold the vehicle in place by
depressing the accelerator pedal; engage the
handbrake instead. Otherwise, the transmis-
sion could overheat.<
Dynamic Driving Control
Dynamic Driving Control enables you to drive
your BMW in an even more performance-ori-
ented manner at the touch of a button:
>Gears are shifted more quickly.
>In Drive mode, the engine speed range is
utilized optimally.
Activating the system
Press the SPORT button while the ignition is
switched on. The LED in the button lights up.
Deactivating the system
>Press the SPORT button again or
>engage reverse gear or
>switch off the engine.
The LED in the button goes out.